This guide will help you get started connecting an AFAS GetConnector to the TX REST data source provider. It assumes you have:
- Created an app-connector in AFAS
- Added the GetConnector(s) you would like to load to the app-connector in AFAS
- Obtained an Afas Token
Step 1: Encode token as base64
The AFAS API token takes the following format:
<token>{YourTokenHere}<token
You must use a base64 encoded token to authenticate the API. There are multiple tools you can use to achieve this; I will be using PowerShell:
$token = '<token><version>1</version><data>{YourTokenHere}</data></token>'
$encodedToken = [System.Convert]::ToBase64String([System.Text.Encoding]::ASCII.GetBytes($token))
$authValue = "AfasToken $encodedToken"
echo $authValue
The result will look something like:
AfasToken PHR{EnCoDeDtOkEnHeRe}This entire output should be passed through the authorization parameter, which will be discussed in the next section.
Step 2: Create a new data connection in the TimeXtender Portal
Create a new data source using the TimeXtender REST data source provider. The settings should look like this:
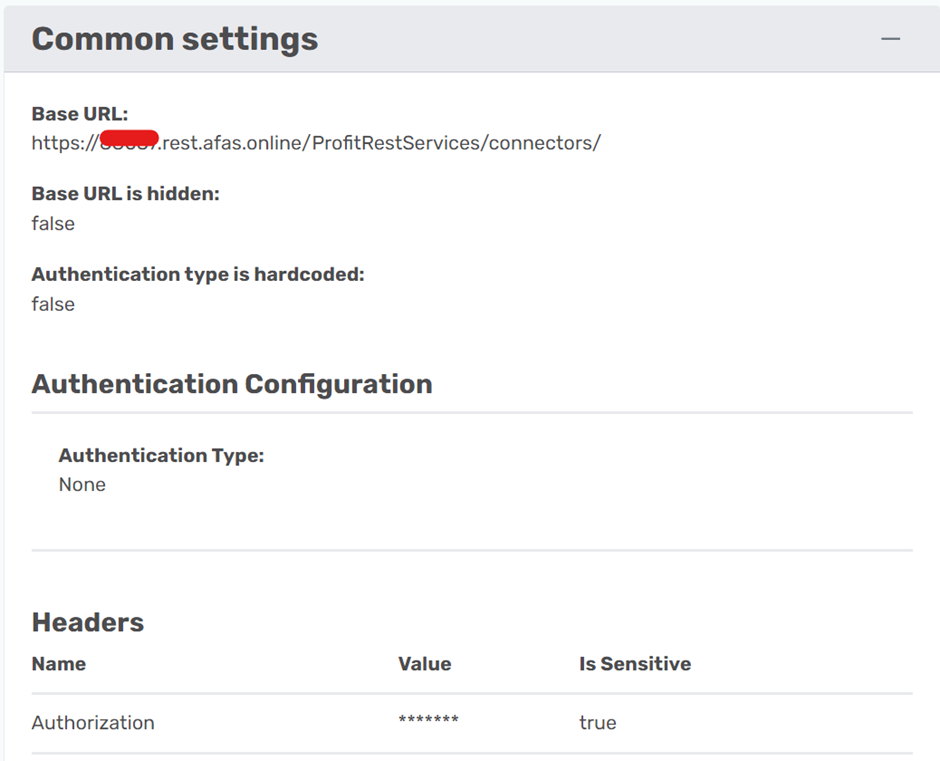
BaseURL: the obfuscated part is the profile number of your Afas environment, which is a 5 digit number
Headers: The value of the header should be the entire output of the PowerShell script above.
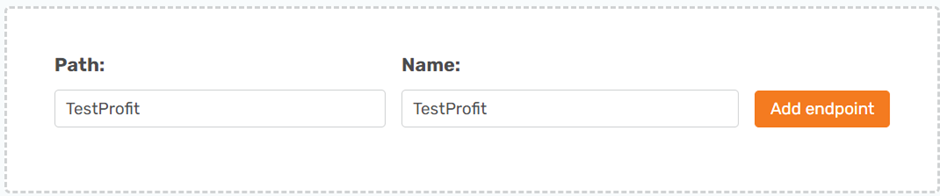
Step 3: Adding Endpoints
Each GetConnecter in AFAS will return one table. Therefore, each table you want to collect will be it's own endpoint within the data source. You can give the endpoint any name and the path will be the name of the GetConnector in AFAS. Here I am using a fictitious endpoint called ‘TestProfit’:
You will need to enable ‘Use endpoint name as schema name’ in the advanced settings of the endpoint. This is because all GetConnectors in Afas contain the data in an array called ‘rows’. If you do not select this, every table in the data source will have the same name and schema.
Step 4: Test Connection and sync to ODX
Click ‘Save’ and map the data source connector to an ODX instance in the portal.
You should now be able to refresh the ODX from TimeXtender desktop to see the data source we created. You can click on ‘Synchronize’ to examine the metadata and transfer to load the first page of data.
You may need to use override datatypes or enable ‘perform exhaustive metadata scan’ if your datatypes do not align. You must add a table to a data-area to see the provider-approximated datatypes!
Step 5: Enabling Pagination
Afas has a default page size of 100 records. If your table contains more than 100 records, you will need to change the page size and/or use pagination. Afas pagination works by passing a skip and take query parameter in each call which states the amount of records to skip (that have already been collected) and the amount of new records to collect.
In order to enable pagination in this way, a prerequisite is a SQL or SnowFlake server that can perform a basic calculation.
Pagination Settings on Data Source Level
While editing the data-source in TimeXtender Portal, enable pagination and fill in the following parameters:
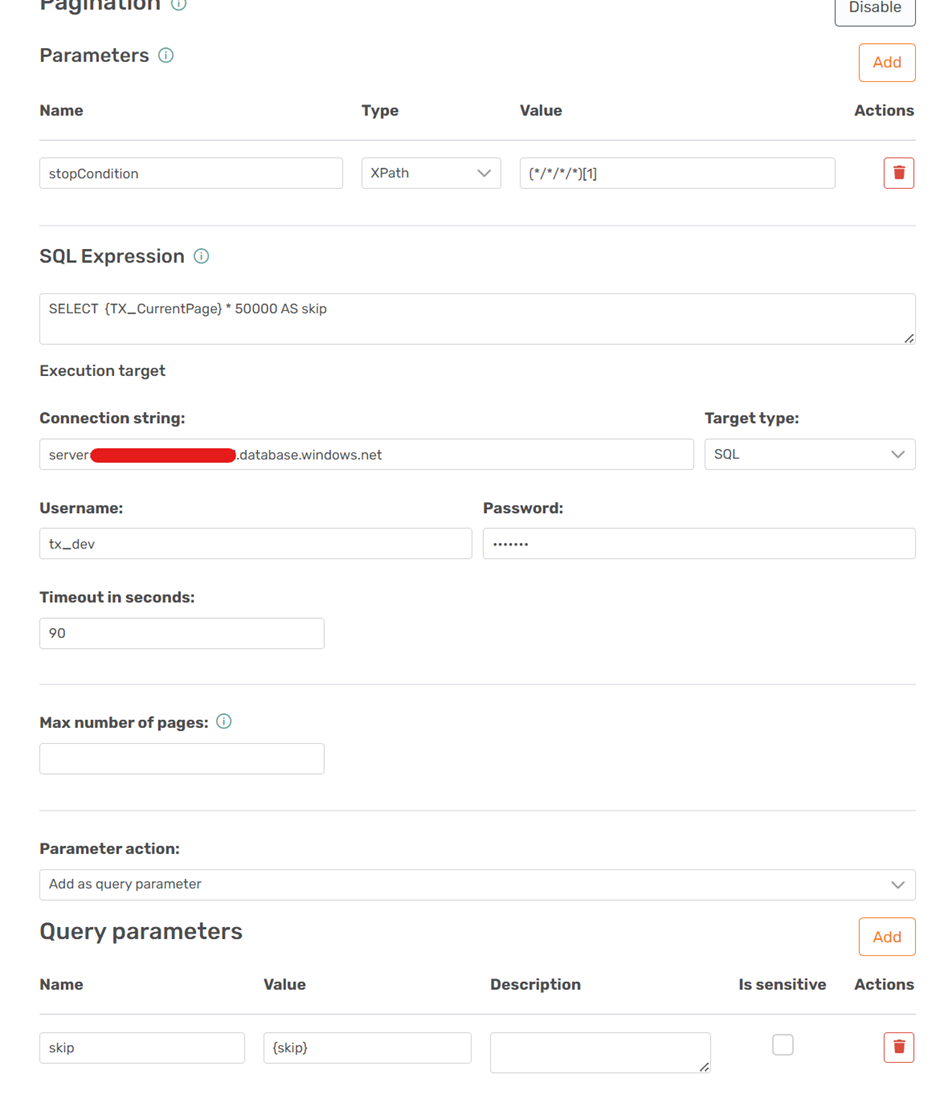
- stopCondition: this parameter could have any name and returns any values in the third or more level of the JSON response. The value of the parameter:
(*/*/*/*)[1]will be null when there are no more pages of data remaining. TimeXtender will complete the reload when any of these parameters is null. - {TX_CurrentPage}: This is a hidden parameter of the TX REST connector which returns the current page collected. Multiply this by the number of records you want in each page, to calculate the ‘skip’ parameter to pass to AFAS.
- Connection string: You will need a SQL or Snowflake server to perform the above calculation and make pagination work. Fill in your own details without defining a database.
- Timeout: The timeout settings for each page subsequent to the first (choose as needed)
- Query Parameters: Here we tell TX to add a parameter ‘skip’ which uses the calculated {skip} value from the above calculation in each new page call
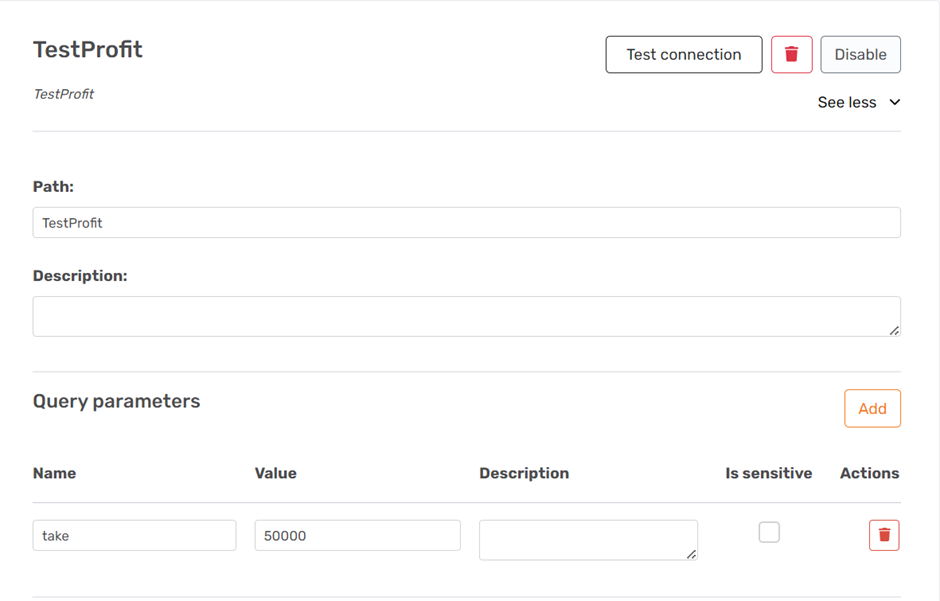
Pagination Settings at Endpoint Level
We define the ‘take’ parameter on each endpoint. This is because TimeXtender only looks at the above settings after retrieving the first page of data. If the take was defined there, it would not apply to the call for the first page.
Add a parameter called ‘take’ to each paginated endpoint and set the same value as the number of records per page from the above calculation:
Override Pagination
You may not want pagination on some of the GetConnectors you are using. AFAS can supply large pages (up to 100.000 depending on the connector), which may be sufficient to load an entire table in one call. For these endpoints, enable the ‘Override Pagination’ option on the endpoint. You can then add two parameters to the endpoint’s query parameters (not in the override pagination section):
skip = -1
take = -1
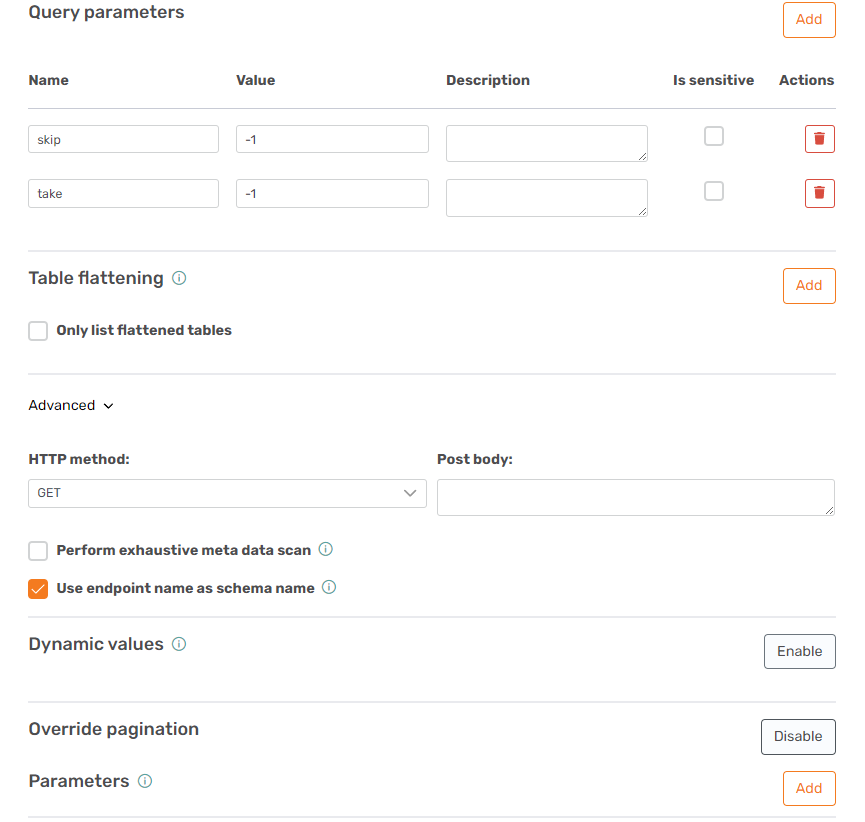
This tells AFAS you want the whole table in one call. If it isn't possible, it will fail with an internal error 500.
Step 5: Squashing Errors:
Error: transfer never stops or reaches the page limit without completing
It's likely your stop condition is not working. If you enable caching, you may see excess pages not containing data that look like this:
<TX_Autogenerated_Root>
 <TX_Autogenerated_Element>
  <skip>39000</skip>
  <take>1000</take>
 </TX_Autogenerated_Element>
</TX_Autogenerated_Root>
In this case, TX is requesting the 39th page, but I only have 35 pages of data. To create this error, I changed the ‘stop condition’ value to (*/*/*)[1]. Since the second level contains values in the form of TX generated info (<skip>39000</skip>), the parameter is never empty and the reload does not complete.
Error: datatypes do not match
Error while writing data to ODX on Data Lake

System.AggregateException: One or more errors occurred. ---> System.FormatException: Input string was not in a correct format.
Executing table Test_Profit_rows:
failed with error:
Unable to process table TestProfit.rows. Check log for details.It’s possible that your transfer will fail at the start due to datatypes being determined wrong. TX REST will use the first page of information by default to determine the datatypes. You can only see the datatypes after adding the table to a data-area. Once you added it to a data area you can use ‘override data types’ to create rules for each field that has an inappropriate data type (you can use AfasOnline to check the real data types).
Alternatively, you can check the box ‘perform exhaustive metadata scan’ on the endpoints that are failing, which will instruct TimeXtender to collect the entire dataset (all pages) to determine the datatype. This means your ‘synchronize’ task for that endpoint will take just as long as the ‘transfer’ task, but gives more assurance of approximated data types.
Error: there was an error
Failed to execute endpoint ‘TestProfit’:

One or more errors occurred.

A task was canceled.
This error appears when the TX REST provider timeouts. There is no descriptive error, it is just stopped and the message is similar to what you get if antivirus stops your reload. Raise your timeout in the pagination section and the ‘advanced’ connections options of the data source.