Creating a TimeXtender Data Source for files located in an Azure Date Lake Gen2 Storage Container is oftentimes appropriate for cloud based solutions, and using an Azure Service Principal or App Registration is a good practice approach for handling authentication.
The following article uses the example of connecting to a CSV file in order to outline the process of setting up this type of data source, which includes the initial configuration steps done in the Azure Portal as well as the subsequent steps done in the TimeXtender Portal.
Create and configure the App Registration in the Azure Portal.
- Make note of the Azure Tenant ID, which will be needed later for the setup of the data source in the TimeXtender Poral.
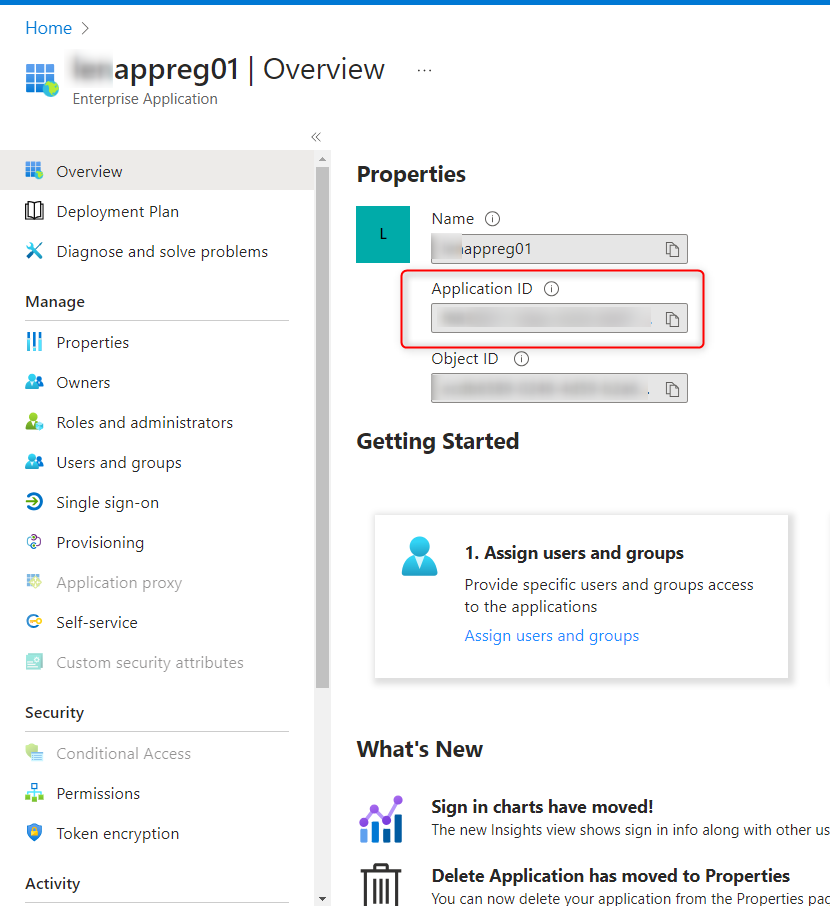
- Create an App Registration in Azure and make note of the Application ID.
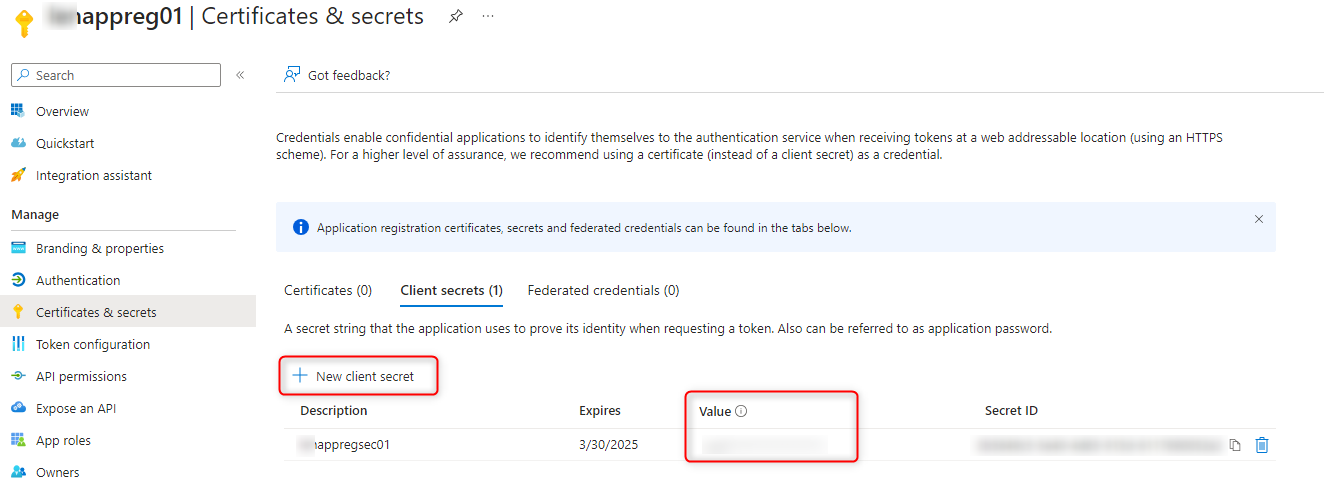
- Add a Client Secret for the App Registration and make note of the value for this client secret.
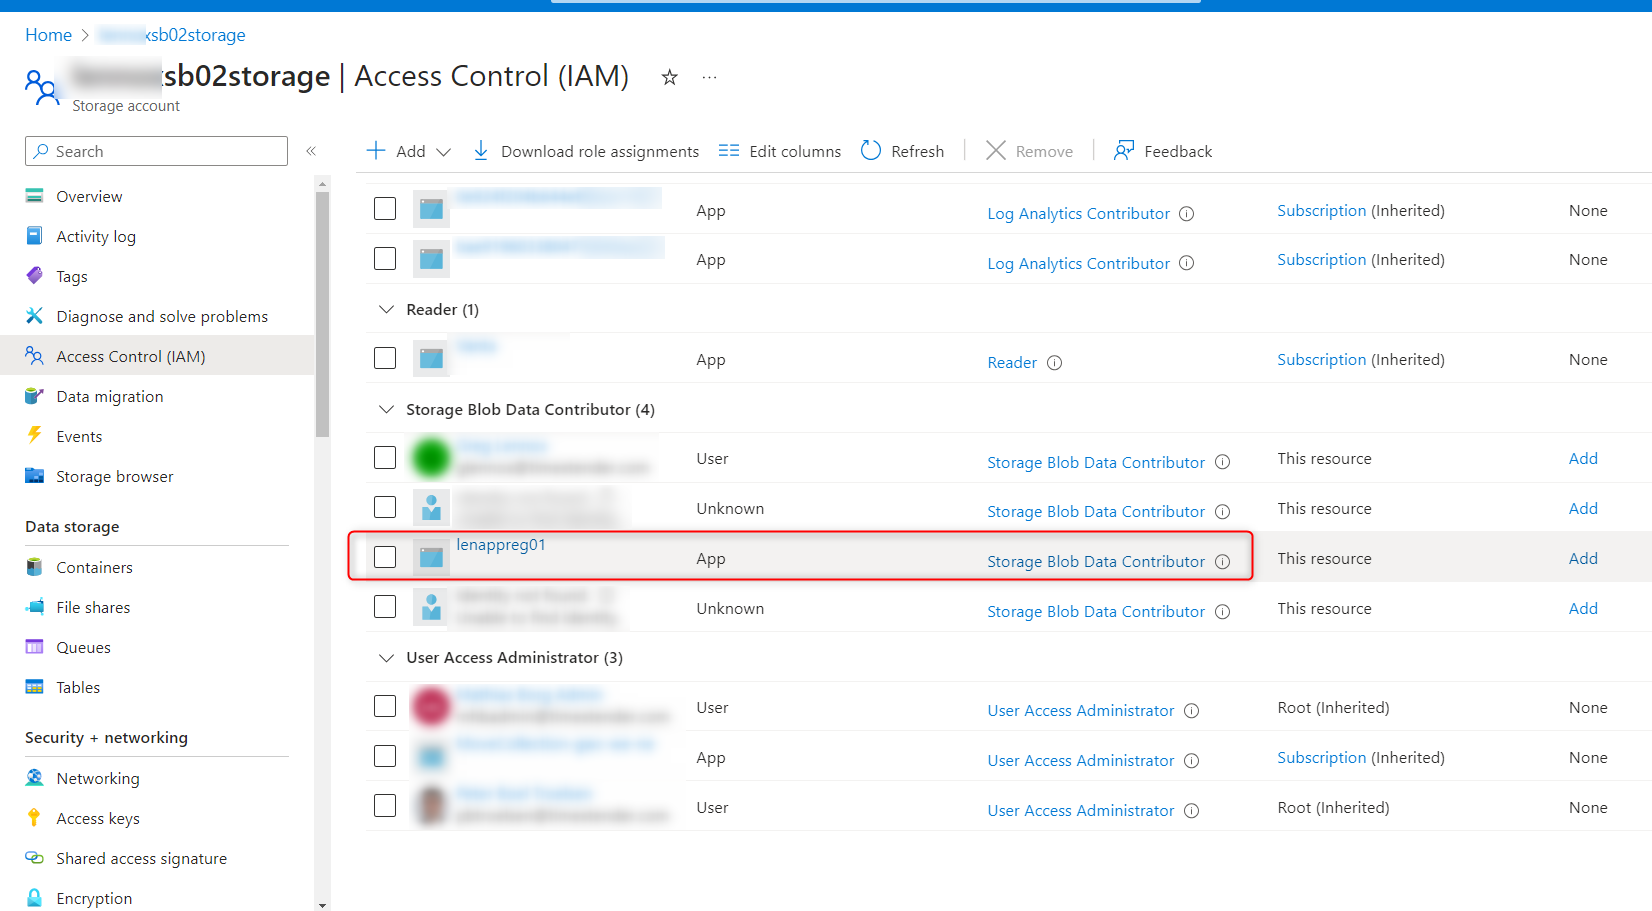
- On the Azure Data Lake Gen2 storage container, in the Access Control (IAM) secttion, add a Role Assignment for the App Registration using the Storage Blob Data Contributor role.
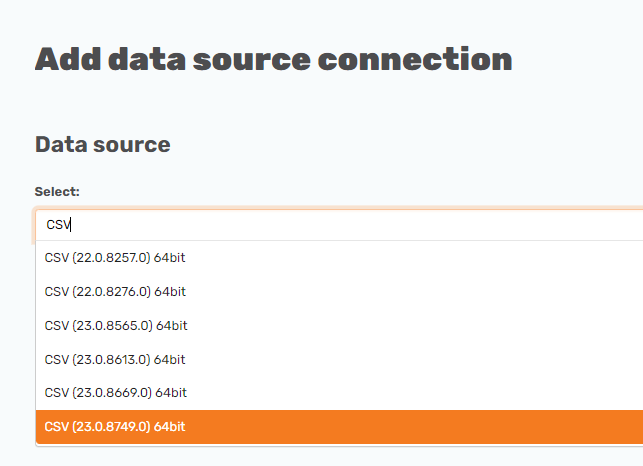
Create a new Data Source connection in the TimeXtender Portal.
In the TimeXtender Portal, start by creating a new data source connection and select the appropriate data source provider.
Although this data source connection is for a CSV file, the Authentication and OAuth sections that reference the App Registration would be similar for other types of files located in an Azure Data Lake Gen2 storage container.
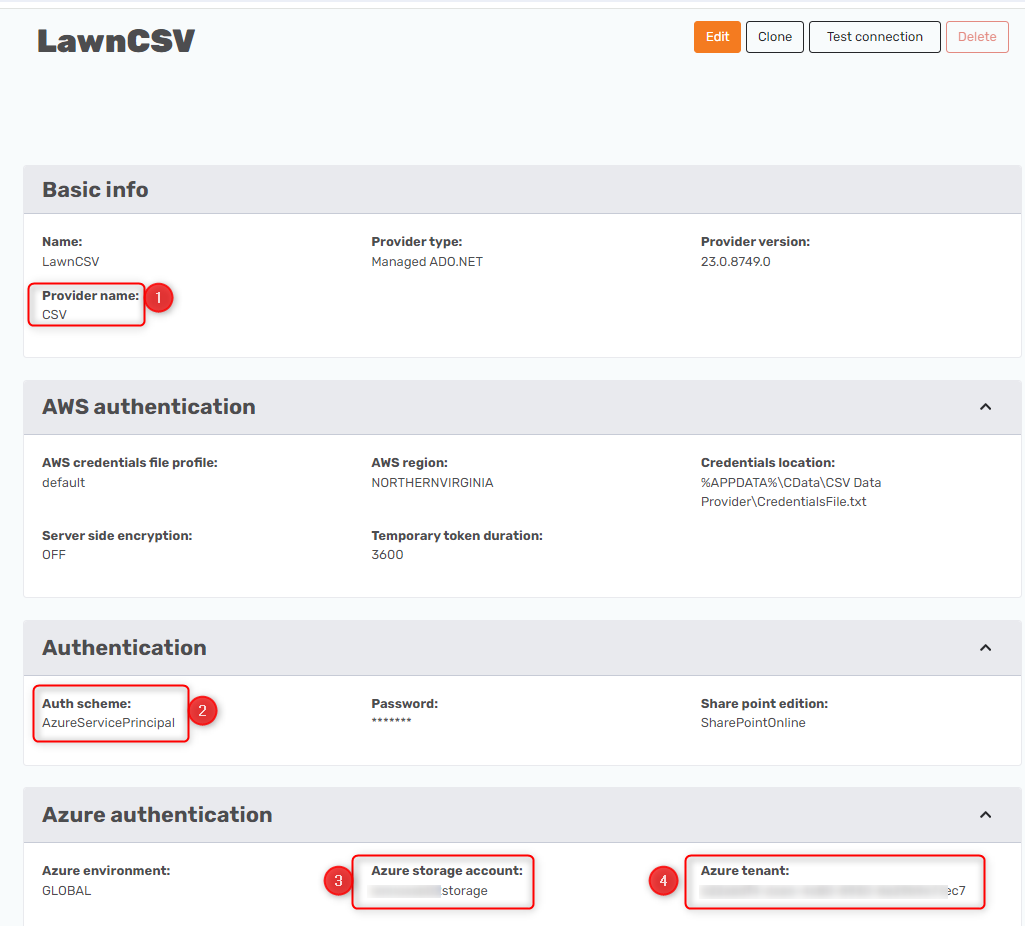
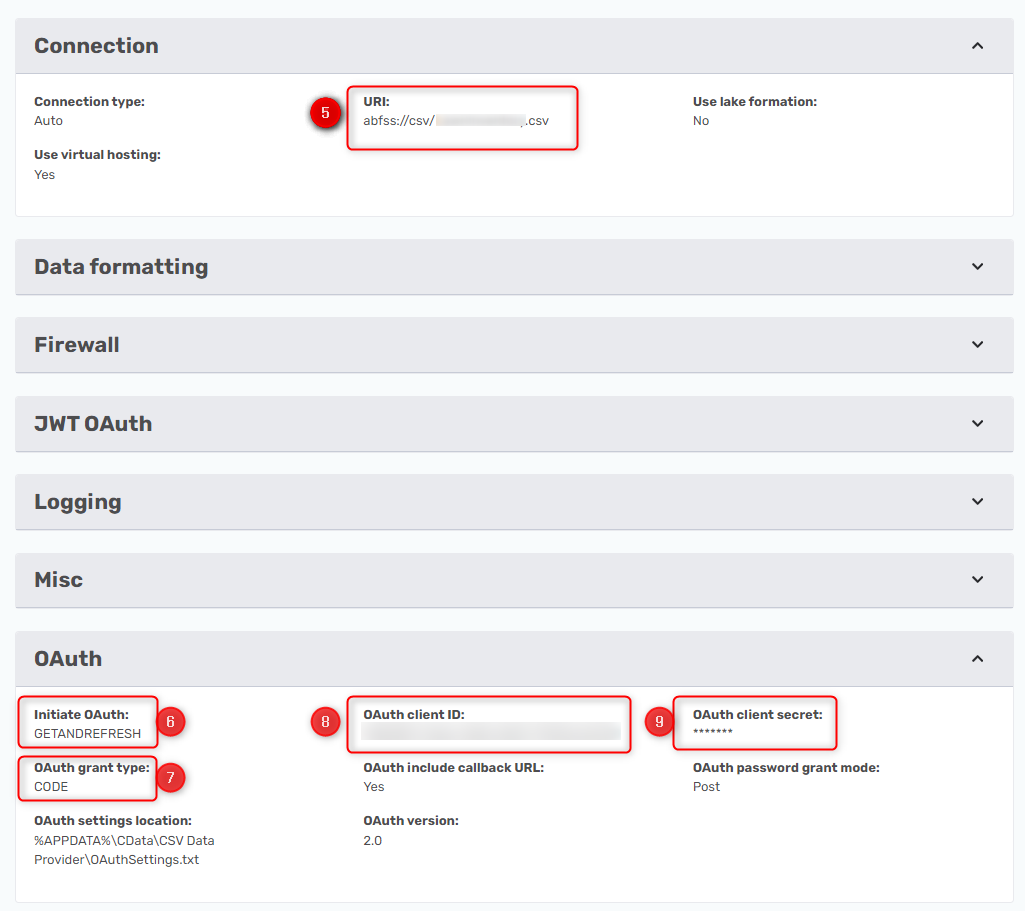
On the data source details page, enter the information for the 9 items outlined below, being careful not to enter information in any other boxes and just updating the items necessary.
The following numbers correspond to the red boxes in the screenshots below.
- Provider Name: This will already be set based on the data source selected as shown above.
- In the Authentication section, set the Auth Scheme to "AzureServicePrincipal".
- In the Azure Authentication section, enter the name of your Azure Storage Account, which will be different from the name in the screenshot below.
- In the Azure Authentication section, enter the Azure Tenant ID for your organization.
- In the Connection section, enter the URI in the format of "abfss://<containername>/<filename>". The format of this may be slightly different depending on where your CSV file is located inside the container.
- In the OAuth section, the "Initiate OAuth" setting should be set to "GETANDREFRESH".
- In the OAuth section, the "OAuth Grant Type" setting should be set to "CODE".
- In the OAuth section, the “OAuth Client ID” should be set to the Application ID of the App Registration as shown in Item #2 of the App Registration section above.
- In the OAuth section, the "OAuth Client Secret" box should be set to the value of the Client Secret for the app registration as shown in Item #3 of the App Registration above.
The URI section might be a little different, depending on the specifics of your Azure Data Lake storage container. Click on the Use the Azure Data Lake Storage Gen2 URI for the Microsoft KB article that has more information on the URI format. Since this approach is using OAuth for the authentication method, the following format is most likely suitable:
abfss://myfilesystem/folder1