In this article, you will read about Configuring Exception Management in TimeXtender Data Quality. Exception Management is a feature that can be enabled for Compare Queries, Queries and Test Groups. Without Exception Management, queries return and report the whole result set without memory of previous executions.
With Exception Management, TimeXtender Data Quality treats each row from the results as a specific exception, logging it to a database and only notifying responsible users of new exceptions. All exceptions are visible on the TimeXtender Portal, where users can work with exceptions and analyze trends.
This tutorial contains the following sections:
Exceptions Types
There are mainly two types of exceptions:
- Actionable exceptions are exceptions that can be fixed. The goal should be to fix all actionable exceptions. For example, products without a price and discrepancies in customer information between systems.
TimeXtender Data Quality monitors the lifespan of exceptions. Specifically, when an exception was made, when they were fixed and who worked on the exception. Query owners can use reports to analyze how long an exception is open, the progress specific users are making and the overall health of their system. - Informational exceptions are exceptions that can’t be fixed after they occur. For example, sales with an unusually high discount or employees that credited the fee of an invoice. The goal with informational exceptions is to monitor and identify patterns. TimeXtender Data Quality does this to help you see what is causing these exceptions and in turn change employee behavior.
Enabling Exception Manager
To enable Exception Management for a Query or Compare Query, open the Exception Manager Properties dialog and check Enable Exception Manager.
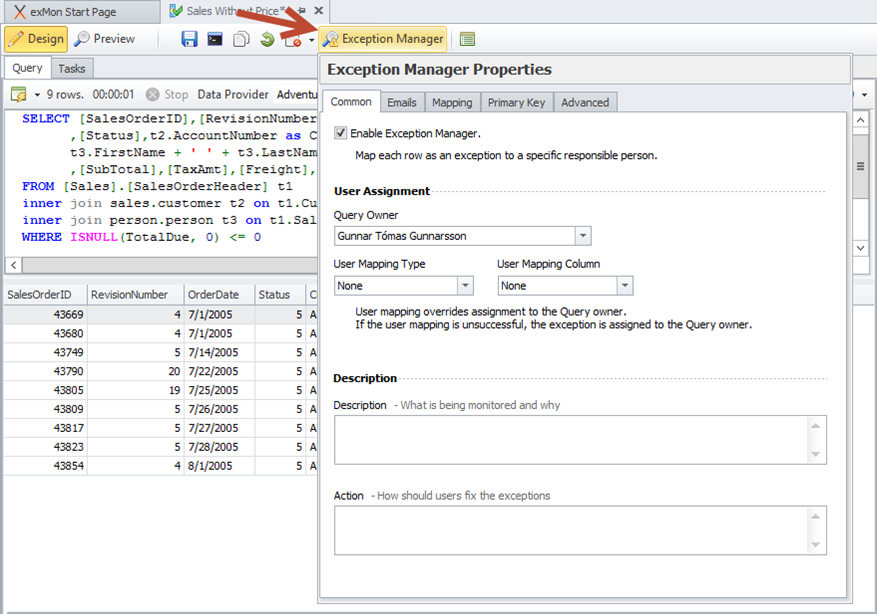
By enabling the basic functionality of exception management after running the query, users can view exceptions on the Portal. There are, however, multiple options for configuring Exception Manager. This section covers each option.
Exception Process types
- Exception Process is the default option and is used in most queries. TimeXtender Data Quality handles results from queries as exceptions to a business rule. Exception Processes will be the subject of this tutorial.
- Approval Process allows TimeXtender Data Quality to handle results from queries, not as an exception but as something a responsible user has to approve. An example of this is notifying a system owner that a user has gained administrative privileges on his system. The system owner will have to approve that change and that approval is audited.
User Mapping
All exceptions are assigned to a user or a group responsible for those exceptions. By default, all exceptions are assigned to the Query Owner, selected in the properties pane.
You can configure TimeXtender Data Quality to assign each exception to specific users according to information in the exception data. For example, this could be a query returning all sales without a price and a column specifying the responsible salesperson.
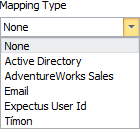
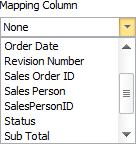
To configure user mapping, choose a Mapping Type and Mapping Column.
Mapping Types
TimeXtender Data Quality comes with three mapping types; Active Directory, Email and Expectus User Id. You can also add your own external mapping type, as described below.
After choosing a mapping type, choose the column containing the user data. After configuring user mapping, TimeXtender Data Quality will automatically map each exception to users according to the mapping. If a map is unsuccessful, that is, TimeXtender Data Quality doesn’t find the user, then the exception will be assigned to the Query Owner.
When using Email and Active Directory mapping types, you can provide the optional flag “--autocreateusers”. TimeXtender Data Quality will then automatically create users that are not found, and assign the exceptions.
External Users
If you are not able to use Active Directory or Email mapping you can specify a custom mapping type. For example, this can be used to map user ids from your ERP system to TimeXtender Data Quality.
To create a new external user mapping source:
- In the left pane, open General
- Then Configuration
- Then External Users
- Click Edit External Systems
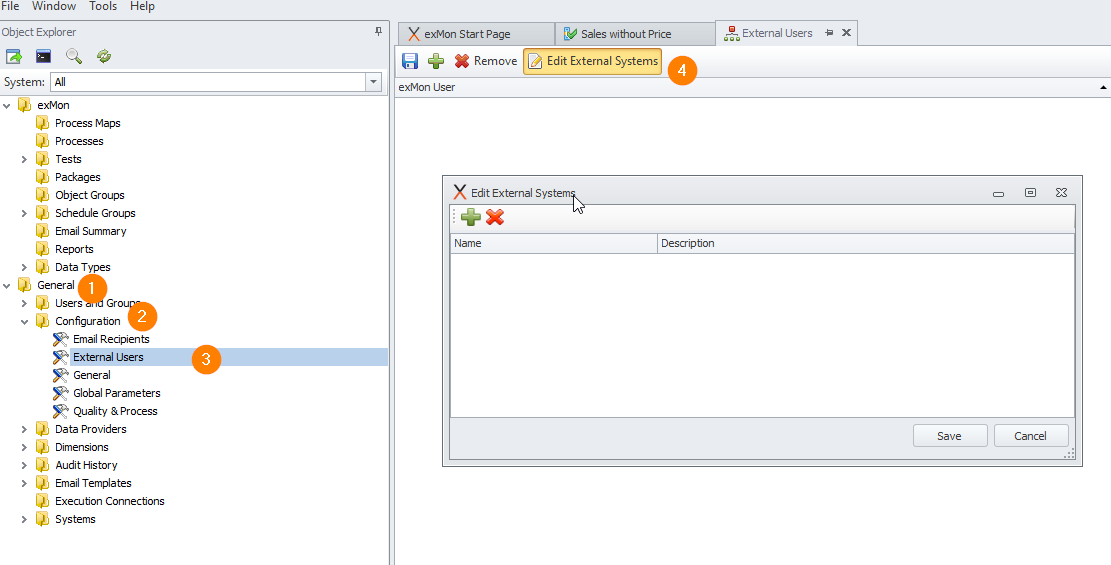
Then, add each user to the list, by adding the source system’s id and map to an TimeXtender Data Quality user.
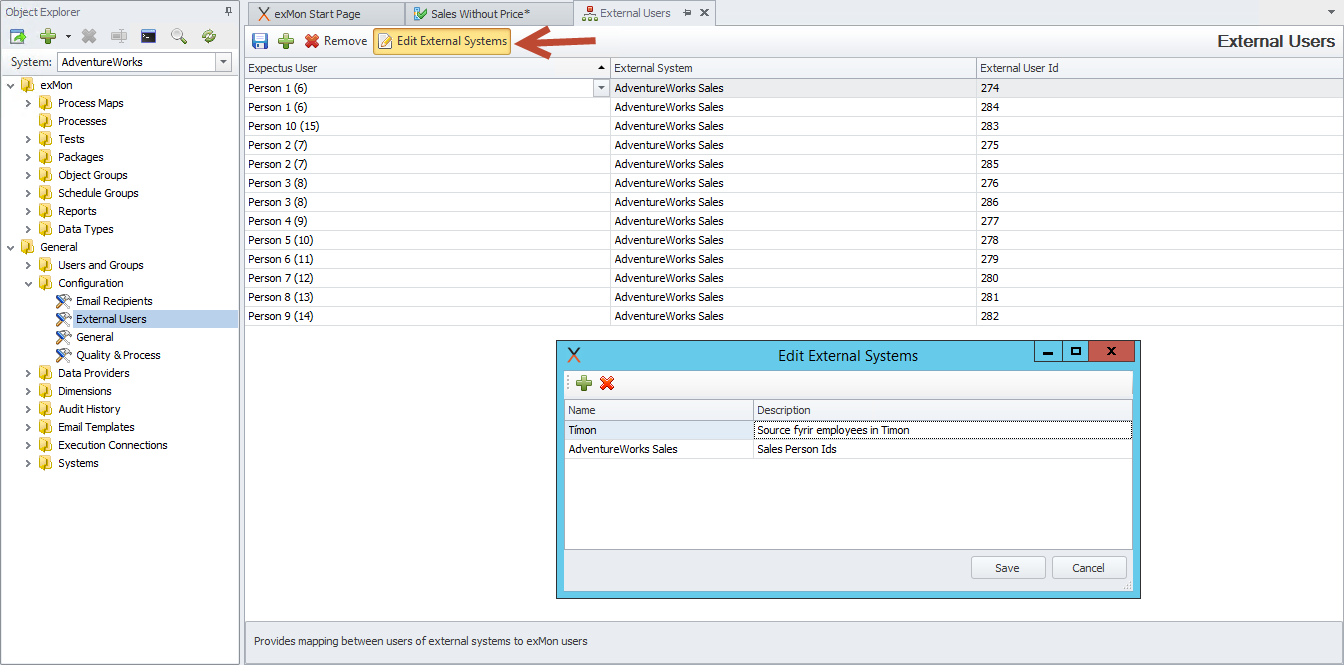
After adding the external mapping type, AdventureWork Sales, you can choose it from the Mapping Type dropdown in our Query.

We can test our user mapping with the Preview mode. In the Exceptions tab, you can see that TimeXtender Data Quality will assign exceptions to different users according to the data in the SalesPersonID column.
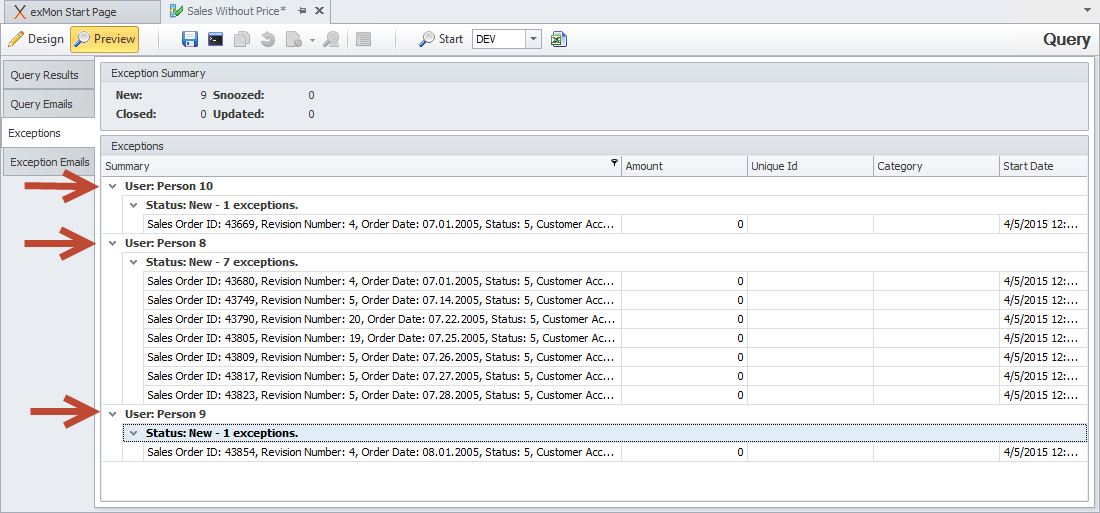
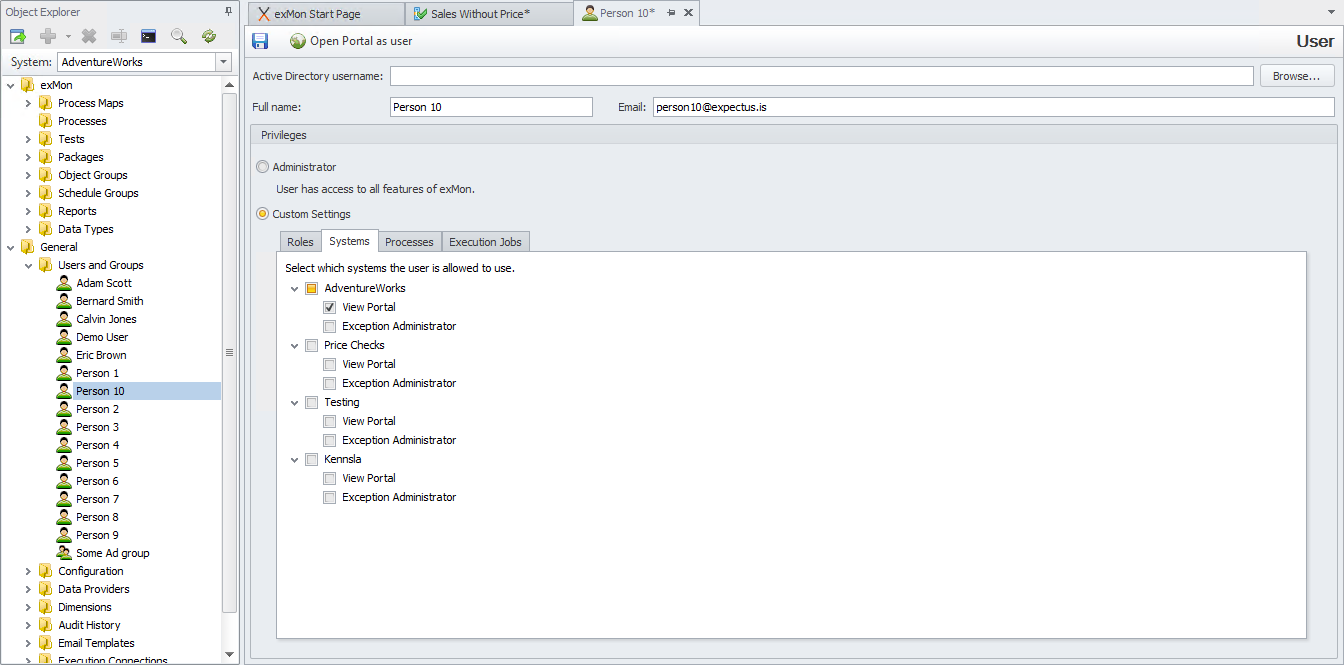
Person 10, Person 8 and Person 9 are all users in TimeXtender Data Quality.
Column Mapping
With column mapping, you can add optional attributes to exceptions that help users to work with them.

Attributes:
- Amount: Often called “Amount at Risk”. With the Amount mapping, you can set a dollar amount for each exception. For example, if you need to fix an issue with an invoice that has a Total Due of $100, then you can use this information to help prioritize which exceptions you should focus on, which are often the exceptions with the highest “Amount at Risk”. This column does not apply to all Queries but is beneficial to use when possible.
- Category: Category mapping maps a column which can be used to categorize exceptions by some common attribute. Portal users can analyze exceptions by category and this information is also often used when creating reports in TimeXtender Data Quality.
- Unique Id: Similar to the category mapping and is also used in offline analysis and report creation.
- Start Date: When TimeXtender Data Quality finds new exceptions, it marks its creation date as the time when the Query is executed. If the Query includes the date of creation for each row, then you can map that column to Start Date and TimeXtender Data Quality will use that column to set the creation date. This can be useful when the schedule of the Query is once a week but you would like to get precise dates when the exceptions were created in the source system.
Dimension Mapping
Assigning exceptions to dimensions shows all exceptions assigned to an entity, like Customer, across all Queries. This can be very useful when there are multiple Queries monitoring exceptions connected to customers and you want to see how exceptions are distributed to customers.

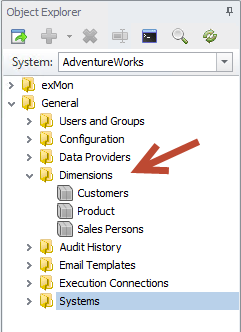
In our example below you have defined three Dimensions; Customer, Product and Sales Persons. Dimensions are created and configured in TimeXtender Data Quality under General > Dimensions.
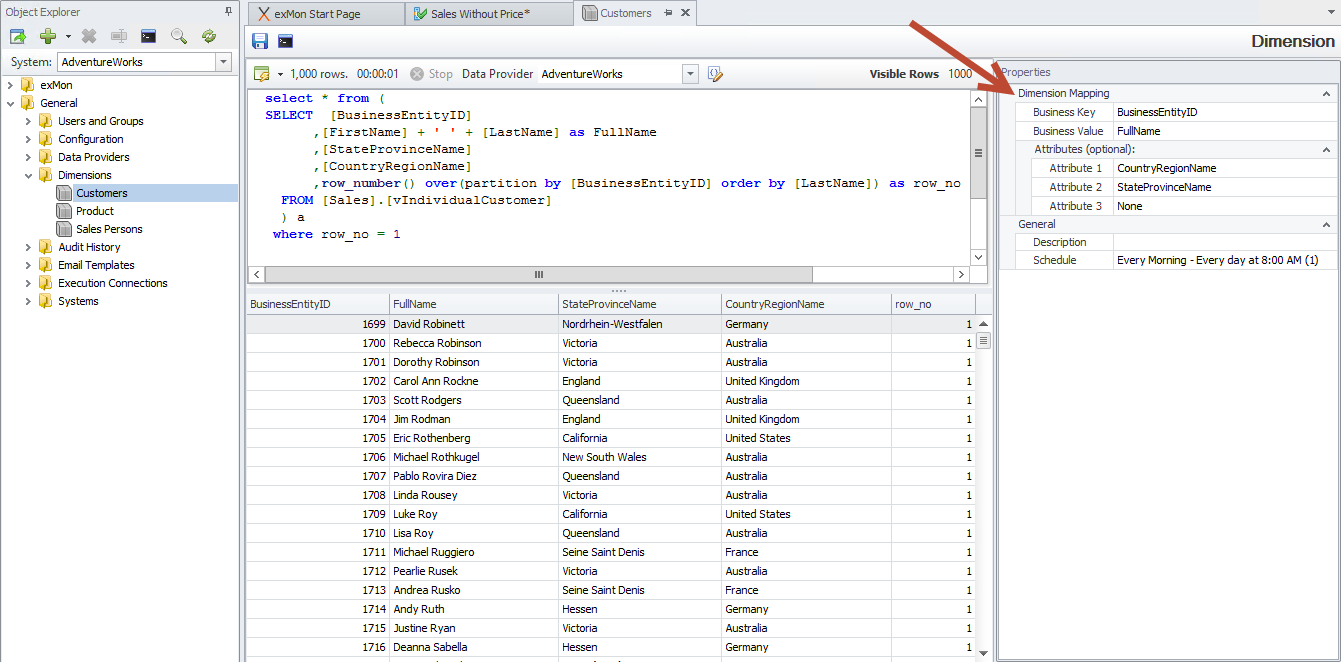
When defining a dimension, you need to provide a Data Provider, a query that gives us a unique id and a name, and optional attributes to categorize the dimension further. The unique id is mapped to Business Key and the name to Business Value. You then need to execute the dimension or add it to a schedule.
Below is an example of how a Customers dimension is defined and the columns mapped to the Business Key, Business Value and attributes. Each customer has a State Province Name which is in a Country Region.
For example, Carol Ann Rockne is in England, United Kingdom.
Notification Properties
There are two different methods to alerting exceptions to the user. Email notifications will be explain here below but we also offer triggering Custom Webhooks. Detailed description can be found here.
The ability to send out emails with exceptions is a powerful way of notifying responsible parties about new or open exceptions. Although powerful, it is important not to overuse email notifications as they quickly become spam for the user and are likely to be less effective.
We encourage our customers to only use email notifications with high priority, time-sensitive exceptions. Normal exceptions can be analyzed and worked with on the Portal. Here are email notification guidelines that have worked well for our customers.
Notify by email for:
- High priority exceptions: The exceptions are high priority and should be dealt with immediately.
- Time-sensitive: The exceptions are time-sensitive. It is too late to deal with the exceptions later. For example exceptions from a query looking for bad addresses in outgoing orders.
- Infrequent exceptions: When users only get a handful of exceptions each week and are not regular users of the portal it makes sense to notify them by email.
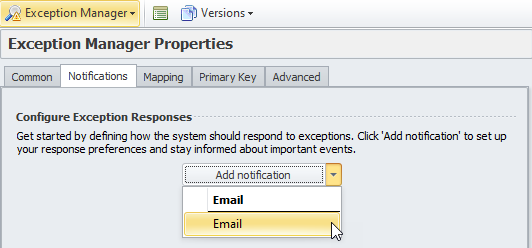
You can configure email configuration in the Notifications tab in Exception Manager Properties. To create a new email notification select Add notification -> Email
Enable emails on new exceptions by checking “Send emails on new exceptions”.
By default, all exceptions are sent to the Query Owner. You can change that behavior with User Mapping, as described earlier in this guide.
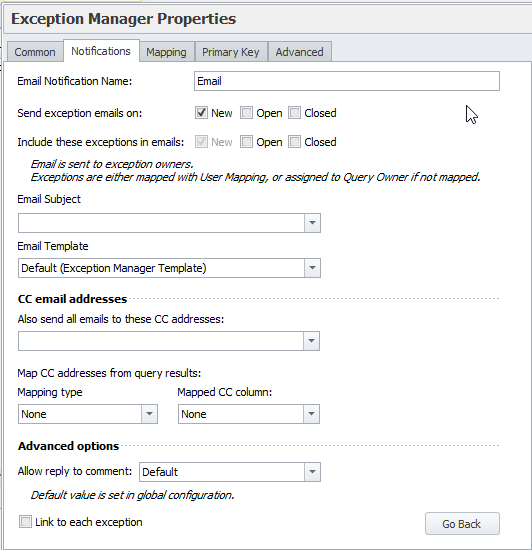
All configured notifications will become visible in a list on the Notifications tab

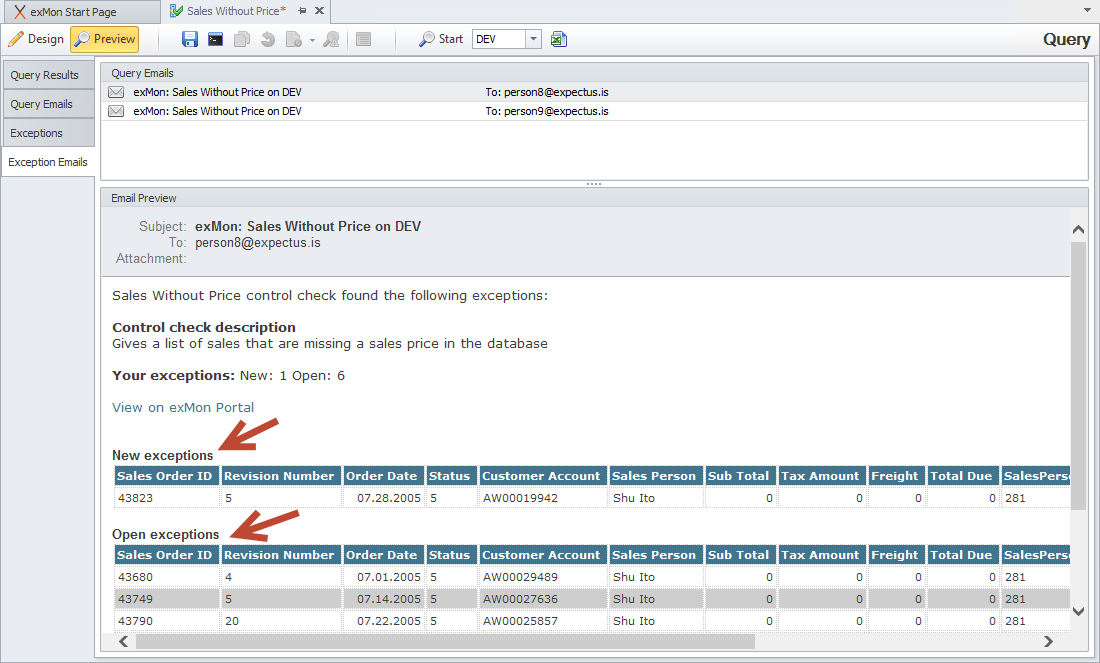
In our example, we have enabled “Send email on new exceptions”. With Preview, you can see the emails that will be send out.
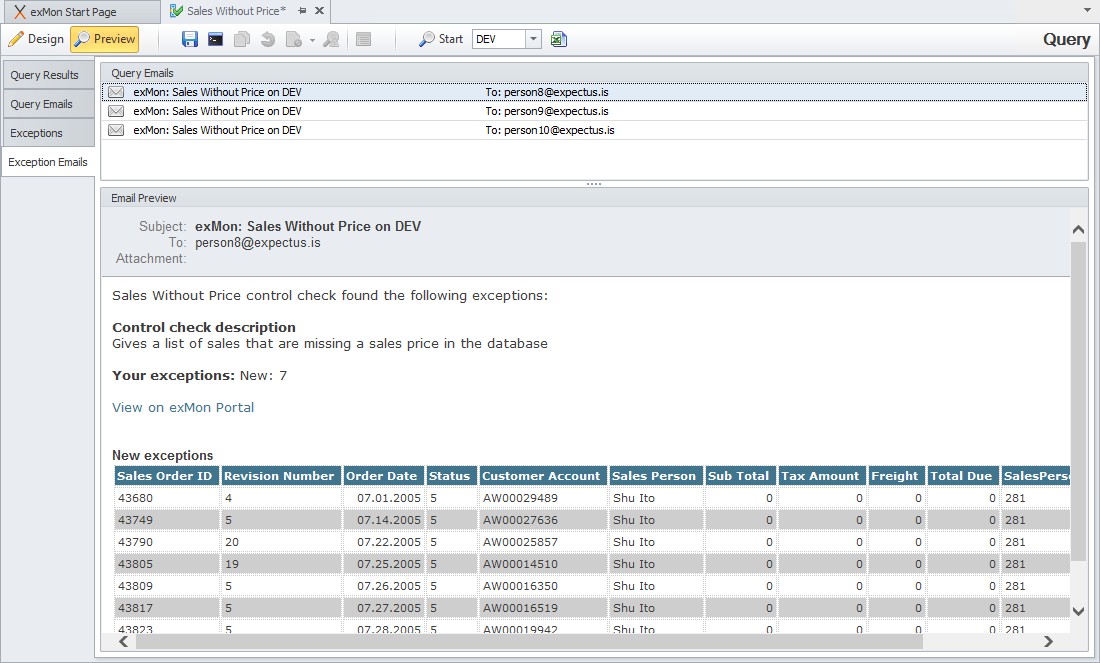
As we have enabled User Mapping, three emails will be sent out, to our demo users: Person 8, Person 9 and Person 10, informing them of the exceptions they have been assigned to.
Email Templates
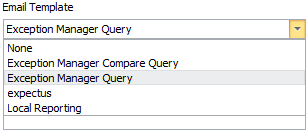
You can choose an appropriate email template with the Email Template dropdown.
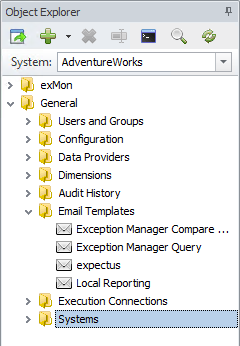
You can customize the look & feel of your emails with email templates. To add or update a template, navigate to General > Email Templates.
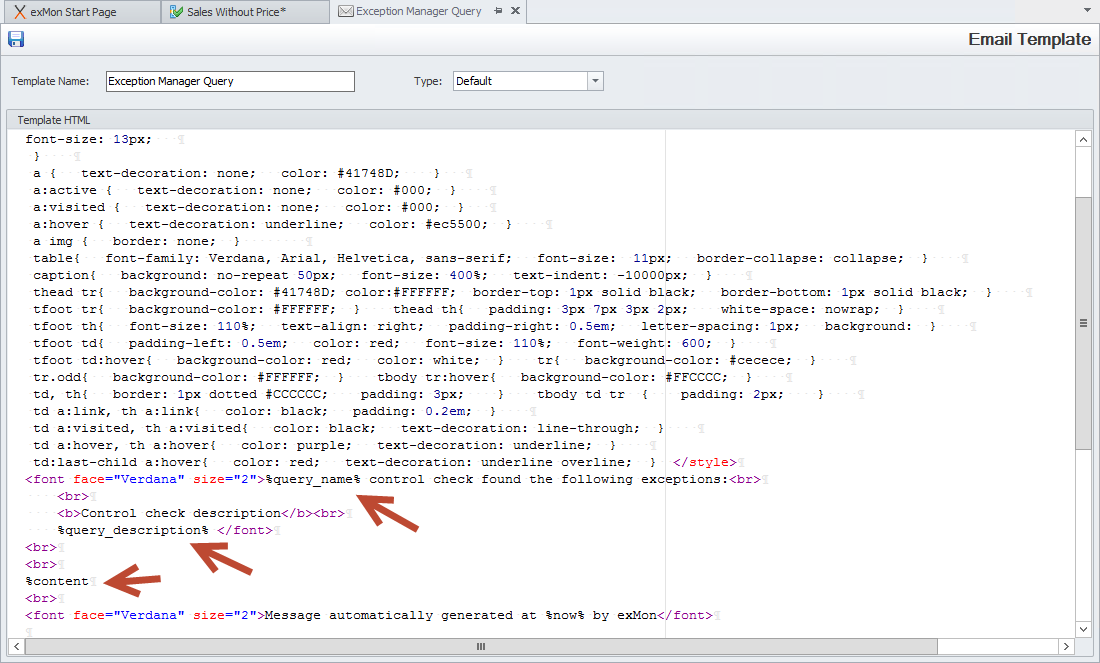
Here, you can use HTML with certain placeholders to control the email generation.
We advise you to create email templates matching your corporation’s branding.
CC Email Addresses
In cases when multiple users need to be notified of exceptions, you can use CC Email Addresses and CC Email mapping.
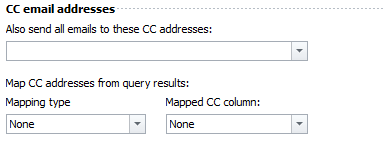
If you have a fixed list of email addresses, you can add them in “Also send all emails to these CC addresses”.
This is useful, for example, when you have a supervisor that needs to be notified of all exceptions for a specific Query. If you need a more dynamic list of email addresses, you can use CC User mapping which works in the same way as the User Mapping, described above.
Advanced Options
There are a few advanced email options:

Allow reply to comment
Allow reply to comment allows the recipient of an email, to reply to the email with a comment that will be added to the activity log of the exception. In the email, there will be two extra columns, where the user can write on reply. TimeXtender Data Quality will interpret the email and mark the exceptions accordingly.
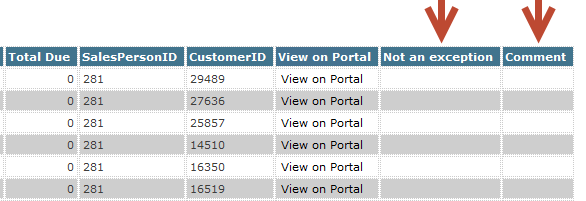
Note: For “Allow reply to comment” to work, TimeXtender Data Quality has to be configured with a mailbox allowing TimeXtender Data Quality to receive emails.
Link to each exception
When checked, TimeXtender Data Quality will add the column “View on Portal”, with a link to the specific exception on the Portal. When clicked, users will get more detail about the exception, have the ability to assign it to other uses, write a comment and make other actions.
Include all open exceptions when sending email
When checking, emails with new exceptions assigned to a user, TimeXtender Data Quality will also include a list of all open exceptions assigned to that user. Below is an example of an email including new and open exceptions:
Primary Key
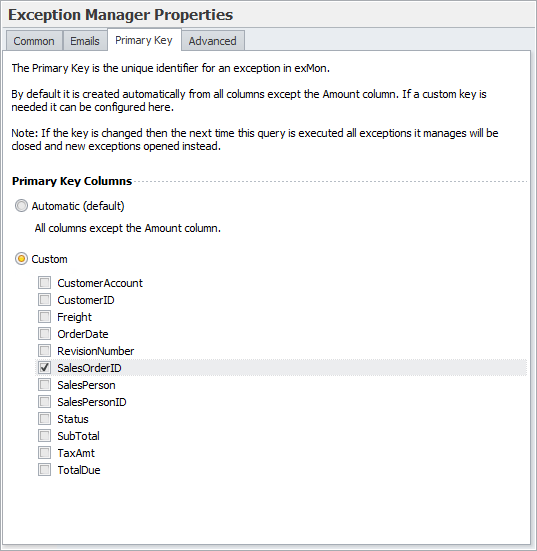
TimeXtender Data Quality tracks each exception in the results from a Query by creating a unique primary key from the row. It is important that TimeXtender Data Quality creates the correct primary key so that it is able to identify each exception and track its lifespan.
With a wrong primary key, marking an exception as “Not an exception”, could cause some new exceptions not to show up, as TimeXtender Data Quality will interpret this as that the exceptions have already been closed. By default, TimeXtender Data Quality selects all columns, except the ones mapped to Amount and User.
We highly recommend defining a custom primary key, from the set of columns that make up a unique key. In our example SalesOrderID is sufficient. In other cases, you could choose multiple columns, for example, SalesPersonID and Date column.
When a Custom Key is defined, it makes it easier to add an additional column to the exception at a later time. If the Primary Key is Automatic, then adding new columns would recreate the key of all open exceptions, resulting in closing them all and reopening them as new exceptions. With a Custom Key, you are able to add columns without changing the key.
Advanced
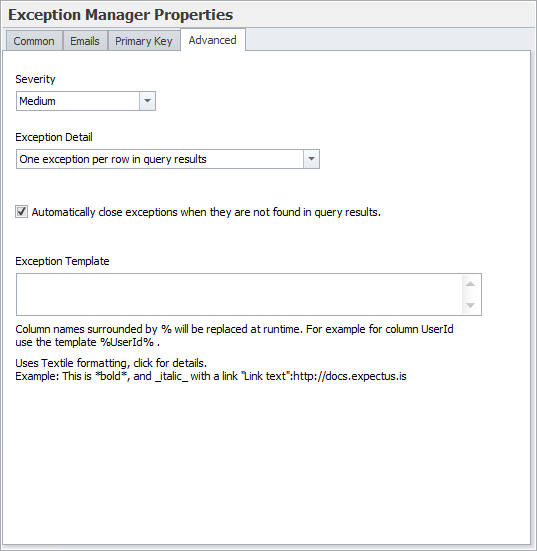
There are a few advanced options that can be useful in some cases.
Severity
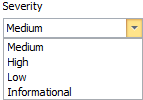
Severity is used to prioritize the Queries into groups of High, Medium, Low and Informational exceptions. The informational priority is used to distinguish Queries that produce exceptions that are non-actionable and can’t be fixed. Informational exceptions can be filtered out in the Portal to view only the actionable exceptions.
Exception Detail
Normally, each row from the Query is handled as an individual exception. With Exception Detail, you can configure TimeXtender Data Quality to only create one exception if the Query returns results. This can be useful in cases where there is a single reason for all the exceptions, and it can be fixed all at once.
Automatically close Exceptions
You can also automatically close Exceptions when they are not found in the query results. This is a key feature and by enabling it, TimeXtender Data Quality will automatically close (mark as fixed) exceptions that are no longer found. This saves users time and gives a clear picture of the current status of open exceptions. Enabled by default, this can be disabled if you prefer. Cases to disable this feature include when the Query is monitoring only the past few days in transactional data.
Exception Template
When browsing exceptions across multiple Queries in the Portal, an exception summary is used instead of the detailed view. The exception summary is generated from an exception template which is automatically generated. You can override the template to omit columns or add extra information.
Clearing Exceptions
When developing Queries you often need to “start from scratch” and clear all exceptions. To clear exceptions use the “Clear Exceptions” button in the toolbar. When clearing exceptions, all exceptions that this Query has created will be deleted from TimeXtender Data Quality and the Query will start fresh on the next execution.

You can choose to clear from Dev, Test or Prod.
In Summary
In this article, you have read about Exception Management. This is a feature that can be enabled for Compare Queries and Queries. Without Exception Management, queries return and report the whole result set and have no memory of previous executions.
