
In this section, you will learn how to configure exception handling settings within our software, allowing you to manage how tests respond when exceptions are detected. This feature enables you to choose between triggering email notifications or webhooks based on your requirements.
Detailed description on how email notifications are configured can be found here.
Below is an outline of this documentation
Setting Up Custom Webhook Notifications
The first thing to consider is to create the actual webhook that will be triggered. Documentation on how to create and configure Zapier webhooks can be found here.
Once the external webhook has been created, we can configure settings and notifications for our tests using this external webhook.
Create and configure Custom Webhook Settings
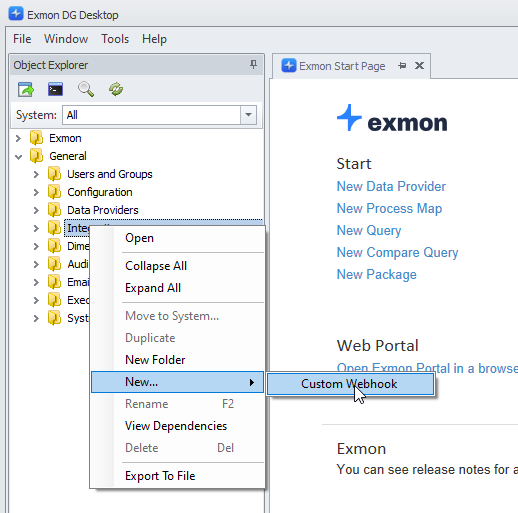
- Navigate to General > Integrations.
- Right-click and select New… Custom Webhook and give the Custom Webhook a name.
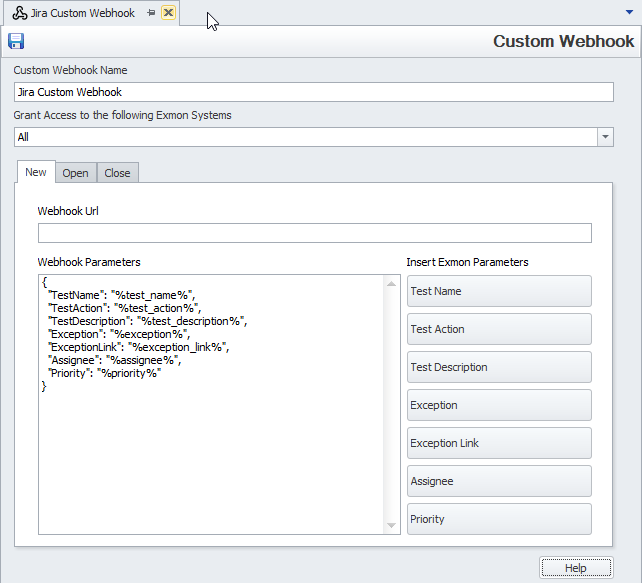
- The settings page will be opened where we need to configure the following fields:
- Custom Webhook Name: This is the name that we have given the webhook.
- Grant Access to the following Systems: This field will determine in which systems your webhook will be available for use.
- Webhook Url: Url to the Zapier webhook. You can configure different webhook urls depending on whether exceptions are being created (new), updated (open) or closed (close) by switching between tabs.
- Webhook Parameters: Define the information expected by your Zapier webhook. Customize these parameters using constants or select Exmon Parameters by clicking on your desired options.
Exmon Parameters will be populated at execution time with information from each exception.
- After saving these configurations this Custom Webhook can be used in tests.
Configure Custom Webhook Notification
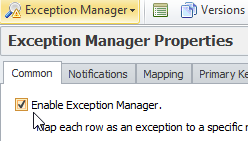
To enable custom webhooks you need to create a Custom Webhook Notification for your test. These are created by navigating to Exception Manager.
Make sure to Enable the Exception Manager located at the Common tab.
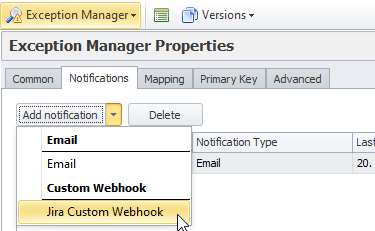
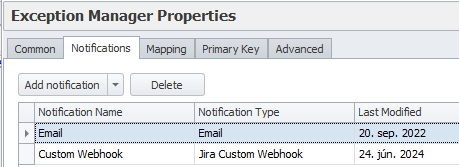
Navigate to the Notifications tab and press Add notification. All Custom Webhook Settings that have been created in the Integration folder will become available, categorized as Custom Webhook. Choose the desired Custom Webhook settings.
The following settings need to be configured:
- Webhook Notification Name: Give your notification a name which will be displayed in the list on the Notifications tab. The Default value is Custom Webhook.
- Trigger this Webhook when
- New exceptions are discovered: When selected, the webhook is triggered when a new exception is created using the settings from the New tab in the Integration settings.
- Existing exceptions persist: When selected, the webhook is triggered when an open exception using the settings from the Open tab in the Integration settings.
- Exceptions are closed: When selected, the webhook is triggered when an exception is closed using the settings from the Close tab in the Integration settings.
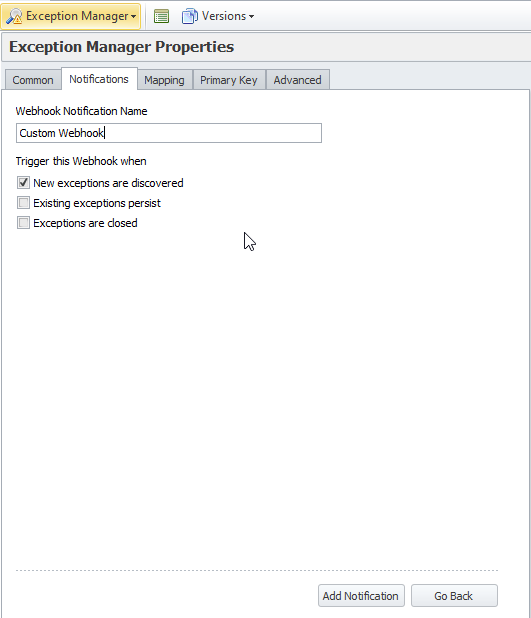
After these settings have been configured make sure to press Add Notification at the bottom of the window. If Go Back is pressed then the notification is not created and you will be directed to the overview list.
Your notification will be visible in the overview list. Double clicking a line will open the detailed configuration.
Testing and Validation
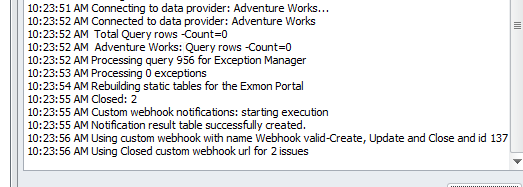
When tests using Webhook notifications are executed the execution log will list what was executed like displayed in the following image.
Example Use Cases
-
Email Notifications: Ideal for immediate alerting and notification to designated stakeholders or support teams.
-
Webhook Integration: Suitable for integrating with external systems.
