
This article is going to explain how you connect to a MySQL data source through the Any Source ADO.NET provider.
While the Any Source ADO.net provider is recommended, ODBC is also available here.
You can also convert an existing MySQL ODBC provider to this Any Source ADO.NET provider using the Change Provider option.
Install the MySQL provider
Download a .NET MySQL provider. I have used MySQL for NET. Just download the provider and install it. If you have our program opened when installing this, you need to restart it to see it.
Setting up the Any Source ADO.NET connection
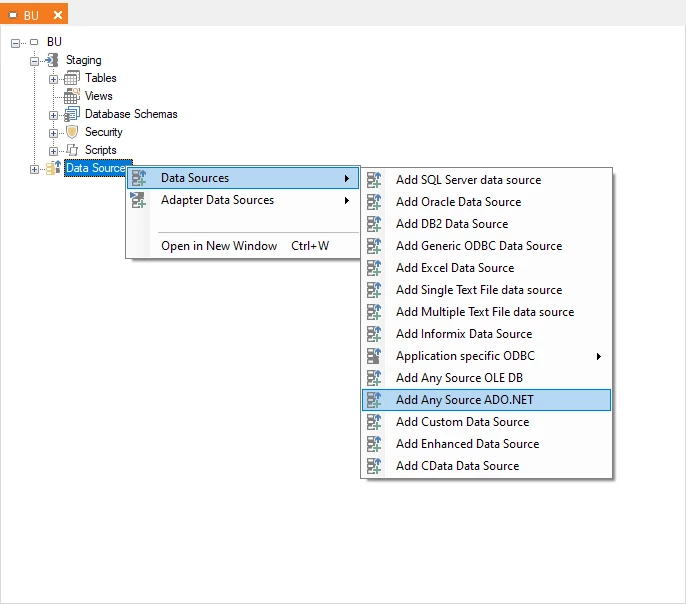
Start by adding a new data source. Right click on Data Sources, go to Data Sources and click on Add Any Source ADO.Net.
If you already set up the connection and want to convert it to using this do like so.
Right-click on the existing provider locate Change Provider and then Change to Any Source ADO.NET.
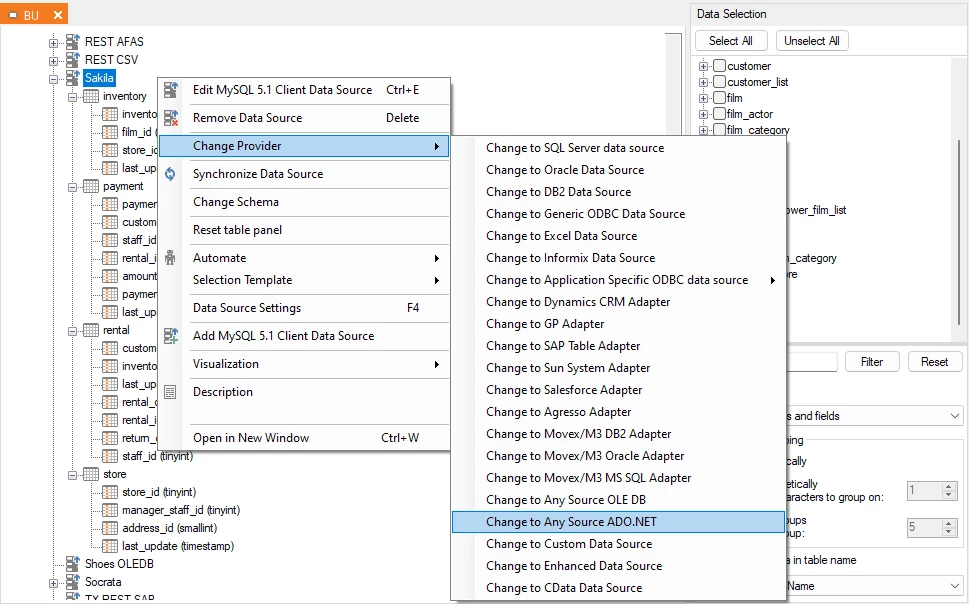
Besides this the procedure is exactly the same.
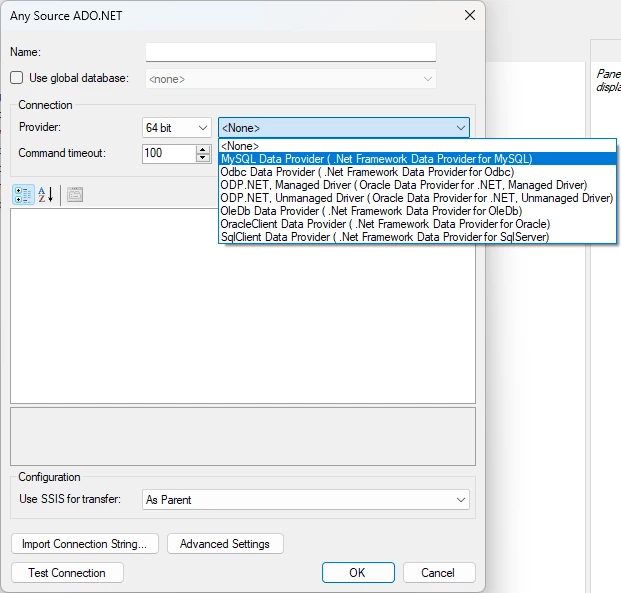
You then need to choose that it is a MySQL connection. Press the Provider drop down menu and choose MySQL Data Provider (.Net Framework Data Provider for MySQL).
Find the Connection area. In the field Database add the database name. In the Server field you add the server name. It can be a ip address as well. I have added port 3306 in the Port field. It is not necessary in this case, as it is the expected default.

Find the Security area. In the User Id field add a user that has read rights on the database. I use root as it is the admin. In the Password field add that users password.
There are more options than this, but these are the ones necessary for gaining connection.
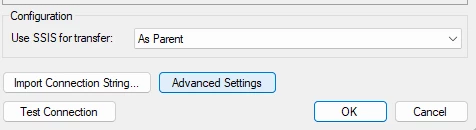
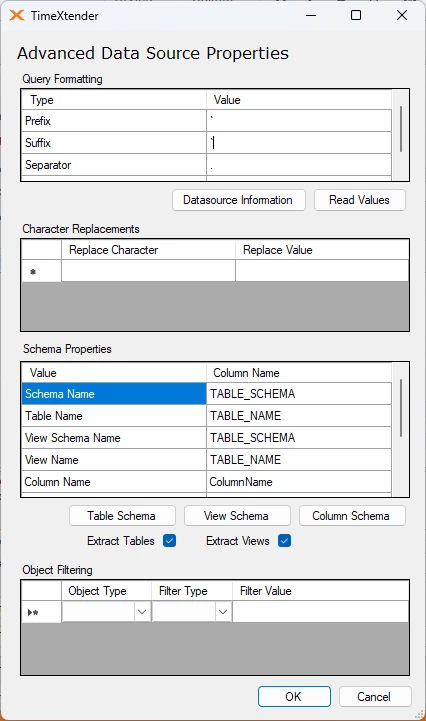
Next step is to go to the Advanced Settings.
Change the Prefix and Suffix to Accent Grave ` and press OK to close this menu and then OK again to add the data source.
That is it. Synchronize with the data source to see the fields.
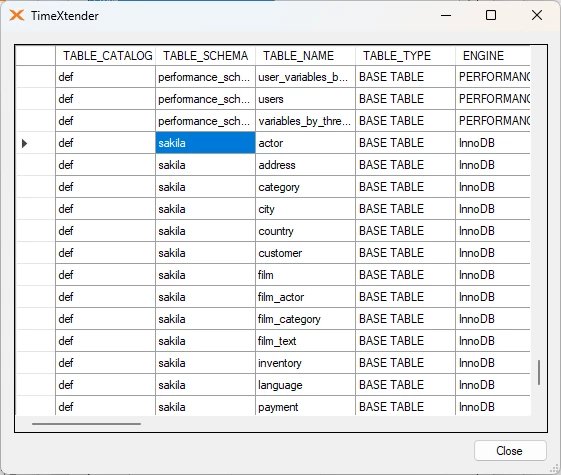
If you want to remove the system fields from the list, you can set it up to only show a specific schema.
To see the existing schema's press the Table Schema button and you can see which fits the data you want.
In the Object filtering area set the Object Type to Schema Name, the Filter Type to String Equal and the Filter Value to the schema name you chose.
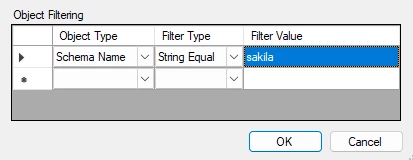
Press OK in both menus to save the settings and synchronize with the data source to remove all tables that does not exist in the schema you chose.
Common issues with MySQL data
Date fields smaller than 1753-01-01
In MySQL the smallest allowed date is 0001-01-01 in MSSQL that is not the case for datetime fields.
If that is the case you will get the following error message.
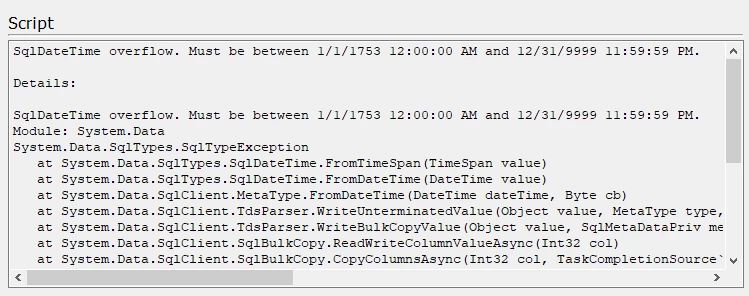
To fix this you can use the override data type feature. Set up a general rule where DateTime fields are converted to DateTime2 fields. Remember that it differentiates between upper case and lower case.
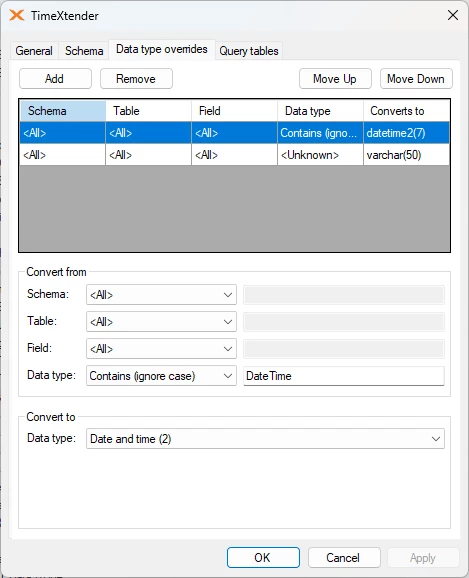
Apply the override and synchronize with the data source. You should get a notification about which fields were affected by the change.
