

Overview
This guide will cover how to create and add Azure Data Lake storage for an Ingest instance in TimeXtender Data Integration.
If you are creating a TimeXtender Data Integration environment from scratch, we highly recommend using one of the Reference Architectures for deploying TimeXtender Data Integration in Azure.
If you have already deployed one of the Azure Marketplace templates with Azure Data Lake then you already have all of the necessary data lake resources and can skip step 1 and proceed with step 2 to register an application.
If you already have an existing TimeXtender Data Integration environment deployed in Azure, but don't have not yet configured an Azure Data Lake storage account, you can use this guide to add a Data Lake storage option by starting at Step 1.
Complete the following steps to create Azure Data Lake Storage for the Ingest instance in TimeXtender Data Integration:
1. Create an Azure Storage Account
Note: If you already have a Data Lake Storage account, you can skip this step.
- In Azure portal, create a Data Lake Storage account that will be used as storage for the Ingest instance.
- Azure Portal -> Create a new Resource -> Storage account - blob, file, table, queue -> Create storage account
- Assign Subscription name, Storage account name, Location and other properties.
- Select Account kind = StorageV2 (general-purpose v2 )
- Advanced tab -> set Hierarchical namespace to Enabled
- It is not necessary to create a container at this time, you will create the container in the TimeXtender Data Integration in a later step.
For more details, refer to Microsoft Azure documentation at Creating Azure Data Lake Storage Gen 2
2. Create an App Registration
In order to access the data lake resources from TimeXtender Data Integration, you will need to configure an App Registration in the Azure portal.
Note: The following steps for access control describe the minimum permissions required in most cases. In your deployment/ production, you may fine-tune those permissions to align with your business rules and compliance requirements. Refer to Microsoft Azure documentation for details.
- In the Azure Portal menu, click on Azure Active Directory, then click on App Registrations in the menu bar on the left. Then click New Registration.
- Enter a name and select Accounts in this organizational directory only. The value of Redirect URI is the URL at which your application is hosted. Click Register when you are done.
- For the newly added App Registration, select Certificates & secrets to create a New Client Secret. This key is encrypted after save, so it needs to be documented somewhere safe. The secret will appear after you click Add.
3. Enable App Registration access to Data Lake
After the App Registration is created, you need to configure access to Data Lake.
- Go back to the resource group where your data lake resources are located and select the Data Lake storage account resource.
- In the menu bar on the left, select Access Control (IAM) and add a role assignment.
- Add the <App Registration Name> you just created to the role of Owner of the resource.
Note: When you add or remove role assignments, wait for 5 minutes before executing a task within the Ingest instance. It can take up to 30 minutes for changes to take effect. For more details, review this article Troubleshoot Azure RBAC
4. Configure Ingest Instance Storage
In the portal, Add or Edit and existing Ingest Instance.
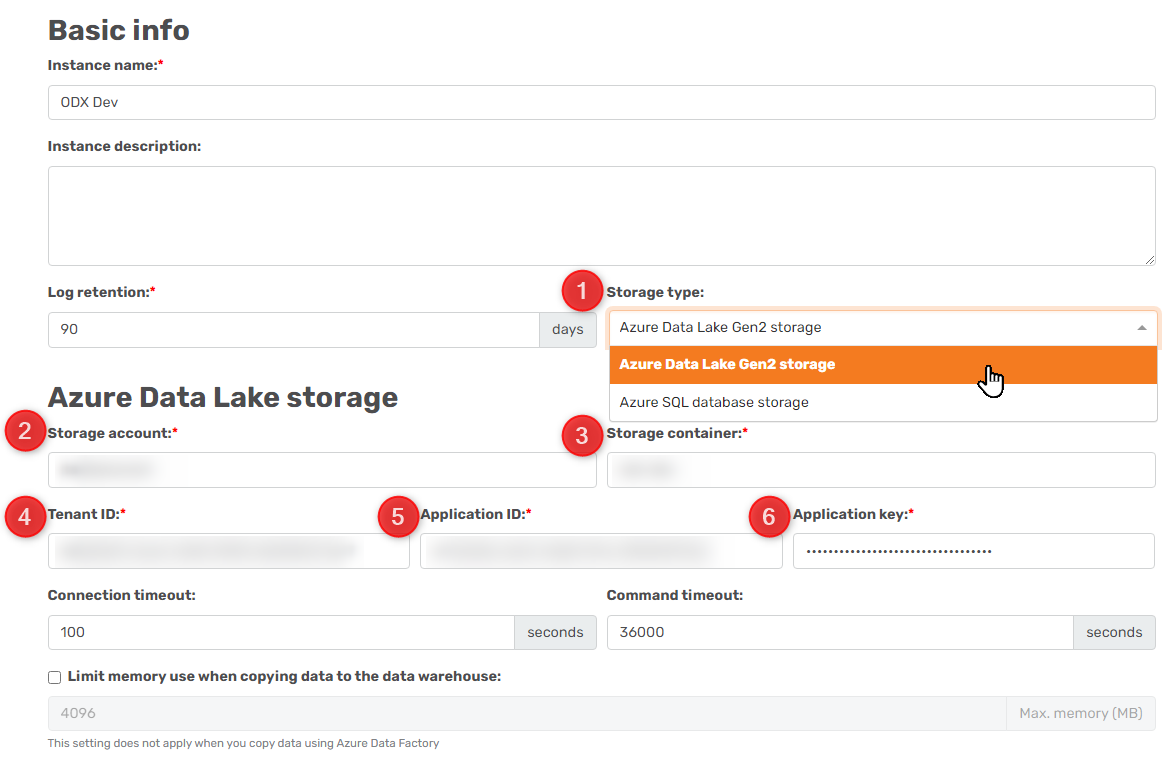
- Storage Type: Select Azure Data Lake Gen2 storage
- Storage Account: Use the name of your Azure Storage Account. The input only needs the name of the resource instead of the URL.
- Container name: Enter a name for the Azure Storage Container. You will create the container in the TimeXtender Data Integration in a later step.
- Tenant ID: Also known as the [Directory ID] found under properties of Azure Active Directory.
- Application ID: This is the Application ID of the App Registration created above. This can be found in the Azure portal>Azure Active Directory>App Registrations
- Application Key: This is the Secret created above for you App Registration
- Timeouts: These are the timeouts for communicating with the Azure Storage account. The defaults are ideal for most situations but may need to be extended for slow connections or exceptionally long data transfers.
- Transfer to Prepare instance - Limit memory use: This setting only applies if you are not using Azure Data Factory for Data Transfer. You can learn more about when to use this feature here: Memory limit restraint of parquet file extraction
5. Create the Storage for the Ingest instance (Container)
Before you can execute transfer tasks in an Ingest instance, you must create the data storage.
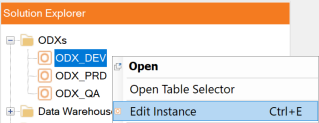
- In TimeXtender Data Integration, right-click on the instance and select Edit Instance
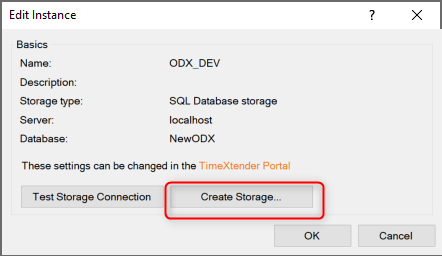
- Click Create Storage... in order to create the storage for the Ingest instance
Troubleshooting
Hostname Error
Error: Service request failed: Invalid URI: The hostname could not be parsed. (System.UriFormatException)
Ensure that the details entered in the portal for the Ingest instance do not contain spaces.
