
Released in TimeXtender 6024.1
Ingesting data from a data source to an Ingest instance, begins in the TimeXtender Portal. Here, you add the data source connection and map it to an Ingest instance. When you open the instance in TimeXtender Data Integration, you can then use the mapped data source connections when you add a data source.
Adding a data source connection
To add a data source connection, follow the steps below.
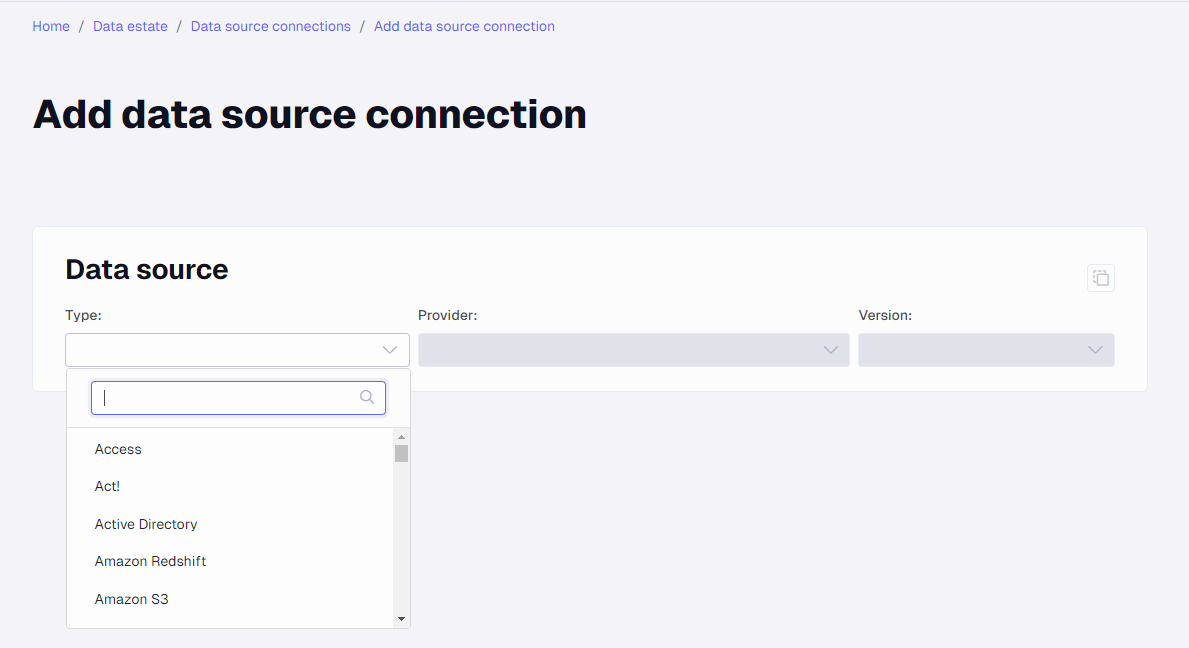
- Go to Data Estate > Data source connections and click Add data source connection
- In the Data Source Connection list, select the Type, Provider and Version you want to use
- In the Name box, type a name for the data source connection.
- In the Description box, type a description of the data source connection.
- Under Connection settings, enter the connection information required by the data source you've selected.
-
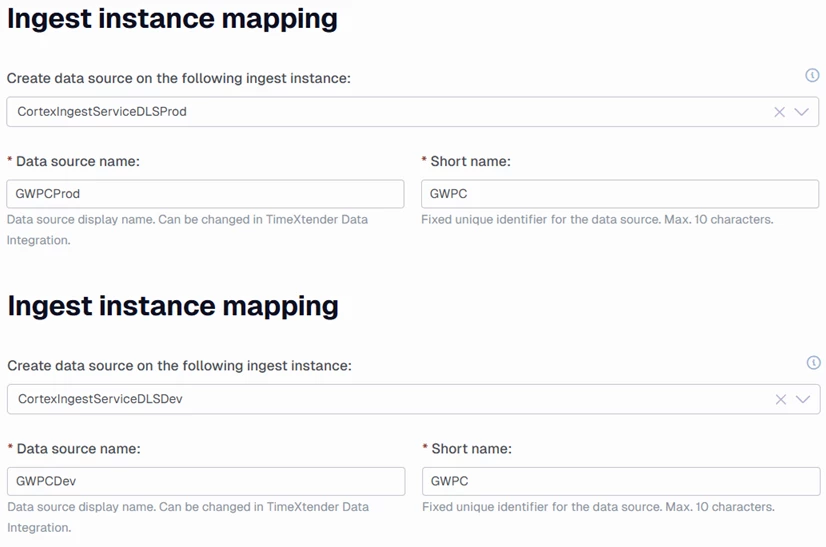
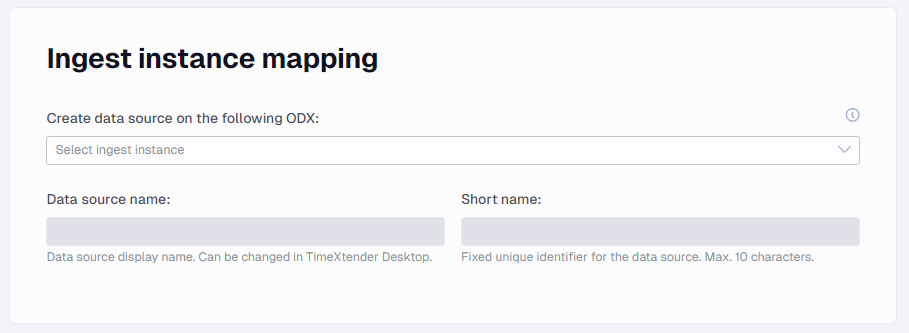
Map the data source to an Ingest instance by selecting an instance, and providing the data source name and short name to be used in TimeXtender Data Integration
Note: All connection credentials are protected with 256 bit AES encryption
Mapping a data source connection to an Ingest instance
You can map a data source connection to an Ingest instance when creating a new data source connection, as shown above. It is also possible to map the data source connection to an Ingest instance by following the below steps:
- Go to Data Estate > Instances and click on an Ingest instance.
- On the Mapped data source connections list, click Add
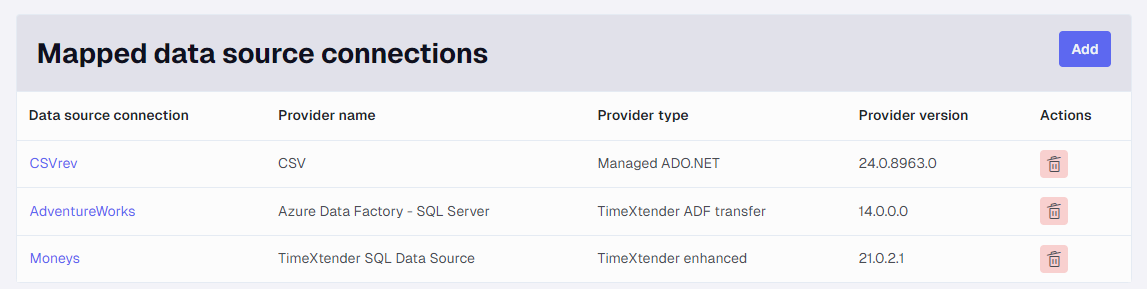
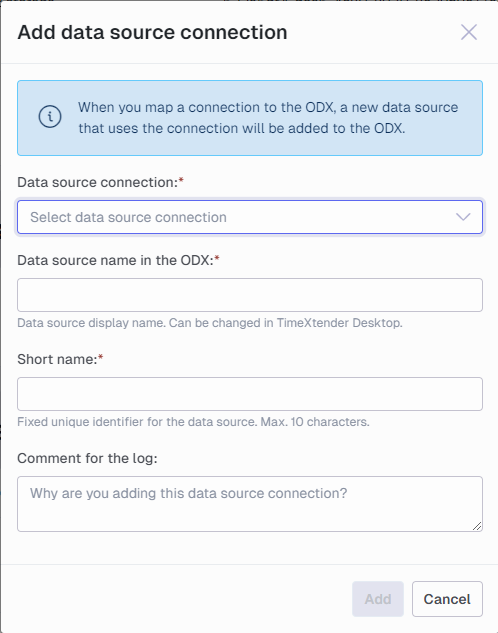
- Select the data source connections you want to add from the Data source connection list, provide a name and short name for the data source that will be created in TimeXtender Data Integration and then click Add
Adding Data Sources in TimeXtender Data Integration
Once you’ve mapped the data source connection to an Ingest Instance, a data source will automatically be created in TimeXtender Data Integration. To add further data sources in TimeXtender Data Integration using existing data source connections, see:
Other Data Source Connection Actions
Cloning a data source connection
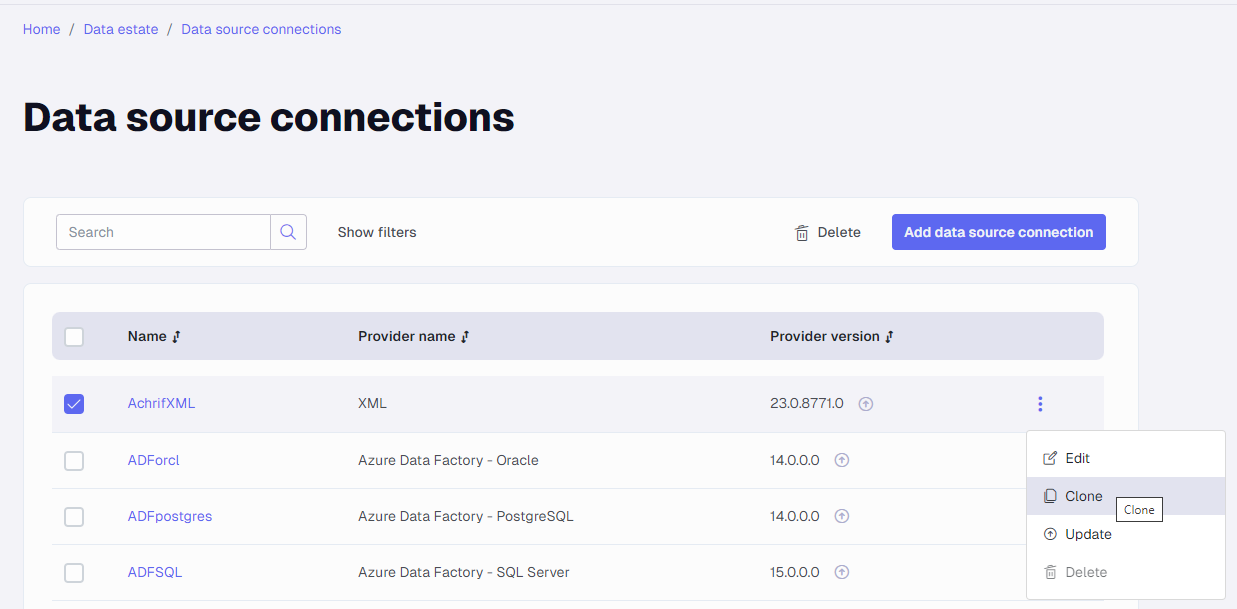
If you need to add a new data source connection that is mostly the same as an existing data source connection, you can clone the existing connection instead of starting from scratch.
On the Data Source Connections page, in the Actions column, click the Clone button.
This will open a page similar to the Add Data Source page, but prefilled with data from the cloned data source, click Save to save the cloned data source connection.
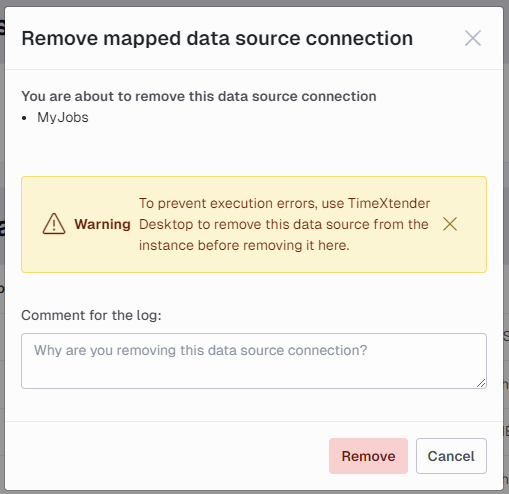
Remove a Data Source Connection
A data source connection cannot be deleted if it is mapped to an Ingest instance. You should also take care when you remove a data source mapping since any data sources in the Ingest instance that use the data source connection will stop working.
Follow the steps below to delete a data source mapping:
- On the Mapped data source connections list, click Delete in the Actions column in the row of the data source you want to remove

- In the Remove data source connection modal, confirm that you want to remove the mapping by clicking Remove