A data source is automatically created in TimeXtender Data Integration when a data source connection is mapped to an Ingest instance in the TimeXtender Portal. This article describes how to manually add data sources in TimeXtender Data Integration using existing data source connections that have been mapped to Ingest instances.
Prerequisites
Ensure that the data source connection has been added in the TimeXtender Portal, and is mapped to an Ingest instance, before attempting to add the Data Source in TimeXtender Data Integration.
Adding a Data Source in TimeXtender Data Integration
This guide describes how to add a new data source on TimeXtender Data Integration
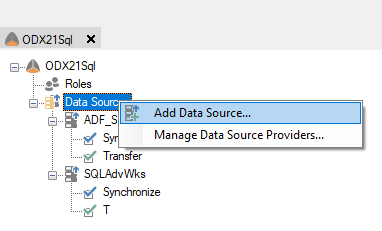
- Double-click on your Ingest instance
- Right-click “Data Sources” > Add Data Source
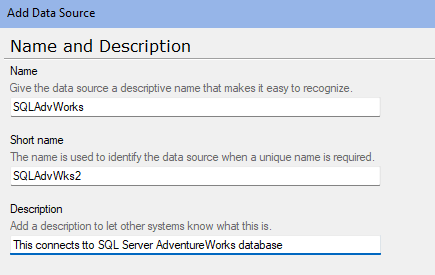
- Enter the Name and Description of the data source.
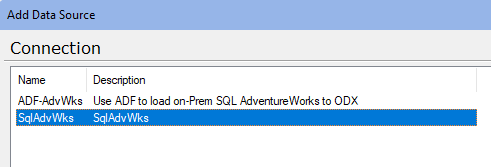
- Select the Connection from available connections you have configured in TimeXtender Portal.
Go through Table selection, define a Transfer task if needed. For additional details, refer to Tasks in an Ingest Instance
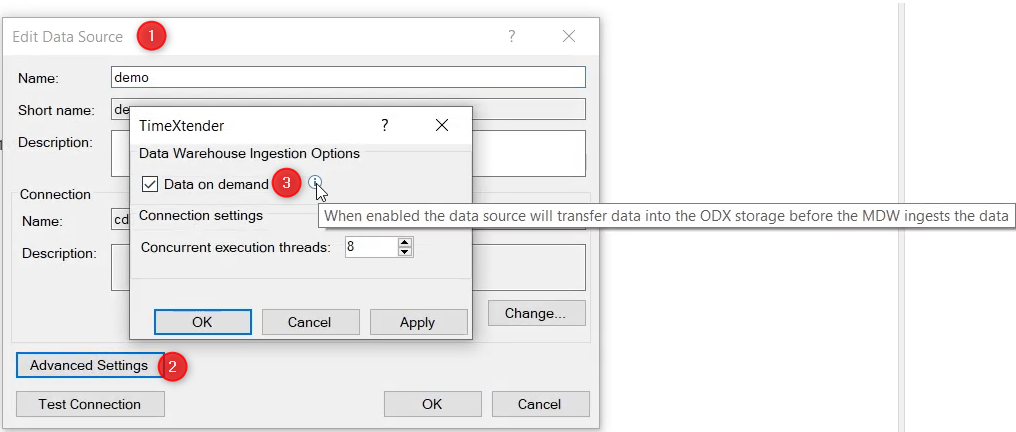
On-Demand Prepare Ingestion
Warning: On-Demand does not currently support ADF data sources
When ‘Data on demand’ option is enabled (in TimeXtender Data Integration Data Source > Advanced Settings), the data source will transfer data into Ingest storage before the Prepare instance ingests the data. This will work without configuring an explicit "Transfer task" under the data source
- Right-click on your data source > Edit
- Click on Advanced Settings
- Check the box Data on demand