There are three methods to connect to Excel files with CData. They are Microsoft Excel, Microsoft SharePoint Excel, and Microsoft Excel Online.
Which one to use depends on what you need to do. There are some things to consider that will help decide what option should be used.
Where is the Excel file stored and how many are there?
Do you have the files in a OneDrive folder, or in SharePoint?
Then you can possibly use all three methods. To limit it to one option you need to answer the following questions
Do you need to connect to many files in OneDrive or SharePoint?
Then you need to use the Microsoft Excel Online provider.
If you only need to connect to one file then you should use the standard Microsoft Excel provider.
You should only use the Microsoft SharePoint Excel provider if you have an old SharePoint server running on a local server, if not you should use the normal Microsoft Excel provider.
The reason is that it can’t use OAuth to connect to the files and then it would require a user account without Multifactor Authentication and you can’t use it to connect to more than one file.
This article discusses the Microsoft Excel provider. If you want to connect to more than one Excel file at a location, the only option is to use Microsoft Excel Online provider, however, these files need to be stored in SharePoint or OneDrive.
Search for Microsoft Excel and choose the one with the highest number.
Give the data source a name.
Locate an Excel file in a folder press and hold Shift, right-click on the file, and click “copy as path”.
Locate and paste this path in the URI field. Remember to remove the quotation (“) marks at the start and beginning of the path.
Locate the Row Scan Depth field. It is set to 100 as default. Consider changing this value. If this value is:
0 - The provider will read the whole file before deciding on the fields' data types.
100 - It will read only the first 100 rows and decide the data types based on that.
10000 - Set it to 1000 if the file is very large, it can take a long time to synchronize the data source and read the whole file to determine the data types.
Click Save to create the data source.
That is all you need to do to connect to an Excel file, however, it may need some additional changes to provide the proper data. You can read about what can be done here. The above options are also relevant for all other connection types.
Set up a connection to a file stored in Azure Storage
Create a new data source in the portal.
Search for Microsoft Excel and choose the one with the highest number.
Give the data source a name.
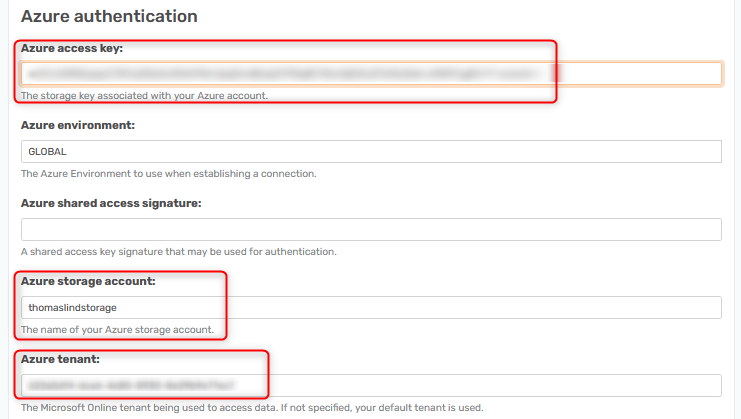
Locate the Azure Authentication area and find the Azure Storage Account field. Add the name of the Storage Account the file is stored in.
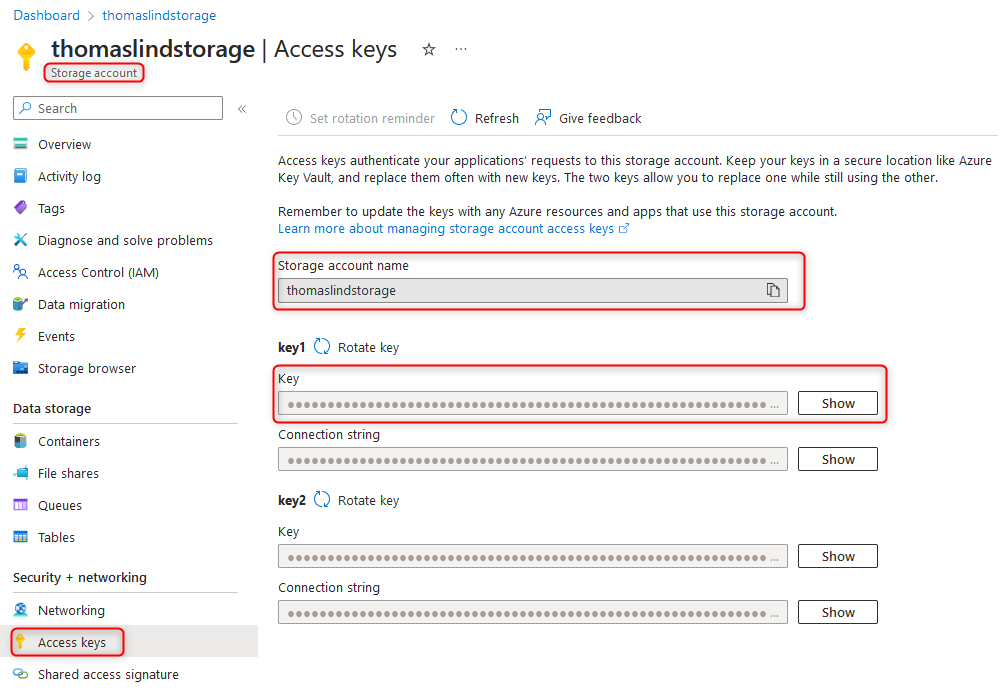
You can copy the storage account name from the Access Keys menu.
Locate the Azure Tenant field and add the Tenant ID for this Storage Account.
The Tenant ID can be found here. Just search for Tenant and choose tenant properties.
Locate the Azure Access Key field and add the Storage Accounts Access Key.
You have an option to use an Azure Shared Access Signature (SAS) token as well, but it is not necessary if you have an Access Key. Here is how I have set it up for my storage account in the portal.
Locate the field called Connection Type in the Connection area.
If you want to connect to a file located in Azure Blob storage
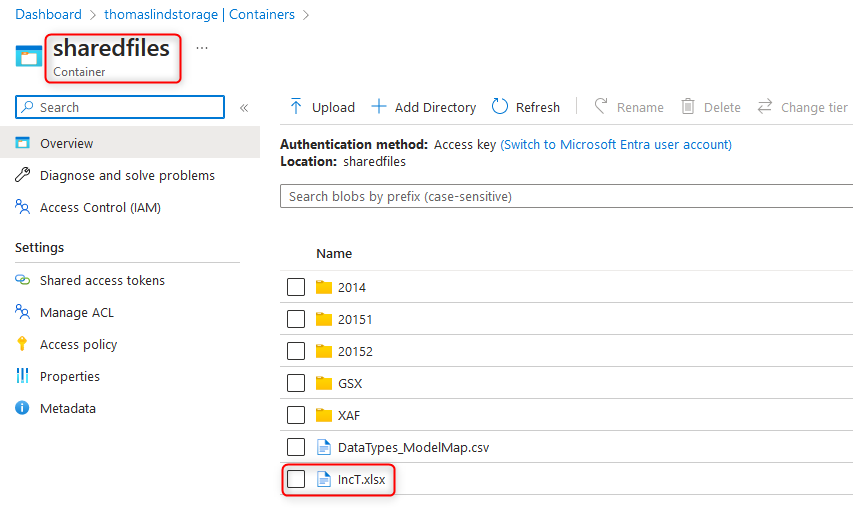
Set the Connection Type field to Azure Blob, locate the URI field, and add the following azureblob://mycontainer/myblob/file.xlsx
How a real path could look:
File path URI: azureblob://sharedfiles/IncT.xlsx
If you want to connect to a file located in Azure Data Lake storage
Set the Connection Type field to Azure Data Lake storage, locate the URI field, and add the following adl://myfilesystem/folder1/file.xlsx
Azure Data Lake Storage Gen2, locate the URI field and add the following abfs://myfilesystem/folder1/file.xlsx
Azure Data Lake Storage Gen2 SSL (this option is most common), locate the URI field and add the following abfss://myfilesystem/folder1/file.xlsx
How a real path could look:
File path URI: abfss://sharedfiles/IncT.xlsx
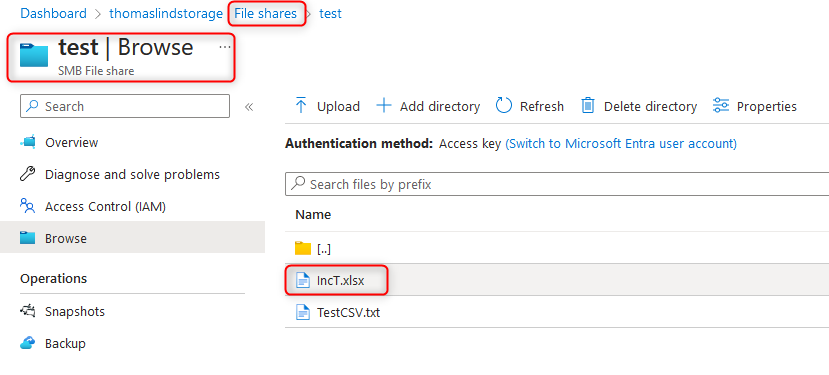
If you want to connect to a file located in Azure Filestorage
Set the Connection Type field to Azure Files, locate the URI field, and add the following azurefile://fileShare/remotePath/file.xlsx
How the path to a file could look:
File path URI: azurefile://test/GSX/IncT.xlsx
Set up a connection to a single Excel file stored in SharePoint
While you can use the Microsoft Excel Online provider to connect to SharePoint as well, this is how to only connect to one file through this provider.
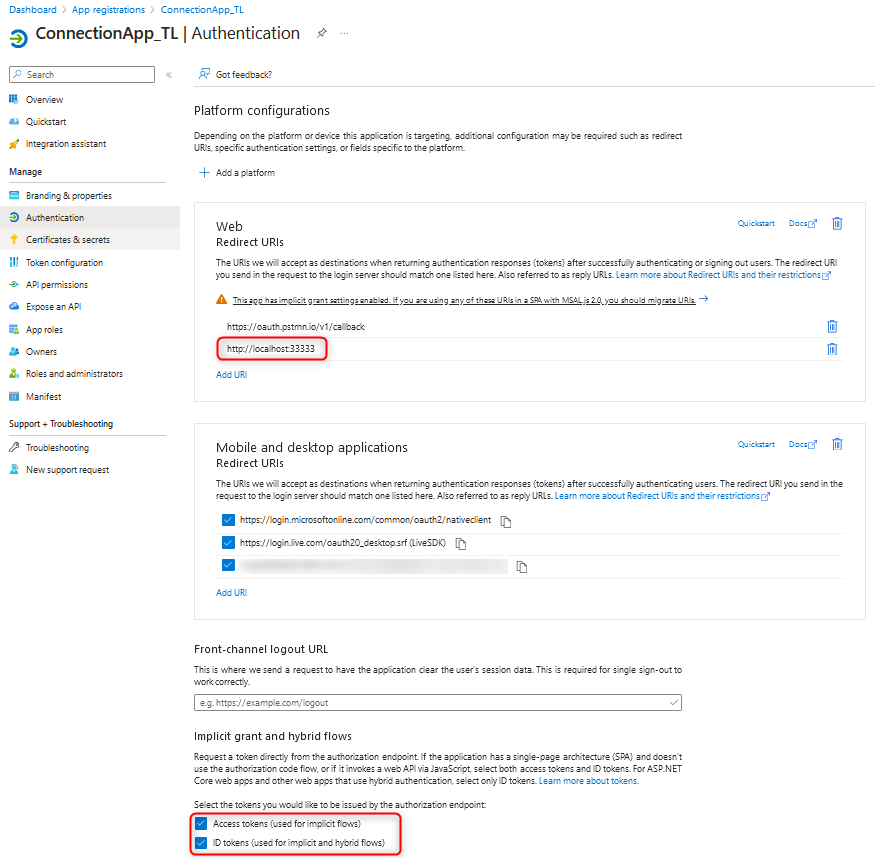
You need to use OAuth for this, so your first step is to set up an app registration.
Once this is done, you have to figure out where the file is located in the SharePoint structure as the options change based on whether it is located on a specific site.
Connect to a SharePoint file
Locate and set the Auth Scheme field to OAuth
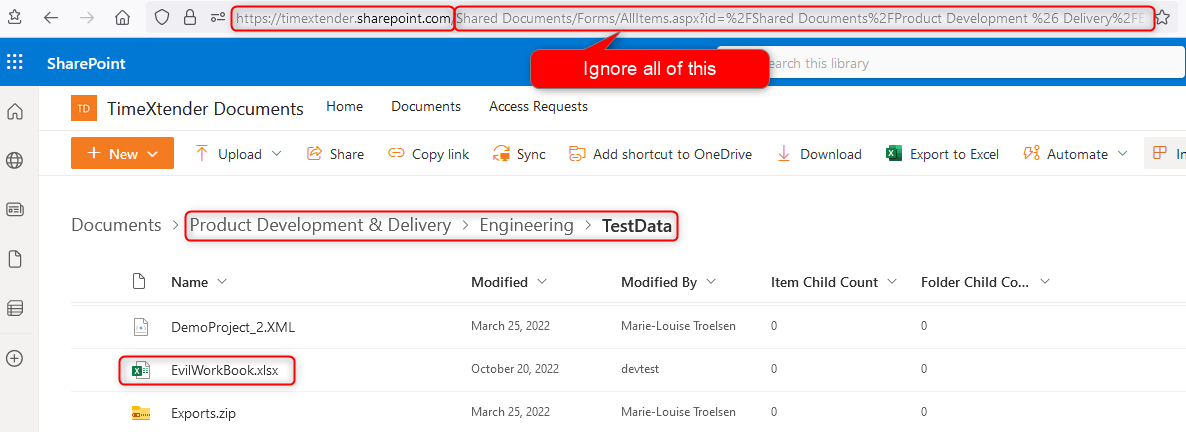
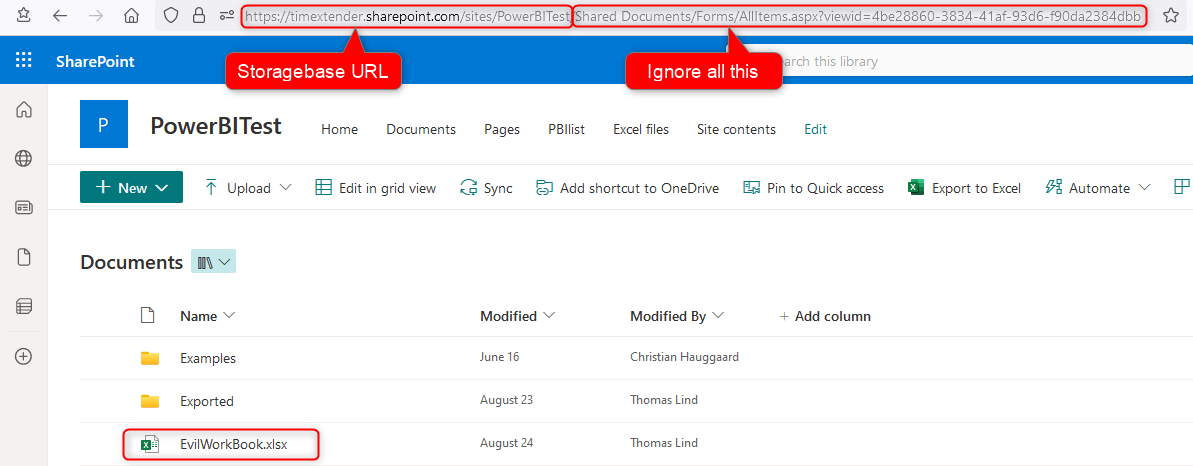
Locate the URI field and add the path to the file sprest://remotePath/file.xlsx. The remote path is not the SharePoint URL, but instead all the folders besides the Documents folder. If the file is stored in the Documents folder the path would be sprest://file.xlsx. See how you can locate the file path here. This would make the path be sprest://Product Development & Delivery/Engineering/TestData/EvilWorkbook.xlsx You do not need to add a SharePoint URL as it is known by the app you are using.
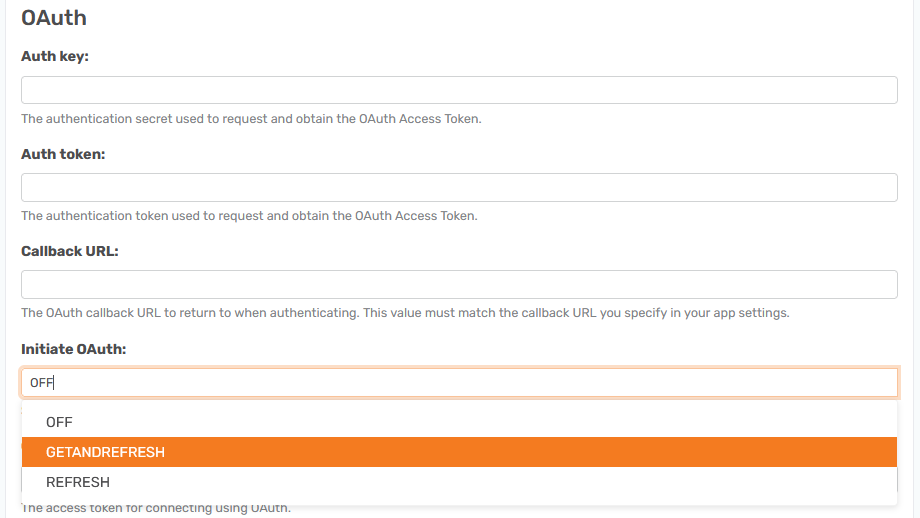
Locate the OAuth area and set the Initiate OAuth field to GETANDREFRESH
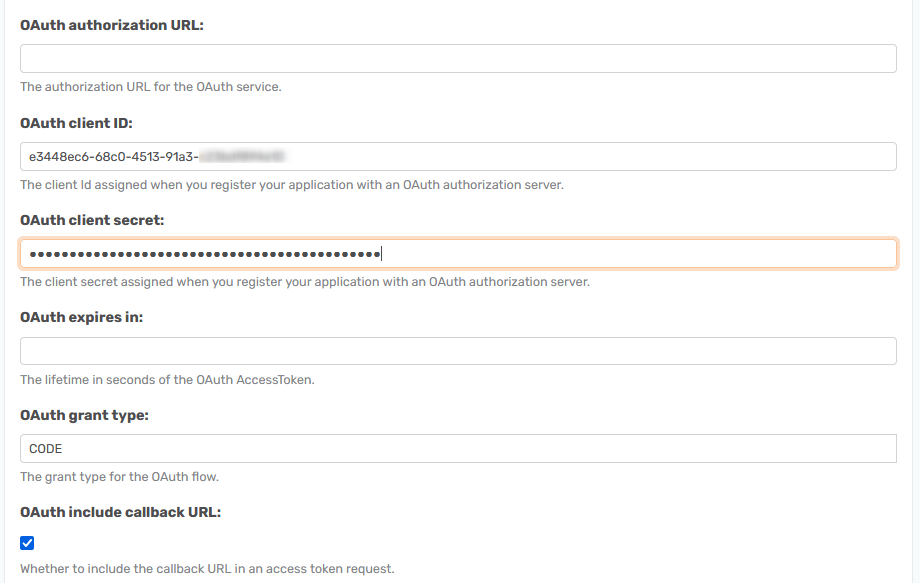
Locate the OAuth Client ID field and add the Client ID of the app you have
Locate the OAuth Client Secret field and add the Secret of the app.
Locate the OAuth Settings File field and consider changing the default path to a local folder on the server. This is where the OAuth connection tokens will be stored. It needs to end in OAuthSettings.txt, but the file does not need to exist before authenticating. How to see where the file is stored as default.
Connect to a SharePoint file on a specific site
Locate and set the Auth Scheme field to OAuth
Locate the URI field and add the path to the file with the following format sprest://remotePath/file.xlsx. The remote path is not the SharePoint URL, but instead all the folders besides the Documents folder. If the file is stored in the Documents folder the path would be sprest://file.xlsx.
Locate the OAuth area and set the Initiate OAuth field to GETANDREFRESH the same as when you are Connect to a SharePoint file and the same relates to the steps below.
Locate the OAuth Client ID field and add the Client ID of the app you have
Locate the OAuth Client Secret field and add the Secret of the app.
Locate the OAuth Settings File field and consider changing the default path to a local folder on the server. This is where the OAuth connection tokens will be stored. It needs to end in OAuthSettings.txt, but the file does not need to exist before authenticating.
Set up a connection to a file on an FTP server
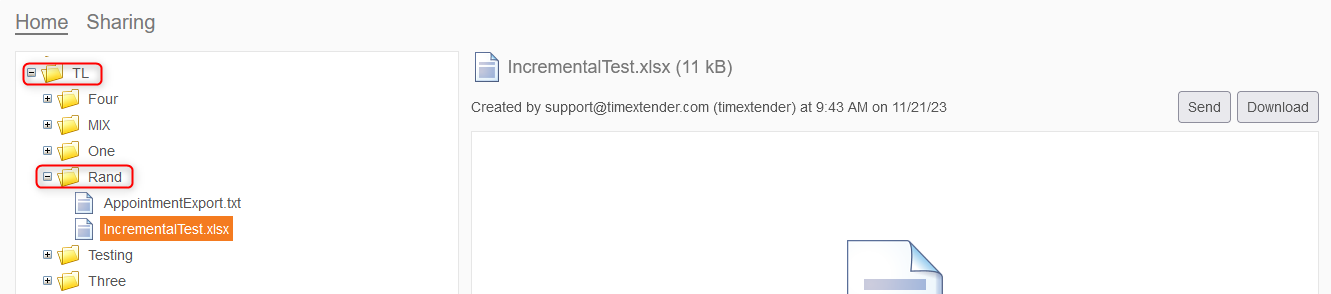
Set the URI to the address of the server followed by the path to the Excel file. URI=ftps://localhost:990/folder1/file.xlsx Here is how it looks when I connect to a file in our FTP server. Here is how the URI would be: ftps://us.hostedftp.com:21/TL/Rand/IncrementalTest.xlxs
Locate the User field and set it to an account that has access to the FTP server
Locate the Password field and add the password of the user account.
Expanded Connection and data format options
In the Connection area, you can set up the connection to a file, specify what sheet you want to connect to, and what the range of it should be. This is also where you can set up various settings such as what culture the file is created in, what culture it should become, and specifying what charset the file uses.
You can add a range in the Define Tables field with the following setup.
Table1=Sheet1!A1:N25,Table2=Sheet2!C3:M53
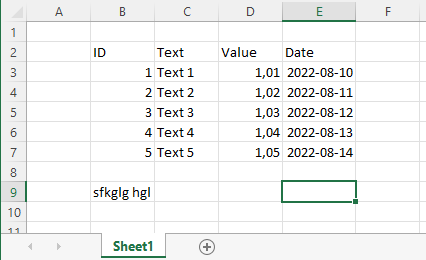
If your file is structured like so and the file is named Data.
It means that in the Define Tables field, you need to add what is below. If you do not know what the maximum amount of rows is, you can add a B* value as a way to get around it. More is explained here Select data
Data=Sheet1!B2:E7
You should always add your connection options in the URI field, the Excel File field is deprecated.
The options can be seen here in the Establishing a Connection link, the optional and required fields are shown.
Data handling options
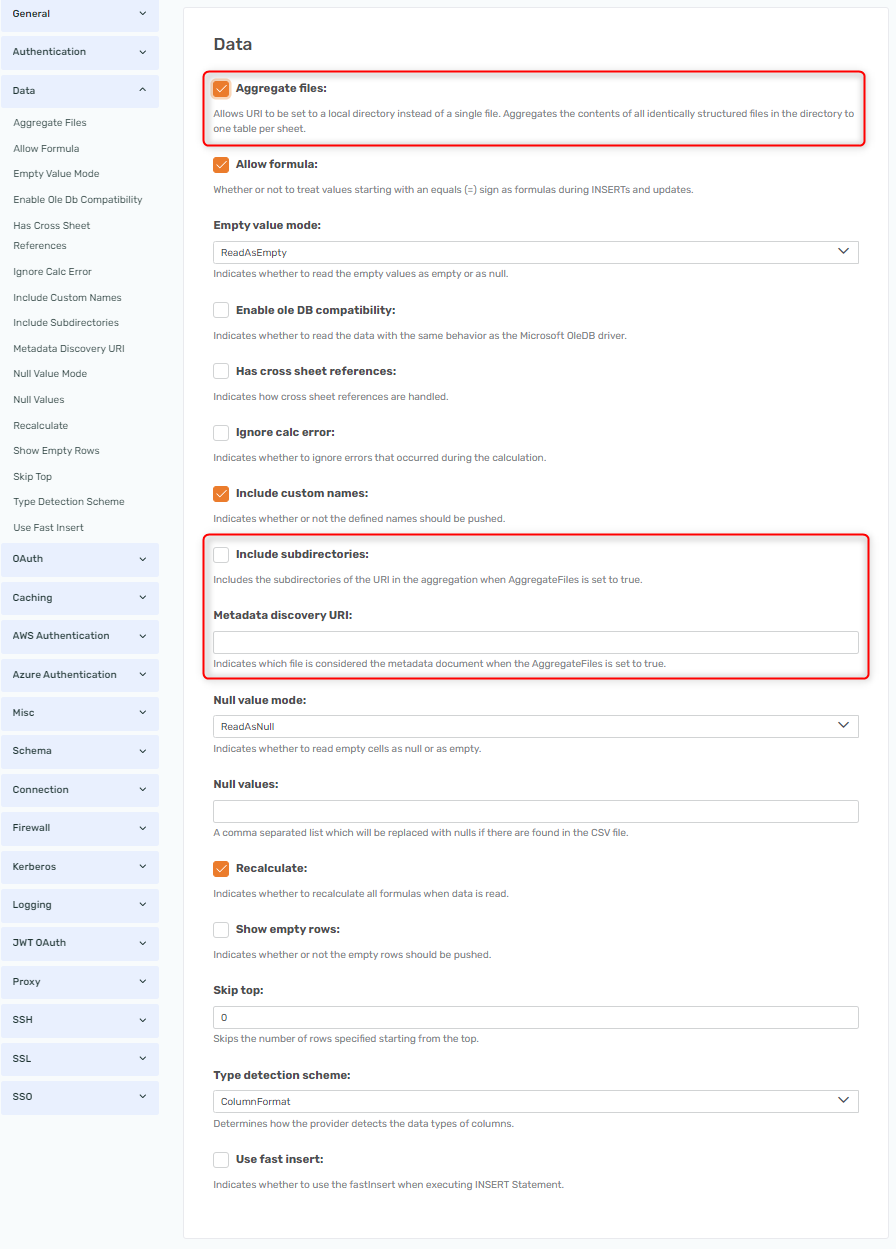
Aggregate files
There is a new feature about connecting to files with a similar structure. You can merge these with the Aggregate files option. The requirements are that the files need to be located in a folder or across subfolders and have the same setup in each. For example like I got in this folder.
If there are files not following this structure it will likely give some issues, but using the Metadata discovery URI and pointing at one of the files will make it look for specific files with this structure.
You also need to turn off the Buffer changes option so it is unchecked as it can’t use this when aggregating the files.
Doing this will aggregate the similar fields into one table instead of having to create multiple data sources to get this.
Type detection
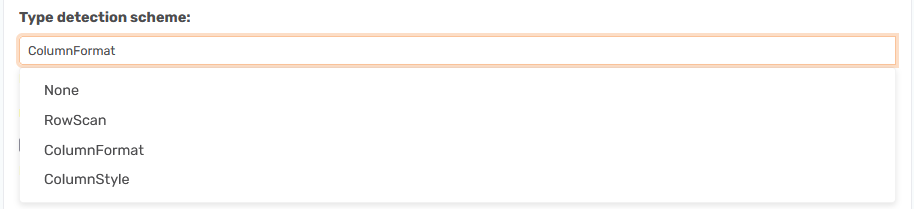
The field Type Detection Scheme is usable when you can’t get the provider to read the correct data types of the fields even when you set the Row Scan Depth to 0.
Then you can change the setup to RowScan and it will set all fields to be String(2000) values. You can then change the field types later on in a data type override or a data area table.