

GraphQL is a query language used to make an API request. In essence, the query language exists as an additional layer between the frontend and the backend and has its own schema that is separate from the backend database schema. In this way, the frontend and the backend do not need to know that much about each other, as all of the communication is happening via the GraphQL query language layer.
In terms of endpoints, the GraphQL API may have just one main endpoint that is used to handle the different GraphQL queries being sent to it. When setting up the data source in the TimeXtender Portal, different endpoints can be added for each of the separate GraphQL queries, which are specified in an HTTP POST method within each endpoint. The path for all of these endpoints may be the same, and it is just the queries within them that are different and determine the data that each retrieves.
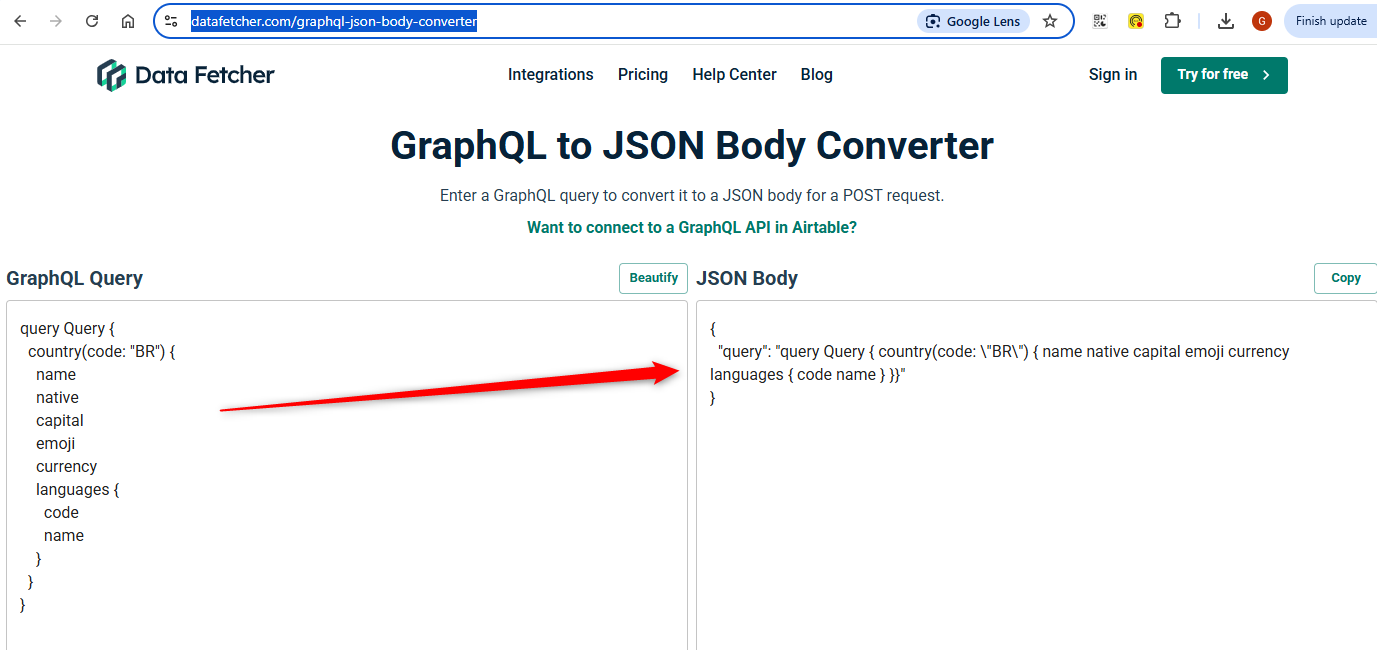
Converting the GraphQL query to the JSON Body Format
The GraphQL quey must be specified in a JSON Body format when using it in a TimeXtender REST API data source endpoint. The following webpage can be used to convert your queries to this format if needed.
https://datafetcher.com/graphql-json-body-converter
Creating the GraphQL data source in the TimeXtender Portal
The following example uses the free online “Countries” GraphQL API to show the different settings used when creating a GraphQL API data source in the TimeXtender Portal using the TimeXtender REST API data provider.
Start by adding a new data source connection using the TimeXtender REST API data provider and enter the following items in the General sections.
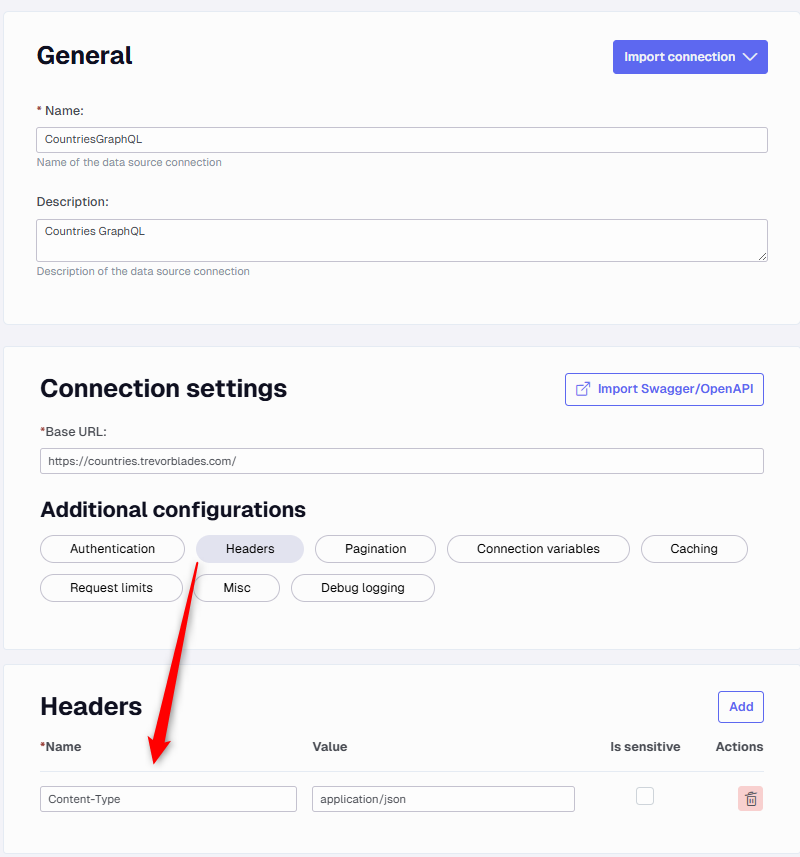
- Enter the Base URL: https://countries.trevorblades.com/
- Click the Headers button under Additional configurations.
- Click the Add button to add a Header that will specify the content type as follows:
- Name: Content-Type
- Value: application/json
For the Endpoint, start by entering the Path for the endpoint, which is everything that comes after the Base URL, and then change the Name to be something that relates to the query.

Click Add Endpoint and then fill out the remaining Endpoint information as described below.
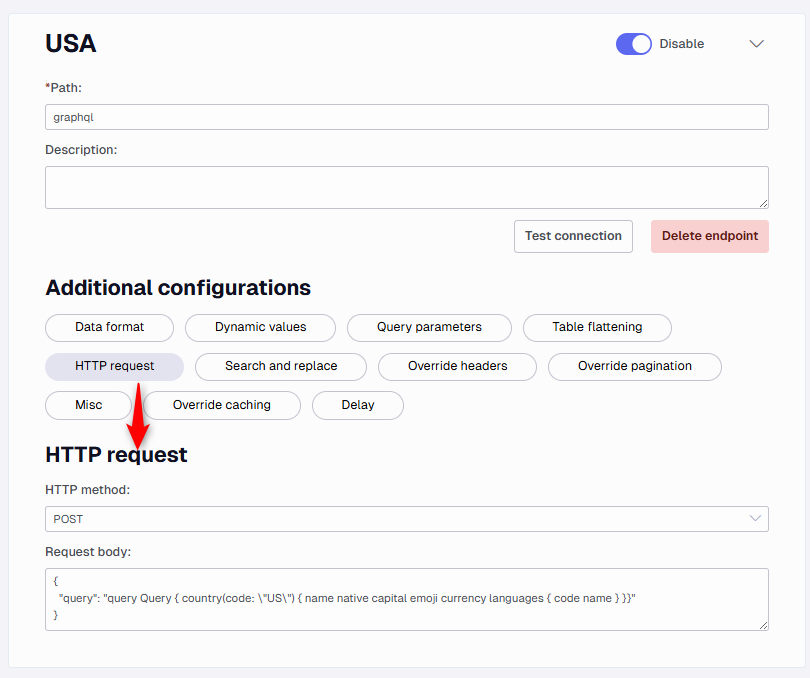
- Click the HTTP request button under the Additional Configuration Section and then click the Add button.
- Select POST in the HTTP method drop down menu.
- Enter the GraphQL query using the JSON Body format in the Request body text box.
Using Postman to compose and validate the GraphQL query.
Postman can be used to test GraphQL queries. Start by clicking on the NEW button and then selecting GraphQL.
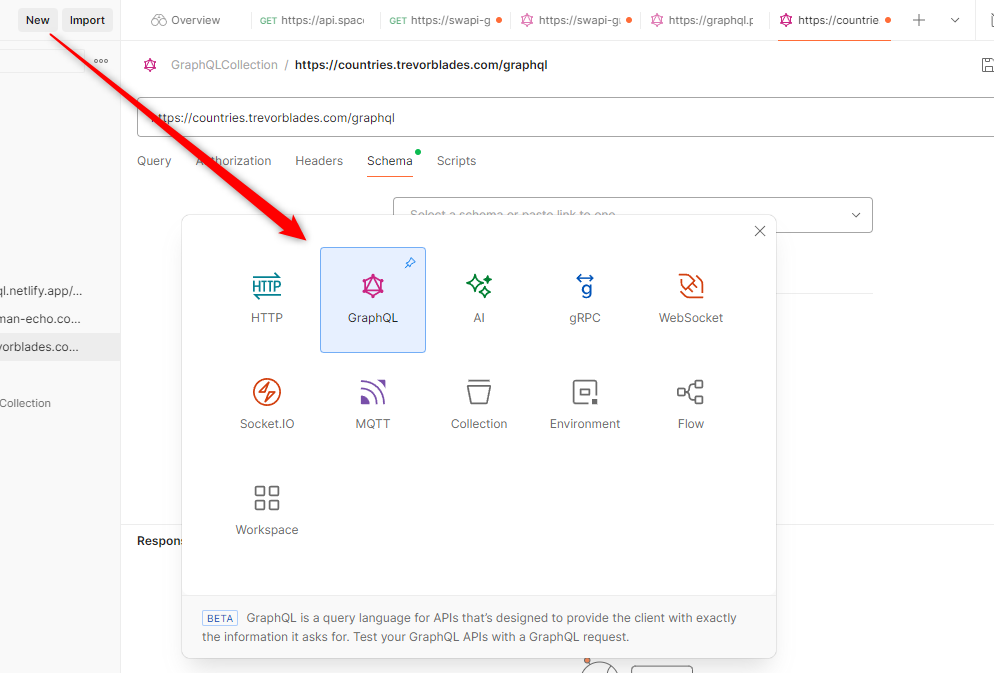
Next enter the entire URL in the field at the top, and then click on the Schema tab below.
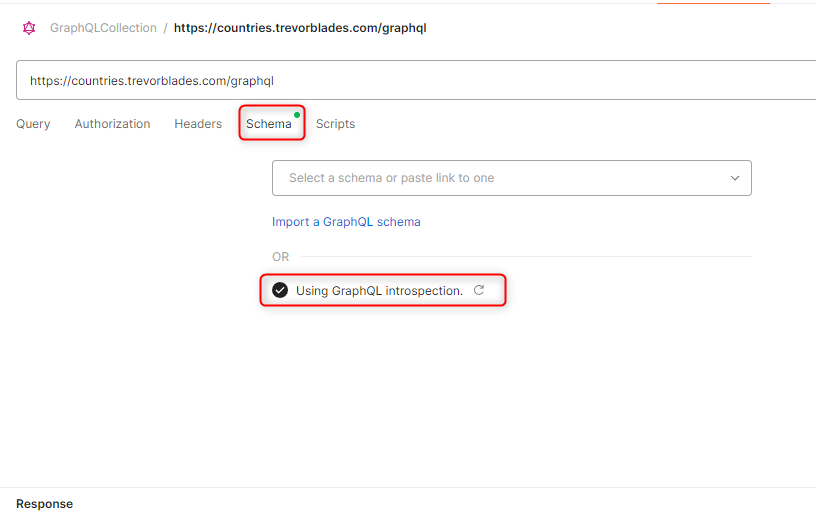
Click on the Refresh arrow next to the Using GraphQL introspection to have Postman query the GraphQL schema from the API backend. If Postman is unable to import the schema, then refer to your API documentation that may have a link where this can be downloaded.
After importing the GraphQL schema, click on the Query tab and the Schema objects will appear in the box on the left.
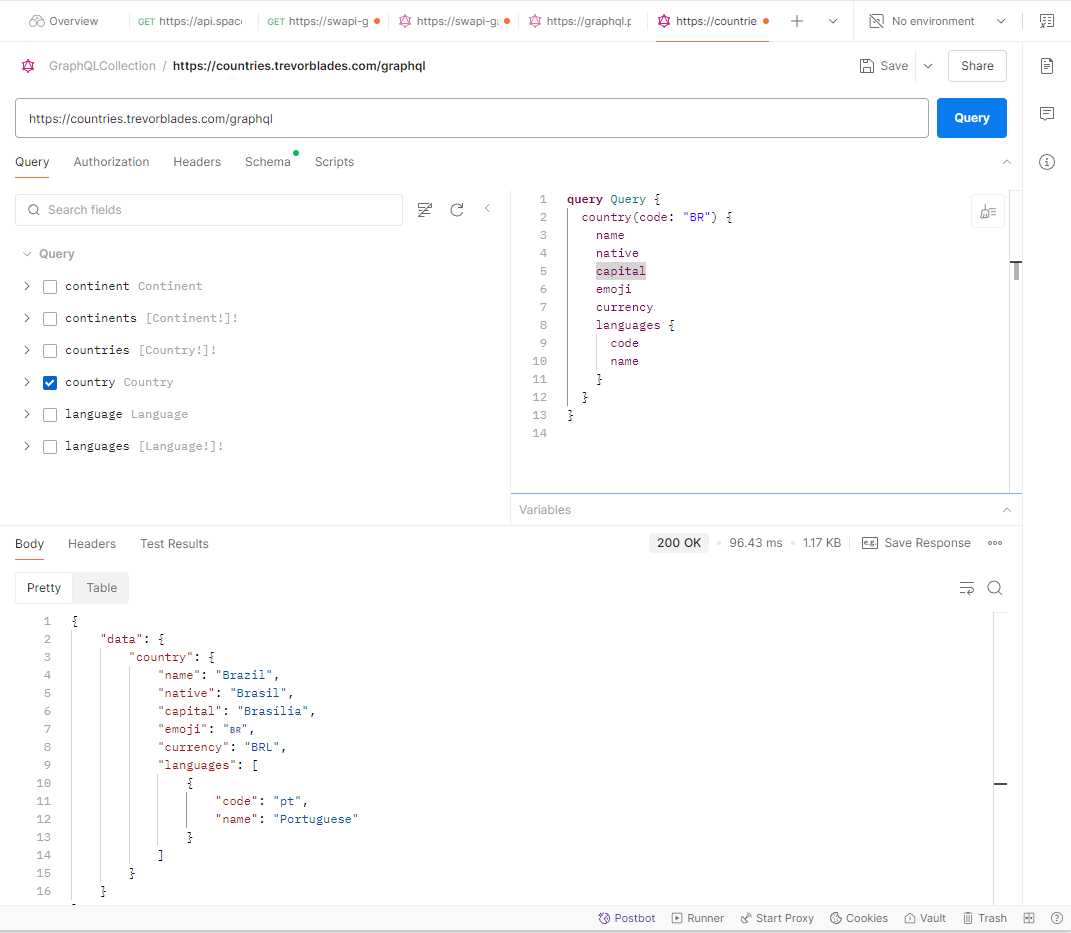
Enter your GraphQL query in the box on the right and click the Query button to see the response displayed below. Once you have confirmed your query is returning the correct results, convert it to the JSON Body format for use in the TimeXtender Portal REST API data source.
