Warning: CData data source providers are no longer supported. We strongly recommend that you use or upgrade to TimeXtender-branded providers.
When you have a data source you want access to, you often find that CData have a provider that can help with this issue. Sometimes you hit another issue with some of these providers when you want to get more than the initial data out of it. Examples of this could be that your REST provider by default only shows 100 rows or that it requires an external input for it to show anything, or the fields data types gets read with an incorrect data type.
This is where the use of an RSD schema file can help. It is essentially a way to control all Get or Post calls sent to the source. It is also a sort of programming language of its own.
Contents
How to generate an RSD file
Setup
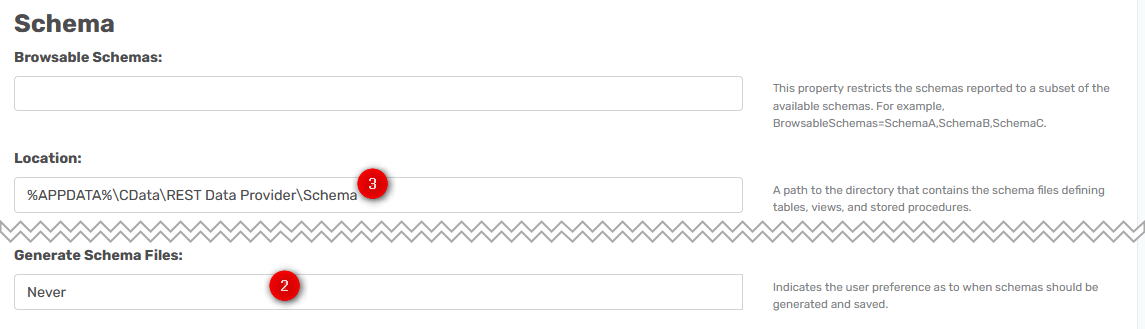
The important options you need to use to generate this are these three things.
- You need to point at a file or URI.
- You need the feature Generate Schema Files set to one of the following options OnUse, OnStart and OnCreate
- Your Schema Location needs to be set to an existing folder.
Here is an how the default look for an JSON provider, but it could be any provider that contains these fields.

What schema generation option to use is dependent on a few things.
- Never: A schema file will never be generated.
- OnUse: A schema file will be generated the first time a table is referenced, provided the schema file for the table does not already exist.
- OnStart: A schema file will be generated at connection time for any tables that do not currently have a schema file.
- OnCreate: A schema file will be generated by when running a CREATE TABLE SQL query.
So if you have connection issues that the RSD file needs to handle, set it to OnStart, OnUse when you want to substitute the URI with the file. For this guide I don't see when we could use the OnCreate. OnUse is the one that is mainly used.
In regards to the location, there already is a default folder path, consider that appdata is a folder that is for the specific user that is currently using TimeXtender Data Integration. So if you have multiple environments and multiple users, add a folder that is sharable across these. If you have the environments on individual servers you either have to store the files on a shared drive or save these files on the same drive and folder on each server. I personally use OneDrive to share my files.
With these options set you can generate the file simply by synchronizing the data source.
An example of how it is done
If you want to try this out the following page can be used. https://gorest.co.in/
Like so.

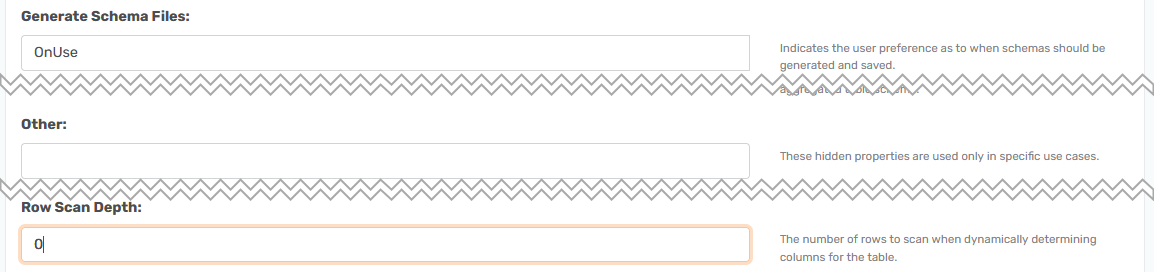

Also added is the Other field, the Row Scan Depth field and the Data Model field in the above images, as they are relevant for how the data types and JSONPath are generated. Row Scan is to make sure the whole file is read before the data types are found, Data Model is so you can choose to use RELATIONAL to generate multiple files from one URI and Other is because you can override certain settings such as the Default Column Size.
These needs to be set before you synchronize as you can’t add these options after the file has been created.
After this create the data source using this setup and let it run the synchronize task.
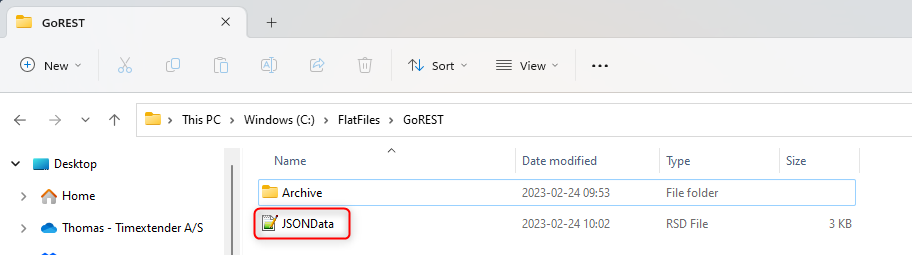
Rename this file to Users, open it in a text file editor and change the following info row to also be called Users.

The rule is that whenever you synchronize and a file without the name the provider would give exists, it will generate it. There is no limit to how many RSD files it can look at as long as they are stored in this folder.
GoRest also has other resources, such as posts and comments. To connect to those with this provider, all you need to do is to change the URI to https://gorest.co.in/public/v2/posts, save the change and run the Synchronize task.

Now another file with the name from before exists. So you would again need to rename the file, open the file and change the title to Posts.
Once you have generated files for all the pages of the source and you want to stop it from generating a file every time you synchronize, you have two options. Either set the URI field to be empty, or set the Generate Schema File to Never. Turning of both options will also work.
Looking at the Data Source Explorer will show you the ones you made a RSD file for.

When one is generated it will look as follows in an text file provider. Bonus info. When working with text files it can be hard to keep track of all of it. Therefore using an provider that can highlight language is a big help. This for example is XML encoding.

Add connection info to RSD file
You can find some info about the options here jsonproviderGet
Also there have been updates to the guide for this by CData, so many of the things explained below is also present here SELECT Execution
Add to URI
If you want to keep the URL parameters separate by modifying attributes in the connection via the _connection object. For example:
<api:set attr="CustomUrlParams" value="field1=value1&field2=value2&field3=value3" />So if you wanted to add the access-token from the custom URL field to the file. You would set it up as follows. You can generate the access-token from gorest here https://gorest.co.in/access-token
<api:set attr="URI" value="https://gorest.co.in/public/v2/users" />
<api:set attr="CustomUrlParams" value="access-token=48ed584d0b694e0db651f7fb1e6846a9f3ce8c4c9889f5b5b5af1c5194d4e02e" />
Then it will be used by the file.
Finally you can also just add it to the URL string like you would if you were to open it in a web browser.<api:set attr="URI" value="https://gorest.co.in/public/v2/users?access-token=48ed584d0b694e0db651f7fb1e6846a9f3ce8c4c9889f5b5b5af1c5194d4e02e" />Custom Headers
You can do the same with custom headers and this is more necessary, as the other part can be added in the URL string and this can't.
The setup is as follows.
- Header:Name#: The name for each custom header to pass with the request.
- Header:Value#: The value for each custom header to pass with the request.
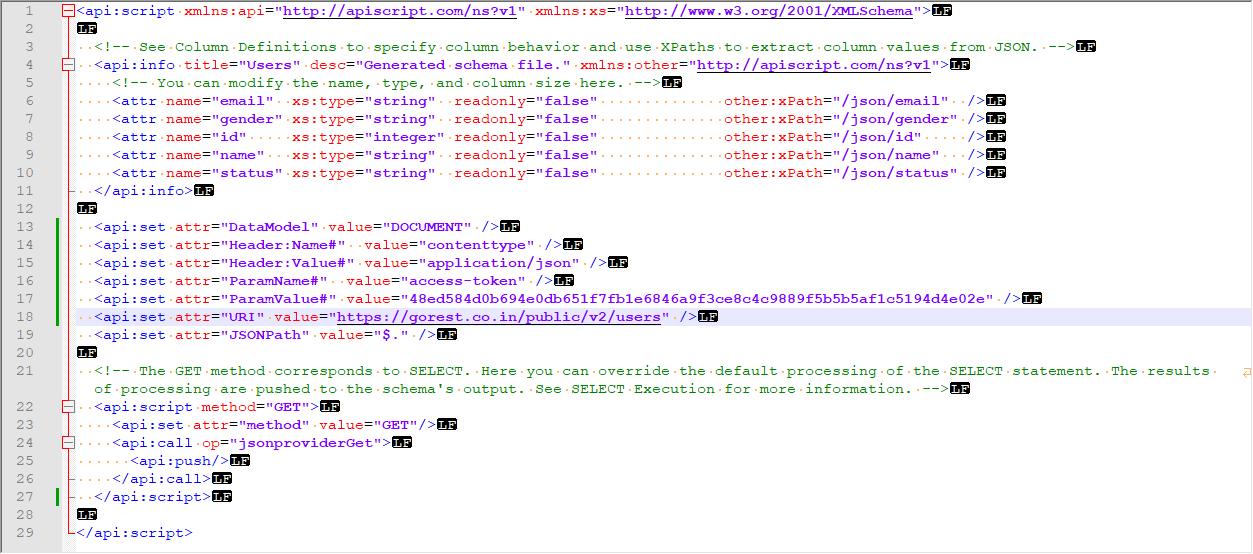
So that translates to this for example. It can set the file requested to be returned in JSON format.
<api:set attr="Header:Name#"  value="contenttype" />
<api:set attr="Header:Value#" value="application/json" />
More importantly you can authenticate the RSD file with this method, say you want to add a bearer token you have generated.
<api:set attr="Header:Name#"  value="Authorization" />
<api:set attr="Header:Value#" value="Bearer 1A_iJBHFUt3gPzkIc3Vi198PxHZ3M6n6OQsCehJ65en" />
It should be noted that this won't be auto updated this way, so you will either need to use the normal OAuth methods explained in the REST guide, or by doing the authentication steps in the RSD file to make it dynamic.
If you go through the initial link about the get command, there are other options that can be used the same way.
How it is done in the file
Important to remember are where in the file it is added, in what order, and how it is used.
Here is how it looks when you add the custom URL parameter to the user RSD file we created using the first method. I added it after the info area and the DataModel row, but before the Script Method=Get and changed the URI row to now contain my changes.
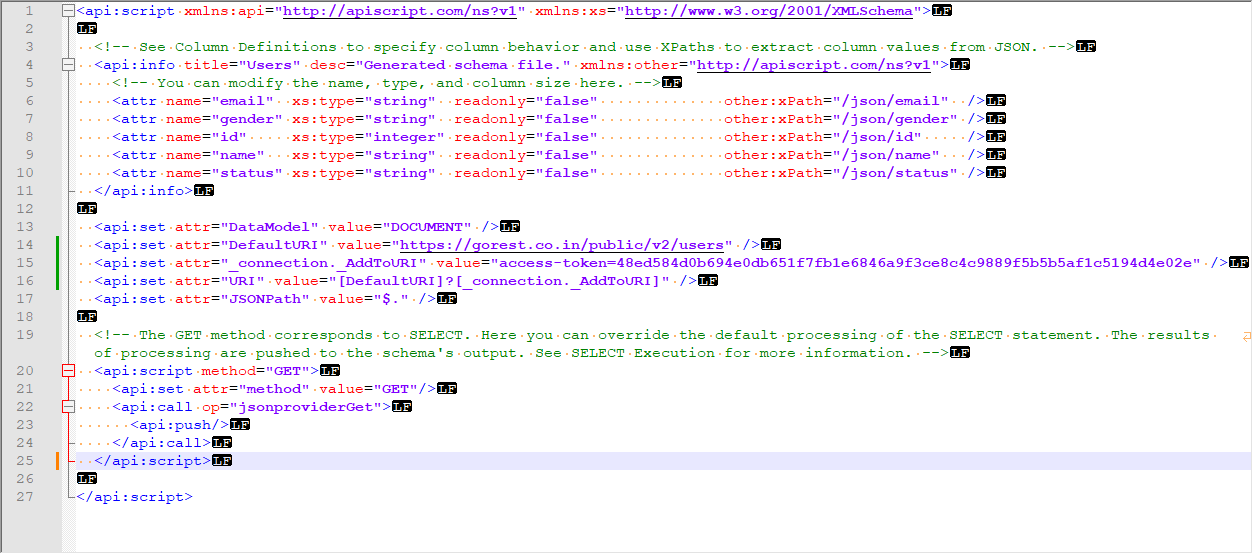
Now, this file doesn't need a bearer token to work, or an access token actually, but you can use the same procedure just explained, but with ParamName instead of Header:Name to achieve the same.
Advanced options
Go here to learn about pagination, nested calls, dynamic parameters, custom authentication and Post calls.
Links and files
All the RSD files I have used in these are added as attachments and here is a list of connection strings for the various parts. They can be copied into a connection string field in a REST CData provider and work with very little customization.