
You can import and export data source connections to use in different accounts, save for later, or share with coworkers.
Two import/export formats are supported:
- Connection profile (recommended): JSON-format that includes extensive information about the data source provider and settings
- Connection string: SQL-like format used by the ODX in TimeXtender 20.10 than contains less information. This format is not supported for all data source providers since it cannot represent all configurations.
No matter the format, the value of password fields, and other sensitive fields, will always be excluded from the export.
Exporting a data source connection
To export a connection, follow the steps below.
- In the TDI Portal, navigate to the Data source connections page or the details page of the data source connection you want to export.
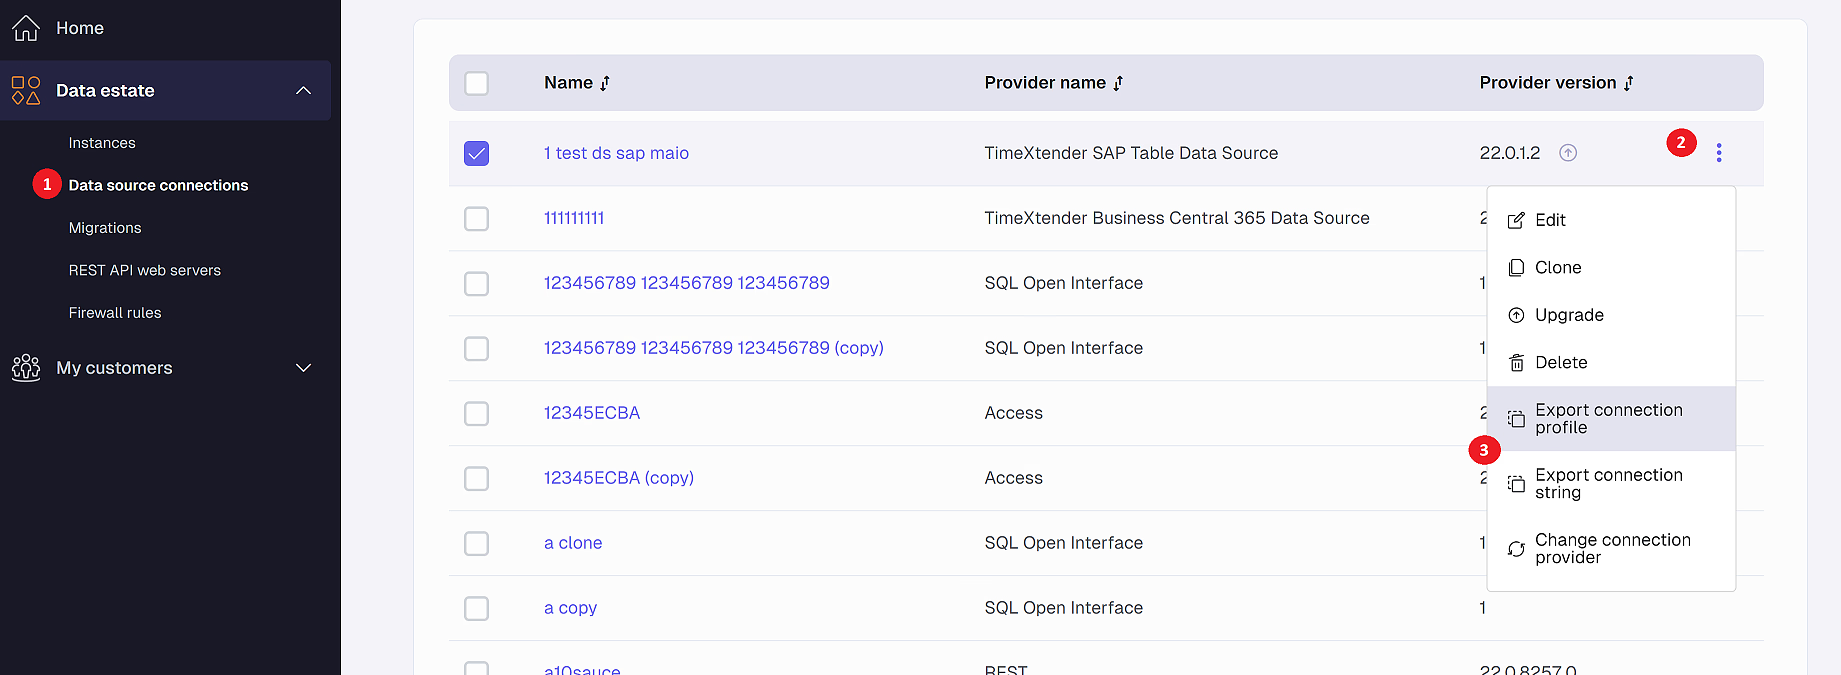
- Click the ⋮ context menu on the data source connection you would like to export.
- Click Export connection profile or Export connection string depending on the format you want to use.
- The data is copied to your clipboard.
Import a data source connection
A connection can be imported either when creating a data source connection or when editing an existing one. When editing, the import will override all existing settings. The flow is otherwise identical.
To import a data source connection and create a new connection, follow the steps below.
- In the TDI Portal, navigate to the Data source connections page. Click Add connection if you’re adding a new data source and go to step 2 or click an existing data source, click Edit and skip to step 3.
- On the Add data source connection page, select the type and provider of the data type. For the most seamless experience, the provider should match the provider used by the connection profile/string you’re importing, but for maximum flexibility, this is not a requirement.
- On the General card, click Import connection and then click Connection profile (JSON) or Connection string.
- In the Import data source connection profile/string modal, enter your exported connection in the Code editor box and click Import.
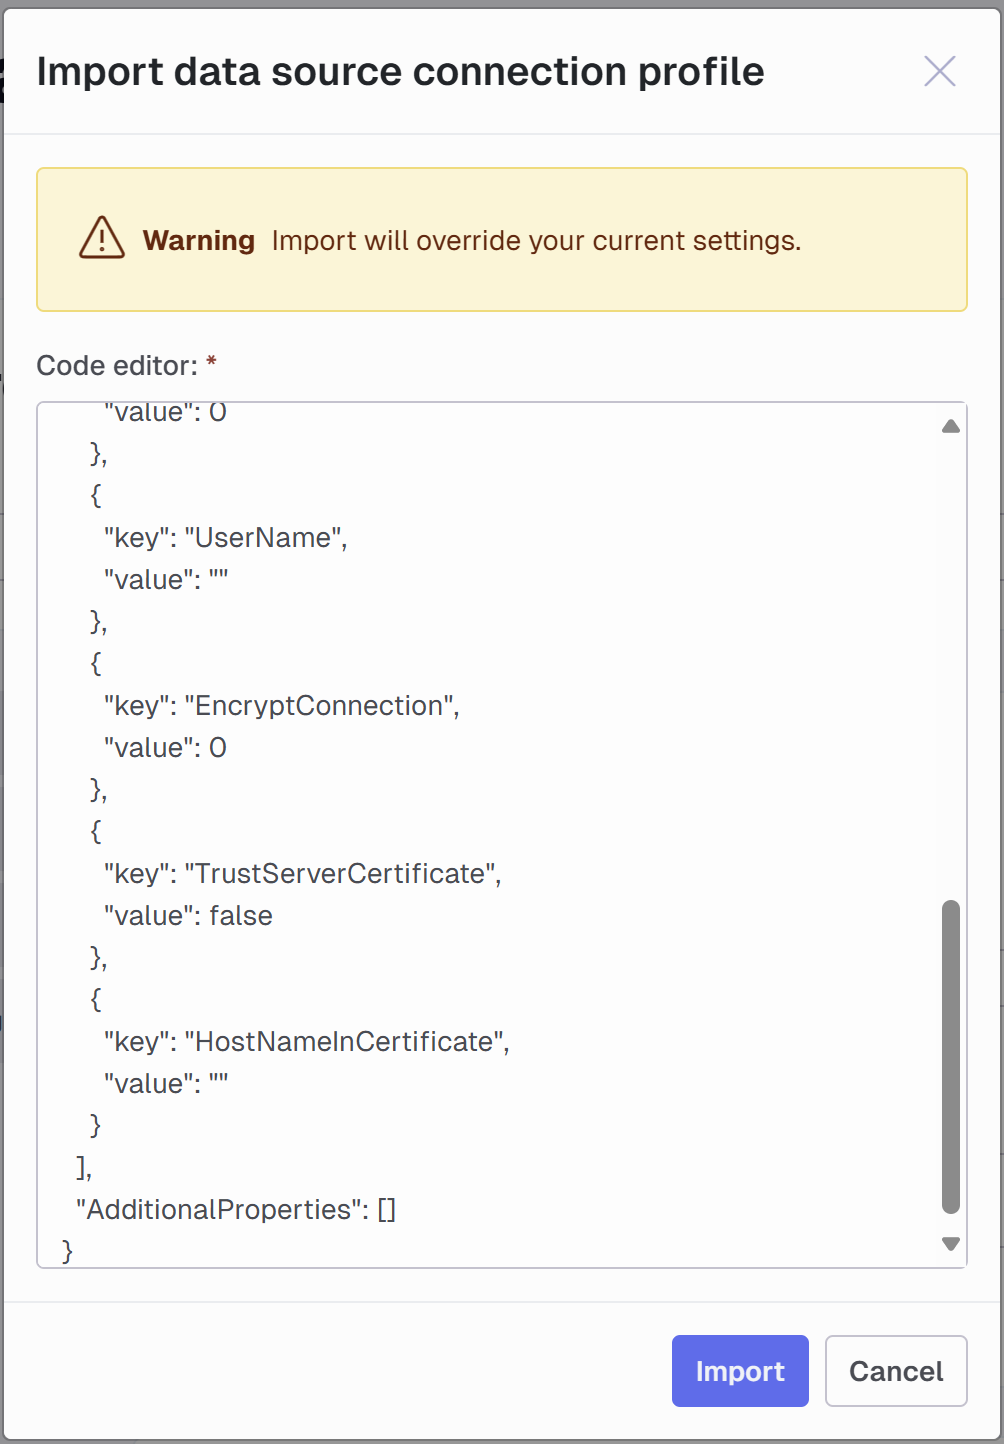
- The form will update to show the imported values. Review the fields and update the name if it is already in use.
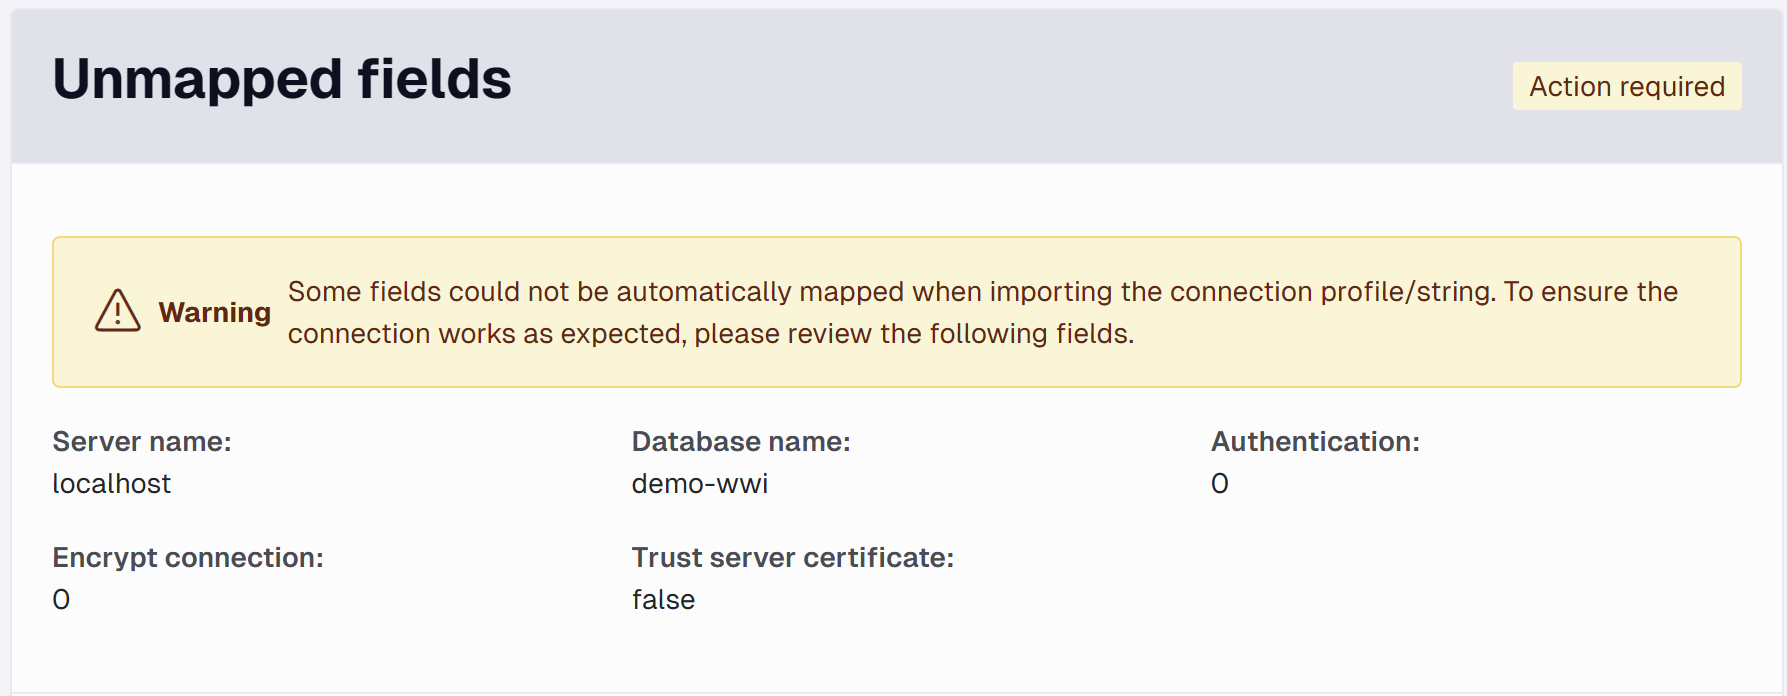
- If some fields in the import cannot be mapped to the selected provider’s fields, an Unmapped fields card will be displayed listing the mismatched fields and you’ll have to decide what to do with them. When the providers simply use different names for the same thing, like “host” for “server”, you can copy-paste the value to the appropriate field. In other cases, unmapped fields can be ignored.
- Click Save.

