TimeXtender Exact Online Data Source
Access and ingest data from Exact Online REST APIs using the TimeXtender Exact Online data source.
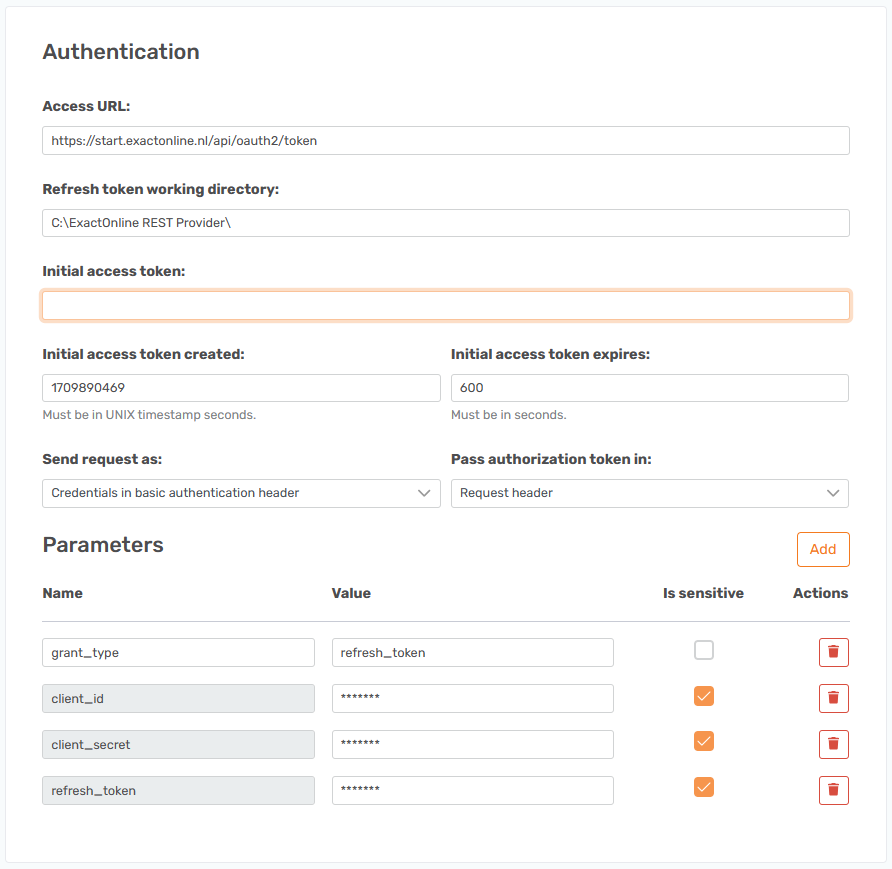
Authentication
Exact Online REST APIs use OAuth Refresh Token flow for authentication. This requires the user to perform initial steps before it is possible to set up the authentication in TimeXtender Exact Online data source.
When you have generated a client ID, client secret, and the initial access token and refresh token, you can fill in the corresponding fields for authentication.
NOTE: the initial access token timestamp needs to be converted to UTC time-zone and then to UNIX timestamp seconds.
To find these values you need to go through a three-step process. The first step is to create an app, the second step is to generate a code, which you need to decode and finally, you will use this code to get the two token values and the timestamp.
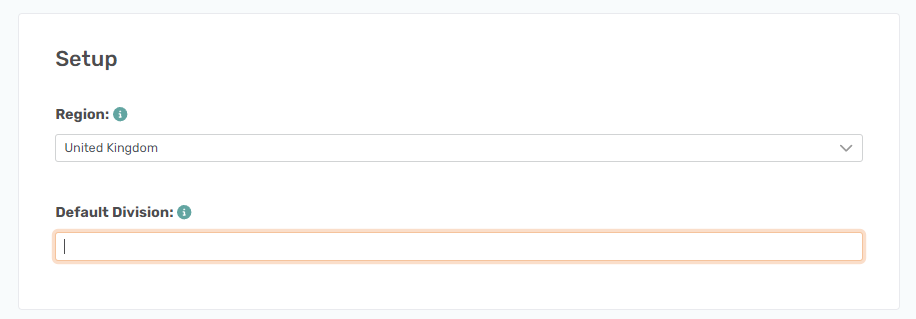
Setup
It is necessary to pick the correct region your Exact Online solution belongs to.
Note that the access URL will automatically update based on your selected region.
It is also necessary to set the correct division numbers for each endpoint. Here it is possible to set a default division number to be used if there is none specified for the endpoint.
Create an APP in Exact
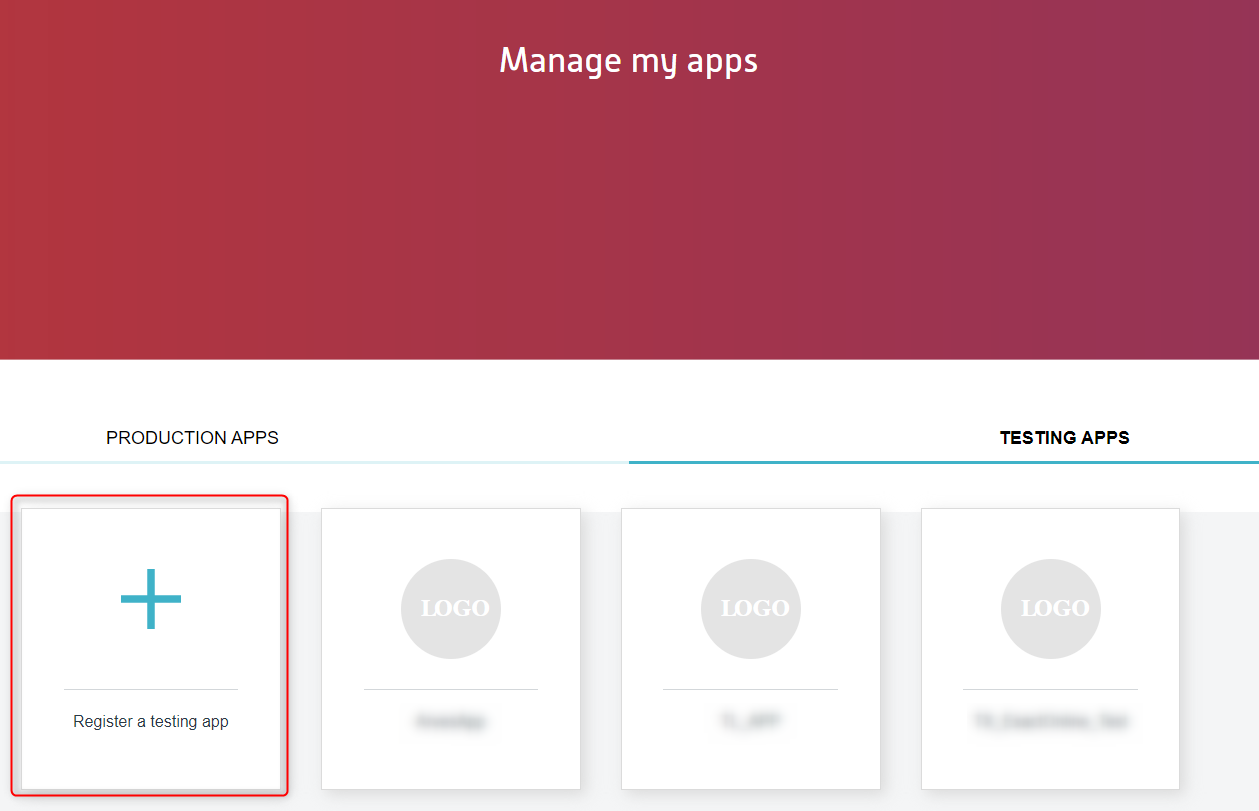
You need to start with an app, if you don’t have one already, you can create it here https://apps.exactonline.com/. Start by choosing the correct region as mentioned in the Setup section. You will likely need to login and once done there is a Manage my Apps link in the upper right corner next to where the Login link used to be. There are Production Apps and Testing Apps and we use Testing Apps with no issues. Clicking on Register a testing app will create an app.
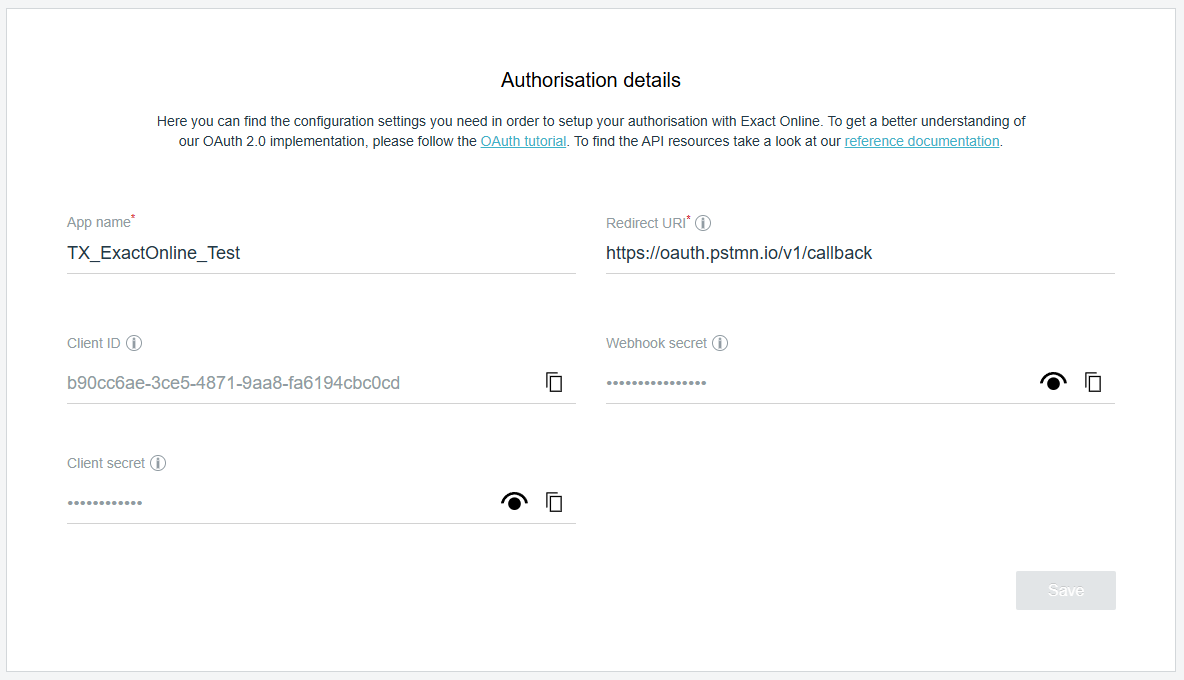
You will get this menu that you need to fill.
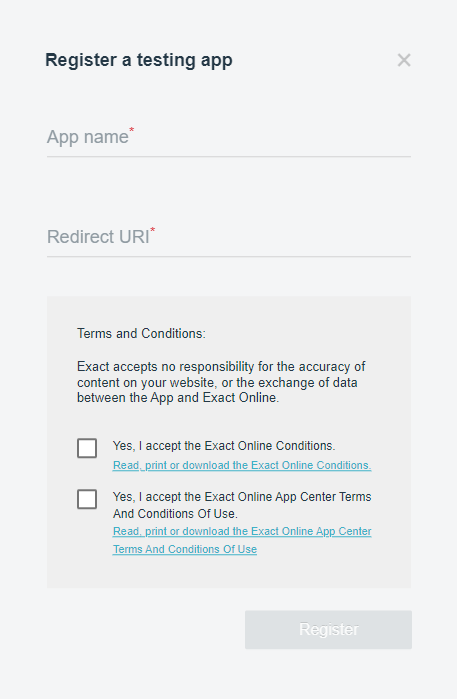
- App name: You need to name the app so you know which one you want to use.
- Redirect URI: You need to apply a redirect URI, one used by us is https://oauth.pstmn.io/v1/callback, but others may work as well. This one from postman will be used when we retrieve the Code.
- You need to accept the Terms and Conditions for it to be registered.
Once you register you will get the setup of the app and the values you need to use.
Click on APP Connection to decide how users will connect with this app.
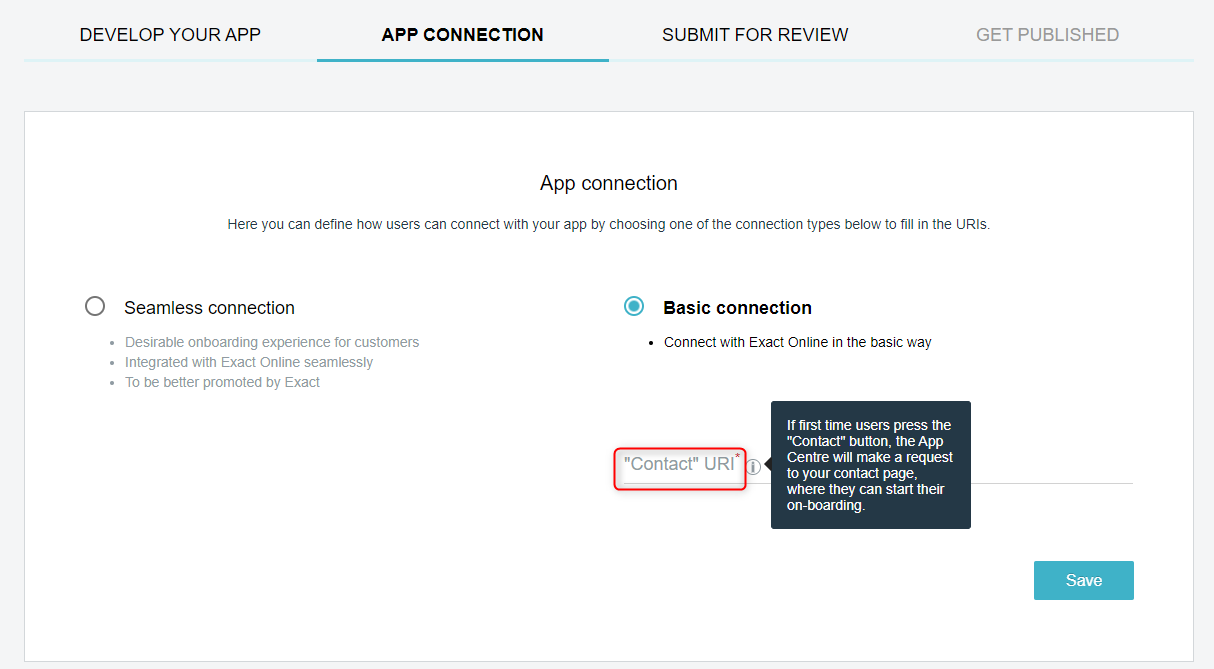
You need to decide whether to use a Seamless connection or a Basic connection. Basic worked for us, so that is what we used. I added the TimeXtender main webpage as the Contact URI.
That is all that we needed. I tried to submit it for review, but no changes were done to it and it worked despite this.
Set up the Authorization request to retrieve the code value to use to generate the tokens
In this step you will need to use an external tool that can help generate an URL. If you see the link Set up Authorization requests it mentions that you need to run a request with an URL you generate with some parameters.
Here is what you need.
- The auth URL: You need to use this endpoint /api/oauth2/auth, but the necessary part is to be sure you use the correct region. For example it will suggest https://start.exactonline.nl/, but in our case this did not work as ours was set up on the UK region. So that meant that we needed to use https://start.exactonline.co.uk/api/oauth2/auth
- The client_id parameter: You need to add this as a query parameter.
- The redirect_uri parameter: You need to add the redirect URI you added in your app. In our case https://oauth.pstmn.io/v1/callback
- The response_type parameter: You need to set this to be equal to code
- The force_login parameter: Set this to 1 to avoid it needing to log in as well.
I added all this in Postman which made it look like this.
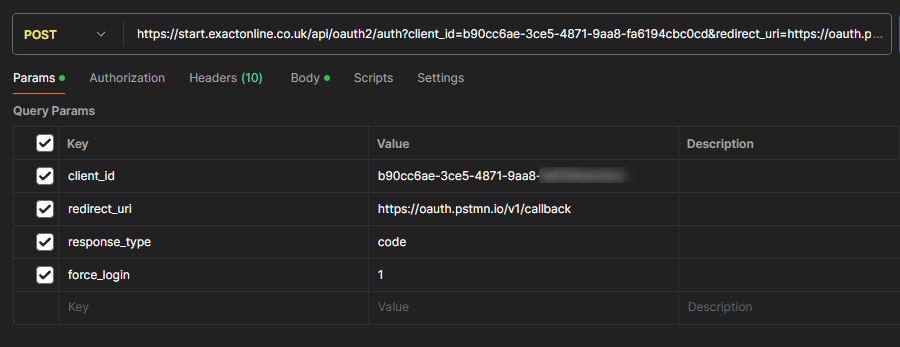
You do not need to Send this command, you only need to copy the resulting URL and paste it in a browser.
It may ask you to log in. If so use the same credentials used to open the Exact app centre.
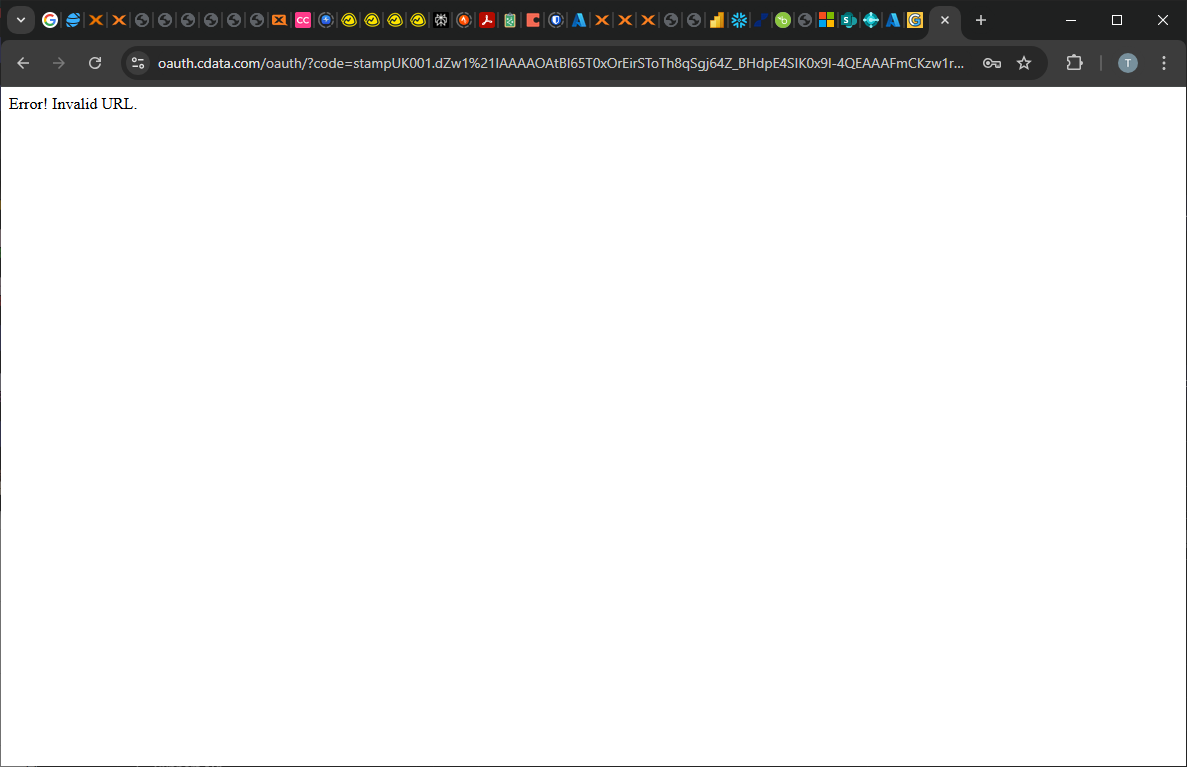
Once you do this you will get the following result.
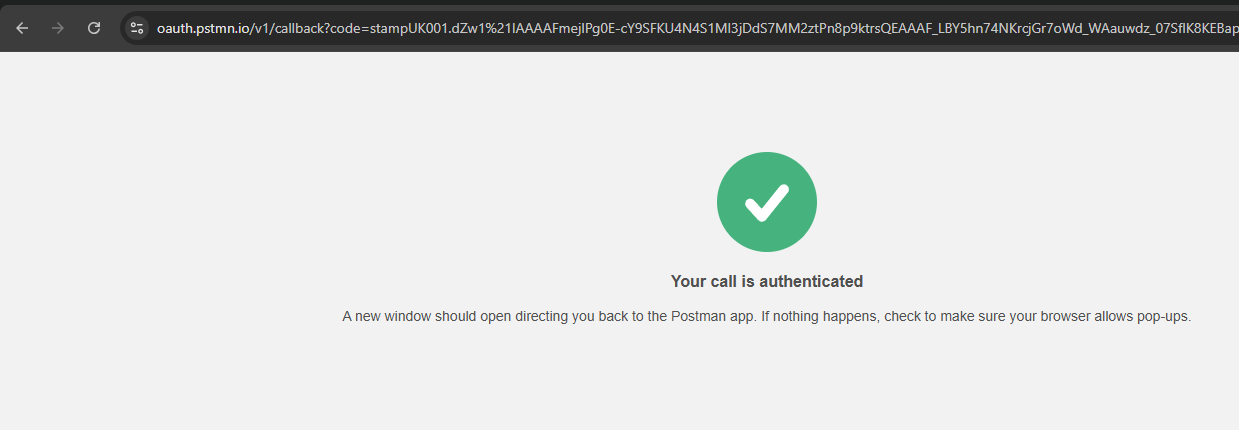
You need to copy the code part of the returned URL.
After copying it you need to decode it like so.
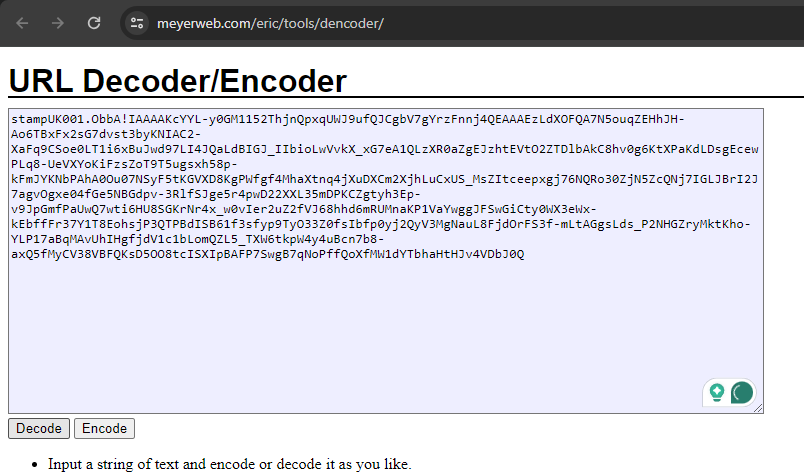
I used this URL https://meyerweb.com/eric/tools/dencoder/
Then you can use it in the next step.
Use the code value to generate the initial tokens
Using the code from above you can do a Post call in Postman to get the tokens used for this. This part is explained here Get and use access tokens.
Here is what you need:
- The token URL: Similar to before you use an endpoint with the same base URL, only this time it is API/oauth2/token. As before you need to be sure you use the correct region for this, so for us it is https://start.exactonline.co.uk/api/oauth2/token
- Be sure it is set to do a Post call and set the Body part to x-www-form-urlencoded
- Add the following parameters:
- code:
- redirect_uri:
- grant_type:
- client_id:
- client_secret:
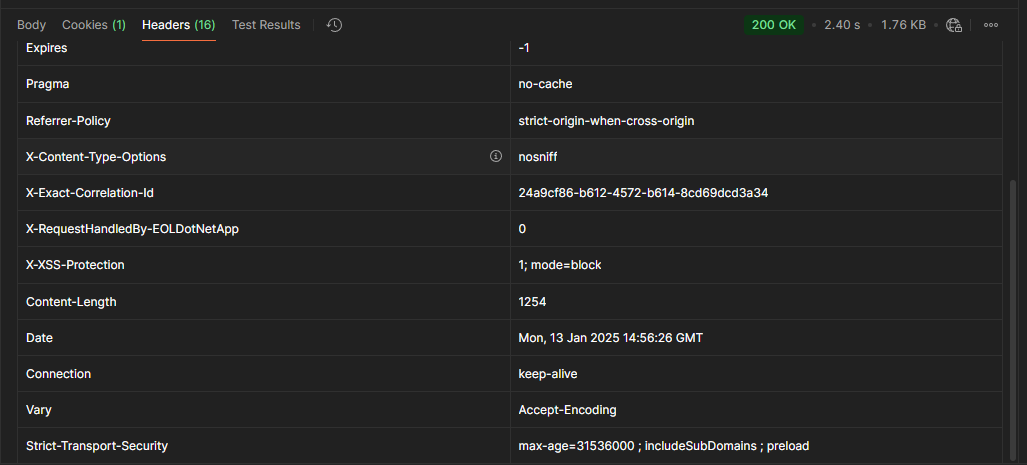
Run the Post call by clicking send and you should get the following result.

- access_token: Is equal to the Initial Access Token value
- token_type: Shows that it is a bearer type.
- expires_in: Is the Initial Access Token Expires in value
- refresh_token: Is the Refresh Token value.
To find the Initial access token created, use the Date of the result, by clicking on the Headers field.
Use this date in this URL https://www.unixtimestamp.com/ to generate it and add the number in the field. Remember that it needs to be in the UTC time zone.
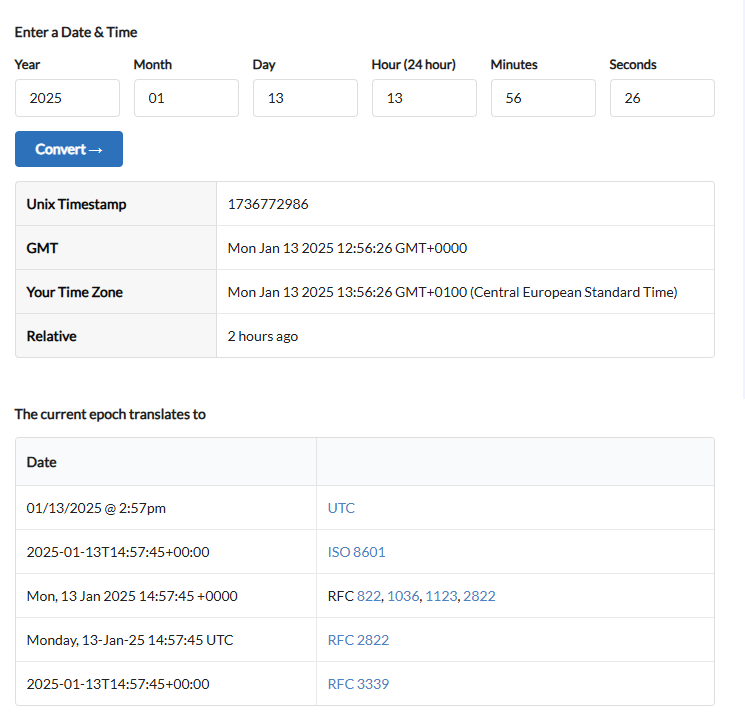
Now you have all the fields needed.
Find the division value
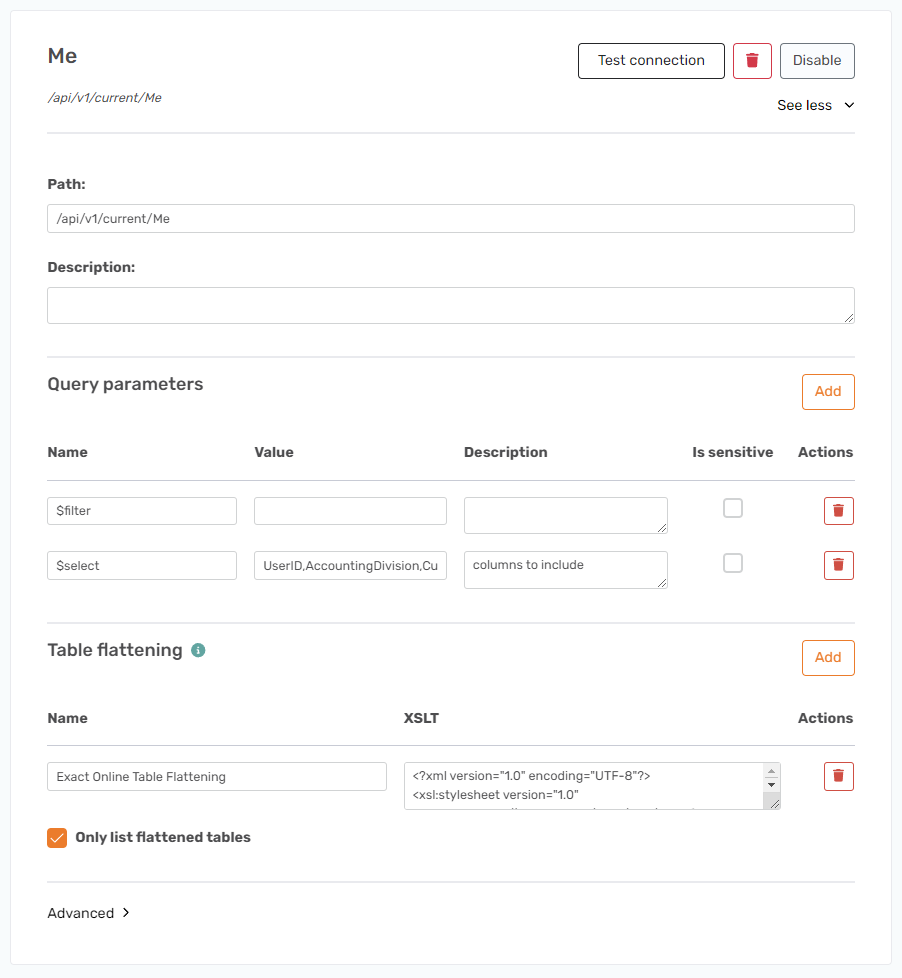
Scroll almost to the bottom of the endpoints and locate the one called Me. Enable it.
Create the data source and synchronize and execute it.
You may see an error about the initial token not being expired, but wait a bit and it should work.
This will return the main division.
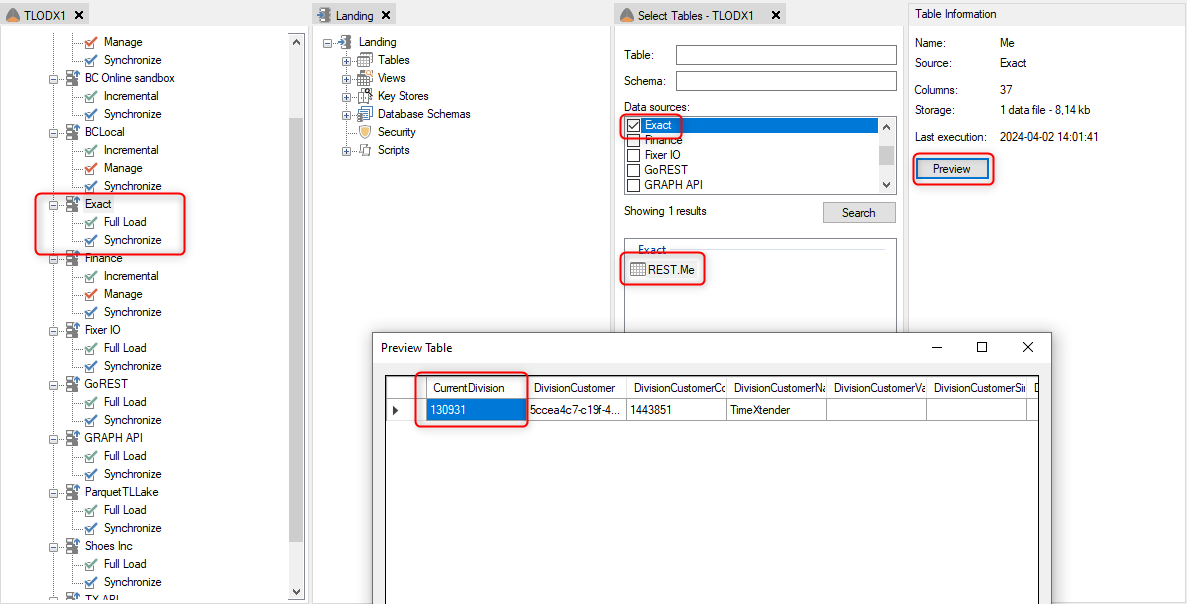
Apply this CurrentDivision value in the Default Division field.
With this set you can turn on the endpoints that require this value.
Endpoints
Note that all endpoints are initially disabled. Please enable the endpoints you require, keeping in mind that the Exact Online API does enforce request limits per minute and day.
Query parameters
There are 2 query parameters per endpoint. These can be used to define the output of the API endpoint.
| Name of parameter | Description |
| $filter | Use this to create filtered queries of data to narrow the results. |
| $select | Use this to narrow the table and select only the properties necessary. Is by default populated with a comma-separated list of all properties. |
Table flattening
An XSL transform is used to flatten the REST API results to a table format. A default XSLT is defined to give the appropriate transformation for the endpoint.
Other
Each endpoint can override the default division number, by using the Division input field to override the division with the appropriate division number for the endpoint.