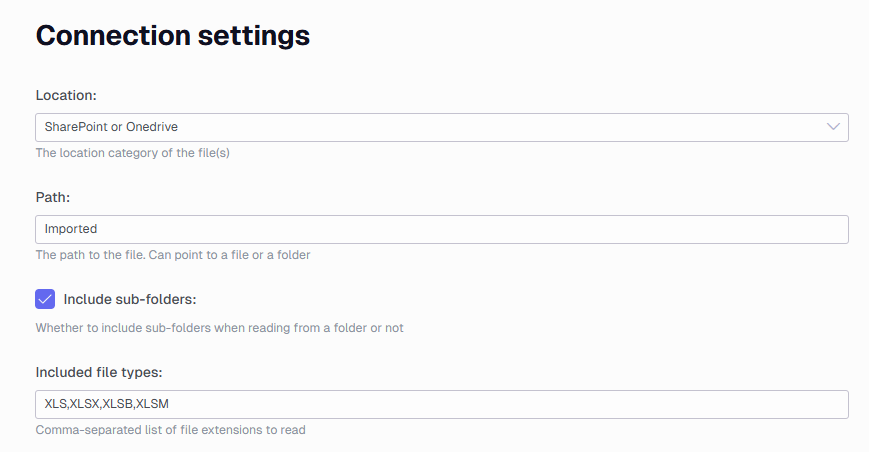
You can use this provider to connect to Excel files. It can connect to multiple files at once and merge them based on specific options such as files, sheets or both. There also is options making it possible to connect to setups that is not straight forward, using table definitions, culture settings and more.
Configuration manual
The following settings can be used with the TimeXtender Excel data source connector.

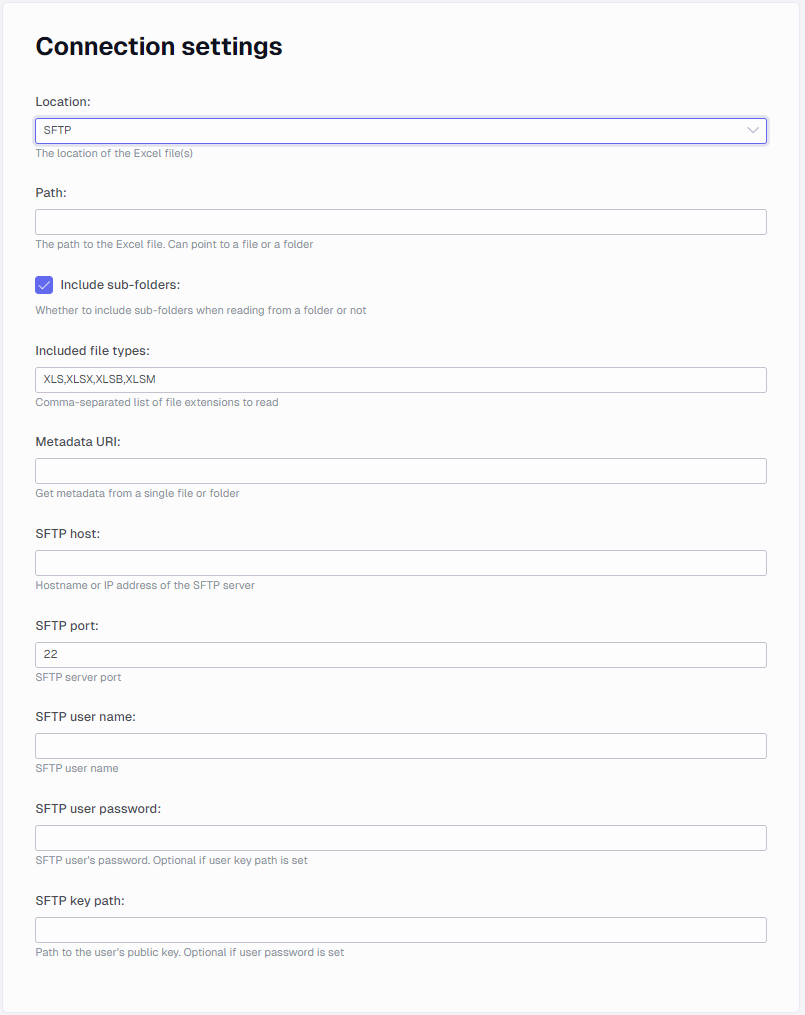
Connection settings
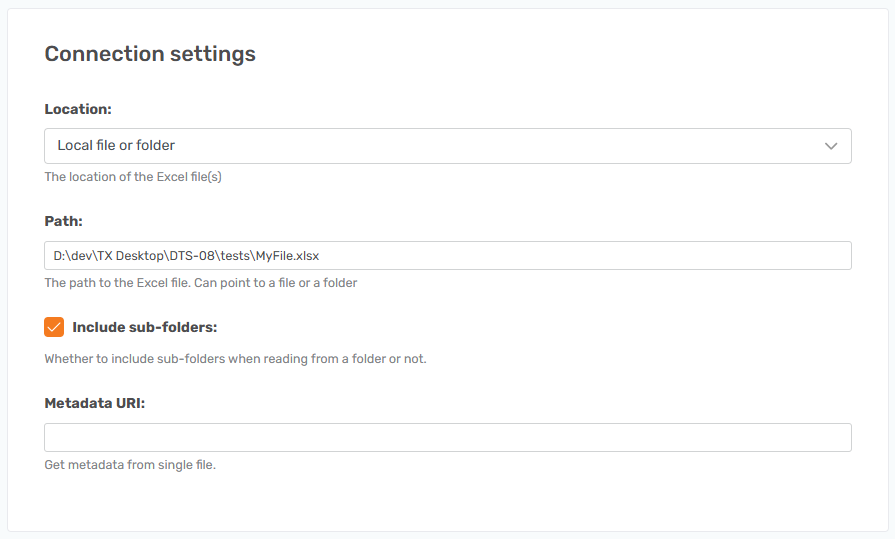
These settings relate to the connection to where the Excel file is located.
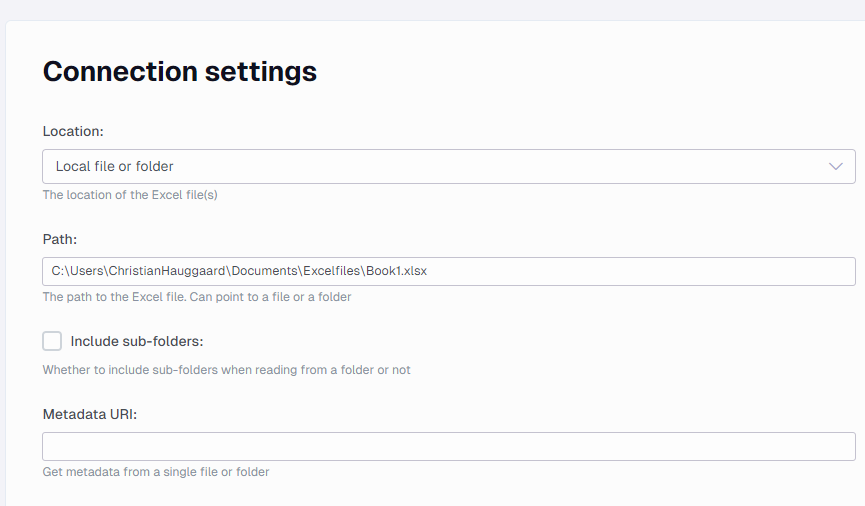
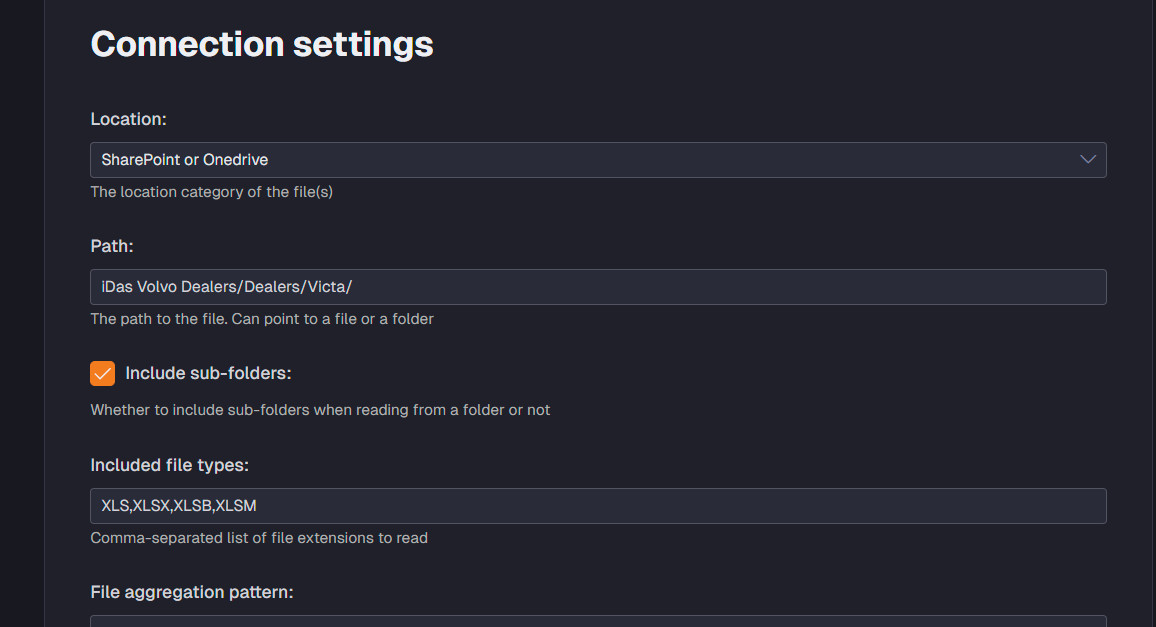
Path

When “Location” is set to “Local file or folder” you can here provide the path to where the Excel file(s) are located. If a path to a folder is provided all files in the folder and if the option “Include sub-folders” is set then all files in the subfolders as well are ingested.
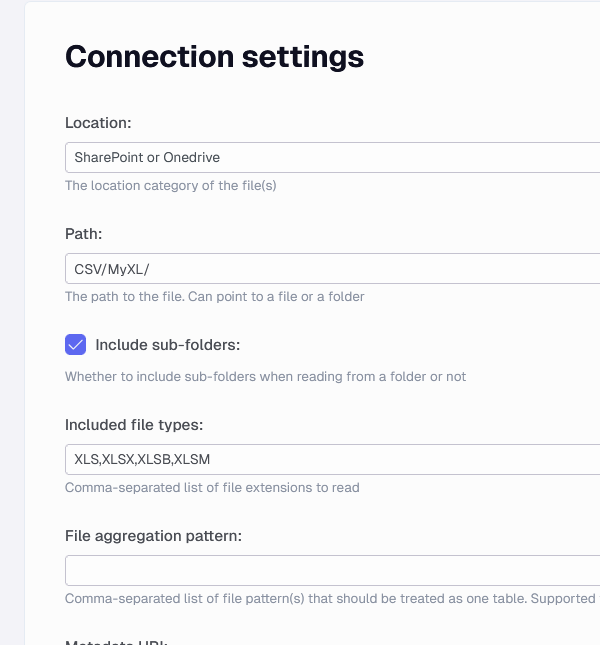
For alternate location such as SharePoint or Azure, you have other options for pointing at a location, such as setting the drive id and a container. If the files are stored on that level you can add a / as the path.
Include sub-folders

As mentioned above this option defines if sub-folders are also traversed to find Excel files to ingest.
Metadata URI

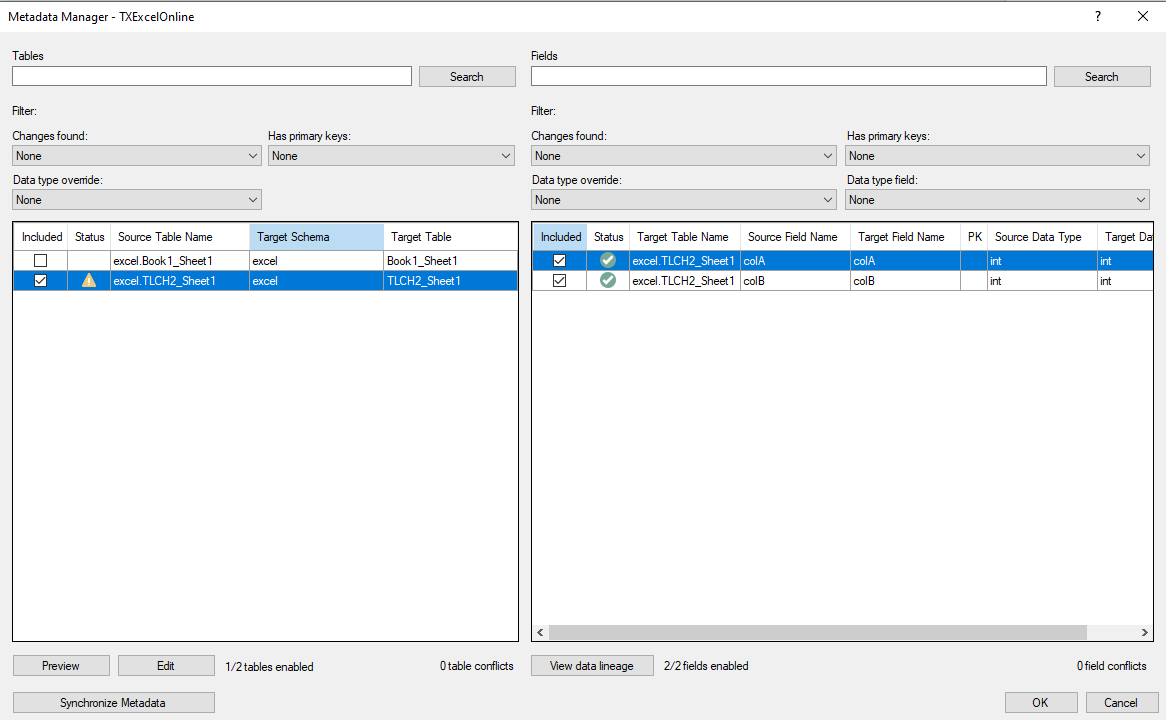
(Optional) Specify the path for a single file as a template to define the metadata to be used across the files defined by the path property. This can be used to reduce the execution time required for the import metadata task by limiting the number of rows that are scanned to infer the data type (i.e. only the rows in the metadata file are scanned instead of rows across multiple files). E.g. C:\FlatFiles\Sales.xlsx
Note: If this setting is used then the other properties to define data types such as Infer datatypes and Number of rows to infer data types will apply to the metadata file instead of the files specified by the path property
Location

Drop down box where you can choose what type of location your Excel file is located at.
The following location types are supported:
- Local file or folder
- Azure Blob Storage
- AWS S3 Bucket
- SharePoint or OneDrive
- Google Cloud Storage
- SFTP
Local file or folder
- When the file is locally stored on some drive.
\\<storageAccountName>.file.core.windows.net\<fileShareName>\<folder>\<filename>.<filetype>
Before connecting to an Azure File Share, you will need to mount the file share as a network drive.
If you locate the file share you can click on the Connect button, then on Show Script and finally on the copy code button.
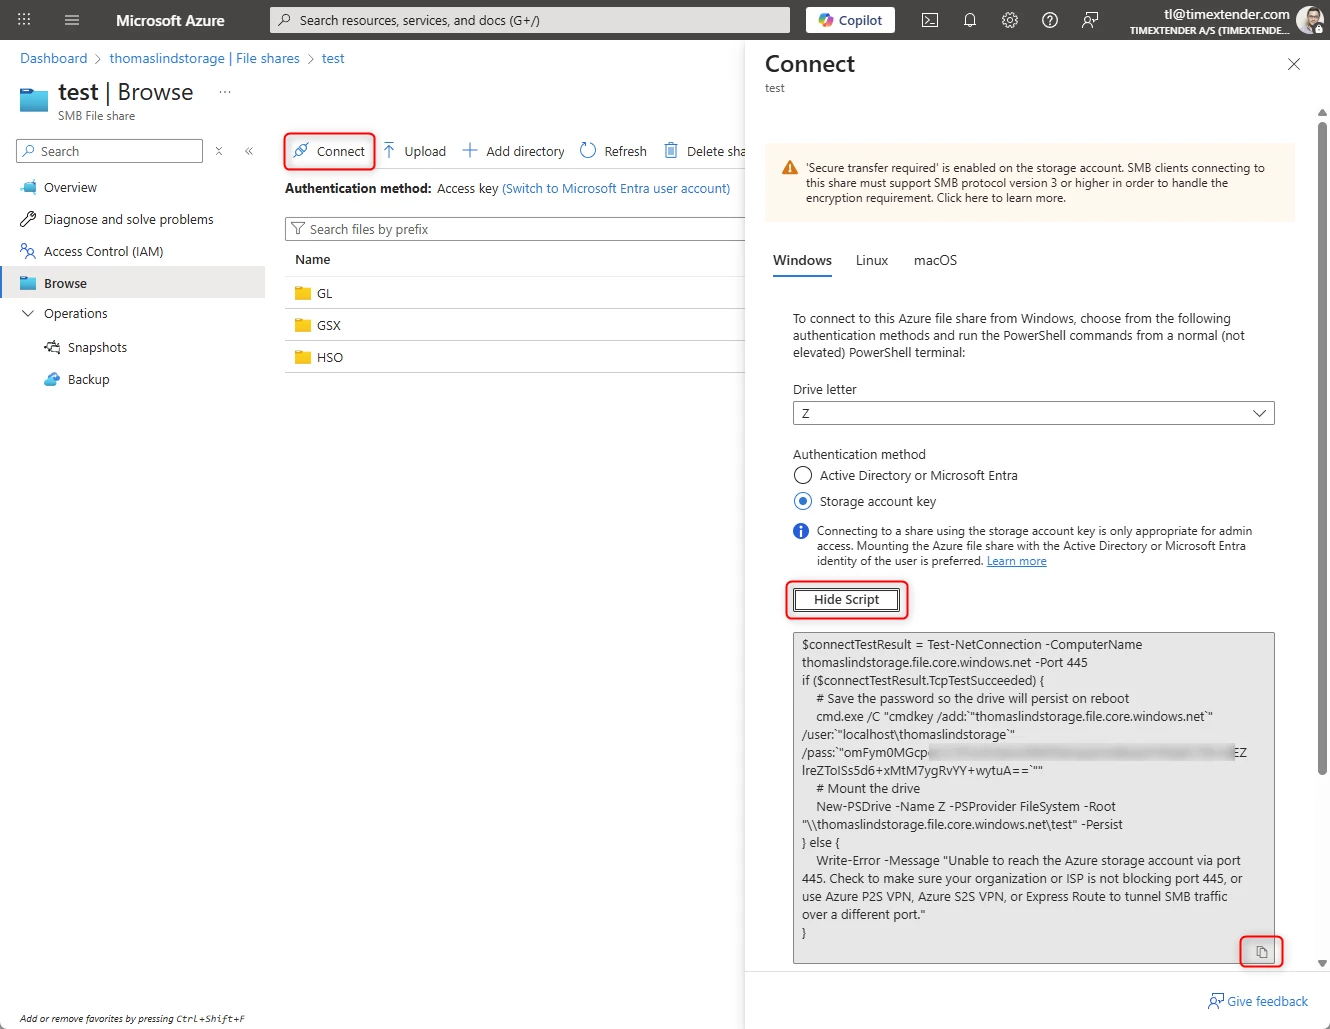
As you can see, you can run this script in PowerShell. It is important that this is done so it runs as the user running the Ingest Instance Service. You can’t do this if you run as Local System.

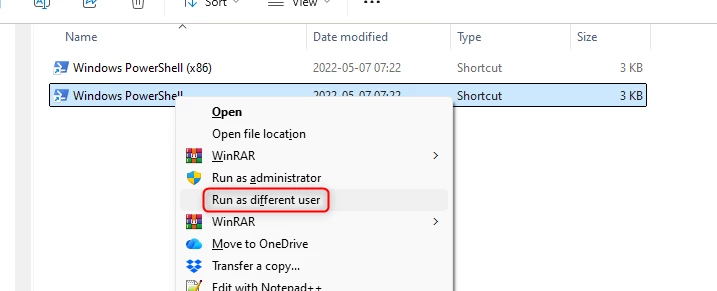
So when you want to run the script start by starting PowerShell as the user that runs the Ingest Service. I did it by searching for PowerShell and right-clicking on it and choosing Open File location. Here I could run it as another user, by right-clicking on the program and choosing Run as a different user.
Once you have copied the script, you can paste it in PowerShell and run it by hitting the Enter button. It will then show a message about the folder being created.
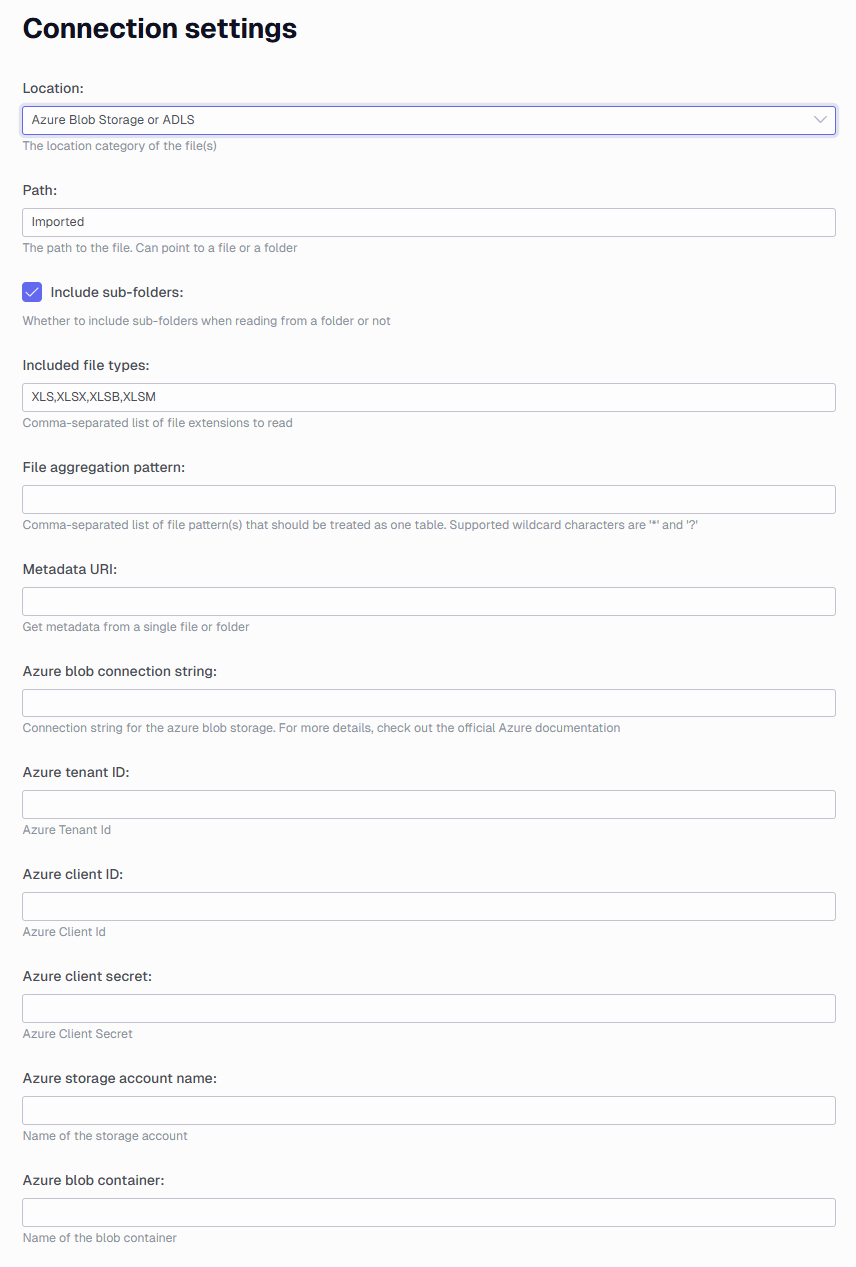
Azure Blob Storage settings
- Azure blob connection string: the complete connection string to the container. You can learn more about configuring connection strings here : Configure a connection string - Azure Storage | Microsoft Learn
- Azure tenant ID: The tenant id the storage account is located in. Is needed when doing OAuth 2.0 authentication using the client grant type.
- Azure client ID: The client id for the application that is used for doing OAuth 2.0 client authentication.
- Azure client secret: The secret value that is set up for the application
- Azure storage account name: The storage account name that hosts the container.
- Azure blob container: the container name
AWS S3 Bucket settings
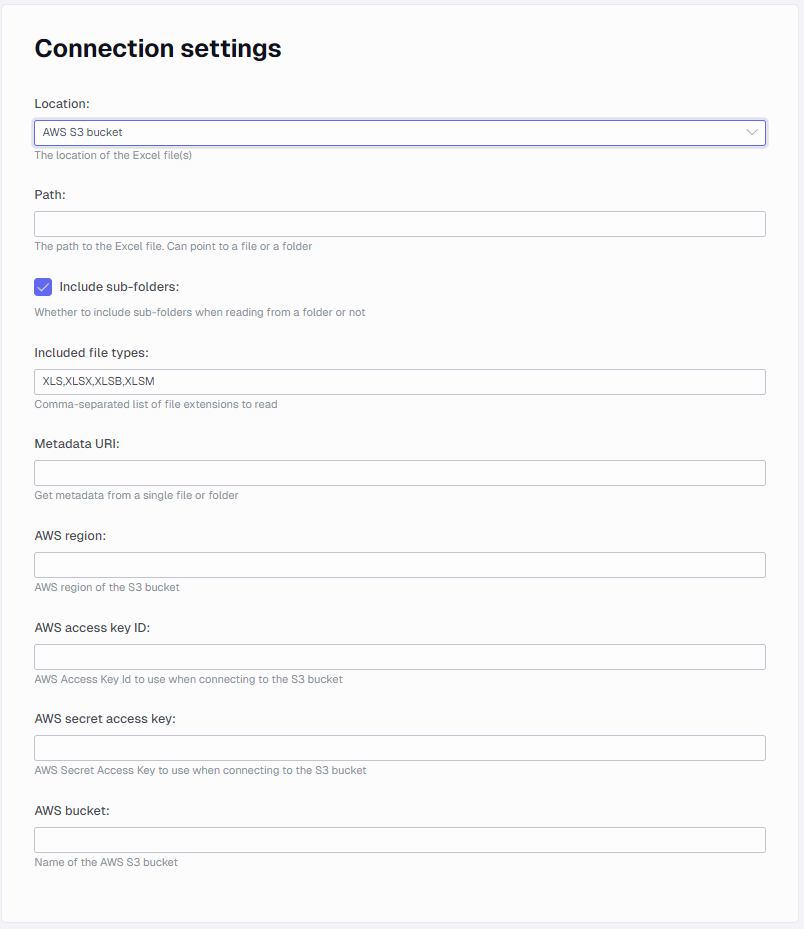
Currently the connector only supports connecting with Access Key Id. You can learn more in AWS documentation.
- AWS region: the related region string (eg. eu-west-2)
- AWS access key ID: access key id to S3 bucket
- AWS secret access key: secret access key to the S3 bucket
- AWS bucket: the bucket name
SharePoint or OneDrive settings
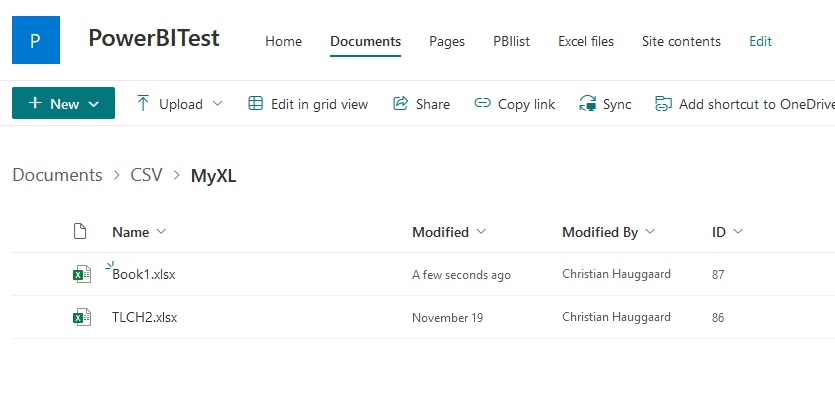
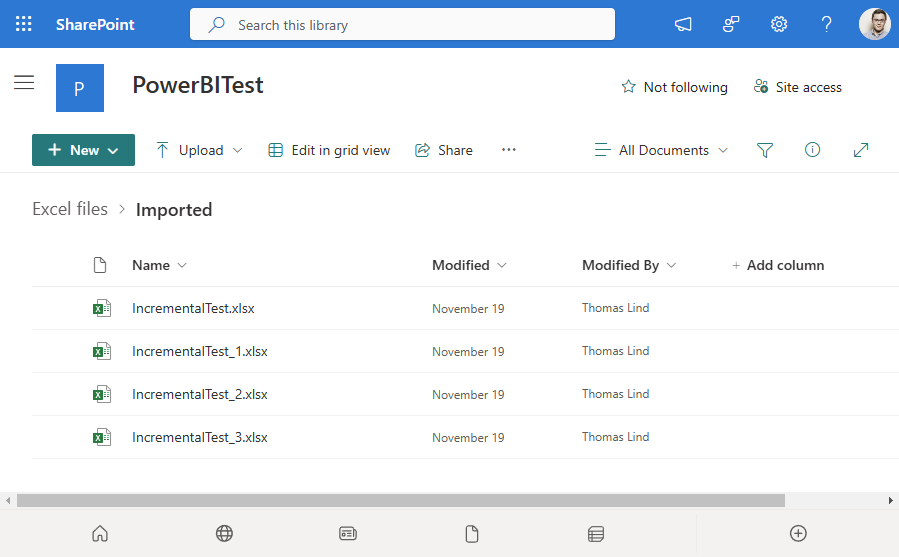
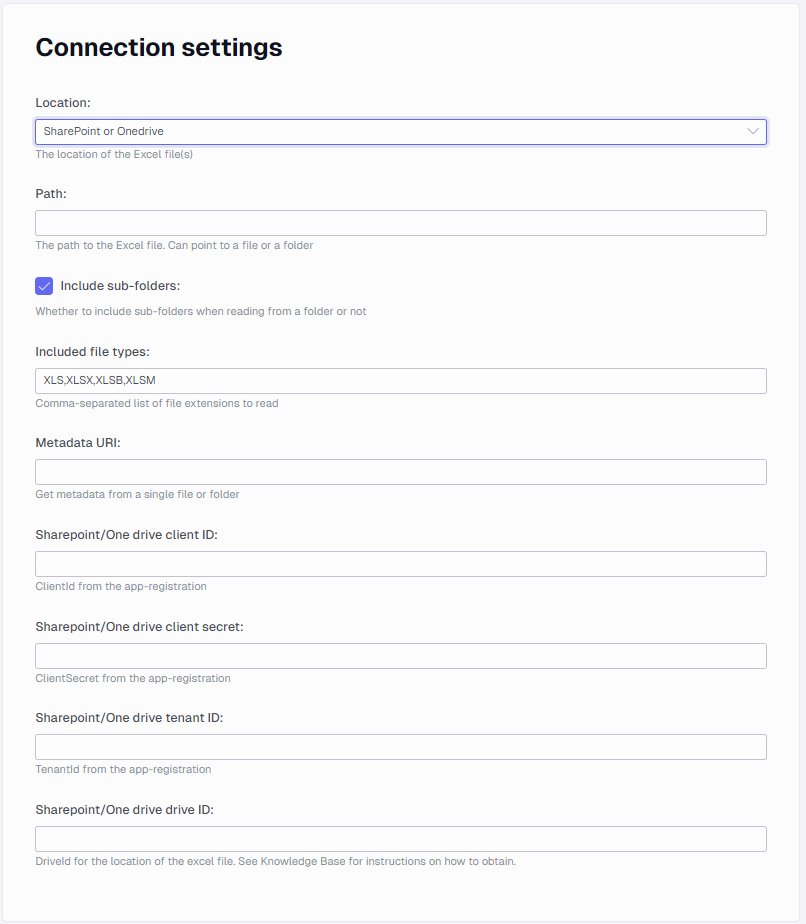
Note: If pointing to a specific Excel file in SharePoint or OneDrive site root folder then enter path as filename.xlsx. If you would like to extract all the files in the SharePoint site then enter path as /. If you would like to extract excel files from a specific folder in the SharePoint site then enter the folder name. If it is a nested folder then enter the following path: foldername1/foldername2. If you would like to point to a specific file in a nested folder in a SharePoint site then enter the following path: foldername1/foldername2/filename.xlsx
- SharePoint/OneDrive client ID: The Client ID of the app you use for access. The app used needs the following granted Application permissions Files.Read.All and Sites.Read.All. To be sure you have enough rights you may also add Group.Read.All and User.Read.All.
- SharePoint/OneDrive client secret: The secret code that is set for the app used.
- SharePoint/OneDrive Tenant ID: The tenant id of the company that hosts the SharePoint site.
- SharePoint/OneDrive Drive ID: The drive id pointing to the Document Library you connect to. Locate a SharePoint/OneDrive drive id
Google Cloud Storage settings
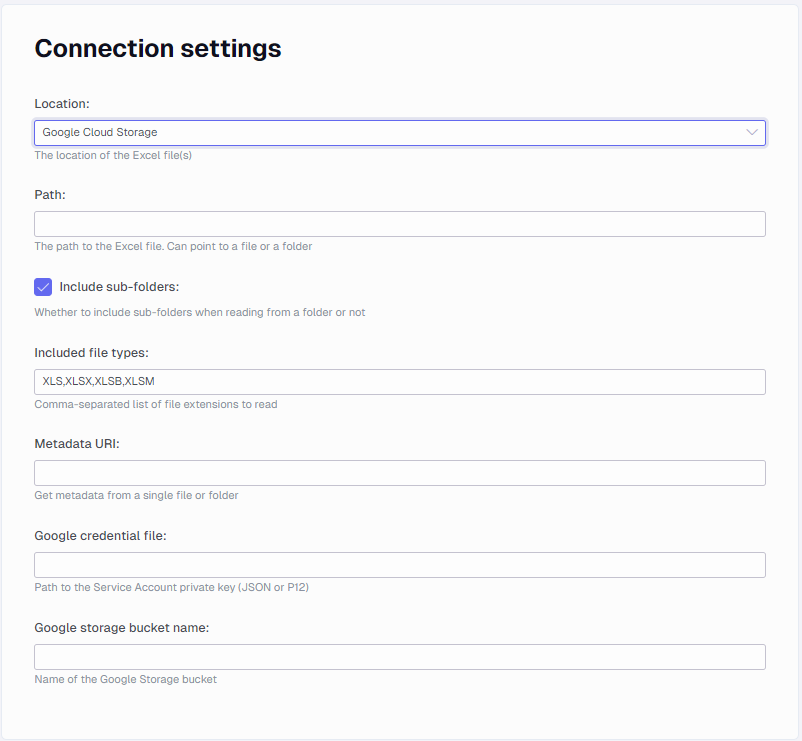
The connector supports GCM authentication with service account keys. You can learn more about them here: Create and delete service account keys | IAM Documentation | Google Cloud
- Google credential file: Path to the Service Account private key (JSON or P12)
- Google storage bucket name: the bucket name
SFTP settings
The connector supports SFTP authentication with password or a public key file. It is mandatory to use one of these methods.
- SFTP host
- SFTP port
- SFTP user name
- SFTP key path
Excel settings
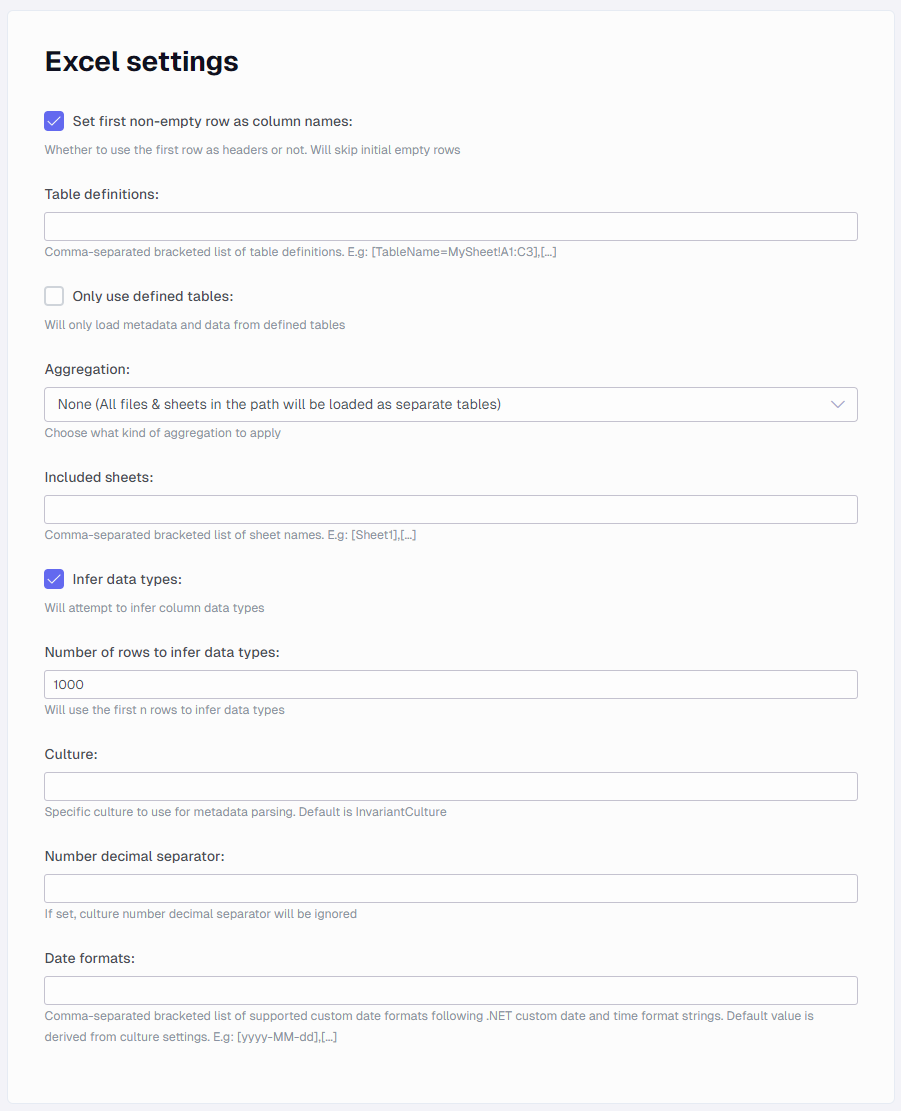
These settings relate to the behavior of the Excel reader and how to treat the content of the Excel documents.
Set first non-empty row as column names

Check if your Excel documents have header records. This will then use the first non-empty record to set the names of your resulting columns. If unchecked generic column names will be generated. E.g. “Column_1, Column_2, …”
Table definitions

Here you can provide a comma-separated list of table definitions to ingest from your Excel document(s). A table definition has the following structure:
<Table name>=<Sheet name>!<Starting cell>:<Ending cell>
E.g. “Table1=Sheet1!E6:H9”
The table will then be ingested with data from within the range provided in the definition. The definition is also dependent on the option “Has header record”, if checked the first record is used for column names. Aggregation options will also affect defined tables.
It is also possible to provide wildcards for some of the parts in the definition. A wildcard is defined by using a “*” star symbol. You can provide wildcards for “Sheet name”, this will then ingest data from all sheets within the range defined. This data is not aggregated unless aggregation options are selected. A wildcard can also be provided for the row part of the “Ending cell” part. E.g. “H*”. The reader will then read all rows within the defined columns.
Example of a table definition using wildcards: “Table1=*!E6:H*”
Only use defined tables

When checked only tables defined using table definitions will be ingested. If not checked all tables defined using table definitions will be ingested along with the whole sheet(s) tables from the file(s).
Aggregation

Here you can choose the type of aggregation you want to apply when ingesting Excel document(s). The options are:
- None (All files & sheets in the path will be loaded as separate tables)
- Files (Matching sheetnames and/or table definitions will be merged across files)
- Sheets (All sheets and/or table definitions within files are merged)
- Files & sheets (A combination of Files and Sheet aggregation)

None – No aggregation is applied and all tables are returned with unique names using the following naming structure:
<filename>_<sheet name> or <filename>_<sheet name>_<table definition name>
Files – Tables within files are named using the following naming structure:
<sheet name> and/or <sheet name>_<table definition name>
The data is then aggregated over files by table name.
Sheets – Data is aggregated over sheets and returned as a single table per file plus any table definition tables. Table definitions are also aggregated.
Files & sheets – Same as above, but in the order that Sheets are aggregated first for each file and then files are aggregated, will return a single table plus a single table for any table definitions.
Included sheets

Here you can specify a list of sheet names to select, by applying the names in a comma-separated bracketed list.
Infer datatypes

Check this to infer data types from your Excel documents. If unchecked, all data types will be strings.
Number of rows to infer data types

If you have checked “Infer datatypes”, you can here provide the number of rows to use for inferring the datatypes. This is because there is a small overhead of doing the inference. Setting the number to 0 or a negative number will result in all rows being used for inference.
Culture

Here you can specify the culture of the read Excel files. For example, if the source is different than yours or does not match InvariantCulture.
Number decimal separator

Here you can provide the number decimal separator used when inferring numeric data types.
Date formats

Here you can specify a custom date format. You can apply more than one by applying them in a comma-separated format within brackets.
Misc behavior
Test connection

Clicking the test connection button has the following behavior:
- If the path is empty or not set will return a failed connection
- If a path is provided and the file can not be opened will return a failed connection
- If a path is provided and the file or folder does not exist will return a failed connection
If none of the above a connection is returned as a success.
This means that we do not check whether the file or folder contains files that are Excel documents or if they are corrupted or contain any data.


