It is possible to use OAuth 2.0 as the authentication method for the TimeXtender REST data source. One API that uses this is the Graph API.
Content
Prerequisites
Using the postman collection explained in this guide Use Postman is a good start as the method is pretty much similar. What we will do is the application method aka Client Authentication.
Application setup
As mentioned above you need to use Application rights for client authentication, so the app you want to use for this must have the correct rights. The Delegated rights are easier to set as they mainly do not require Admin consent, that is not the case for most Application rights, so get these rights authenticated before starting.
I got one app where I got all the application rights added
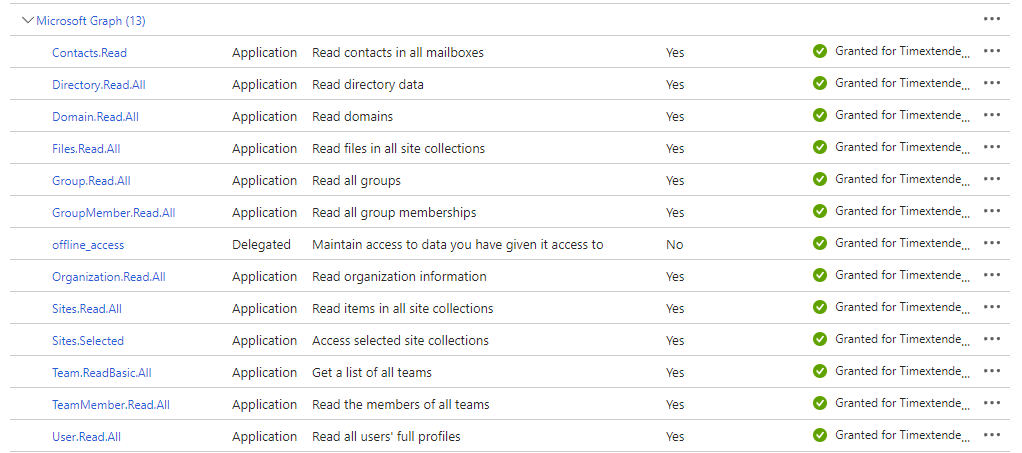
If you want access to groups and users, you will need the Group.Read.All and Users.Read.All.
Besides this you need to have a client secret to go with the client id.
Access Token URL
To get the token you need to add an Access token URL and for Graph API you need to add the following setup.
https://login.microsoftonline.com/{tenant id}/oauth2/v2.0/tokenAs you can see you need to add the above with your own Tenant ID added in place of {tenant id}.
Scope
The scope option is a way to assign rights on the token connection request, so essentially a scope could be Users.Read or similar, but with the app already being set up using .default will make sure this one is being used.
The default scope can be added two ways, as .default or as https://graph.microsoft.com/.default which is essentially the same thing.
Initial setup
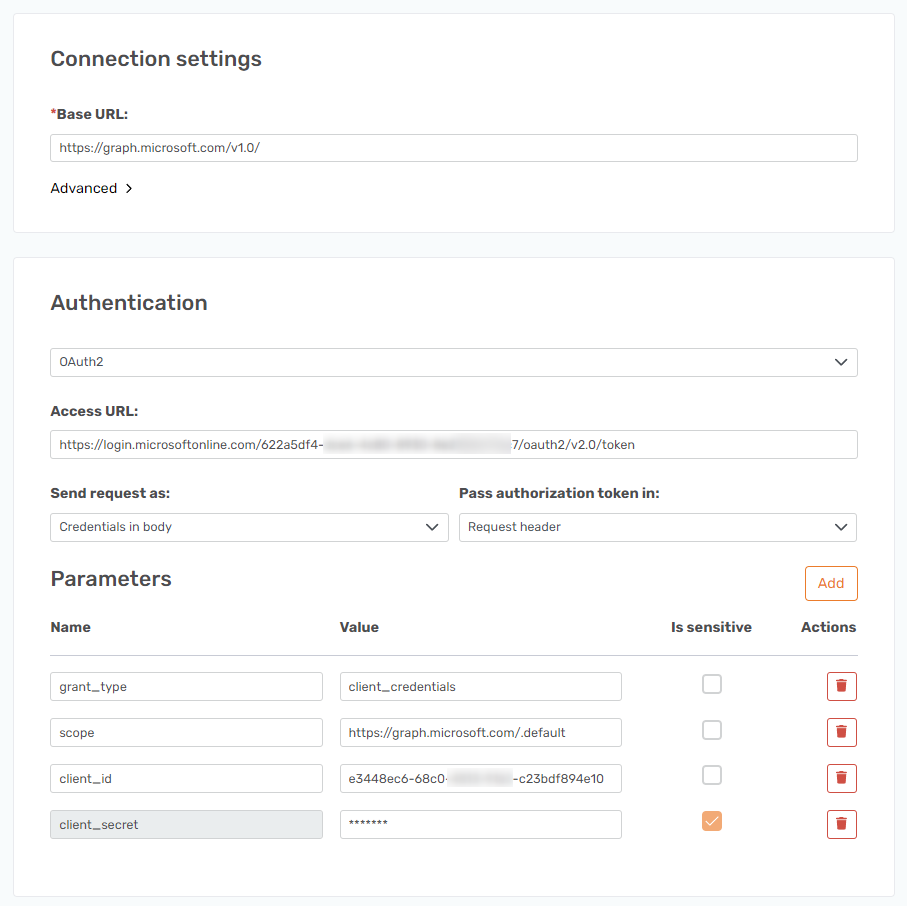
To set up the Graph API data source start by adding a new TimeXtender REST data source, naming it and adding the following base URL.
https://graph.microsoft.com/v1.0/
Set up OAuth Authentication
Expand the Authentication area and set the type to OAuth2.
Add the Access token URL in the Access URL field.
Be sure the Send request as is set to Credentials in body and that Pass authorization token in is set to Request header. This is because the API requires an Authorization header with a bearer token to use for access.
You also need to add four parameters. They are the following:
- A grant type parameter that is set up as Name equal to grant_type and Value equal to client_credentials.
- A scope parameter that is set up as Name equal to scope and Value equal to https://graph.microsoft.com/.default
- A client ID parameter that is set up as a Name equal to client_id and a Value equal to the client ID of your app.
- A client secret parameter that is set up as Name equal to client_secret and Value equal to the client secret of your app.
The setup will look like this.
Main Endpoints
These are endpoints that have no dynamic parts and will give at least one page of data if your app has the proper rights.
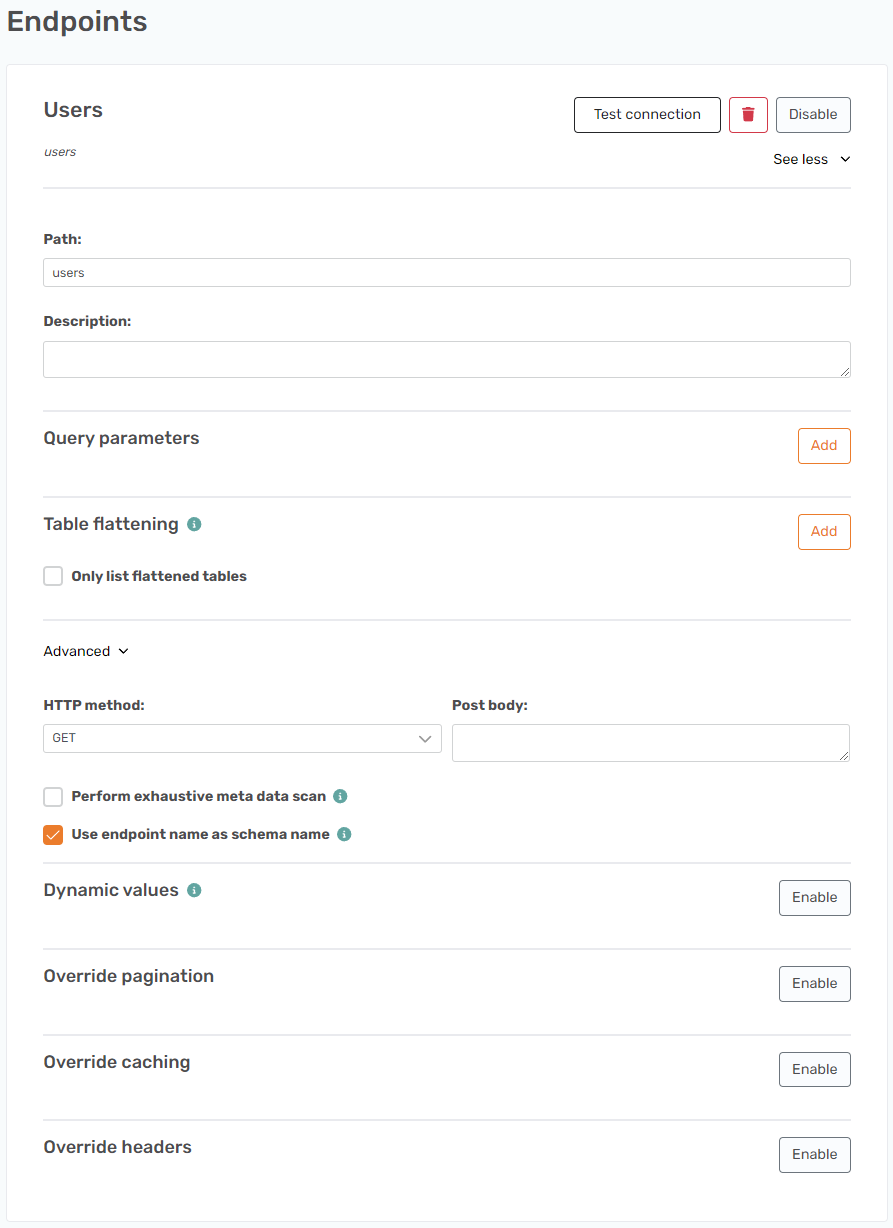
Users
This is a very simple setup. All needed is to add the endpoint as Name equal to Users and Path equal to users.
Besides that you need to check the Use endpoint name as schema name option to avoid issues with the other endpoints
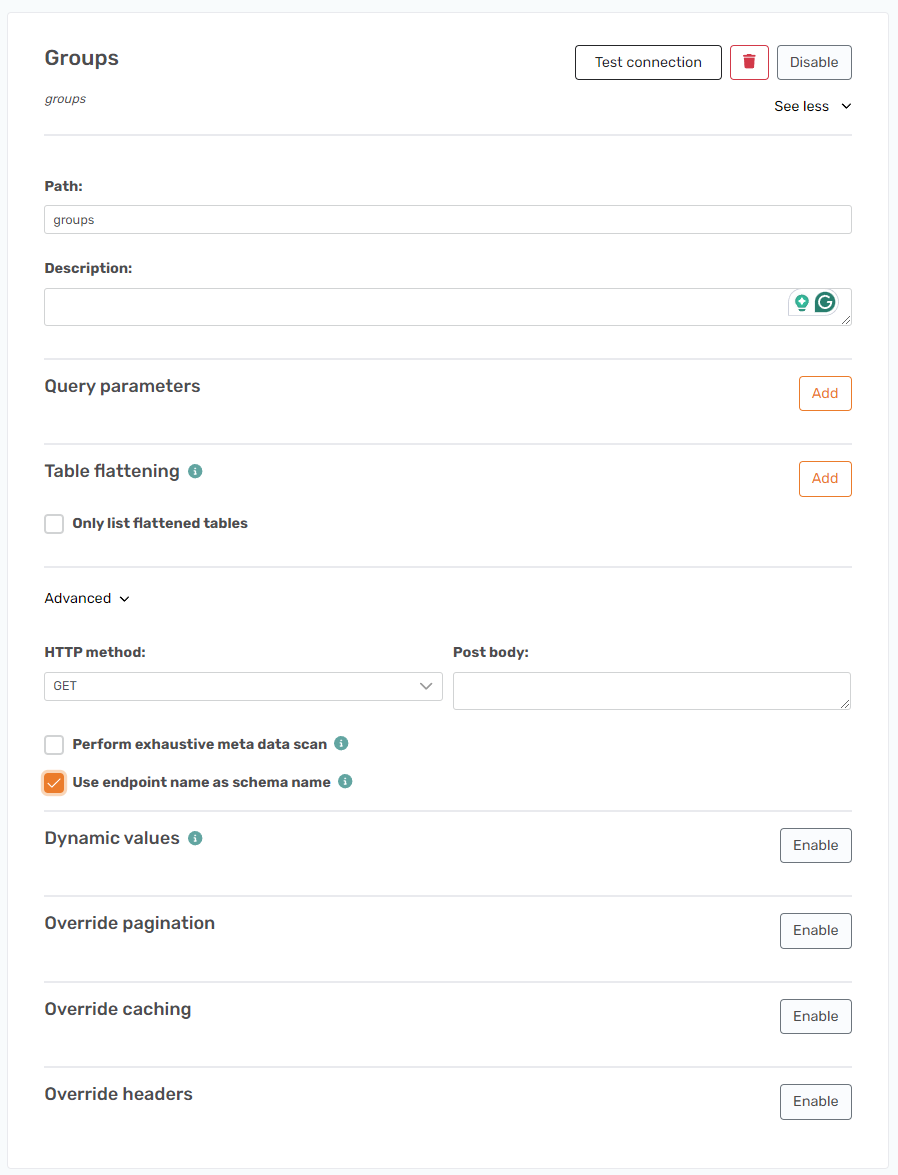
Groups
The groups endpoint is set up the same as Users from above, only difference is that your Name is equal to Groups and the Path is equal to groups. Again you need to check the Use endpoint name as schema name.
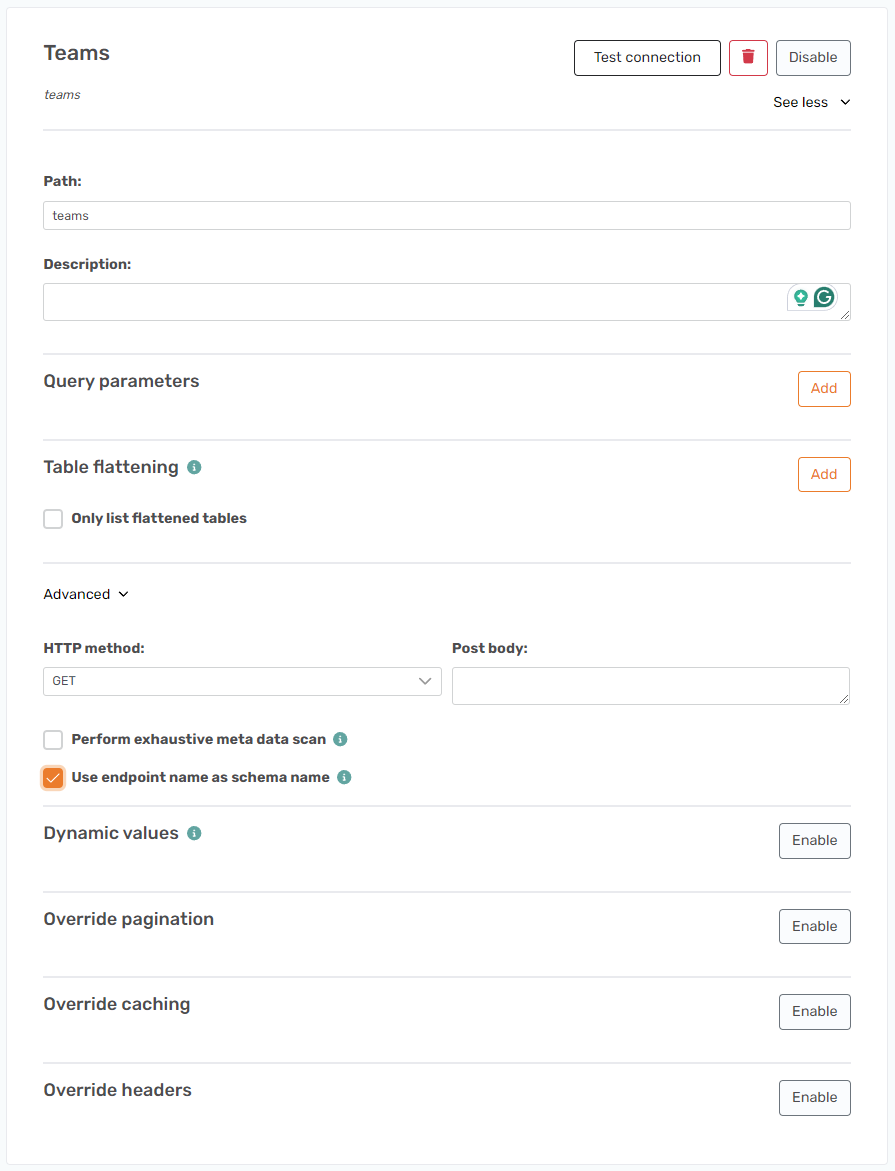
Teams
The groups endpoint is set up the same as Users from above, only difference is that your Name is equal to Teams and the Path is equal to teams. Again you need to check the Use endpoint name as schema name.
Set up pagination
Pagination is done using a cursor token. You can see it if you preview the result of doing a get-call with the proper authentication applied. The field is called @odata.nextLink and contains a URL that gives the next array of items.
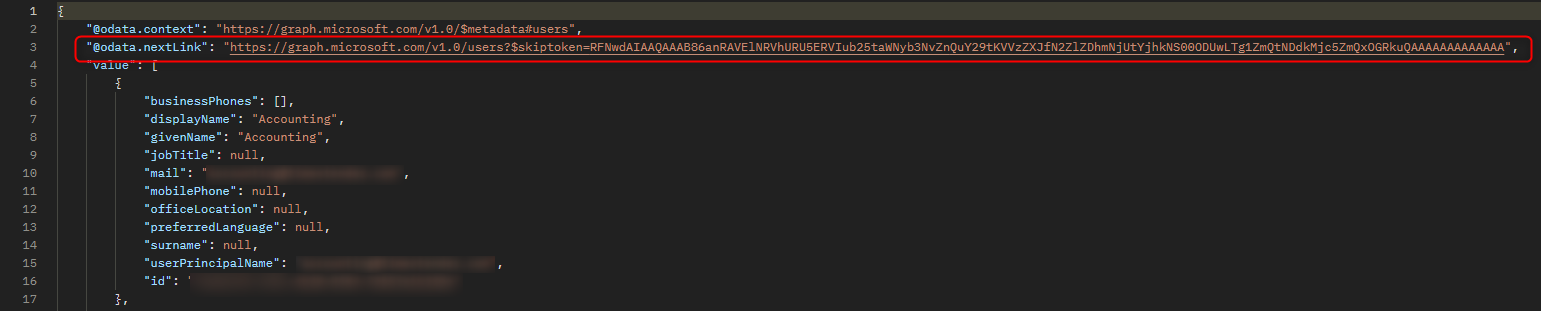
You can see the same if you add the Users endpoint and turn on caching to a file. It will then look like this.

Here it has a different structure and will be located as an attribute of the <TX_Autogenerated_Element> tag.
To set it up and make it iterate over these skiptoken values, you add a parameter that points at this value
The Name is set to nextLink, the Type is set to XPath, and the Value is set to /TX_Autogenerated_Root/TX_Autogenerated_Element/@odata.nextLink
Other than the parameter you set the Parameter Action to Replace URL and the Replaced URL to {nextLink}. Remember to add the curly brackets to make sure it is seen as a value.
This setup should look like this.
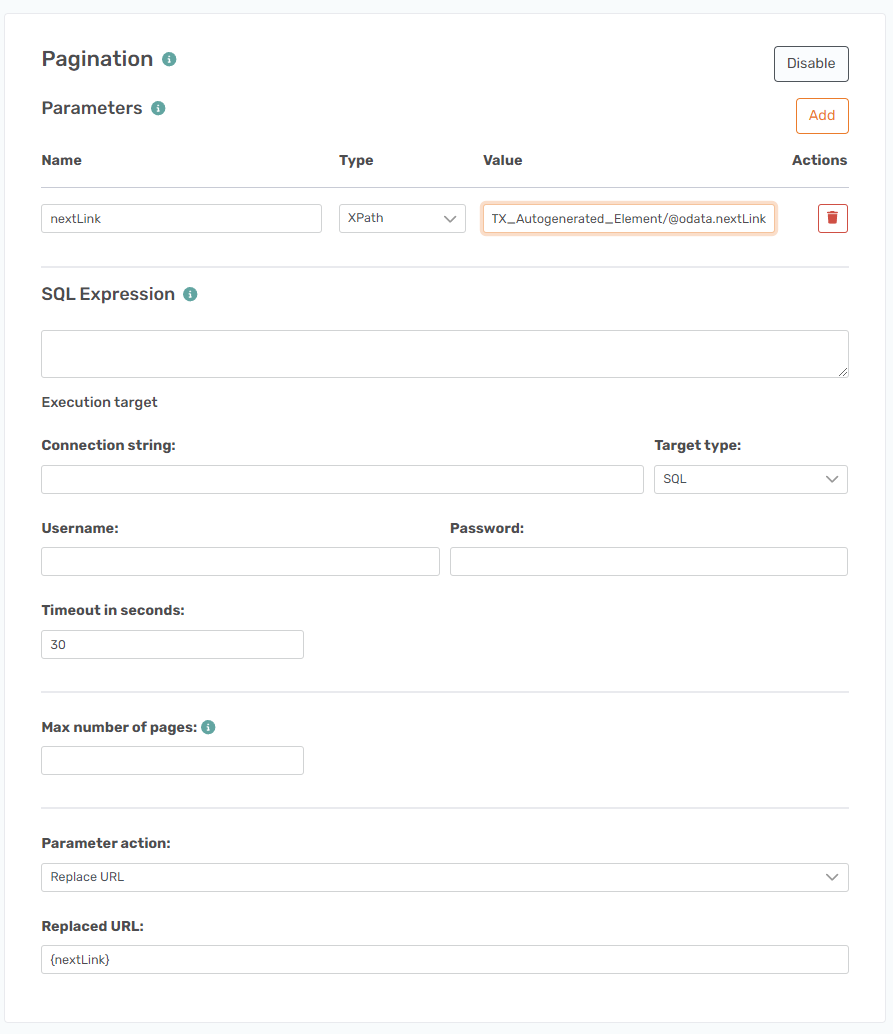
You do not need to add a stop condition as it will automatically stop once it can’t find the nextLink part in the XML page.
Dynamic endpoints
There are many endpoints, so this is just a small selection of the ones that are available. The Users and Groups endpoints are necessary for most of these to work.
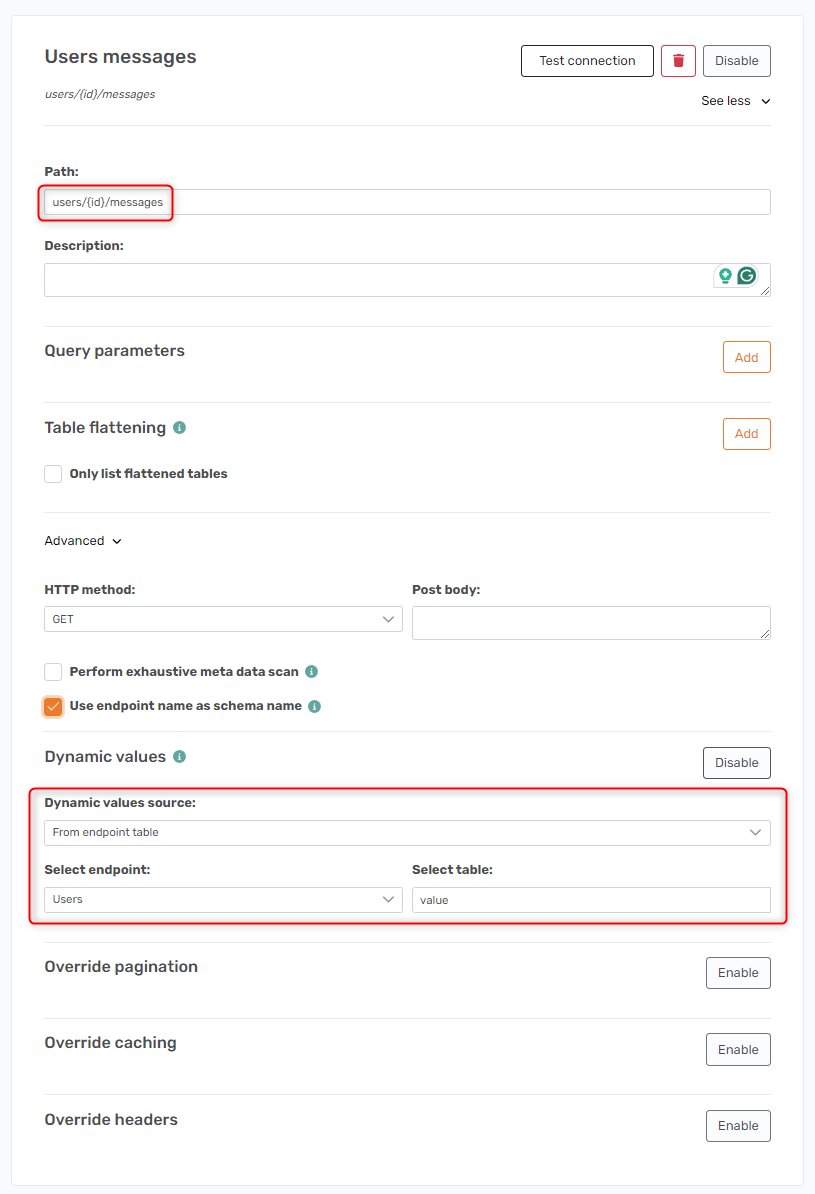
Users messages
You can get the messages from a user by using the following path.
https://graph.microsoft.com/v1.0/users/{UserId}/messages
To find the user ID check the Data Source Explorer for the Graph API data source and find the values table. There is a field called id, which contains the user ID.

Then you set up the endpoint like this.
Add a Path that is equal to users/{id}/messages with the Name equal to Users messages. Be sure to check the Use endpoint as schema name. Set up Dynamic values by clicking Add, setting the Dynamic values source field to From endpoint table, the Select endpoint field to Users, and the Select tables field to value.
Note: This section is a new addition that shows how to get the {id} value as a field in the result of the table
If you set up Table Flattening, you can add a static field. If you add it like so, you can have a field called groupId that contains the {id} from the main users call.
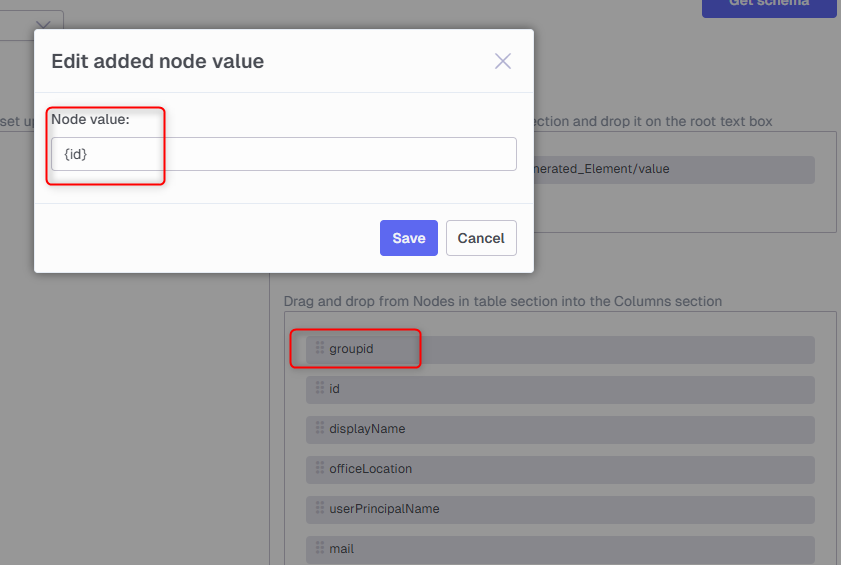
The XLST code will show it like so.
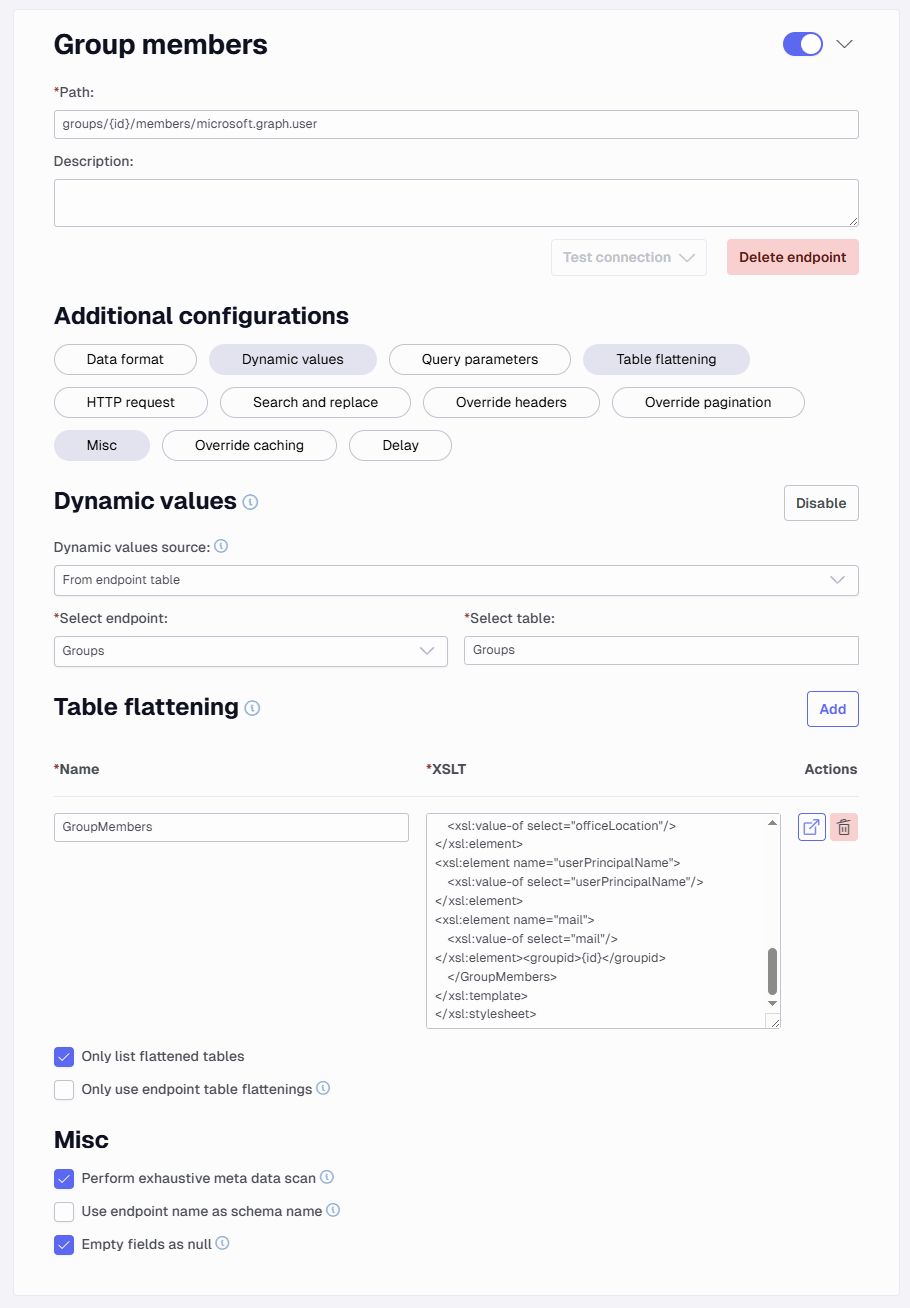
</xsl:element><groupid>{id}</groupid>
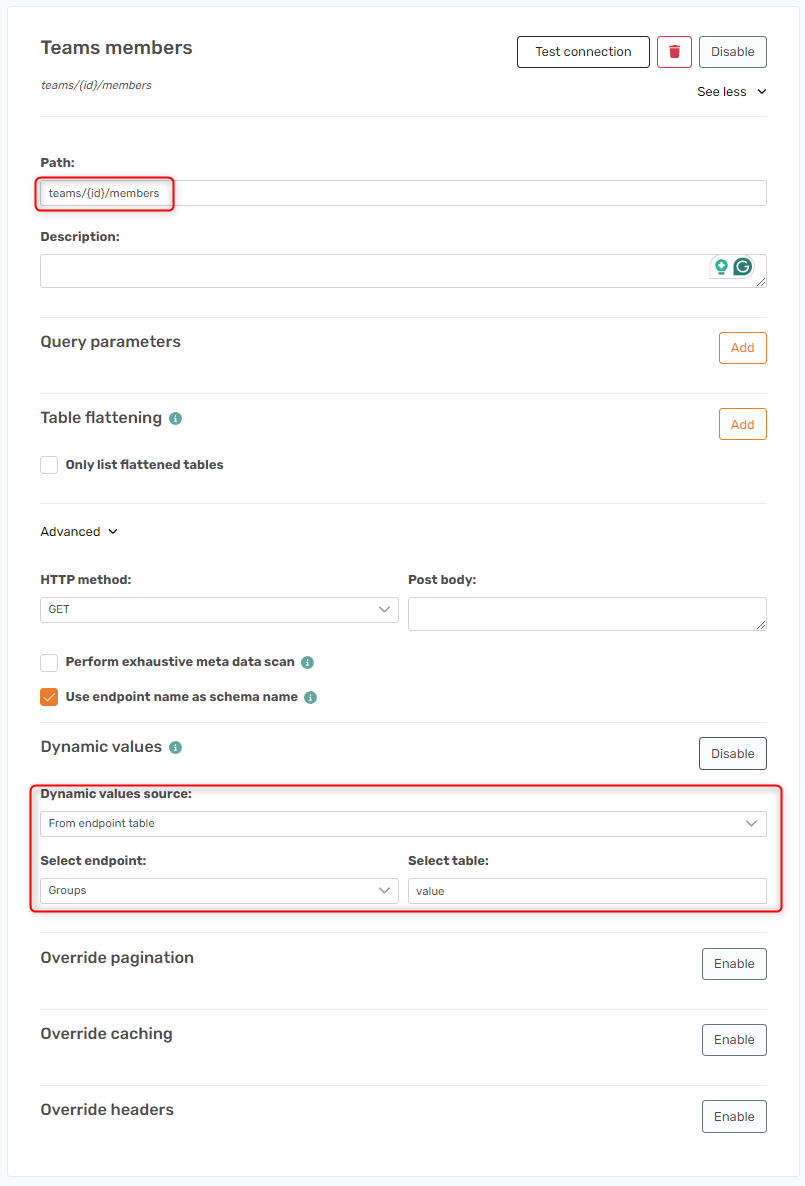
Team members
Using the Groups endpoint you can get the groups that are members of what teams by using the following path.
https://graph.microsoft.com/v1.0/teams/{GroupId}/members
To find the group ID check the Data Source Explorer for the Graph API data source and find the values table. There is a field called id, which contains the group ID.

Then you set up the endpoint like this.
Add a Path that is equal to teams/{id}/members with the Name equal to Teams members. Be sure to check the Use endpoint as schema name. Set up Dynamic values by clicking Add, setting the Dynamic values source field to From endpoint table, the Select endpoint field to Groups, and the Select tables field to value.