
The Preview Table and Query Tool features within TimeXtender Data Integration provide developers with an easy way to review the contents of a table and perform quality control checks to confirm that the table is working properly as it is being developed. Previewing the results can be particularly helpful when coding transformations.
Preview Table
Use Preview Table to preview the contents of a table according to the following steps:
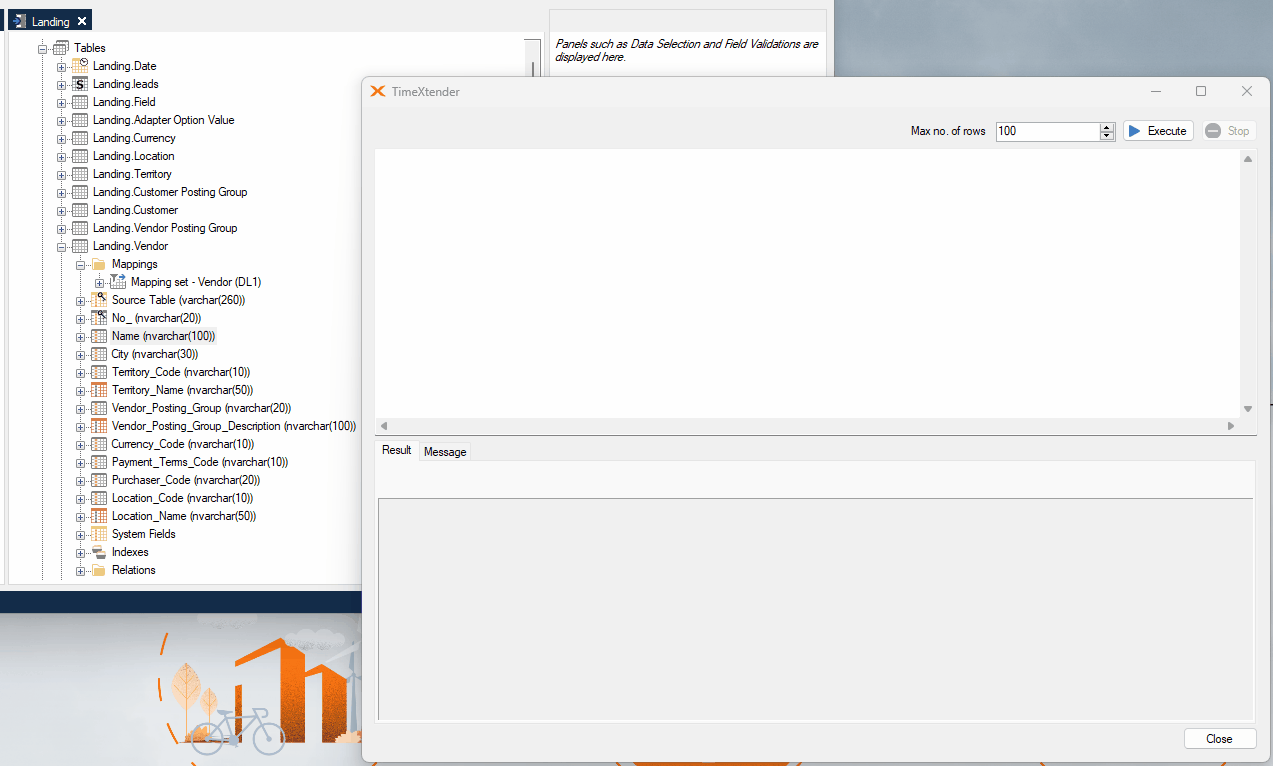
- Right-click on a table located in a data area and click Preview Table to open the following window where you can preview the data in the table.
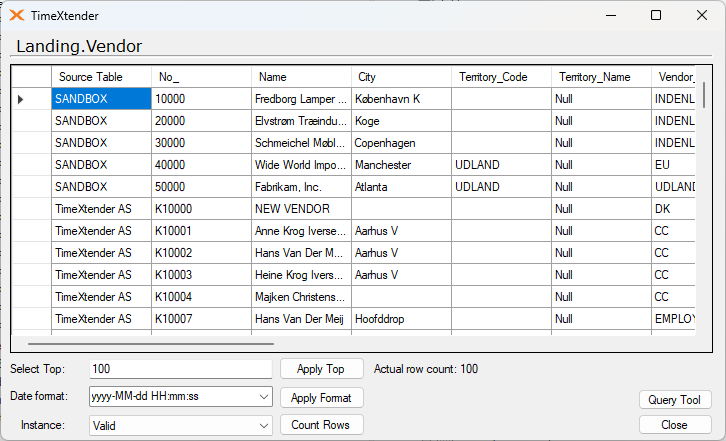
- Use the following options to adjust how the preview results are shown.
- In Select Top, type the number of rows to be fetched and displayed. Click Apply Top to apply the setting. Note that the “select top” setting is applied before any sorting of the data.
- In the Date format list, click the date format to use for dates. Click Apply Format to apply the settings. Once the format has been set it will be used for all table previews.
- In the Table Instance list, click the instance of the table to be loaded from one of the following:
- Valid
- Transformations
- Raw
- Incremental
- Click Count Rows to see the number of rows that the table contains.
- Once preview is complete, click Close to close the window.
Query Tool
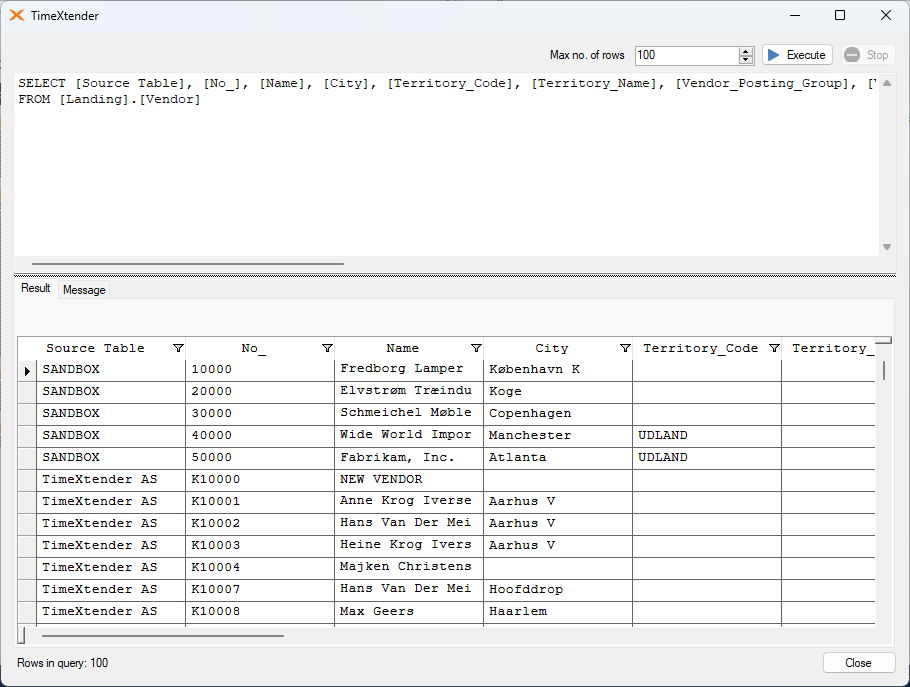
The Query Tool is a powerful supplement to the Preview Table feature, and provides more flexible options in how the table contents are queried and displayed. Enter or update the SQL select statement in the Query Tool window to query the table contents as desired.
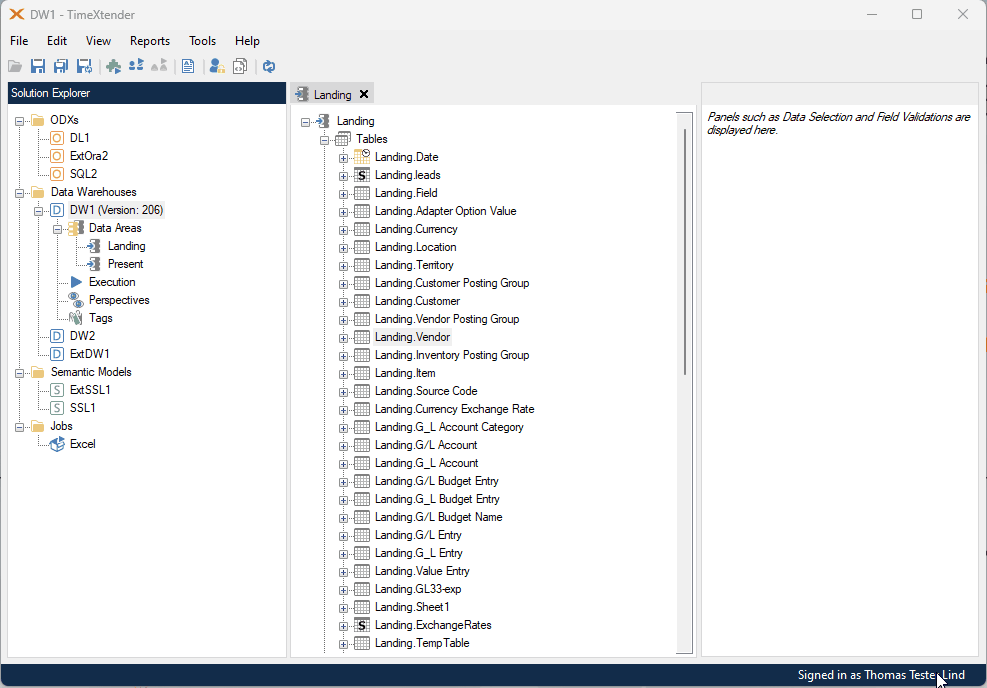
Opening the Query Tool
Open the Query Tool window using one of the following options.
- Right-click a table, click Preview Table and then click the Query Tool button in the Preview Table window.
- Right-click a table, click Advanced and then click Query Tool.
- Click a table and then press the F8 function key.
The Query Tool opens with the preview contents query pre-populated. Update or amend this query as needed.
Executing queries
Use the following steps to execute a query:
- Open the Query Tool using one of the options described above.
- Enter a query in the top text box of the Query Tool window.
- Adjust the “Max no. of rows” to the desired maximum number of rows to be returned.
- Click Execute
- OR -
Press F5 on your keyboard. - An animated lotus flower icon will be displayed while the query is running.
- If the query is taking too long to complete, click the Stop button to cancel the execution of the query.
The Result tab will display the query results when they are available, and the Message tab will display any messages that resulted from the query execution, i.e. error messages.
Drag-and-drop and the Query Tool window
The Query Tool supports drag and drop of tables and fields.
- Drag a table or a field into the query to place the table name in the query.
- If you drag a table to an empty query, the default query is generated. The default query fetches everything in the table.
Sorting and filtering data
The Query Tool provides a way to sort and filter the results.
Note: Only the rows returned by the query are available for sorting and filtering in the Results tab. In order to sort or filter all the rows in a table, include these conditions in the query, e.g. by using "order by" or "where" clauses. Fetching thousands of rows and sorting them in the Results tab can be very slow.
To sort the data, follow the steps below.
- Open the Query Tool and execute a query as described above.
- In the Result tab, click a column heading to sort the rows on the value in that column. Click again to switch between ascending or descending order.
Use the following steps to apply a filter in the results tab.
- Open the Query Tool and execute a query as described above.
- In the Result tab, click the filter icon next to the column name to select the filtering options.
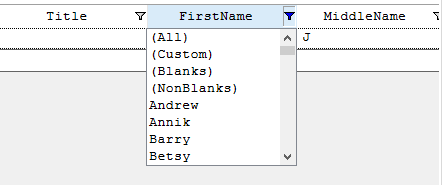
- (All) will show all values so is equivalent to having no filter.
- (Custom) allows you to create a custom filter, which is described in further detail below.
- (Blanks) will filter to show only the blank rows.
- (NonBlanks) will filter to show only the rows that are not blank.
- Below these options are the individual values from the field listed out in order. Click on one of these values to filter the list by that specific value.
- If selecting (Custom) in the list above, the Custom Filter dialog box will appear, where one or more custom filter rules can be created using the following comparison operators:
- Equals.
- Not equal.
- Less than.
- Less than or equals.
- Greater than.
- Greater than or equals.
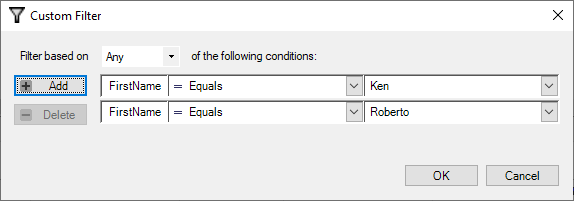
- When using more than one filter rule in the Custom Filter dialog, the following options are available to setup these rules and configure how they are applied together.
- Click the Add button to configure an additional filter rule.
- Click the Delete button to remove the currently selected filter rule.
- Use the “Filter Based on” drop-down menu to configure how the filters interact with each other by selecting one of the following two options:
- Any - equivalent to OR condition, meaning each rule applies independently of the other rules.
- All - equivalent to AND, meaning that the entire set of conditions must be satisfied for a result to be returned.
- Click OK to activate the filter.
