

This article explains the process of adding tables to Deliver instances. By providing only the most relevant data to each department or business unit in the form of a data mart, data consumers do not have to waste time sorting through all the data in the warehouse to find what they need.
Adding a Table to a Deliver instance
- Drag a table from a data area to Tables under the relevant Deliver instance.
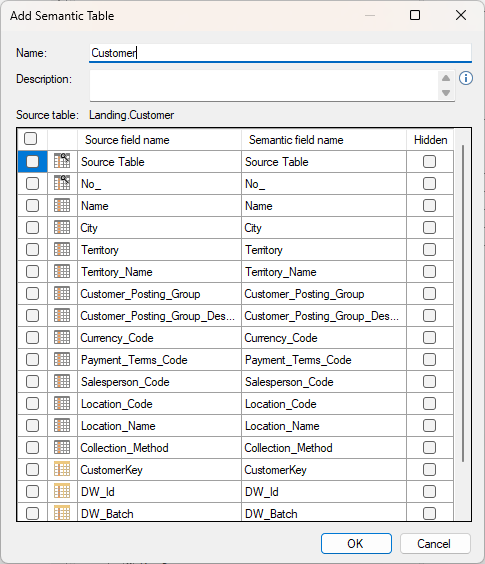
- If the table name is to be changed, type the new name in the Name box.
- In the Description box, type a description of the model for use in front-end tools.
Note: This setting applies to SSAS Tabular endpoints only.
- Select the fields to be included.
- (Optional) In the Hidden column, check the box for any fields that are to be hidden, which means they will be added to the Deliver instance table but will not be shown in the endpoint.
- Click OK to add the table.
- The Set Up Relations window may appear in either of the following cases:
- There are other tables on the model that have an existing relation to the new table.
- There is a field with the same name as a field on the new table.
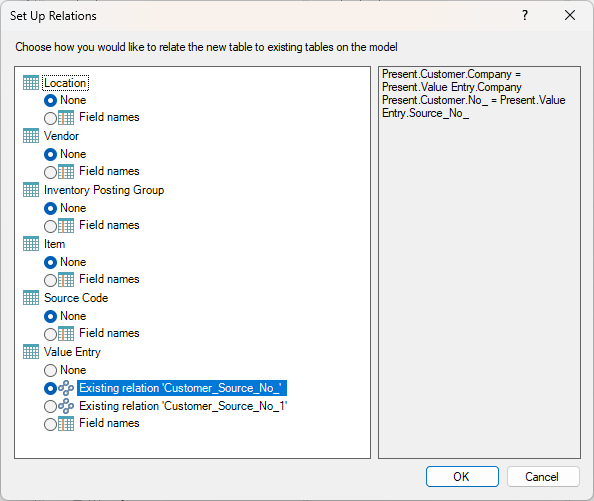
Configure how the new table will be related to any existing tables in the Deliver instance model using one of the following options:- None: No relations to the other table in the model.
- An existing relation defined in the data area (recommended).
- Field relation: Relate using identical field names on both tables.
- Click OK to add the relations (if any).
Adding a Data Selection Rule to a Table
Data selection rules are used to specify a set of conditions that data extracted from a source table must satisfy in order to be populated. By applying selection rules, only the subset of data that you actually need is loaded into the Deliver instance table.
See Data Selection Rules for more information about adding data selection rules.
Adding a Hierarchy to a Table
Adding hierarchies can be benefical for browsing data in front-end applications.
Use the following steps to add a hierarchy to a table.
- Right-click the table and click Add Hierarchy to open the Add Hierarchy window.

- Type a name for the hierarchy in the Name box.
- In the Description box, type a description of the hierarchy for use in front-end tools.
Note: This setting applies to SSAS Tabular endpoints only.
- Select Hide blank members to hide blank members in the hierarchy caused by ragged hierarchies. For example, in a country-state-city hierarchy, some cities such as Washington DC do not belong to a state and so will have a blank member above them in the hierarchy.
Note: This setting applies to SSAS Tabular endpoints only.
- Add fields to the hierarchy by doing one of the following:
- Select a field in the Available fields list and then click the Add > button.
- Double-click a field in the Available fields list.
- Click a field in the Hierarchy list and click Move Up or Move Down to reorder the field.
- (Optional) Click a field in the Hierarchy list and click Rename or press F2 to rename the field.
- Click OK to add the hierarchy, which will then be displayed in the Heirarchies folder in the table tree.
Setting a Default Date Table
Note: This setting applies to SSAS Tabular endpoints only.
Knowing what table is the default, or primary, date table enables additional features in Analysis Services Tabular client applications such as PowerBI.
Any table can be set as the default date table, including date tables added in the data area and tables that are not a specific Date table. To work, the table needs a field of the data type datetime to be used as the key. On date tables created by TimeXtender Data Integration, this would be the datevalue field.
To set a table as the default date table
- Right click the table and click Set as Default Date Table.
To remove a table as the default date table
- Right click the table and click Remove as Default Date Table.
