Enabling Team Development on a TimeXtender Data Integration (TDI) Prepare or Deliver instance allows multiple developers to work simultaneously on different parts of the data estate and coordinate their changes through the addition and release of Work Items on the objects under development. Understanding how to use work items is essential for developers who need to implement their changes without overwriting or conflicting with the work of others, which could ultimately lead to corruption errors that must to be addressed before further development can continue.
Work Items are like Post-it notes on data estate objects that let other people know that someone else is currently working on this item and it may be subject to change. Coordinating changes to a TimeXtender data estate can be challenging, as some objects may be dependent upon or have a relationship with other objects, and changes made to one object may result in other objects being changed as well. Therefore, it may be necessary to create multiple Work Items for all of the objects that may be impacted by a particular development task.
Best Practices for using work items
Before proceeding with any development work, check to see if there is a newer version of the project or instance available. If so, close and reopen the project or instance to ensure your work is performed on the most recent version. Note that with Team Development enabled, it is possible that another developer may have saved out a new version of the project or instance and you may not be aware of it. The specifics on how to check for newer versions depends on the version of TimeXtender you are using and is described in more detail in the Coordinating Versions and Associated Work Items section below.
Always create work items before performing any work, and note whether an object already has a work item before creating your own. If so, wait for the other work item to be released before creating your own work item on the same object.
Create work items on all of the objects that may be impacted by your changes. Objects that change to a red font and are marked with an asterisk as a result of a change should all have their own work items as to notify other developers that these objects may be changed as part of a future deployment.
The following examples illustrate how work items may be needed for multiple objects involved depending on the type of development work being undertaken.
- The addition of a conditional lookup will affect both the source and target tables, so work items should be created for both of these tables.
- Deleting a field that is involved in a mapping will cause the data area table involved in that mapping to be marked in red. Work items should therefore be created on both the original table and the destination table that included the mapping for the deleted field.
- Updating an instance variable will mark all objects where the variable is used in red. Create work items on all of the related objects where the instance variable is used.
- Modifying a script action will affect all of the objects where the script action is used. Create work items on all of the objects that use the script action.
Implementing Work Items
Enabling Team Development
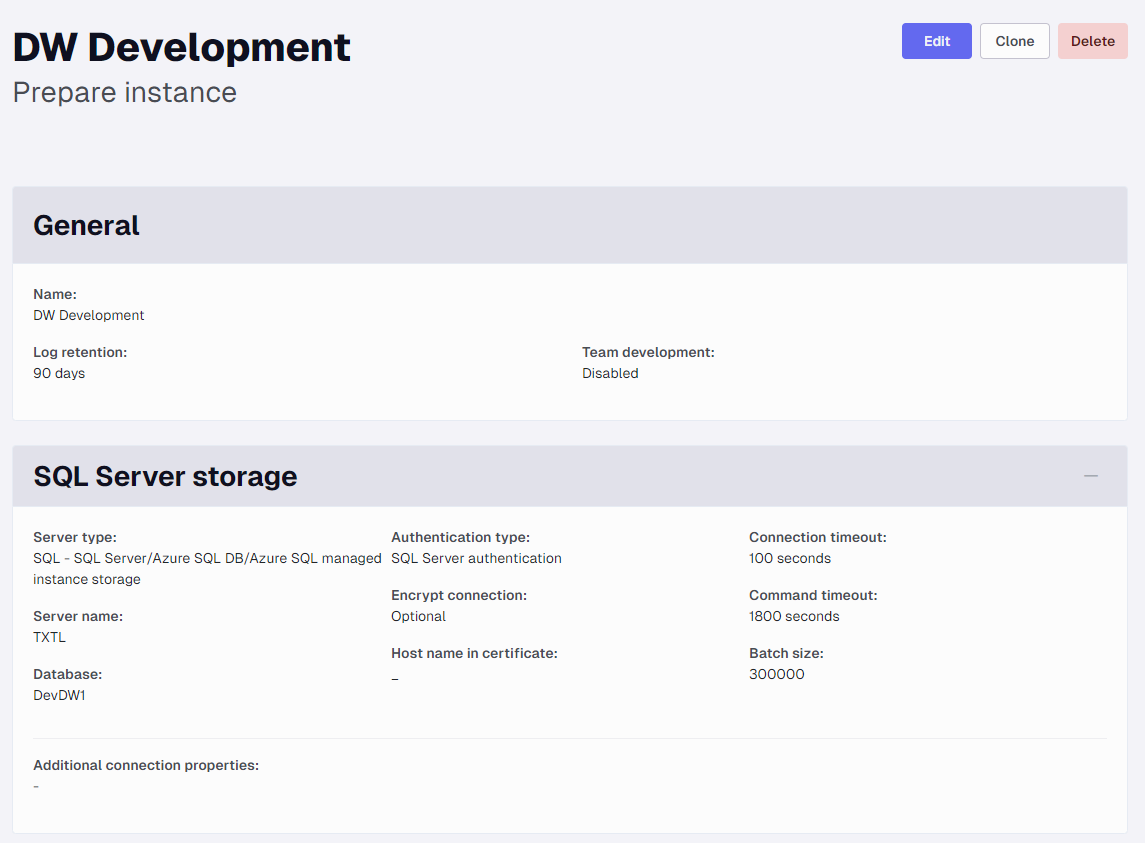
Team Development must first be enabled before work items can be used. This is done in the TimeXtender Portal on the Prepare or Deliver instance level.
Adding Work Items to Objects
Right-click on an object and select Add Work Item.
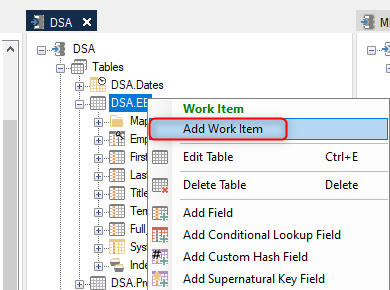
Enter text in the description area that describes the work that will be done and then click Create work item.

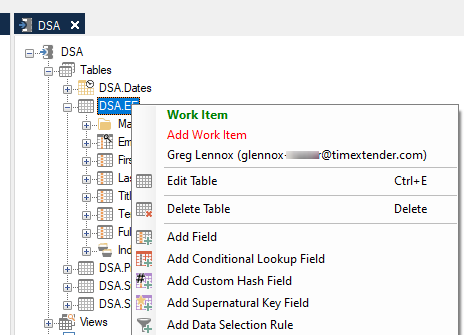
If other users attempt to create a work item on this same object, they will see that a work item from a different user already exists for that object and the Add Work Item link is in red, which indicates that an additional work item would conflict with an existing work item.
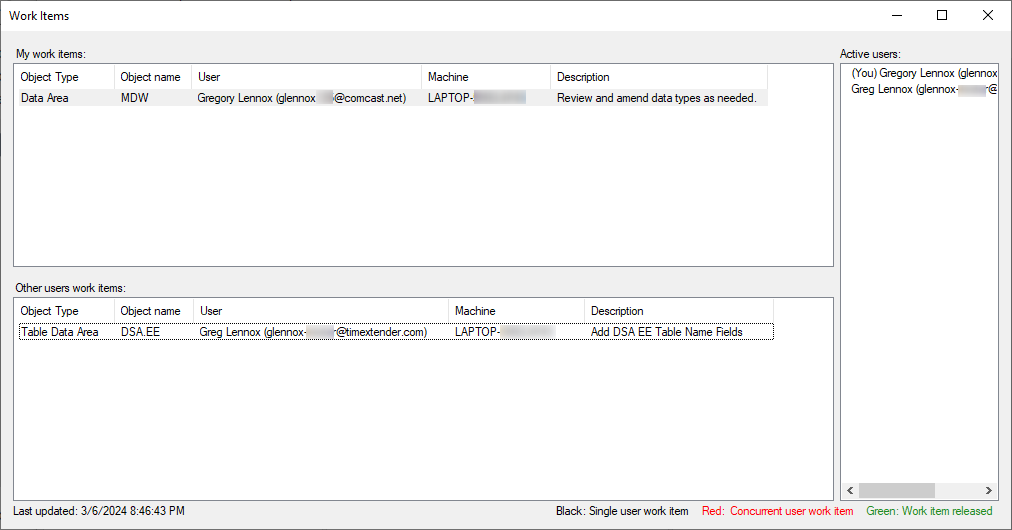
In order to understand all of the work items that are currently active, go to Tools->Work Items to open the following dialog that displays all of your own work items on top and all of the other work items for other users below.
Completing or Releasing Work Items
Work items are generally completed or released during the deployment of their associated object. During the deployment of a data area, the work items created by that user are listed below.
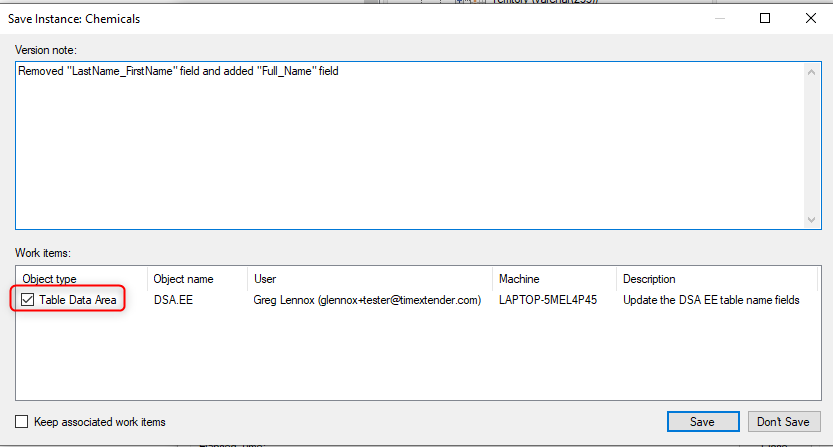
By checking the box next to a Work Item during a deployment, this work item will be associated to the new version of the instance or project that gets created as part of the deployment, which means that this new version contains the changes that were coded as part of that work item.
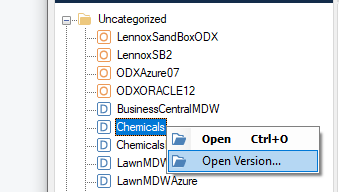
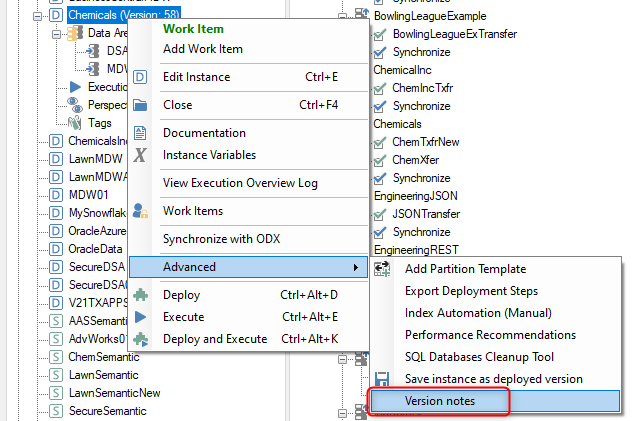
For TimeXtender Data Integration versions, the work items associated to specific versions are available in one of the two following methods:
- Open Version dialog. Close the instance if it is already open, then right-click on the instance and select Open Version.
- Advanced->Version Notes. Right-click on the Instance, select Advanced, and then click on Version Notes.
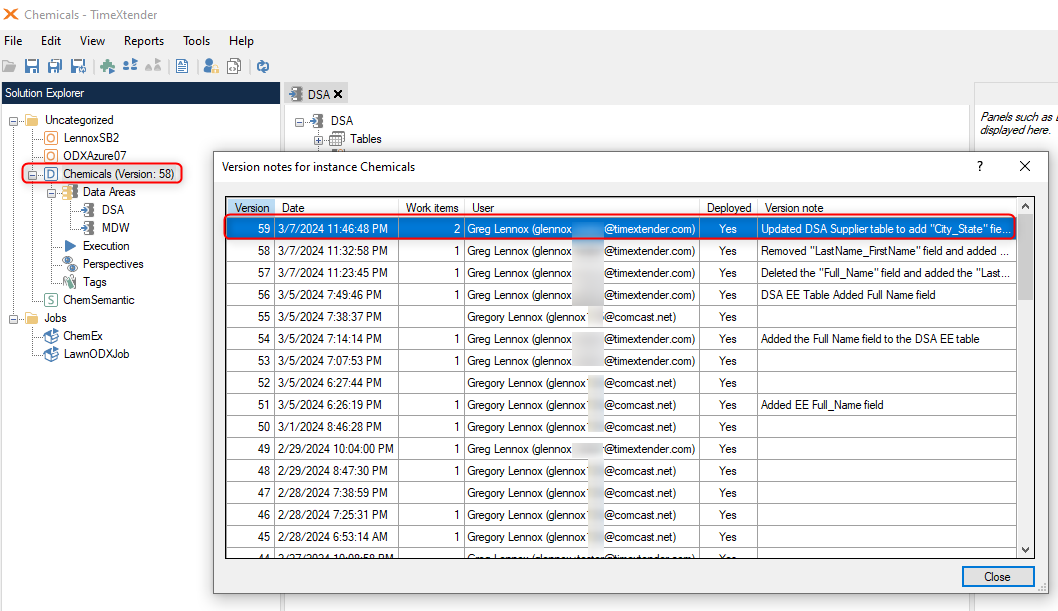
In the following example, there is a deployment that had 2 work items associated with it.
Click on the Version note column field for that particular version to view the Version Deployment screen that lists out the deployment details, including the two work items and their descriptions, which may contain additional information on the development work that was performed.

Coordinating Versions and Associated Work Items.
Work items that are checked as part of a deployment are incorporated into that new version. After the deployment is complete, the user that performed the deployment will have open the new version of the product or instance that was just created by the deployment. However, other users that had the project or instance open during the deployment may still be on the previous version, and are therefore now a version behind. If one of these users goes to Tools->Work Items, they may see the other Work Items that were deployed by the other user as now released and displayed in a green font.

The screenshot above shows two released work items from a different user listed below while this user is on Version 173 of the Sandbox project. The fact that there are two released work items items listed below is an indication that a newer version of the project is available.
As shown above, the user currently is on Version 173 of the SandBox project, however, the Repository Administration dialog indicates that Version 174 is the most recent version of the project that has been saved.
Before beginning any new development work then, it is a best practice to open the most recent version of the product or instance. If you do not have any changes to save, then the most straightforward way to open the most recent project version is to simply close it and then reopen it.
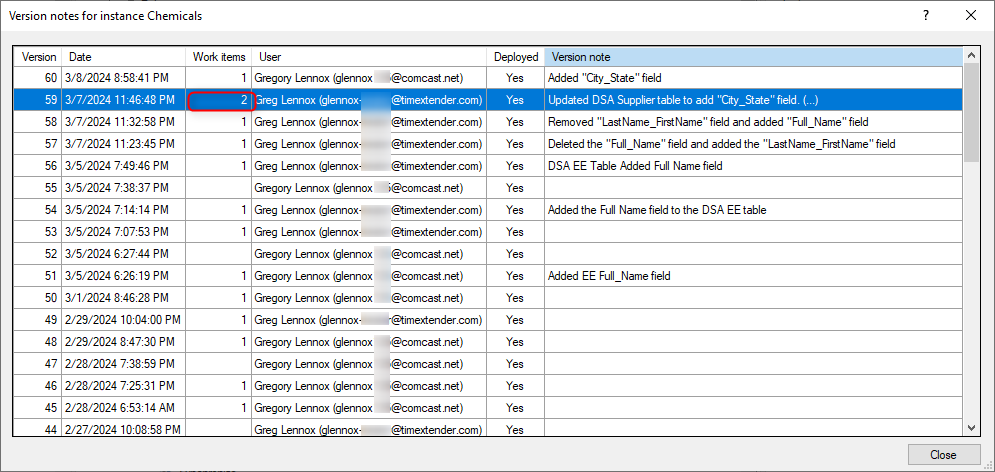
In the TimeXtender Data Integration, opening the Version Notes is an easy way to check whether a newer version of the instance is available.
In the TimeXtender Data Integration Version Notes shown above for the “Chemicals” Prepare Instance, we can see that Version 58 is currently open but there is a newer version 59 that is also available. If we do not have any changes to save, then the most straightforward way to open the most recent version of the instance is to close it and then reopen it.
Keep Associated Work Items
Work Items can be deployed without being released by clicking the Keep Associated Work Items check box during the the deployment
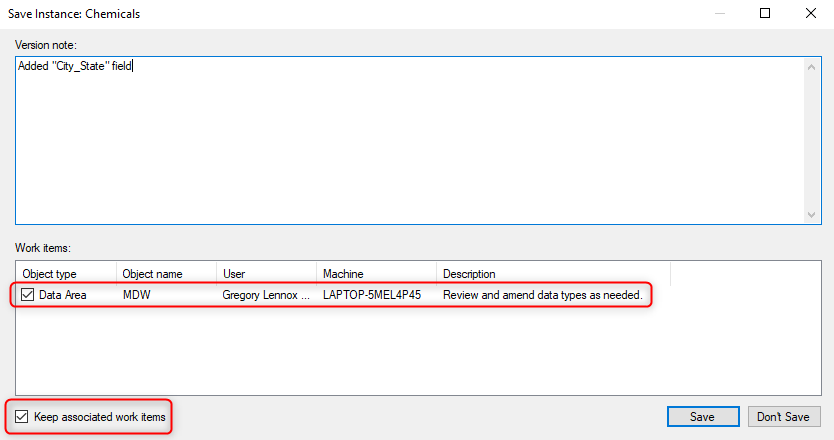
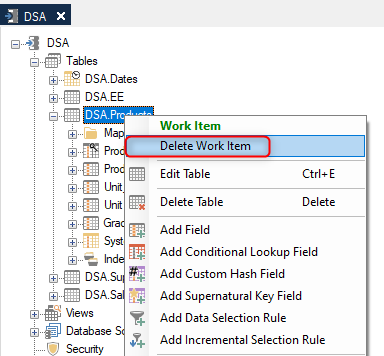
After the deployment is complete, the work item will still be associated with the data object so that additional development work can be completed until such time as it is appropriate to release it in a subsequent deployment, or perhaps simply delete the work item if it is no longer needed.
Repository Corruption Issue with Team Development
When one or more developers are working on the same instance or project, there is the possibility that one or both will save changes that will conflict or adversely impact the work of another, and a corruption in the project or instance is the result. The most common corruption error is the “Object reference not set to an instance of an object” null reference error.
To resolve this error, please submit a support ticket by emailing support@timextender.com.
Otherwise, users can consider the following potential workarounds that can be attempted on their own, which may or may not be able to resolve the error.
- Close the instance.
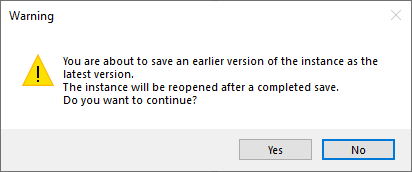
- Revert to an earlier version of the instance. By right-clicking the instance and selecting Open Version and selecting an earlier version.
- Confirm that the error is resolved in this earlier version. Then click Save.
- Click Yes to save the earlier version as the latest version.