Snowflake is a cloud-based data warehouse storage technology with automatic usage-based scaling of compute and storage resources. Additionally, Snowflake offers multi-cloud compatibility, allowing for greater flexibility in data management across different platforms.
Warning: TimeXtender currently only supports Snowflake accounts hosted on Microsoft Azure or AWS. When creating your Snowflake account, you must select Microsoft Azure or AWS as the cloud provider. GCP-hosted Snowflake accounts are not supported.
The following limitations apply when using Snowflake storage:
Ingest instance must use Snowflake or Azure Data Lake Storage with SAS authentication for storage
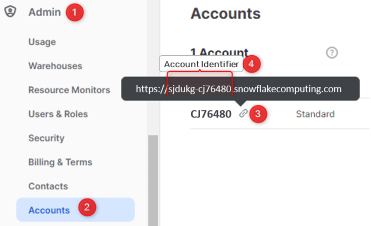
The Snowflake Account Identifier should look like this: <OrganizationID>-<AccountID>
To find the Account Identifier in the snowflake portal click
Admin >
Accounts >
Next to your account ID, click the link
Copy the subdomain of the URL, the portion between "https://" and the first "."
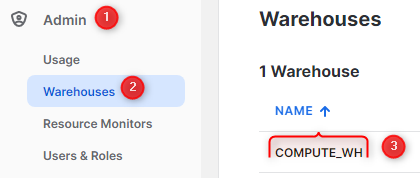
Find the Snowflake Warehouse Name
Admin > Warehouses
Copy the name of the Warehouse you wish to use
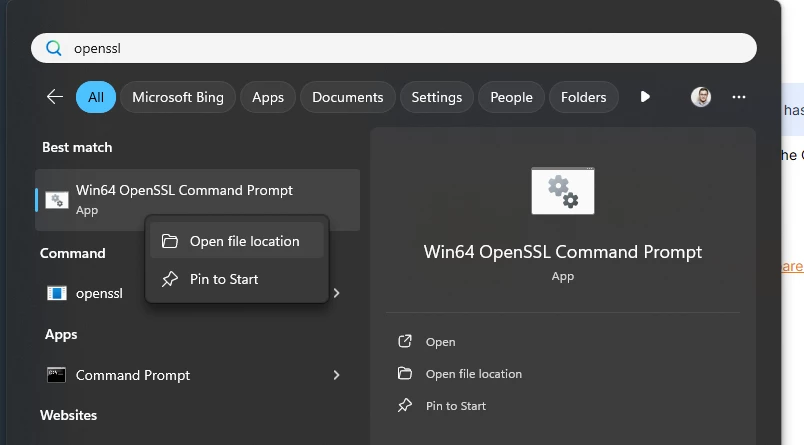
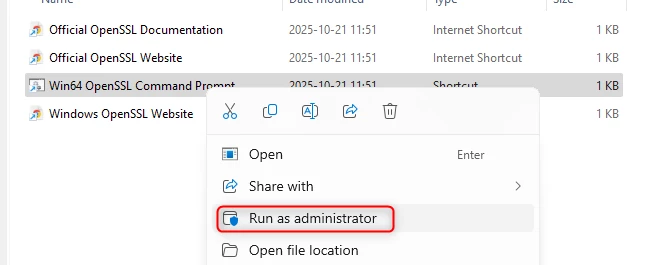
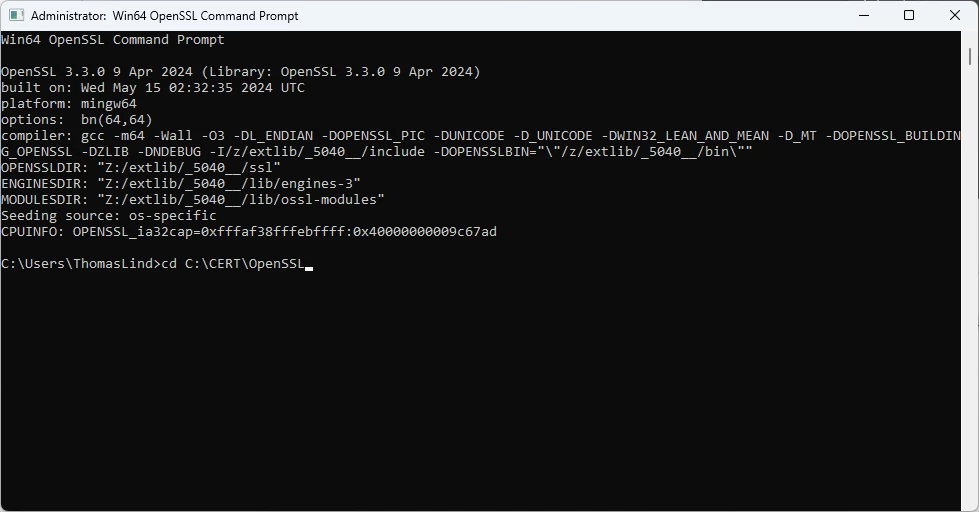
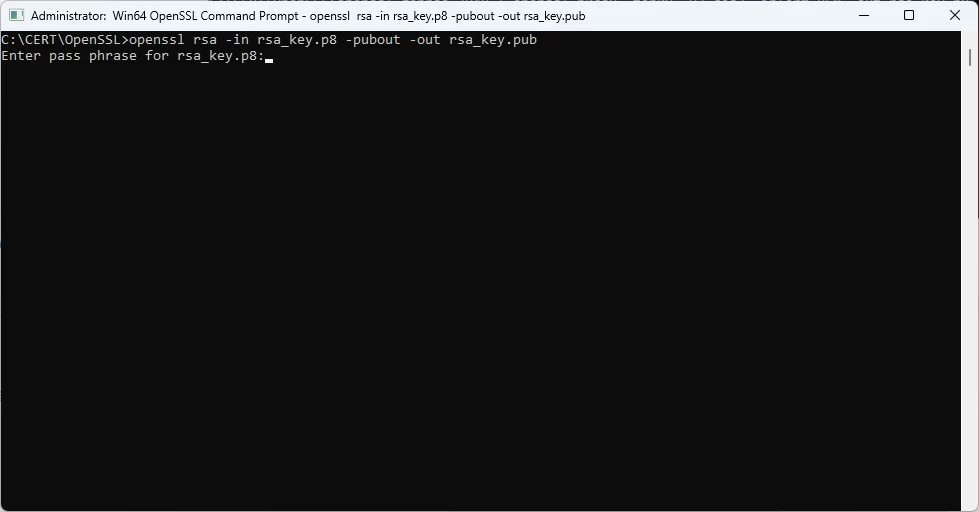
Setting up key pair authentication
Note: Authentication without Multi Factor Authentication has been deprecated, so you will need to use Key Pair authentication to gain access from the program
Add the password you created earlier to complete it.
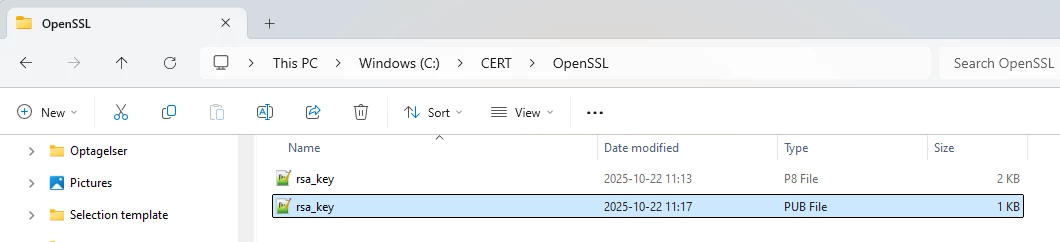
Now you have the two certificates. You can open both files with a text editor.
Create user account to use for Key Pair authentication.
Start by going to the snowflake portal. https://app.snowflake.com/. Log in to your account. Make sure you are able to create users, you may have to change the rights. In here go to Users & roles.
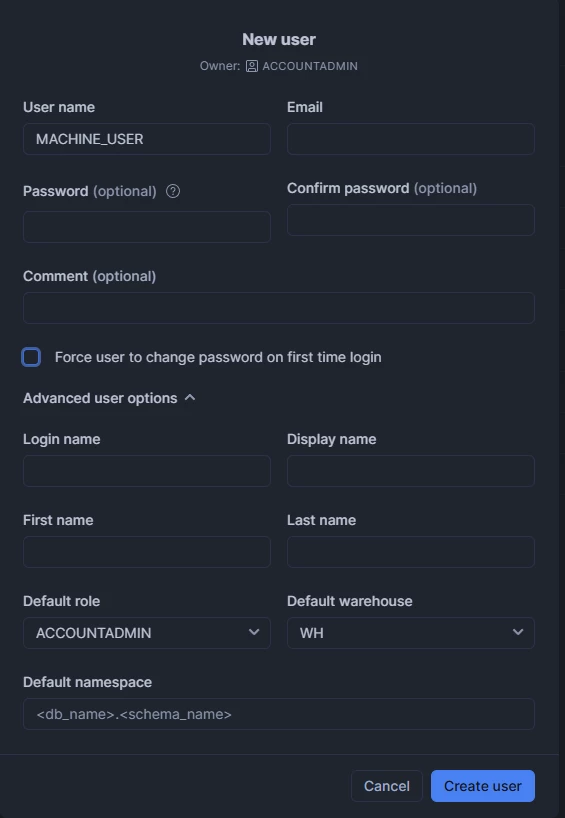
Add a user
I set mine up like so and called it MACHINE_USER.
Notice that I didn't add a password or checked the Force user to change password on first time login.
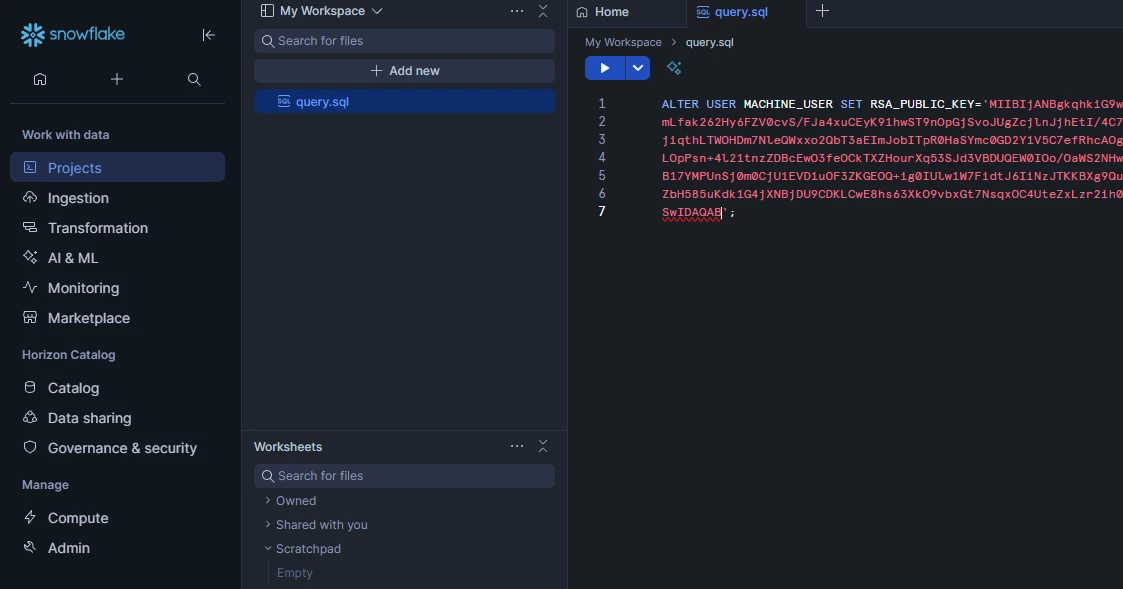
Now click on Projects. Create a new SQL file and give it a name. I called it query. I added the following query to make it use the public key for access. Do not add all the content, only the part after -----BEGIN PUBLIC KEY----- and before -----END PUBLIC KEY-----.
ALTER USER MACHINE_USER SET RSA_PUBLIC_KEY='content of the rsa_key.pub file';
Now you can use the MACHINE_USER account to authenticate your create and read commands towards Snowflake.
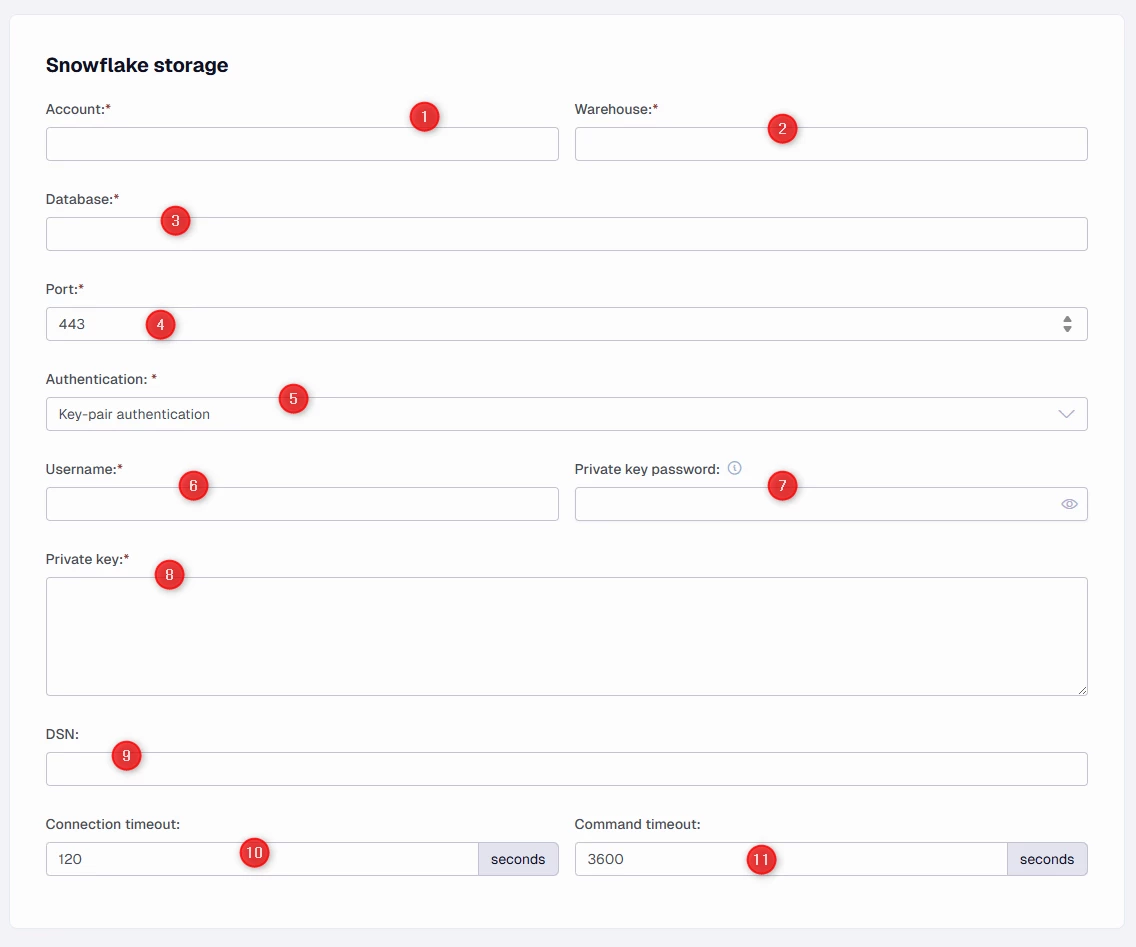
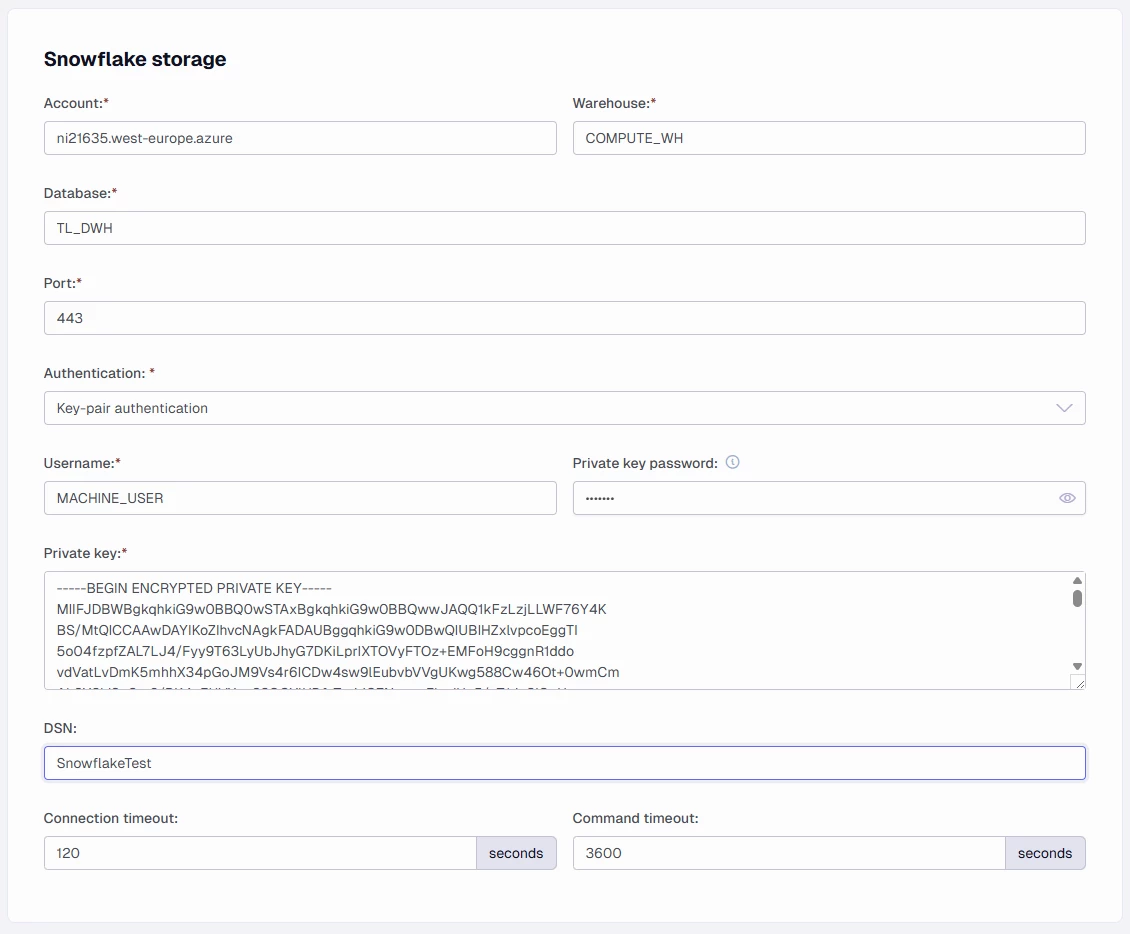
Set the Authentication type to Key-pair authentication or Username and Password.
Enter the Username you altered to allow the user to access using the public key. In my case the MACHINE_USER account shown in the above section.
Enter Password you created when you generated the private key.
Add the Private Key content. Add the whole thing from where it begins with -----BEGIN ENCRYPTED PRIVATE KEY----- to the end.
DSN will be explained in the Connecting to Tabular, Tableau and Power BI Endpoints from a Snowflake Prepare instance section.
Connection Timeout: number of seconds to wait before terminating the attempt to connect to the server. Set it to 0 to wait indefinitely
Command Timeout: number of seconds to wait before terminating a command. Set it to 0 to wait indefinitely
Configure SAS token for Ingest ADLS storage
Note: This section only applies if your Ingest instance uses Azure Data Lake Storage. If your Ingest instance uses Snowflake ingest storage, you can skip this step.
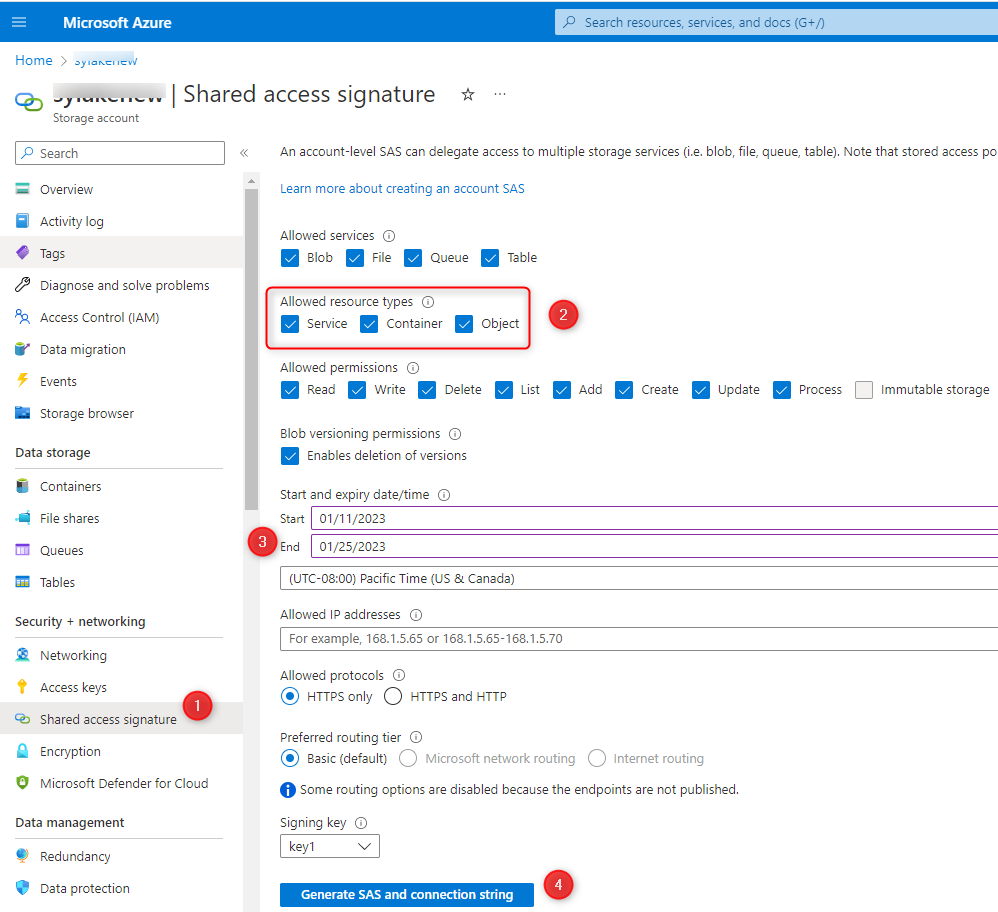
In the Azure Portal portal.azure.com > go to your ADLS resource, go to Shared access signature
Check mark Service, Container and Object boxes
Specify an expiry date
Generate & Copy the SAS token
Go to TimeXtender portal > Data estate > instances > Edit Ingest instance > Azure Data Lake Storage
Enter the full SAS token in the Azure SAS Token box
Connecting to Tabular, Tableau and Power BI Endpoints from a Snowflake Prepare instance
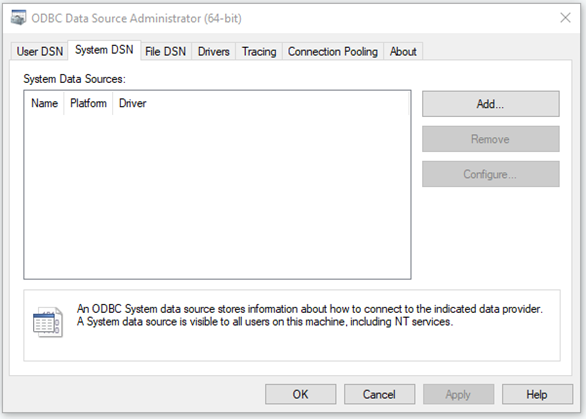
Open the ODBC Data Source Administrator Application and go to the System DSN tab
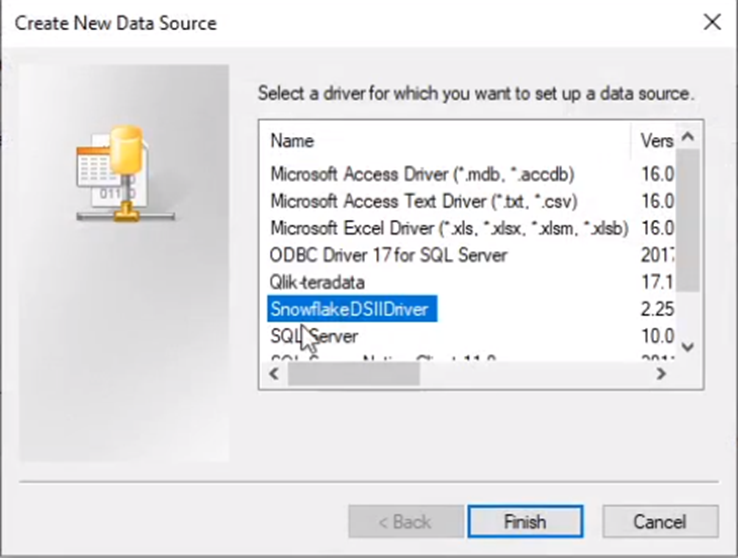
Press Add and select SnowflakeDSIIDriver. Click Finish.
In the Snowflake Configuration Dialog, provide a name for the data source, and enter the user and password that were created when you signed up for Snowflake. Specify the database, schema, warehouse and set Tracing to 0. Click Test to ensure the connection to the data source is successful. Press OK.
Select the Prepare instance with Snowflake storage in the TimeXtender Portal in order to edit its details.
Type the Data Source name, that was entered into the Snowflake Configuration Dialog, into the DSN field. Press Save to confirm.
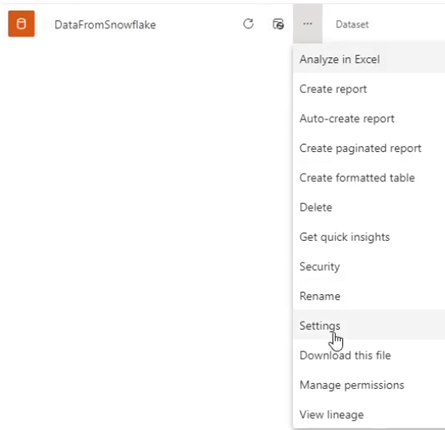
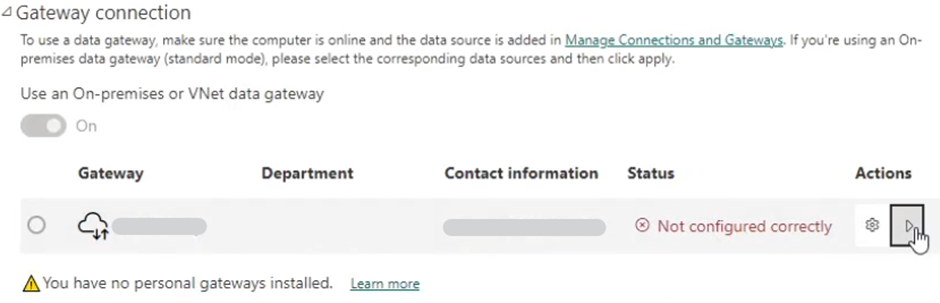
If using the Power BI endpoint, the ODBC Data source credentials must also be updated. After deploying the Power BI endpoint within TimeXtender Data Integration. Navigate to the dataset in app.powerbi.com, and click on the three dots, and select Settings.
Expand the gateway connection menu and press the action button.
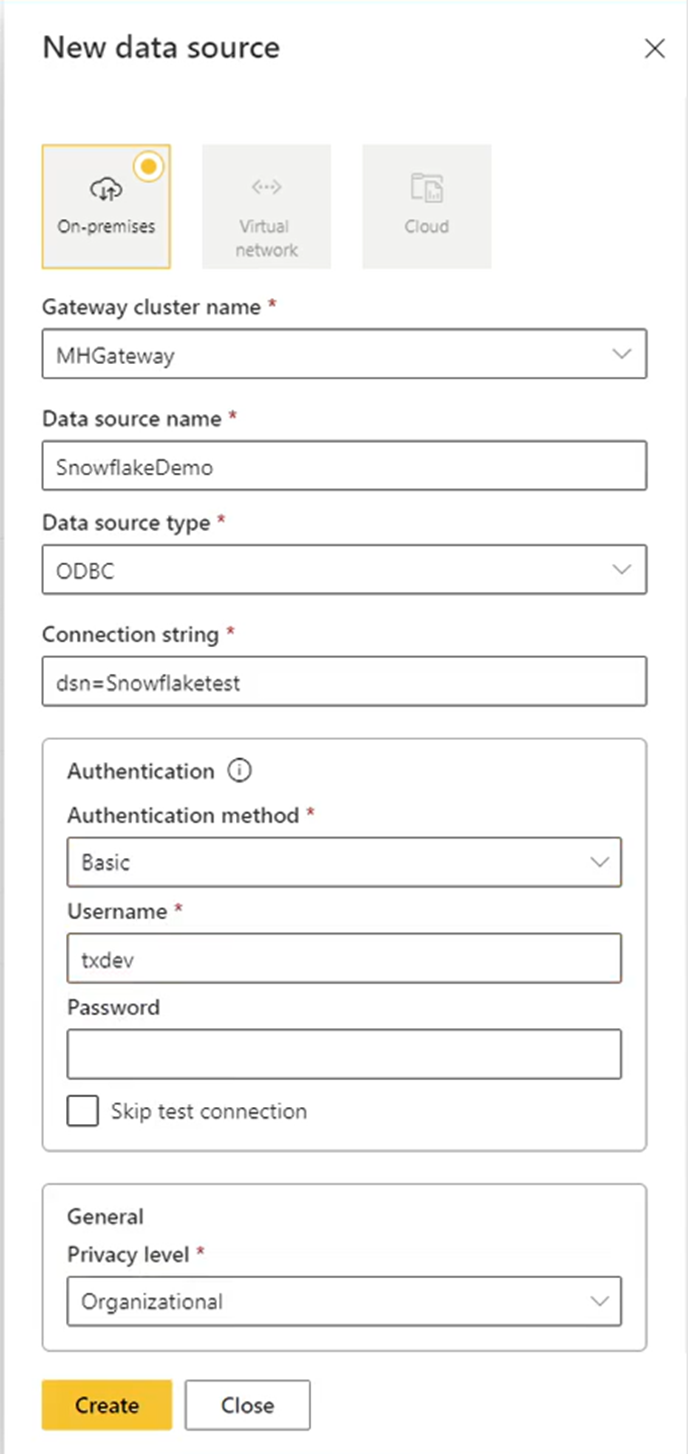
Click Add to gateway on the ODBC data source.
Provide a name for the gateway and the data source. Select basic authentication method and enter the Snowflake username and password. Press Create.
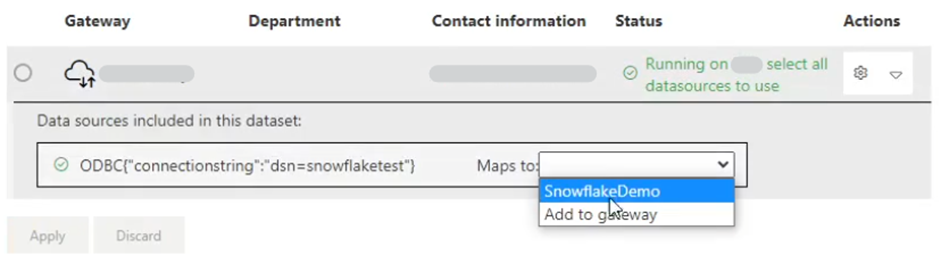
Expand the Gateway connection again and map the ODBC connection. Click Apply.
Troubleshooting
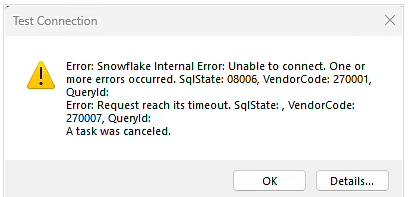
Unable to Connect
Error: Snowflake Internal Error: Unable to connect
Cause: The account name is incorrect.
Solution: Edit your Prepare instance in TimeXtender Portal to review and correct the account name, as described above.
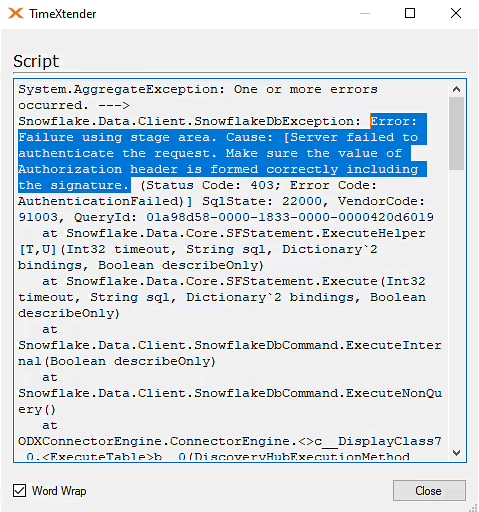
Failed to authenticate request
Error: Server failed to authenticate the request
Cause: Snowflake is unable to access the Ingest instance storage
Solution: If using Azure Data Lake for Ingest storage, verify the SAS token is configured with access to the folder in Azure Data Lake that you're pulling the data from. If using Snowflake ingest storage, verify the Ingest instance connection credentials are correct.
Execution Fails on Transfer task in Ingest instance
Error: SQL compilation error: syntax error line 1 at position 7 unexpected 'R'. syntax error line 3 at position 18 unexpected '('.
Cause: This error occurs if Incremental Load is used.
Solution: Set Table Settings to Full Load or Disable Incremental Rules on Data source in your Ingest instance and Synchronize your Ingest instance against your Prepare instance.
Locked User
Error: 'User temporarily locked'
Cause: This error may occur if the user is testing the connection 5 or more times with an incorrect password
What are the minimum privileges required for a Snowflake user to fully utilize all TimeXtender functionality if one doesn’t want to give the ACCOUNTADMIN access to TimeXtender?
Ref item 6. “Enter Username” in the “Configure Storage for Prepare Instance”.
Thanks for the key pair addition Thomas. In the part ‘Configure Storage for Prepare Instance’ , can you please add nr 5 where you choose the Authentication (that one is missing so you reach 10 instead of 11).