The Question
The following is a use case where we have two dimension tables that have no join between them and we need to create a list that is combining the values from two different columns and includes all the different combinations. The following example may help clarify the purpose of this column.
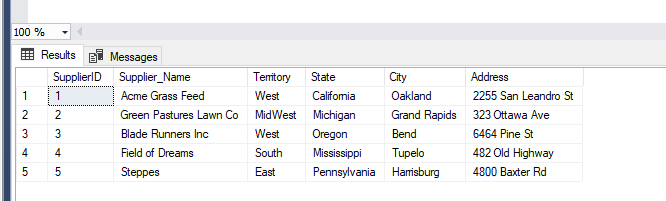
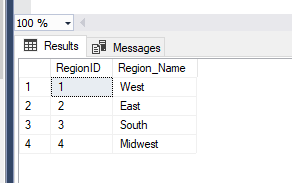
We have the following two different dimensions with no join between them.
Dimension One: Suppliers
Dimension Two: Regions
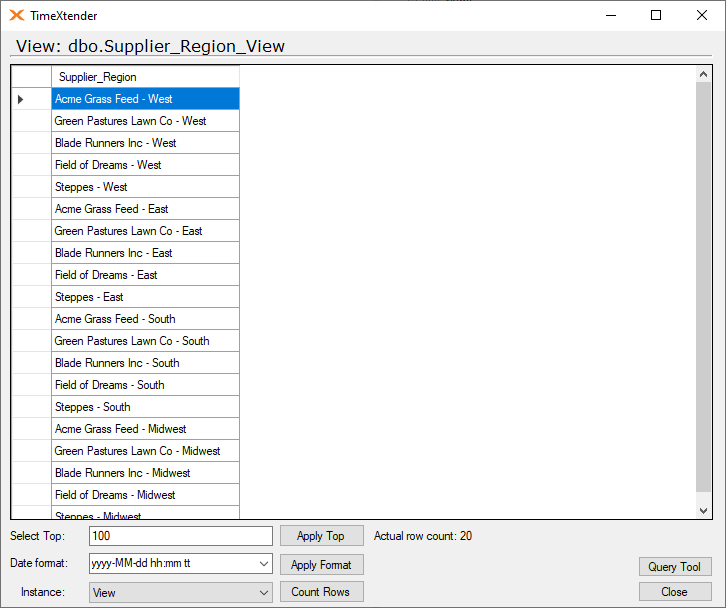
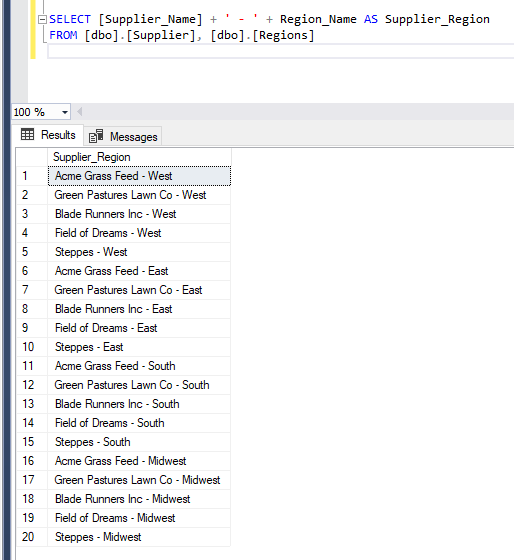
The new column would combine the Supplier_Name with the Region_Name separated by a hyphen. For each Supplier then, there will be 4 different entries, one for each of the regions, i.e. “Steppes - East”.
The following SQL Statement will accomplish the desired result:
SELECT [Supplier_Name] + ' - ' + Region_Name AS Supplier_Region
FROM [dbo].[Supplier], [dbo].[Regions]
Another example of this could be create all combinations from a set of Account Numbers concatenated with some dimension ID value to create a reporting dimension.
In this example, the first Account Number dimension value is:
1410
And a list of the values from the second dimension are:
10
20
30
40
50
60
Combining these two dimension values into one column that has rows for all of the different combinations between the two columns would look like the following:
1410-10
1410-20
1410-30
..
1410-60
The Solution
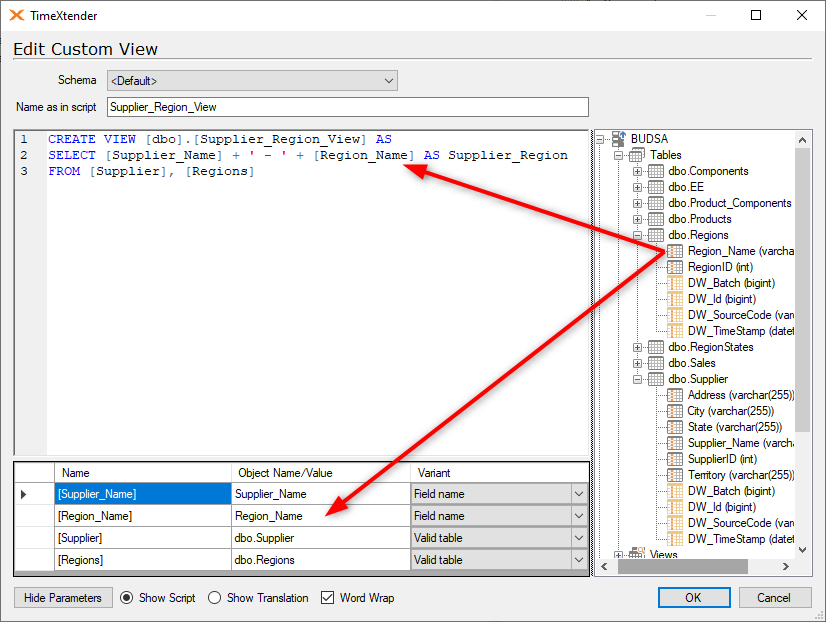
The most straightforward solution would be to create a Custom View using the following syntax.
CREATE VIEW [dbo].[Supplier_Region_View] AS
SELECT [Supplier_Name] + ' - ' + [Region_Name] AS Supplier_Region
FROM [Supplier], [Regions]
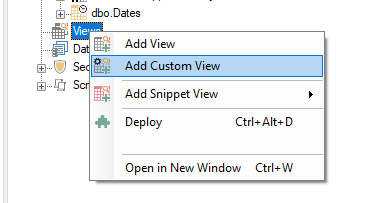
To Create a Custom View, right-click on Views and select Add Custom View.
In the Custom View dialog, parameterize your fields and tables by dragging them over from the right-hand pane.
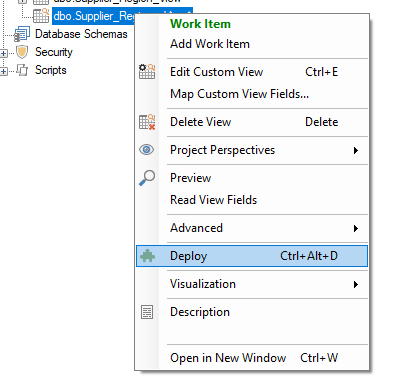
Once your view is created, right-click on the view and select Deploy.
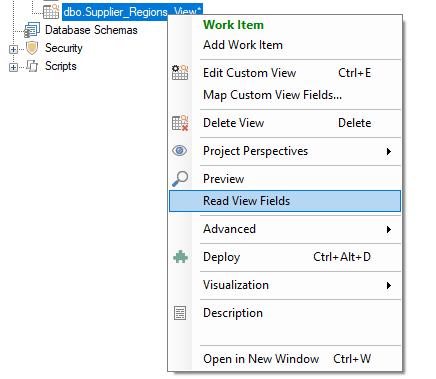
If the View deploys successfully, right-click on the View and select Read View Fields.
You will then be able to right-click on the view and select Preview to see the results of the create view script, which appears similar to the following in this example.