Execution of the tables performs all the steps needed to transfer and cleanse the data into the tables that have already been deployed.
“Deploy and Execution” are two separate processes that are commonly performed one after the other via the “Deploy and Execute” command, and together these two processes are used to create and populate tables in the SQL database.
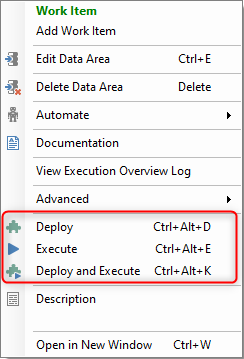
However, Deploy and Execute are different processes that can be run separately, and each process has its own options and circumstances.
After data area changes have been deployed, then the execution of the table can be performed to transfer and cleanse the data. Click on the following link for more information on deploying tables.
Execution of tables
The following describes Executing tables in detail.
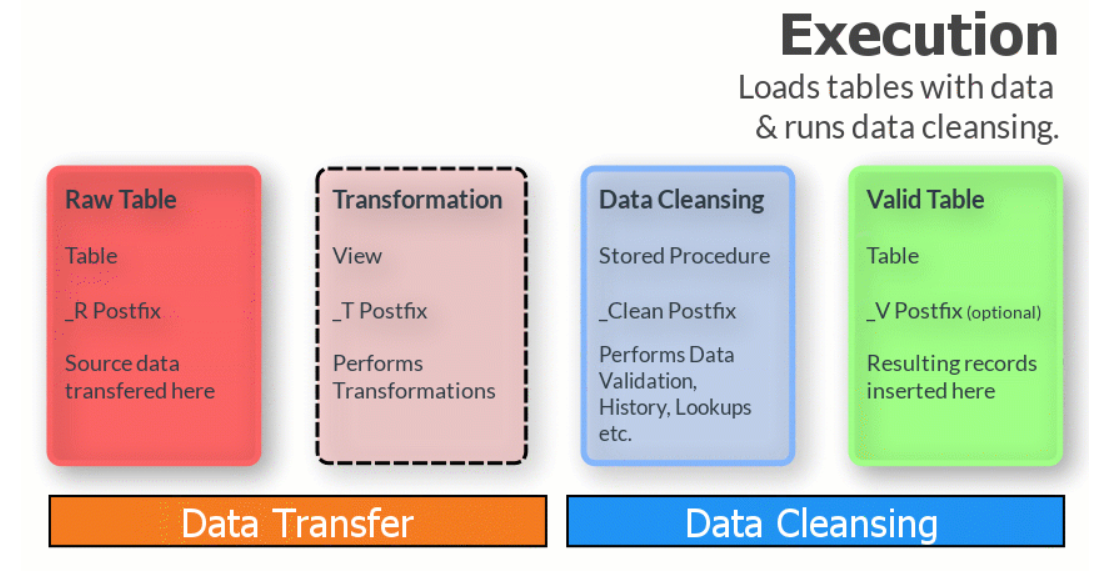
Execution is the process of loading data into the selected area using the following steps:
- By default, TimeXtender Data Integration will truncate the Raw Table, unless this setting has been disabled, which can be done in the Table Settings -> Data Extraction tab.
- Transferring data from the Ingest instance storage to Raw tables. Note that the data selection rules and the incremental loading rules will apply during bulk loading and transferring of data from the data sources into the destination areas. The actual transfer of the data will be performed using one of the following two methods.
- If the Prepare instance is configured to use an Azure Data Factory (ADF) to transfer the data from the Ingest instance, then the Azure Data Factory will be responsible for the data transfer. When several tables are being transferred as part of the execution, then the Azure Data Factory may employ the Data Factory Merge option to do all of the transfers in one step.
- When the Prepare instance is not configured to use an Azure Data Factory for the data transfer from the Ingest instance, then ADO.NET will perform the data transfer. Note that since ADO.NET is part of the server where TimeXtender Ingest service is running, then the state of that server may have an impact on execution performance.
- Transferring data from one Data area to the raw table of another Data area. Transfer of data from one data area to another is done using the Direct Read method, which is comprised of stored procedures transferring the data internally within the database.
- If enabled, Custom Data is inserted into the Custom Data table using the _CustomDataFill Stored procedure.
- By default, TimeXtender Data Integration truncates the Valid Table, which can be configured under Table Settings -> Data Extraction tab. Table truncation must be disabled if either of the following are enabled:
- Simple Mode.
- History.
- Incremental Loading.
- Processing data (Data Cleansing): Data cleansing is the process of validating data against the business rules, and then moving the validated data to the Valid table. Status information is generated at this point, and the specific processing steps include the following:
- Disable indexes on the Valid table.
- Process Incremental Loading.
- Process conditional lookups and insert values into the Raw table.
- Apply all transformations through the Transformation view (_T)
- Log violations of data cleansing rules for records in the raw table. These violations may include records that fail primary & foreign key checks as well as custom field validations. Violations are logged by inserting the DW_ID of the violating row in the List table (_L), which references the associated error message in the Messages table.
- Messages table (_M) - contains the error message or description of why each row in the List table was flagged is recorded in the
- Implement all functions as needed for enabling History.
- Load all records from the Transformation view into the Valid table.
- Rebuild table indexes as needed.
- Batch Data Cleansing may be helpful for large data sets, as it breaks the data cleansing steps up into batches. The following link has a more detailed explanation of this feature.
- Verifying data against checkpoints: The process of checking the data that is being processed against any checkpoints that may have been configured. Checkpoints are validation rules that will halt the execution process when the rules are not met. This feature can be helpful if it stops a problematic execution from overwriting the current data in the Prepare instance with non-valuable data. The following community post has some perspective on using this feature.
TimeXtender Data Integration supports managed and threaded execution, which means that TimeXtender Data Integration can execute a package in multiple threads while managing dependencies between the objects and optimizing the execution to complete in the shortest amount of time.
Setting up a default execution package to run with multi-threaded execution is one way to realize this performance optimization. The following guide has more information on setting up execution packages.
The Deploy and/or Execute dialog
The following dialog is displayed when clicking on either “Execute” or “Deploy and Execute” on either the Table level or on the Prepare instance level.
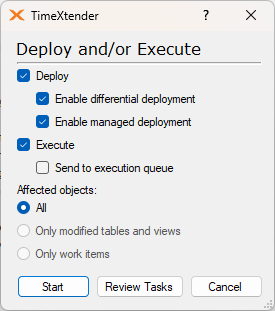
In the Affected objects section, only the “All” option is available, which means that all the objects in the data area will be executed.
Conversely, the Affected objects area will have more options available when selecting to “Execute” or “Deploy and Execute” on a more specific object, like a table located in a data area.
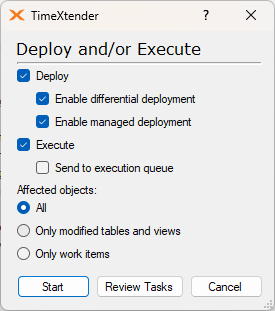
In this scenario, the Affected objects section will now have two more options available and the following is a description of all three options:
- All
Will execute all steps in the selected area.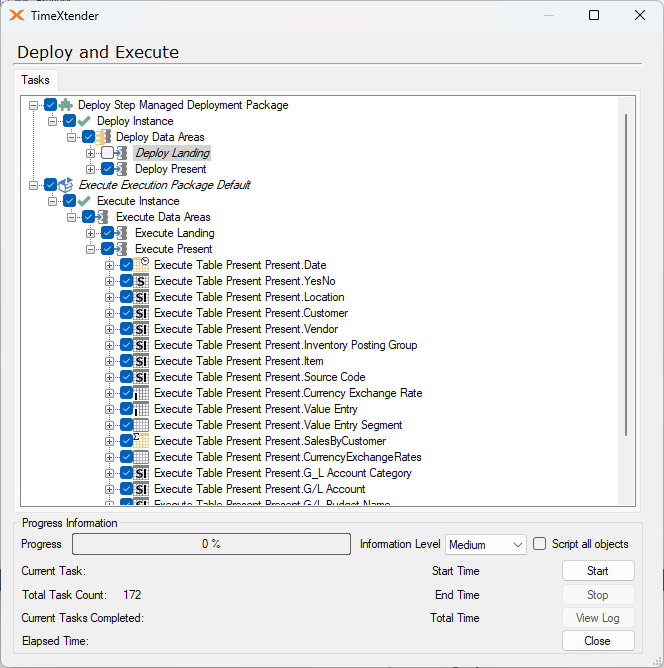
- Only modified tables and views
Will execute only those steps that are required for deployment. This option works best when both Differential and Managed deployment is chosen, as the exectution will only select those tables necessary for the execution.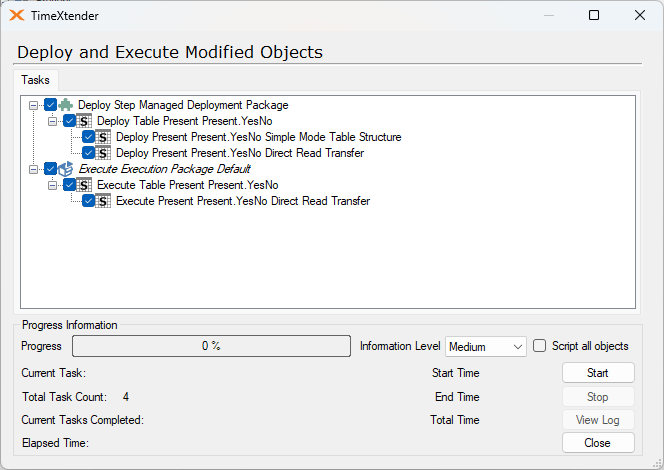
- Only work items
Only those objects that are work items will be executed.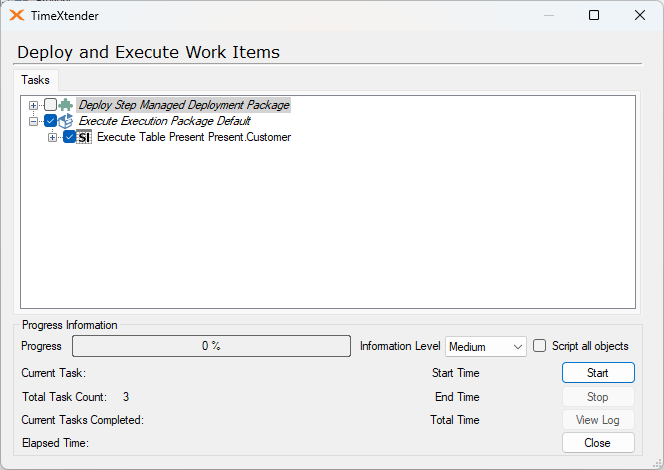
In the screenshot above, the Customer table is a Work Item and even though another table may also need to be deployed as well, this execution option will only attempt to execute those objects that are added as Work Items.
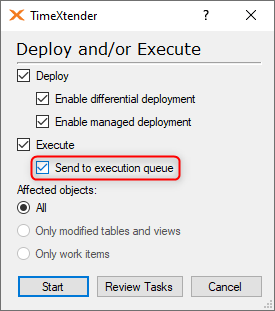
The Send to Execution Queue option allows users to push the execution to the execution queue, which means that users can continue to work while the package is being executed. See the following section for more information on this feature.
Executing objects with the Execution Queue
The Execution Queue enables users to continue working while the execution of tables or the entire instance is performed in the background.
Use the following steps to open the Execution Queue window.
- Start an execution and check the Send to execution queue box in the Deploy and Execute dialog.
- On the Tools menu, click Execution Queue.
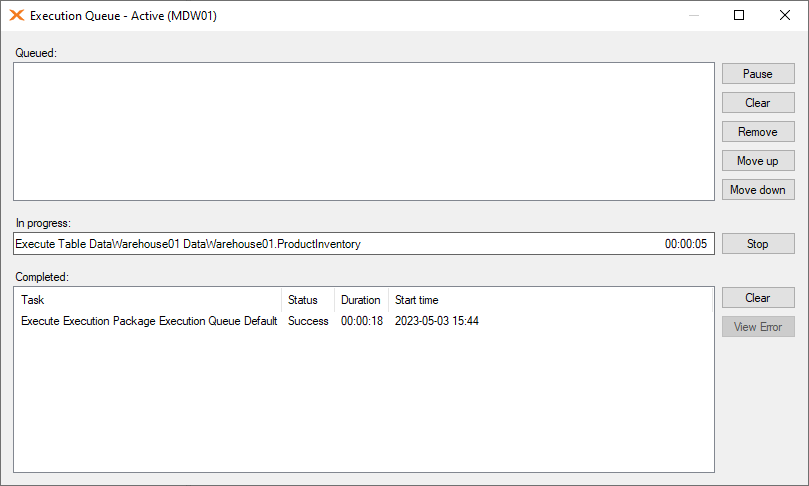
Adding an object to the Execution Queue
Adding an object to the Execution Queue is a simple drag-and-drop operation.
- Drag-and-drop a table, a perspective, an execution package, or another type of executable object to the Execution Queue window. After the object has been dragged to the Queued area, a new window will appear that will allow users to select which execution steps for the object will be added to the queue.
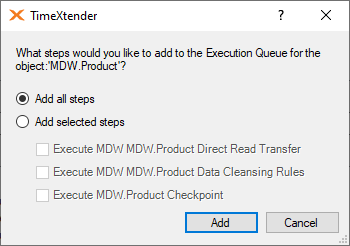
- Select Add all steps, or Add selected steps and choose which steps you would like to added to the queue. Click Add button when finished.
- The object is now queued up in the Execution Queue. If there are no other items in the queue, the object will immediately be moved to In Progress and begin executing.
-
The Execution Queued mode can be paused using the Pause button, which acts like a tobble between Pause and Resume. Pausing will prevent further objects from being executed but does not stop an object that is currently in progress. Pressing the Resume button will resume executing the queue.
Pausing and resuming the queue
The Execution Queued mode can be paused using the Pause button, which is a toggle button that changes to Resume after pausing the execution mode. Pausing will prevent further objects from being executed but does not stop an object that is currently in progress. Pressing the Resume button resumes executing the queue.
Moving and Removing Queued Items
The Queued list shows the items waiting to be executed.
The queued objects can be moved up and down in the list by selecting the item and using the Move up and Move down buttons. The top item in the list is the next to be executed.
An object can be removed from the list by selecting it and clicking Remove. Clicking Clear removes all the items from the list.
Stopping Current Execution
In Progress shows the object currently being executed. Pressing Stop halts the execution of the object and pauses the execution of the queue.
Removing executed items and viewing errors
The Completed list shows the objects that have been executed, and lists out the Status of each individual items, including the Duration and the Start Time. Completed items can have one of three statuses:
- Success: The object was executed without errors.
- Failed: The execution was ended prematurely by an error.
- Stopped: The execution was stopped by the user before it was completed.
Select a failed task and click the View Error button to open the Error Message box and review the related error information.
Closing the Execution Queue Window
You can close the Execution Queue window by clicking the X in the top right corner.
Closing the Execution Queue window or closing the entire instance does not stop or pause the execution of any queued objects. It only hides the window, and the Execution Queue will continue working in the background. Open the Execution Queue window to review the status of queued objects or to add more objects to the queue.
When you close TimeXtender Data Integration, the Execution Queue will be stopped along with the rest of the application.
Guard on Execution
The Guard on Execution option can prevent a table from being executed. This option can be enabled in the lower left of the Table Settings dialog.

Attempting to execute a guarded table may appear to start running, but once completed, the following “Is Guarded” message will be displayed.
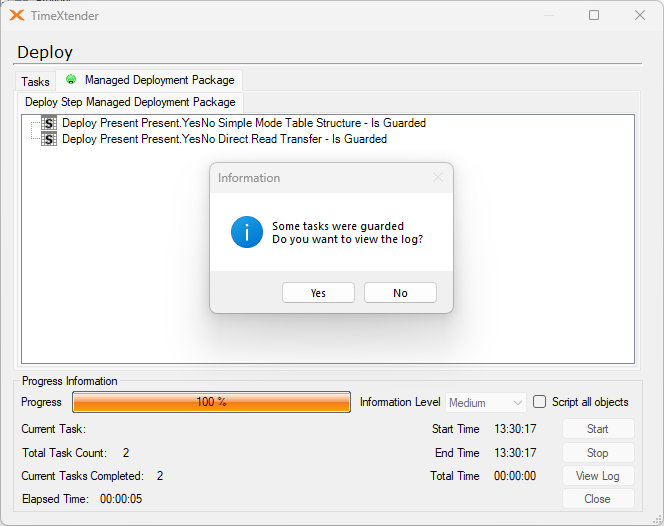
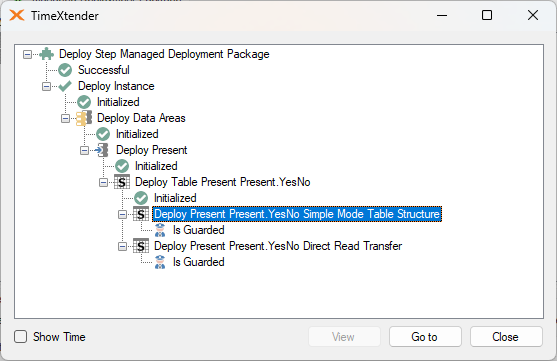
Guarding tables prevents them from being deployed and executed, which can be help avoid losing data that should not be overwritten or may no longer be available in the data source.


