


In this dimension walkthrough, you will learn how to create a dimension that connects a salesperson's id and a salesperson's name in TimeXtender Orchestration and Data Quality. This connection is made with the database AdventureWorks.
Create your dimension
- Open TimeXtender Orchestration and Data Quality
- On the left side, you see a tree list.
- Expand the node General
- Right-click the Dimensions node
- Select New... and then Dimension
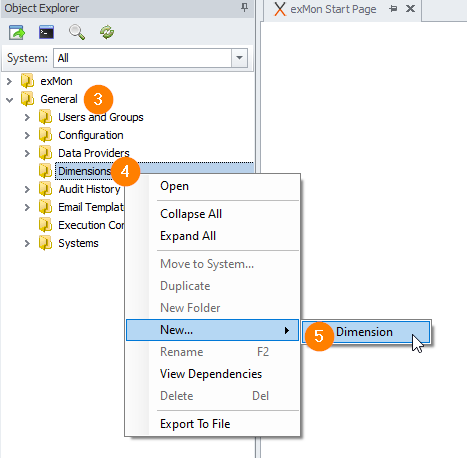
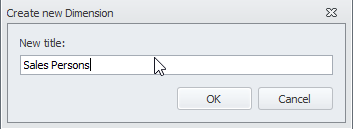
- In the popup type Sales Persons
SQL query
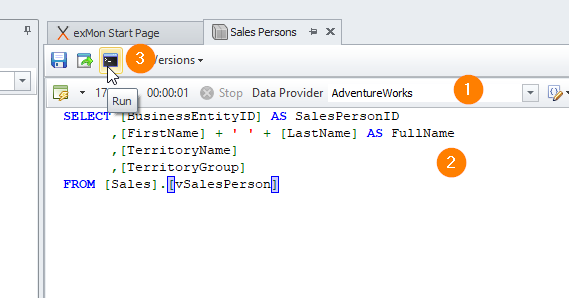
Our dimension interface should now be open, so our next job is to create a SQL query that returns a row for all our salespersons, both their id as well as their name.
- Select the data provider AdventureWorks
- Paste the following SQL query into the textbox
SELECT [BusinessEntityID] AS SalesPersonID
      ,[FirstName] + ' ' + [LastName] AS FullName
      ,[TerritoryName]
      ,[TerritoryGroup]
FROM [Sales].[vSalesPerson] - Run the SQL query either by pressing F5 or clicking the run button
Note: It is important that the ID is unique
Business Key & Business Value
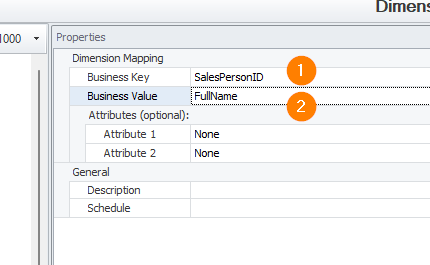
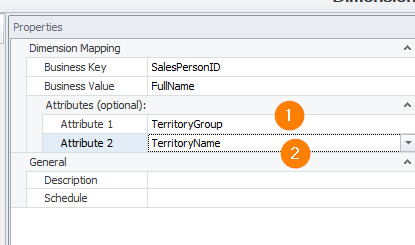
Next, we want to connect the ID and name of the salesperson together. We do this by setting the SalesPersonID column as our business key and the FullName column as our business value.
- In the properties window on the right, select SalesPersonID as the business key
- Select FullName as the business value
Now each time our dimension has been executed a connection is created between the business key column and the business value column.
Dimension Attributes
Dimension attributes are filters that allow the TimeXtender Orchestration and Data Quality portal to organize our business keys into a tree list. They are optional, but if you have access to columns such as salesperson‘s store, country or even continent, setting them as attributes can increase the dimension‘s readability.
- In the properties window on the right, select TerritoryGroup as Attribute 1
- Select TerritoryName as Attribute 2
Final Steps
Now the final step before our dimension is in production is to deploy it.
- Save and click the Deploy button
- If the Test environment is enabled, select the correct deploy environment
- Write a comment detailing the changes being deployed
- Make sure to check Sales Person in the popup and click Deploy

