In this article, you will read about importing data from CSV files (comma-separated values) and TXT files with fixed column width into Data Enrichment. In this example, we have a CSV file with three columns, a header row and two data rows.
Creating a table
- Open Data Enrichment and click Create a table
- Select Empty table
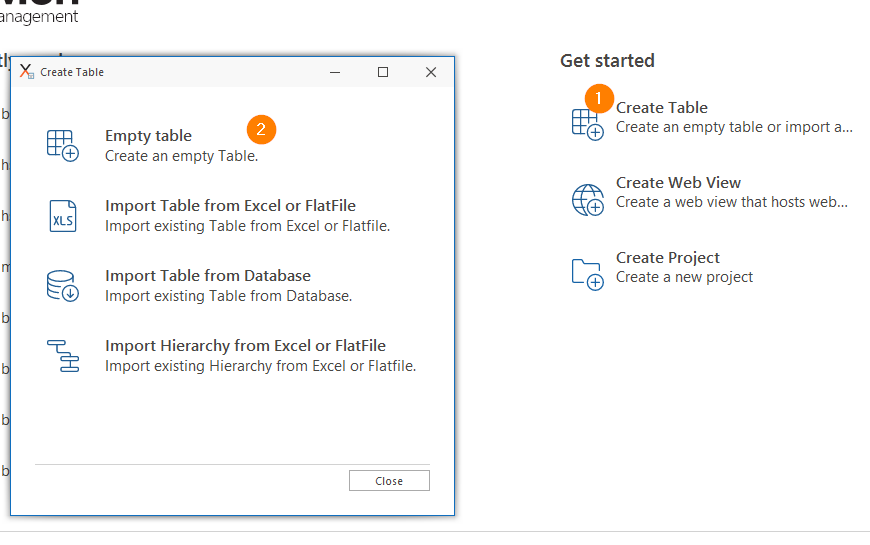
- Name the table Customers
- Click on Table Designer
- Click Add and name the first column ID
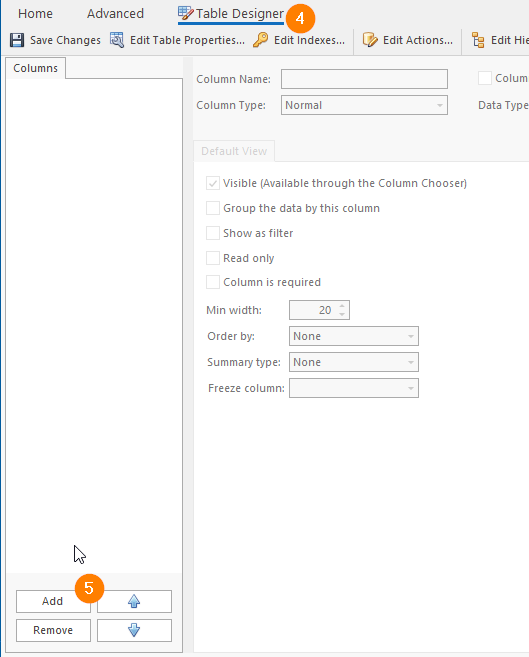
- Repeat step 5 for the columns Name and Contact
- Click the Home tab and add in the following dummy information
ID Name Contact A Andy andy@duck.com B Buzz buzz@duck.com C Jesse jesse@duck.com
Importing a CSV file
- Click Import Data

- A dialog opens to select the data source.
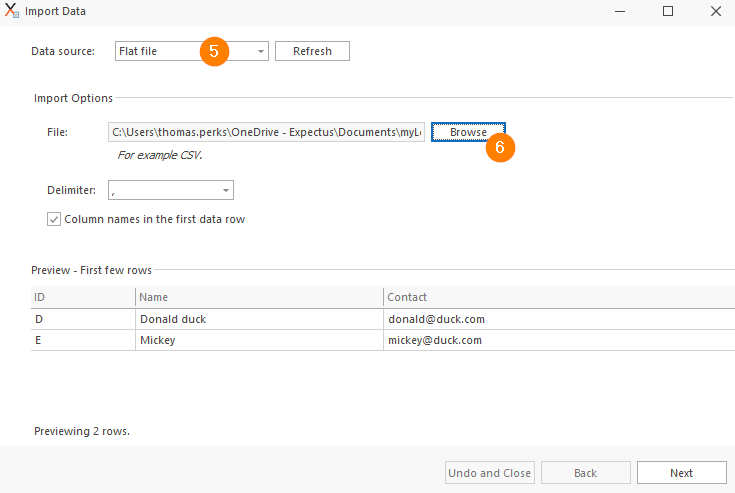
- In Data source select Flat file and then Browse to find your CSV file.
-
A dialog opens to select the data source.
-
In Data source select Flat file
-
Then Browse to find your CSV file.
-
You can choose or override the Delimiter and if your data uses the first row as column names.
-
When changing the selection, the preview below displays how Data Enrichment will interpret the data.
-
When you are ready, click Next.
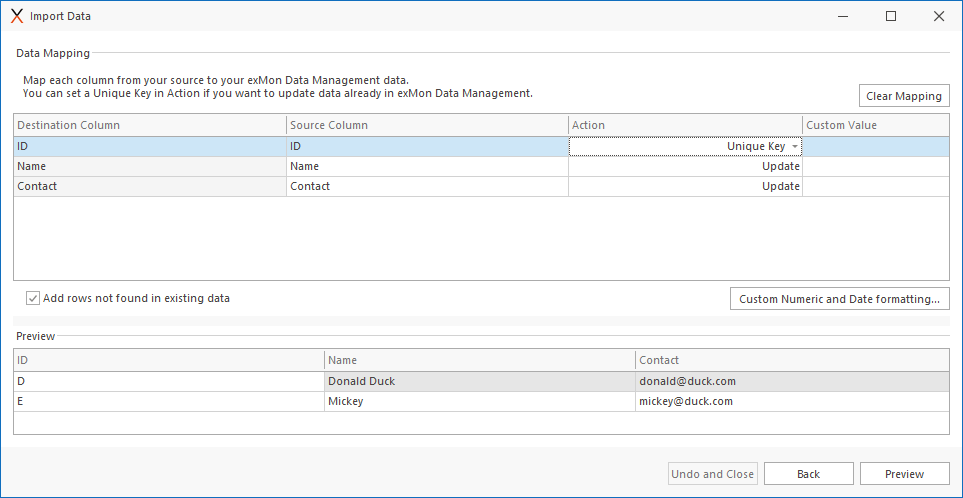
For each destination column (column in the Data Enrichment table), select a column from the CSV file. If the column names in the CSV and the Data Enrichment table are the same, then the mapping will be automatically filled out.
This step allows you to map columns from the CSV file to the table in Data Enrichment.
Below you can see a preview of the data and how the import will map the data.
Fixed width files
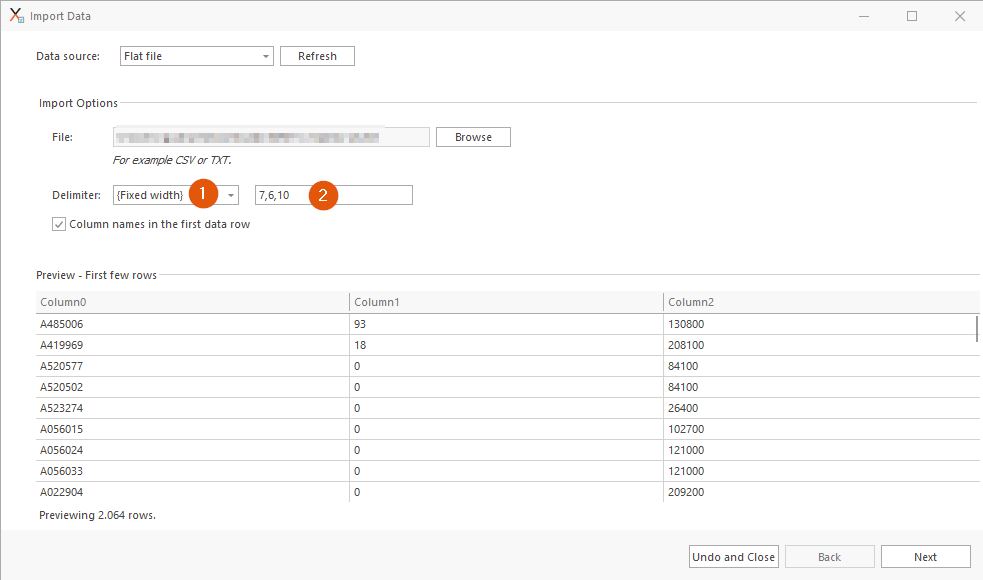
If your file is not separated by a delimiter, but has fixed width columns you can configure the import by:
1. Selecting Fixed width in the Delimiter dropdown.
2. Inserting the correct size of all the columns, separated by a comma, in the text editor.
What is the Source Column?
For each destination column you have three options:
- Select a column from the CSV file.
- Fixed: A predefined value for all rows. When selected you will enter the value in Custom Value.
- [None]: The column will be left empty.
What is an Action?
After mapping the columns you will need to select an Action for each column. The import can either add rows from the CSV or find existing rows and update attributes when found. For example, if you are importing a customer address list you might want the import just to find the customers in Data Enrichment and update the addresses.
The Action determines the behavior for the import.
- Unique Key: This means that this column is what makes the row unique. For example, the customer id or product id. You can select multiple columns as the Unique Key.
- Update: The data in the Data Enrichment table will be updated with data from the CSV.
- Ignore: The column is ignored during the import. It's the same as selecting Source Column as None.
Add rows not found in existing data
When using Unique Key the import will try to find matching rows in Data Enrichment when importing. This option is to change behavior when the import does not find a row from the CSV. When unchecked, the import will not add new rows, only update existing rows.
Custom Numeric and Date formatting
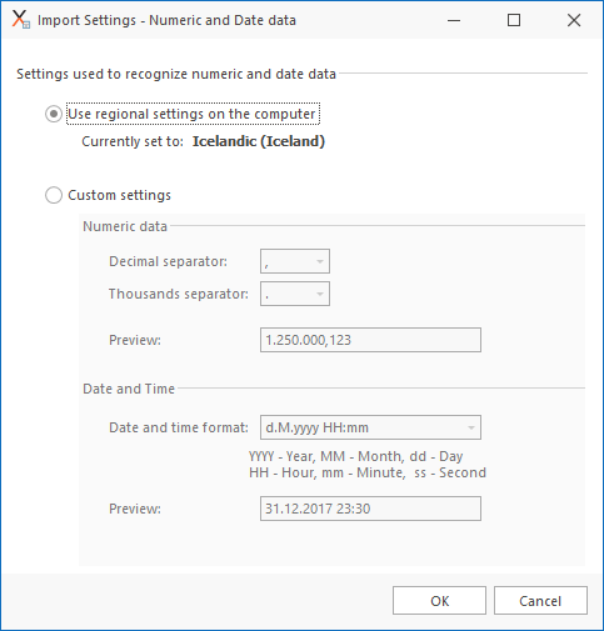
When importing CSV with numbers and dates, Data Enrichment assumes that the number and date format is the same as regional settings in Windows. When working with CSV from external sources this is often not the case.
You can override both numeric and date formats using this dialog.
When you have chosen all the mapping options, click Preview to preview the import.
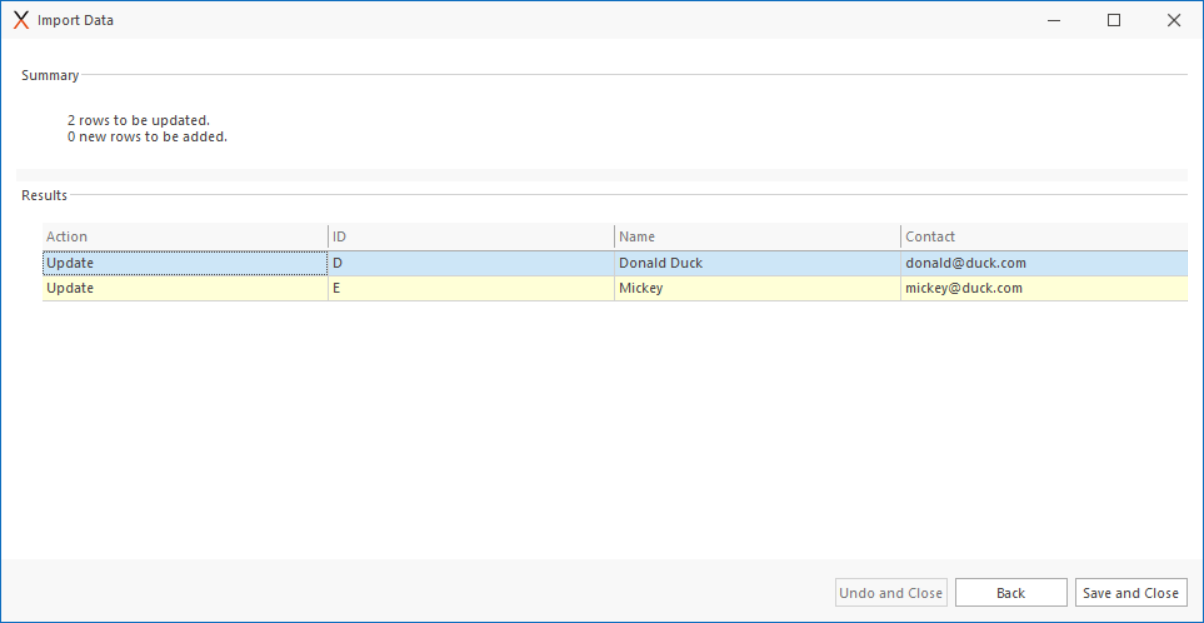
The preview window will show the results of the import. At the top, there is a summary of the import and below each row of the import is displayed.
If there were any errors during the import they will be displayed in this dialog.
When ready, you can click Save and Close to apply the import.
Note that you have not made any changes to the Data Enrichment table until you click Save. When Save and Close has been clicked Data Enrichment will suggest the correct size for string columns depending on the longest string in each column which you can change in the 'Format & Size' tab in the Table Designer if you prefer it differently.
