


TimeXtender provides the flexibility to connect to many different data providers, and there may be times when new fields have been added to a data source after that data source has been configured in the ingest instance and tables from that data source have been mapped into a Prepare instance data area. This article clarifies the steps needed to update both the ingest instance data source and the Prepare instance table to include this new field.
The steps outlined below include screenshots of an SQL Server database source as an example, where an additional column called “Manufacturing Supplier” is added to the “LawnProducts” table.
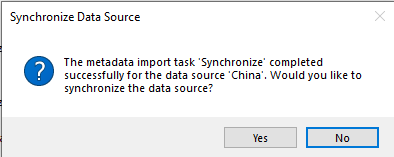
- Execute the import metadata task for the data source and then click Yes to the prompt asking if you would like to synchronize the data source. Alternatively, right-click on the Ingest Instance data source and click on Metadata Manager and then click Synchronize Metadata
- Check the Included checkbox for the field you wish to include, then click OK and commit changes
- Right-click on the Ingest Instance and select Synchronize (<Prepare Instance Name>) or Synchronize with Remapping (<Prepare Instance Name>)
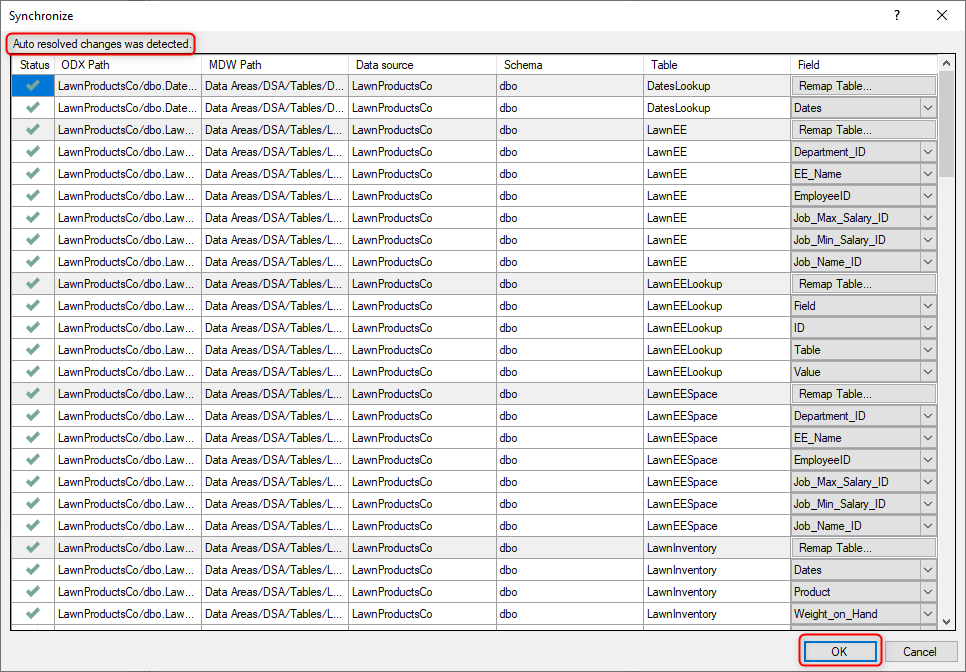
- In the Synchronization table that is displayed next, a message may appear in the upper left status bar stating that “Auto resolved changes was detected.” Click the OK button on the lower right to apply these changes.
- Execute the Transfer task under the data source.

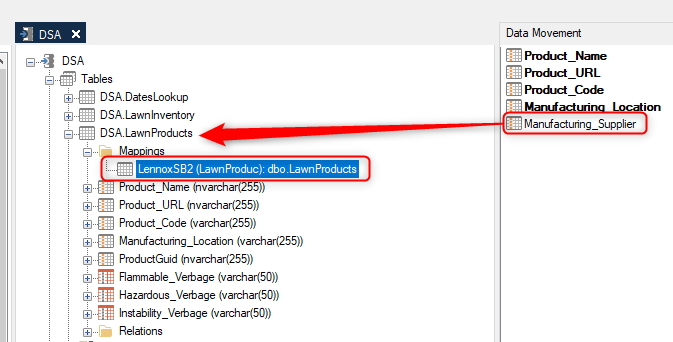
- In the Prepare instance data area, expand the table that should contain the new field. Expand the Mapping folder underneath this table, and then click on the mapping itself that will then open the Data Movement pane on the right. The new field should now be available in the list of fields and greyed out since it has not yet been added to the table. Click and drag the field onto the Prepare instance table to add the new field to the table.
- Right-click on the Prepare instance table and select “Deploy and Execute” to apply the new field.


