Cloning of a TimeXtender Data Source can be done in either the TimeXtender Portal or in the TimeXtender Data Integration, however the result of the cloning action is different depending on where it is performed. Therefore, the purpose for cloning the data source usually determines whether cloning is done in either the TimeXtender Portal or the TimeXtender Data Integration. The following clarifies the differences between these two types of cloning and provides use cases to illustrate the benefits of each.
Clone a data source connection in the TimeXtender Portal
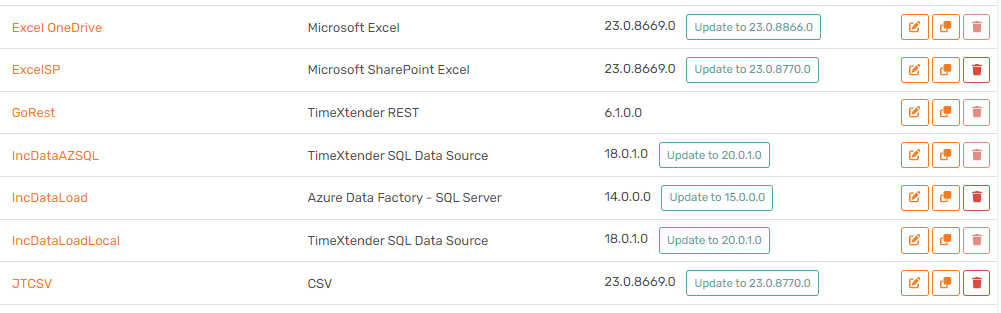
Cloning a data source connection in the TimeXtender Portal will create a new data source connection based on an existing data source connection.
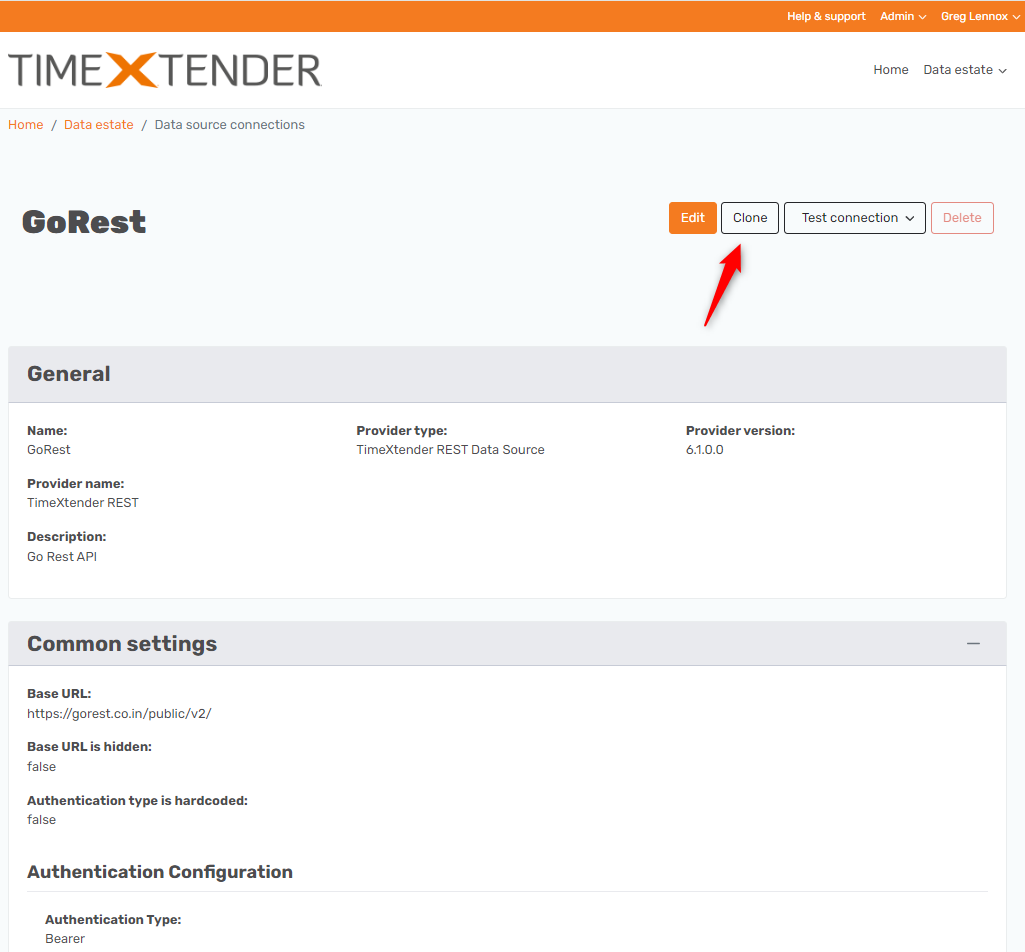
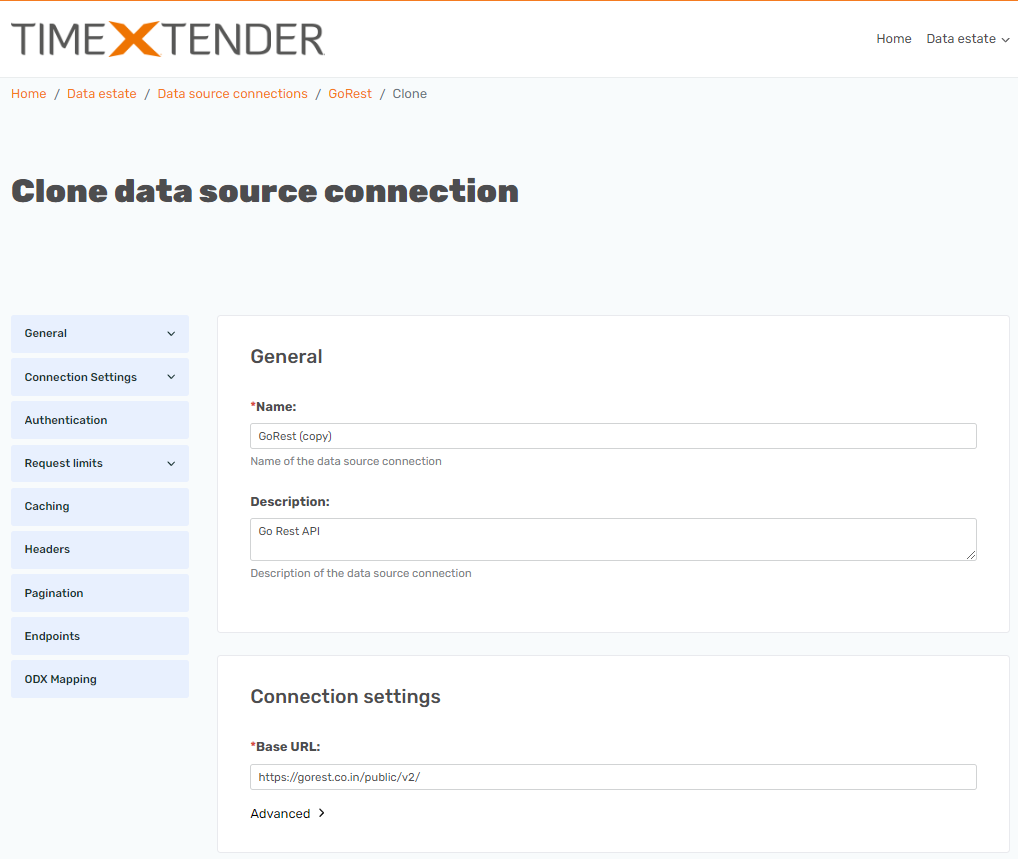
Click the Clone button in the TimeXtender Portal to open the data source settings window for the new data source. Amend any settings as appropriate. The cloned data source will pre-populate the name using the original data source name appended by “(copy)”. Either accept this name or amend it to something more suitable. Once any edits are complete, click the “Save” button to create the new data source connection.
Use Case 1: Streamlining the process of creating a new data source
There may be instances where you need to create multiple data sources where many of the configuration settings are the same, and perhaps there are only one or two settings that are different. Clone one of the existing data sources and then just update the setting or settings that are different, i.e. “URL” to create the new data source.
Use Case 2: Perform upgrade validation testing
TimeXtender is periodically releasing new versions of its data providers. A review of your data connections in the TimeXtender Portal may indicate that a newer provider is available for particular data connection.
The following steps could be used validate whether the new data provider will perform as expected prior to upgrading to it in your production environment.
- User has Ingest Instance Dev and Ingest Instance Prod
- Ingest Instance Dev is upgraded to the latest version, So the data source connections need to be updated.
- User clones their [TimeXtender SQL] data source.
- User renames the new clones to [TimeXtender SQL DEV] and the original to [TimeXtender SQL PROD].
- User Upgrades [TimeXtender SQL DEV] data source connection to the latest version
- User Edits the Data Sources in the Ingest Instance Dev and remaps to [TimeXtender SQL DEV].
Using the steps above, The Ingest Instance Dev will be using the latest data source provider while the Ingest Instance Prod is still using the original data source provider, which allows validation testing to be performed in the development environment without affecting the production environment.
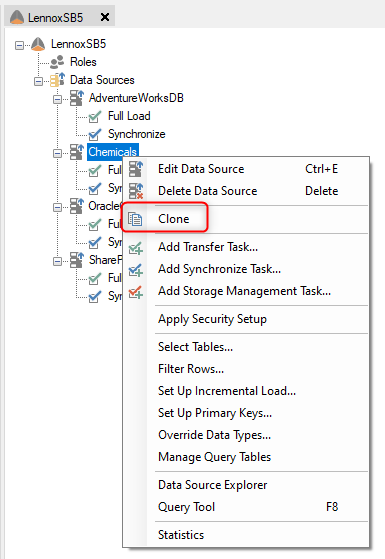
Cloning a data source in TimeXtender Data Integration
Cloning a data source in the TimeXtender Data Integration (TDI) will create a new copy of an existing data source.
Right-click on an Ingest Instance data source in TDI and select “Clone” to open the dialog where a copy of the original data source can be created.
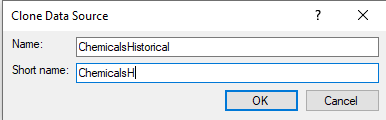
In the “Clone Data Source” dialog, amend the name to one that is unique and suitable for the new copy of the original connection.
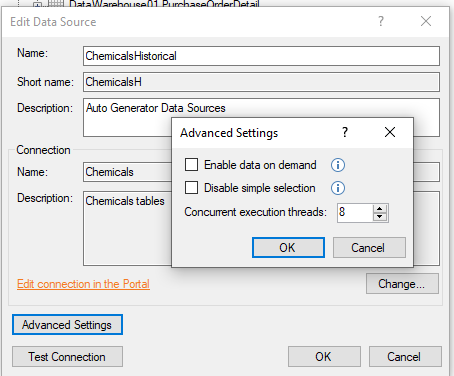
After clicking OK, the Edit Data Source window for the new data source will open up. Advanced Settings could be amended here as appropriate.
Use Case 1: Implementing row filtering to segment the data source into different data sets
This may be able to streamline the loading process, as the two copies of the same data source can be used to separate the loading of historical data from current data, as in data from the past year for example. By doing this, we can not only speed up the loading process (only reload data for the current year) but also reduce the strain on our primary data sources (not reloading the full dataset). Click on Filtering Rows in Ingest Instance Data Sources to open the KB Article that explains how to do this in more detail.
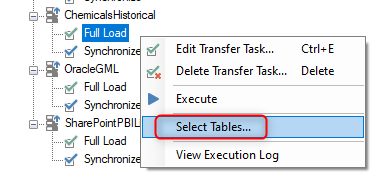
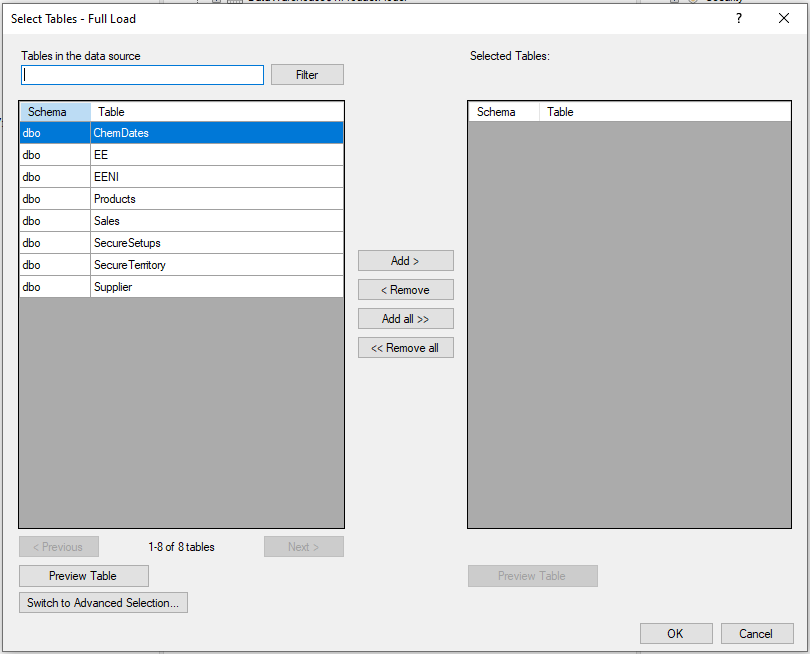
Use Case 2: Select different tables in separate copies of the same data source
It may be that there are some tables that can be uploaded according to a different schedule as compared to other tables in the same data source. By segmenting these tables into different data sources, we can set different schedules that are more appropriate for each. Right click on the transfer task and click on “Select Tables” to open the dialog for this.