Create an App Registration in the Azure Portal - It is recommended to use a dedicated app registration to ensure this account is the only one with access to the client credentials.
In Fabric/Power BI Admin Portal, enable “allow service principals to use Power BI APIs” as described here, in order to grant the app registration access to the Fabric workspace.
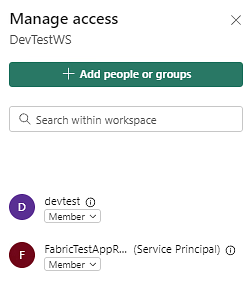
Create a workspace, or navigate to an existing workspace, in the Fabric portal and select Manage access. Grant the App Registration account Member access to the Fabric workspace.
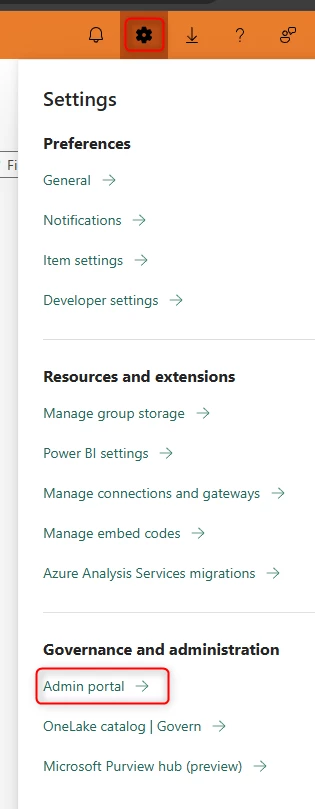
Go to the Admin Portal
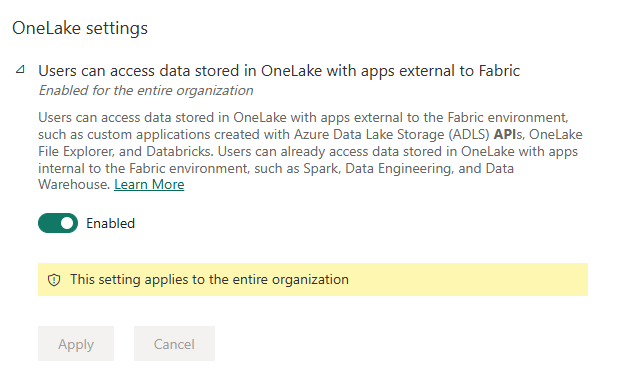
Under Tenant scroll down and locate OneLake settings. Enable the following setting for Users to access data stored in OneLake with apps external to Fabric.
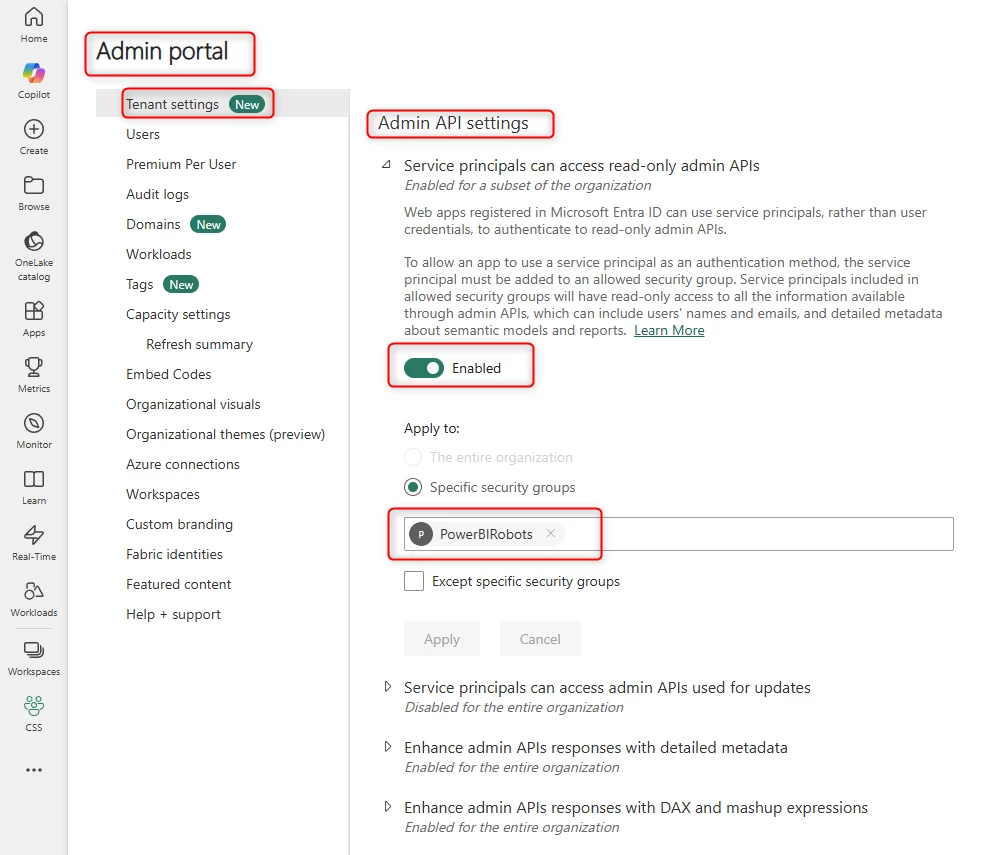
Under Tenant scroll down and locate Admin API settings. Make sure the Service principals can access read-only admin APIs is enabled and a security group is allowed. The security group we have added contains a list of service principals.
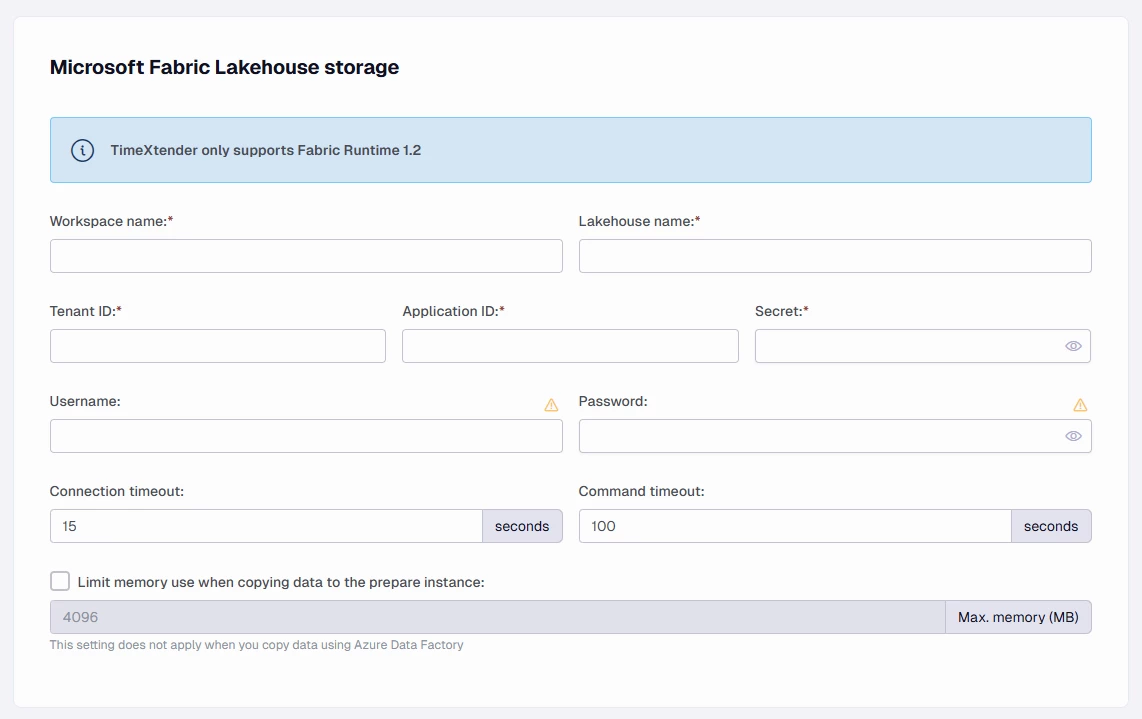
Add Ingest Instance with Fabric Lakehouse Storage
Note: You can connect to an existing Lakehouse that has been created directly in the Fabric Portal, or you can choose to create the Lakehouse within TimeXtender Data Integration (TDI).
Enter the workspace name for the existing Fabric workspace
Provide a name for the Lakehouse
Enter the Tenant id for the tenant associated with Fabric.
Enter the Application id for the App Registration.
Enter the Application Key (i.e. the client secret value) associated with the App Registration
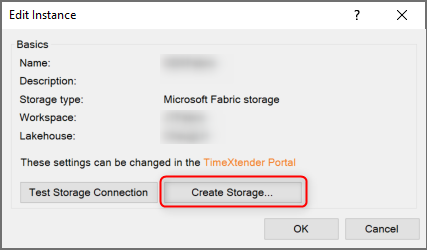
Create the Fabric Lakehouse Ingest Instance Storage
Open the TimeXtender Data Integration (TDI) application and open the Ingest instance
If you haven't created the Lakehouse already, you can do it now by right-clicking the instance in the Solution Explorer and then clicking Edit Instance followed by Create Storage.
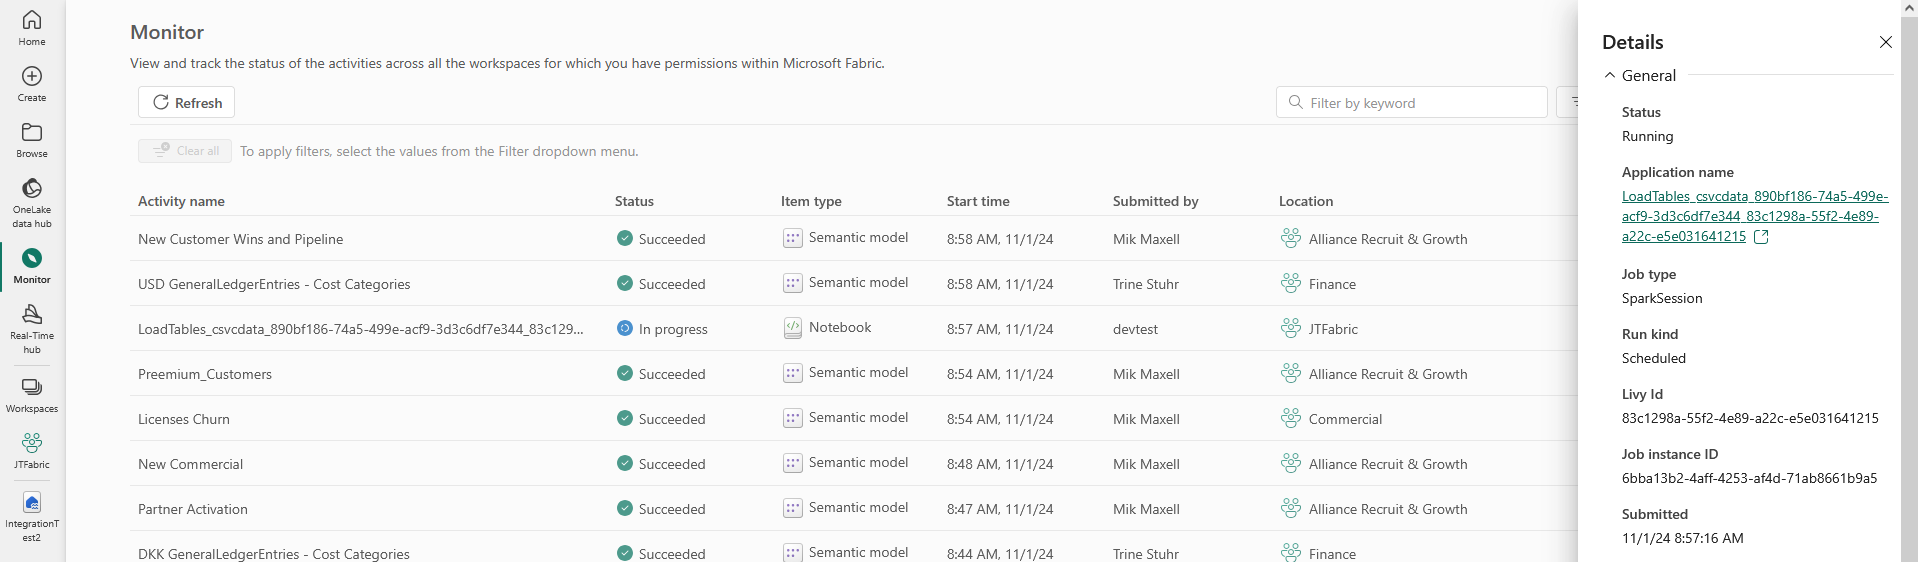
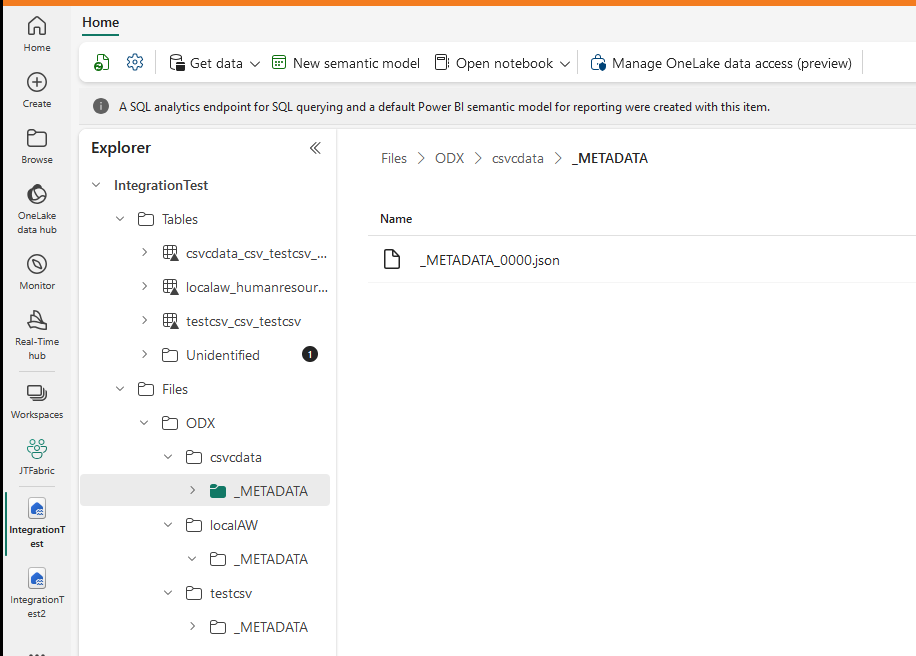
Objects created in Fabric
A notebook is created and run when a transfer task is executed for a data source in a Fabric Ingest instance. You can see these notebooks being created and run in within the Fabric portal under Monitor. The notebook creates a delta parquet table in the lakehouse (with the naming LoadTables_<data source name>_<uuid>), and creates a temporary parquet file in the lakehouse file folder. The data from the temporary parquet file is transferred to the delta parquet table in the lakehouse, and then the temporary parquet file is deleted. JSON files are also created in the lakehouse file folder to capture the data source metadata.