


Primary keys play an integral role in data models, and are usually a field that does not allow null values and contains a unique value or identifier for each row in the table. The primary key in one table can be referenced as a foreign key in other tables, helping to create the pathways over which the data can flow throughout the model and be harnassed to create meaningful representations. Therefore, designating which field or fields comprise the primary keys for each data table is an important task in TimeXtender and can be setup on the Ingest Instance data source itself, when appropriate.
Since an Ingest Instance data source may comprise a large number of tables that are setup in a similar fashion, the “Set Up Primary Keys” functionality includes the ability to set up primary key rules that may apply to more than one table based on the conditions set for the rule.
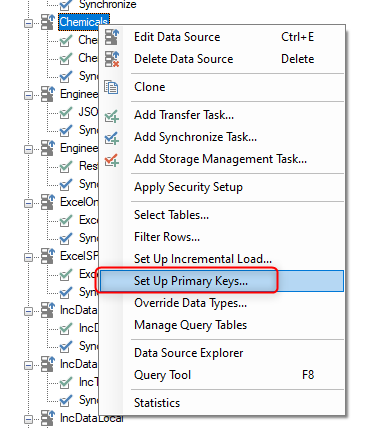
To begin, right-click on the Ingest Instance data source and select “Set Up Primary Keys”.
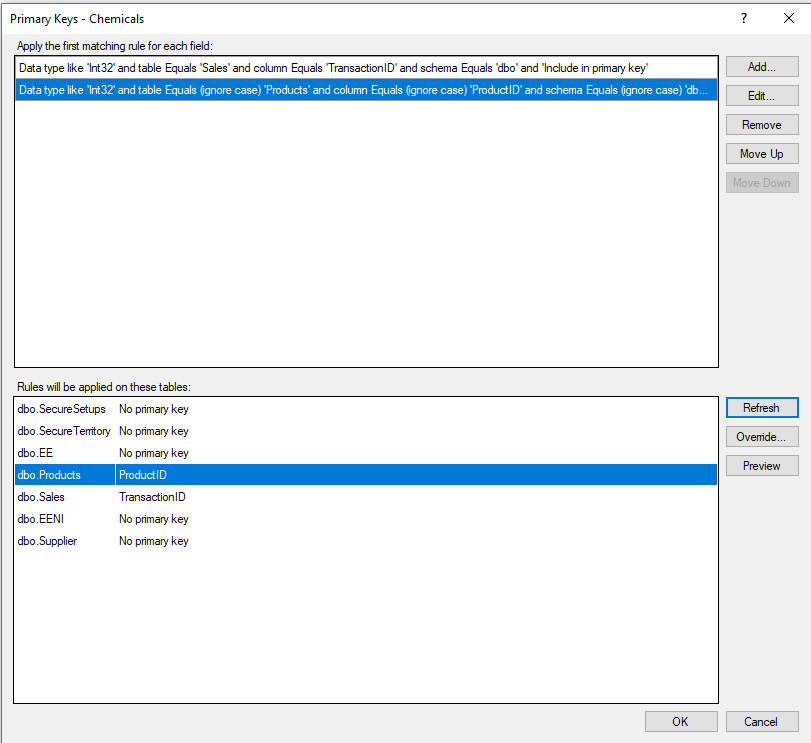
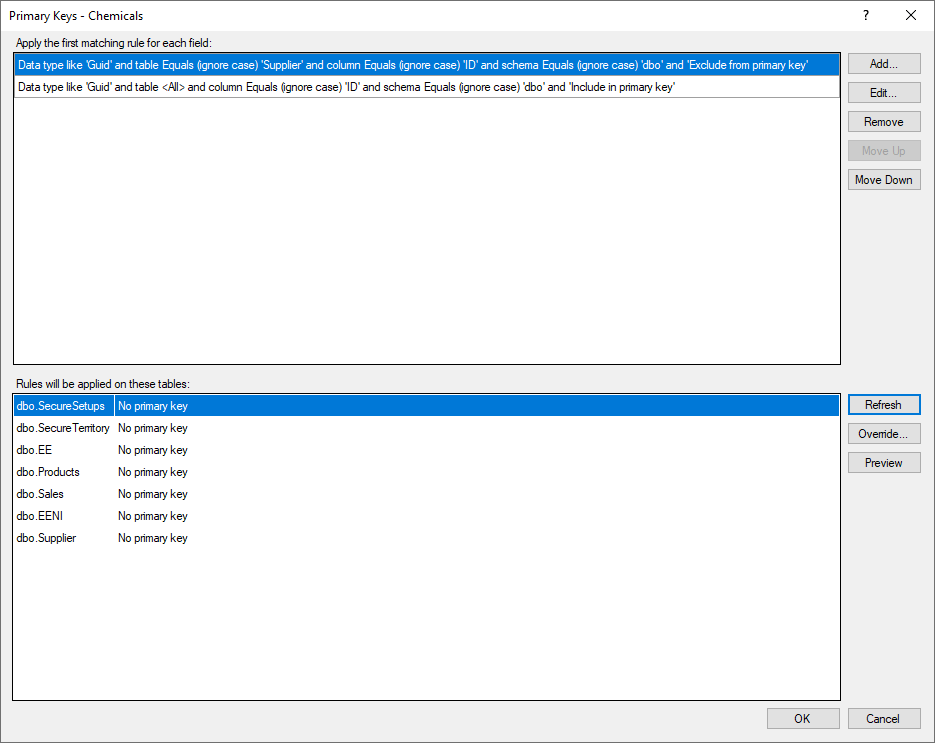
The Primary Keys window will open with a display of all the primary key rules that are currently set up for the tables in the data source.
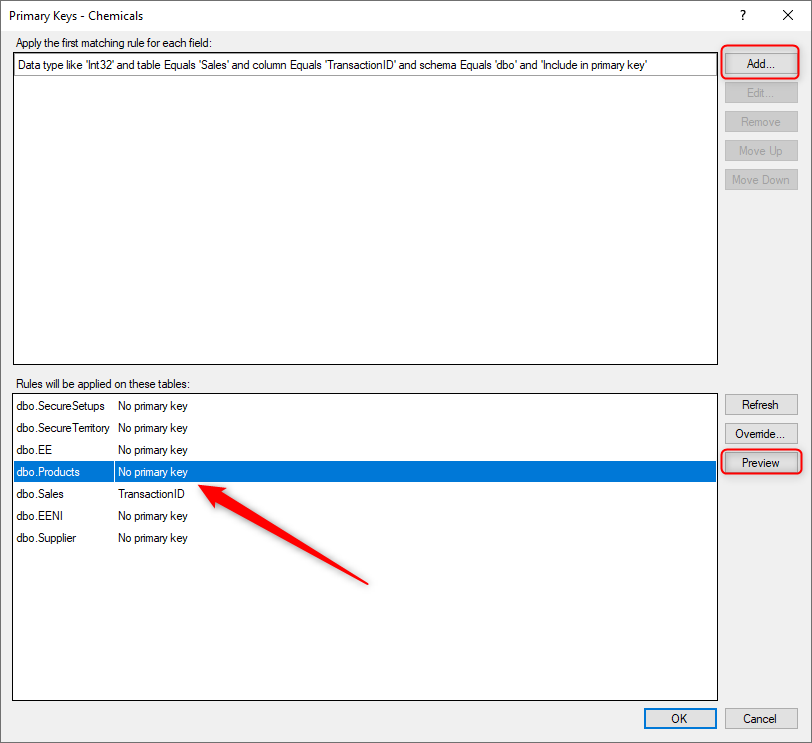
In the example above, only the dbo.Sales table has a primary key rule, which is specifying that the ‘TransactionID’ field be included in the primary key.
To set up a primary key rule, first select the table from the list below and then click the “Add” button to open the “Add Primary Key Rule Setup” dialog, where conditions can be configured to identify the appropriate field or fields to be included or excluded from the primary key.
It may be helpful to preview the data in the table in order to confirm that the primary key field values appear suitable. Click the “Preview” button to open a query tool window where this can be done.
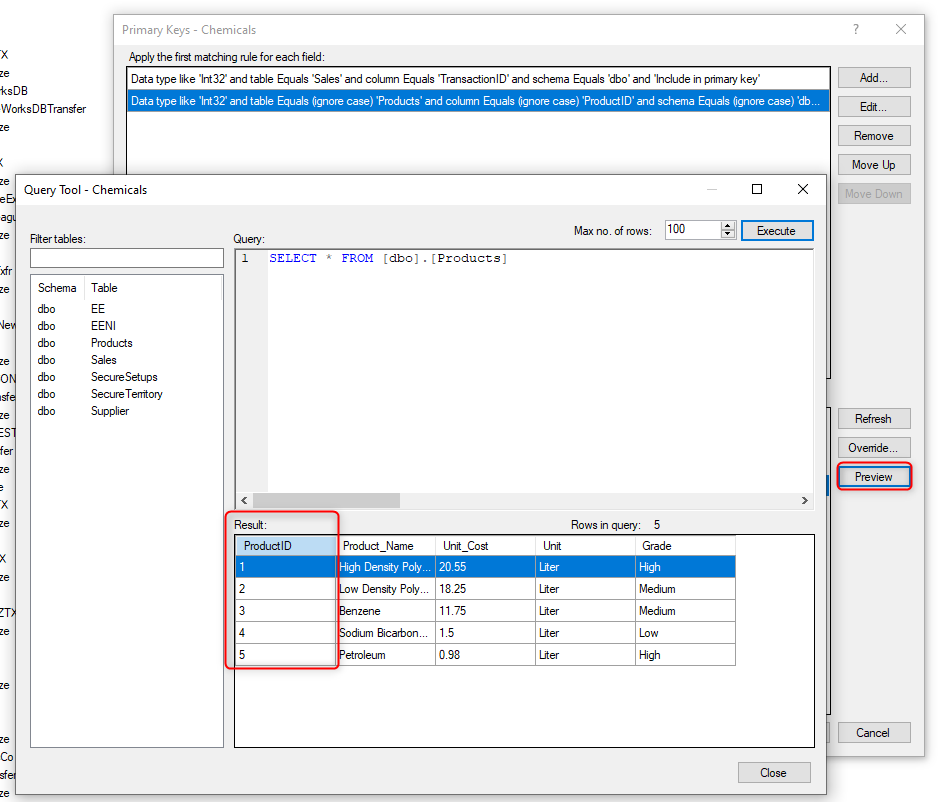
In the example above, a review of the dbo.Product table data confirms that the ‘ProductID’ column would be appropriate to include in the primary key.
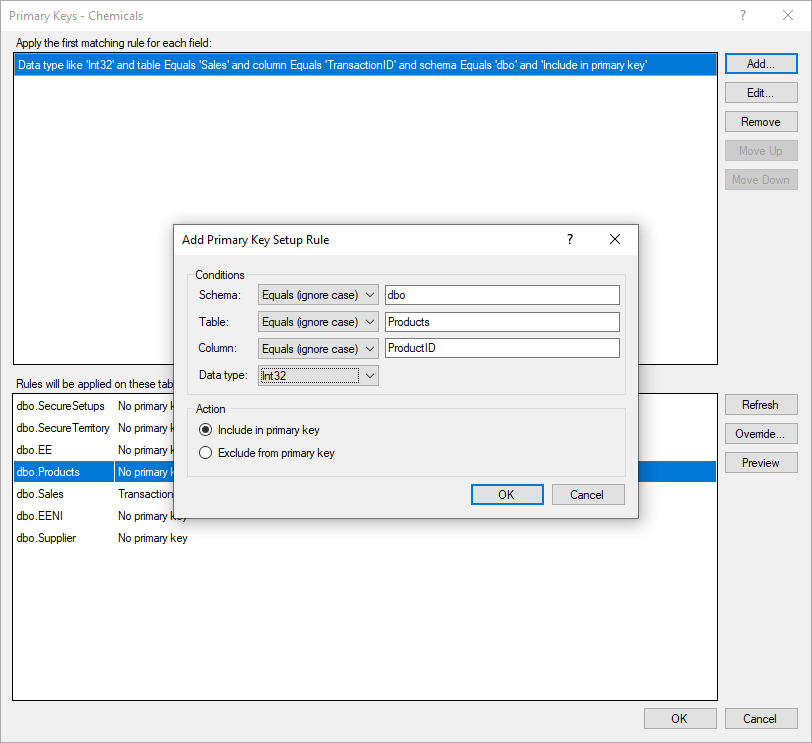
Clicking the “Add” button opens the following “Add Primary Key Setup Rule” window.
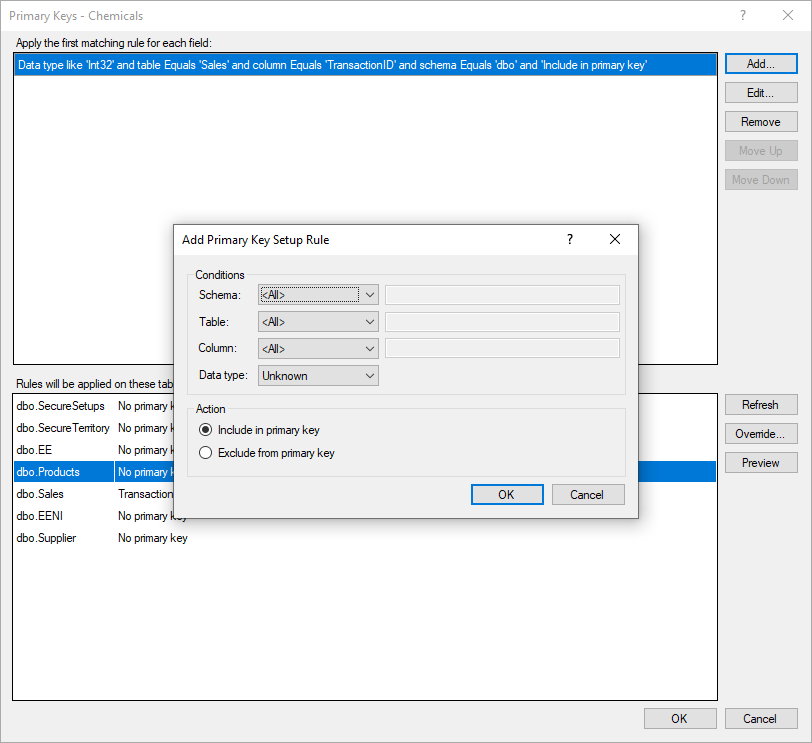
A Primary Key Rule is created by configuring one or more of the following four Conditions to be used to identify the table and column to be included or excluded from the primary key.
- Schema
- Table
- Column
- Data type
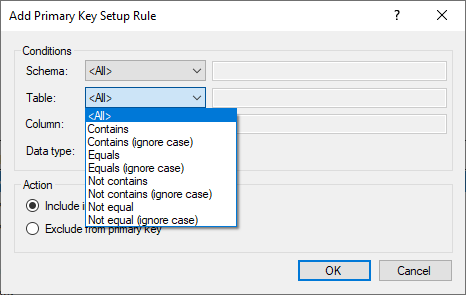
For the Schema, Table, and Column conditions, select a comparison operator and enter a name value sufficient to identify the appropriate table and column. The forth condition that can be used specifies the Data Type of the primary key field. The comparison operators available for the Condition statements are as follows:
- Contains
- Contains (ignore case)
- Equals
- Equals (ignore case)
- Not contains
- Not contains (ignore case)
- Not equal
- Not equal (ignore case)
Once the Conditions have been configured, click one of the following two Action radio buttons to determine if the results are ether included or excluded from the primary key.
- Include in primary key
- Exclude from primary key
Once the Conditions are complete, click “OK” to create the new primary key rule. In the “Primary Keys” window, click “Refresh” to see the new primary key rule listed above as well as the new primary key indicated below in the list of tables.
By leaving the Table Condition set to “Any”, a Primary Key Rule can be configured to apply to multiple tables that have a similar column naming scheme. In the event that there are also tables that have a field that matches this condition that is not a primary key, then an additional “Override” rule can be created to exclude that same field for that particular table.
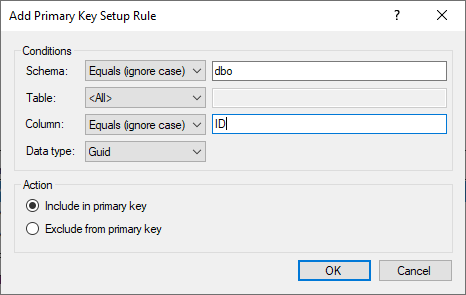
For example, if mulitple tables have the primary key field with the name of “ID” and a data type of “Guid”, then the following rule could be used to set the primary key for all the tables that match this condition.
- Schema: set to “dbo”
- Table: set to “<All>”
- Column: set to “ID”
- Data type: set to “Guid”
- Action: set to “Include in primary key”
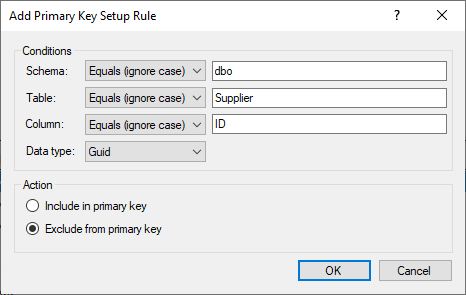
However, if there was a table that had a field that matched this condition was not a primary key field, then an Override exclude from primary key rule could be setup as follows.
- Schema: set to “dbo”
- Table: set to “Supplier”
- Column: set to “ID”
- Data type: set to “Guid”
- Action: set to “Exclude from primary key”
Once the override rule is created, use the “Move Up” and “Move Down” keys to set the override exclude rule to come before the include rule so that it has priority in the order of evaluation.
In the event that a single primary key rule is unable to provide a unique value for each row in the table, additional override rules can be created and their evaluation order can be configured in a way that may be able to create the primary key. Press the “Override” button to select from the other fields available in the table and create additional primary key rules.
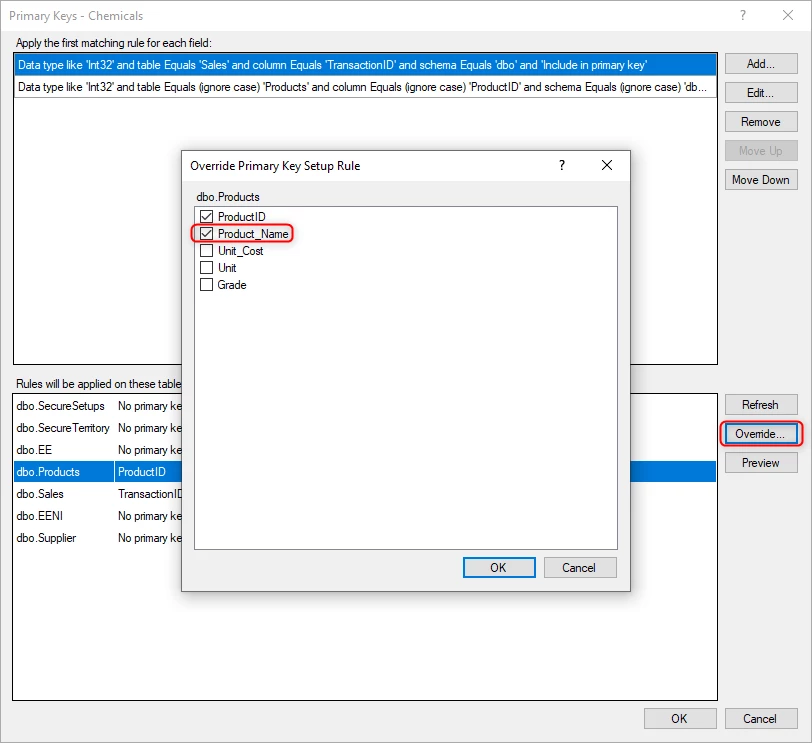
In the example above, the “Product_Name” field has been checked to create an override rule that may augment the original “ProductID” field rule. After selecting the appropriate override field or fields, click “OK” to create the new rule or rules and return to the Primary Keys screen, where the additional rules may be listed at the top. Use the “Move Up” and “Move Down” buttons to set their appropriate evaluation order from top to bottom.
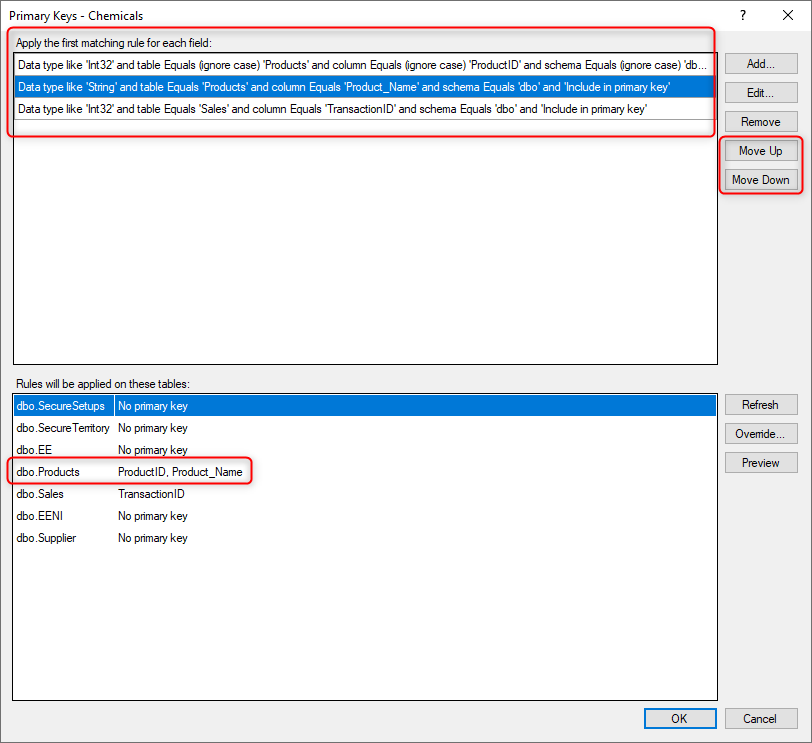
In the example above, the dbo.Products table now has a combined primary key based on both the “ProductID” and “Product_Name” fields. Each field has its own primary key rule listed above and both fields are shown as primary keys for the dbo.Products table as listed below. The “Move Up” and “Move Down” keys were used to reorder the rules so that he “ProductID” rule is listed first with the “Product_Name” field rule coming right after.


