


This article describes how to select and copy data to a Prepare instance from an Ingest instance or another Prepare instance. In TimeXtender, table selection is the act of finding a table or view in a source instance and mapping it to the destination instance. Once a table or view has been selected, deploying and executing the table in the destination instance will copy/transfer the data from source to destination.
Selecting tables from an Ingest Instance
To find the tables and views you want to copy data from in an Ingest instance, follow the steps below.
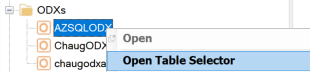
- In the Solution Explorer in the left hand pane, right-click on the TIS instance, and click Select Tables
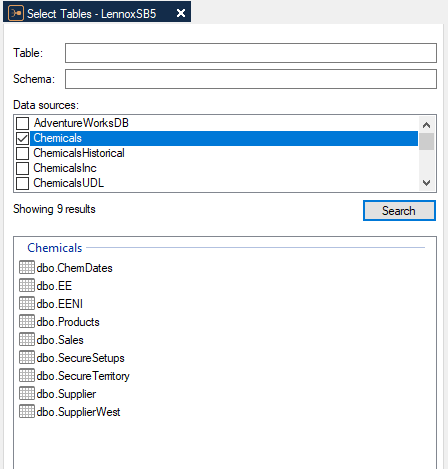
- In the Select Tables tab, enter the name and/or schema for the tables and views you want to copy using the Schema and Tables boxes.
- In the Data source list, select the sources you want to search and click Search. If a new data source has recently been added, while the Table Selector was open, click on Search again to refresh the results.
Selecting tables from a Prepare instance
Note: Both Prepare instances must be using Microsoft SQL storage.
Note: To prevent circular references, you can only copy data one way. In other words, a Prepare instance cannot be both source and destination for another Prepare instance.
Note: Due to object ID clashes, you cannot select data between identical Prepare instances, e.g. the same instance in DEV and PROD environments, created by migrating the DEV instance to PROD.
If you want to copy tables from another Prepare instance, follow the steps below:
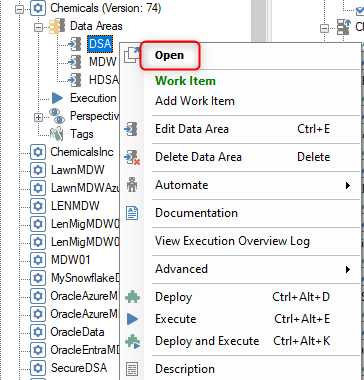
- In the Solution Explorer, right click the Prepare instance, you want to get data from, and click Open.
- Expand Data Areas, right click the relevant data area and click Open.
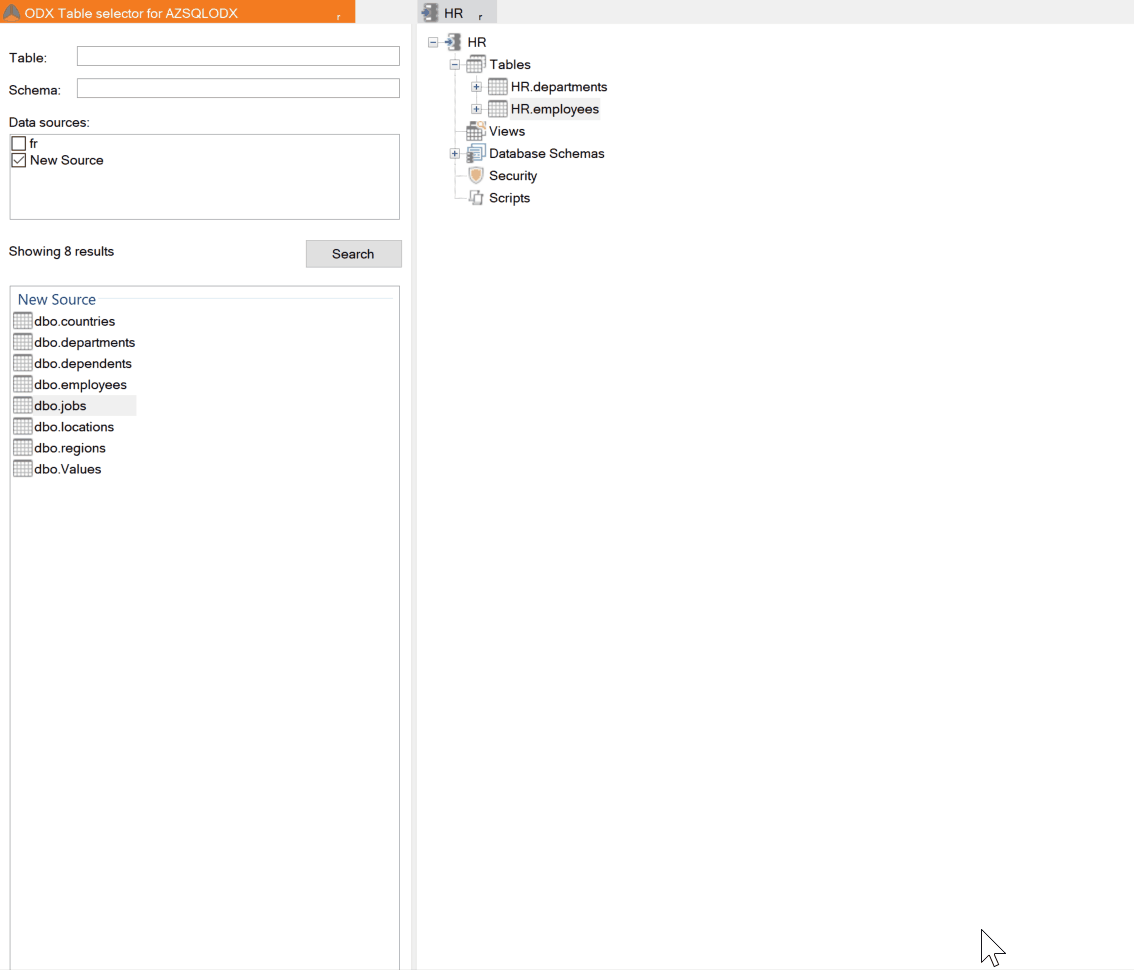
- With the data area opened in a new tab, locate the table(s) you want to map and copy data from.
Mapping and copying tables
Once the source table or view has been located, you can create the actual mapping using a drag-and-drop operation.
- In the Solution Explorer, right click the Prepare instance, you want to copy data to, and click Open.
- Expand Data Areas, right click the relevant data area and click Open.
- Drag the tables from the source instance to the data area you just opened. When you drag and drop a single table, each operation has a default action and some secondary actions. The default action will be used if you drag and drop using the primary mouse button, while the secondary actions will be available in a shortcut menu if you use the secondary mouse button to drag and drop. The available actions are as follows:
- Add New Table (default): Adds the table as a new table in the prepare instance. Default when no table in the prepare instance has the same name as the table being dragged.
- Synchronize on Table Name (default): Synchronizes the table with an existing table in the prepare instance with the same name. New fields from the new table are added and already existing fields are mapped to the fields from the new table. Default when a table in the prepare instance has the same name as the table being dragged.
- Add New Table with Field Selection: Adds the table with the fields you select in a window that opens.
- Synchronize with Other Table: Synchronizes the table with an existing table in the prepare instance chosen by you.
- When dragging from an Ingest instance - or more precisely, the search results in Select Tables - you can hold Shift or CTRL to select multiple tables to drag. When you drag and drop multiple tables, TDI will first try to synchronize each table on table name. If no table with the same name exists in the prepare instance, the table is added as a new table.
- Right click the tables or data area and select Deploy to deploy the changes.
- Right click the tables or data area and select Execute to transfer the data from the source Instance to the data area.
