This article clarifies the concepts of role-playing dimensions and explains how to implement them in TimeXtender.
What is a Role-Playing Dimension?
Role playing dimensions are a useful approach that can streamline your data warehouse by reusing the same dimension table in a different context depending on how it relates to the fact table. When implemented properly, role-playing dimensions create consistency, improve query performance, simplify maintenance, and ultimately enhances the depth and breadth of business insights derived from your data warehouse.
Example
To illustrate this concept, consider the following two tables:
Fact Table: SalesTransactions
| OrderID | ProductID | Quantity | OrderDate🗝️ | ShipDate🗝️ |
|---|---|---|---|---|
| 001 | 101 | 2 | 2023-10-15 | 2023-10-16 |
| 002 | 103 | 1 | 2023-10-16 | 2023-10-17 |
| 003 | 108 | 5 | 2023-10-17 | 2023-10-17 |
Dimension Table: Date
| DateValue🗝️ | Day | Month | Year |
|---|---|---|---|
| 2023-10-15 | 15 | 10 | 2023 |
| 2023-10-16 | 16 | 10 | 2023 |
| 2023-10-17 | 17 | 10 | 2023 |
The first sign that you may benefit from a role-playing dimension is when your fact table has more than one foreign key which relates to the same dimension table. As you can see in the example above, the Fact table contains values for both OrderDate and ShipDate. In this scenario, the Date dimension table can serve as a role-playing dimension for both OrderDate and ShipDate by relating the DateValue field to either foreign key. By utilizing the same Date dimension for OrderDate and ShipDate, you avoid creating redundant tables and ensure consistency in the way you analyze dates across different aspects of the sales process.
If we were to query these tables in SQL we could join Date to SalesTransactions using either foreign key field. And, depending on which field we chose, this would change the context of the dimension and results of the query. This enables us to do complex calculations comparing the dates for each context. Here’s an example of how you might calculate “DaysToShip” by querying these tables in SQL:
SELECT
    st.OrderID,
    st.ProductID,
    st.Quantity,
    od.DateValue AS OrderDate,
    sd.DateValue AS ShipDate,
    DATEDIFF(day, od.DateValue, sd.DateValue) AS DaysToShip
FROM SalesTransactions st
JOIN Date od ON st.OrderDate = od.DateValue
JOIN Date sd ON st.ShipDate = sd.DateValue
Using Deliver Instance Models
By using Deliver instance models in TimeXtender Data Integration, you can leverage the benefits of role-playing dimensions while still providing the comprehensibility and ease-of-use for business users. For example, you can add a Date dimension into a model as both OrderDate and ShipDate, configuring the appropriate relation for each. This ensures business users can seamlessly navigate through the different roles without getting lost in technical intricacies. Furthermore, complex measures, such as the DaysToShip example used above, can also be embedded into the model for quick and easy analysis.
To add role-playing features to a Deliver instance model, you simply add the dimension into the model several times using the appropriate table name and relation each time. Employing intuitive labels and relationships help users comprehend how different roles of the same dimension contribute to various analyses without confusion.
Instructions
The following steps explain how to implement the OrderDate/ShipDate role-playing dimension in a Deliver instance model.
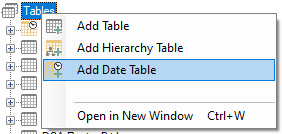
- In your Prepare instance data area, right-click on Tables > Add Date Table
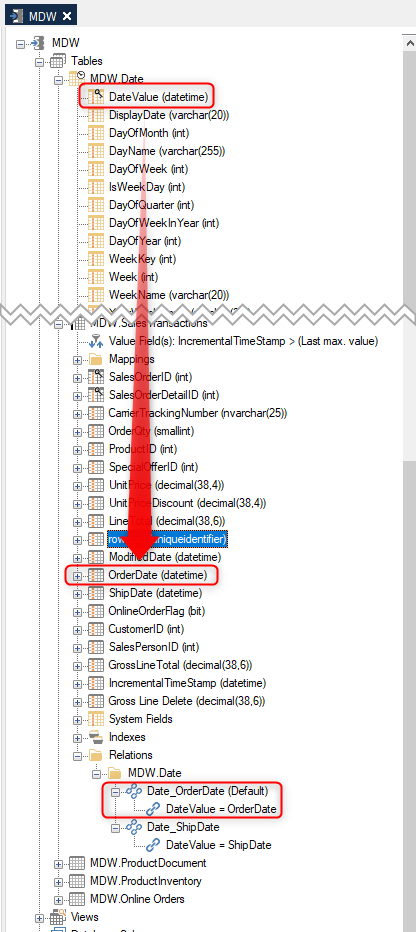
- Create your Role-Playing Relations: Drag the “DateValue” from the Date table onto the “OrderDate” field in the Fact table.
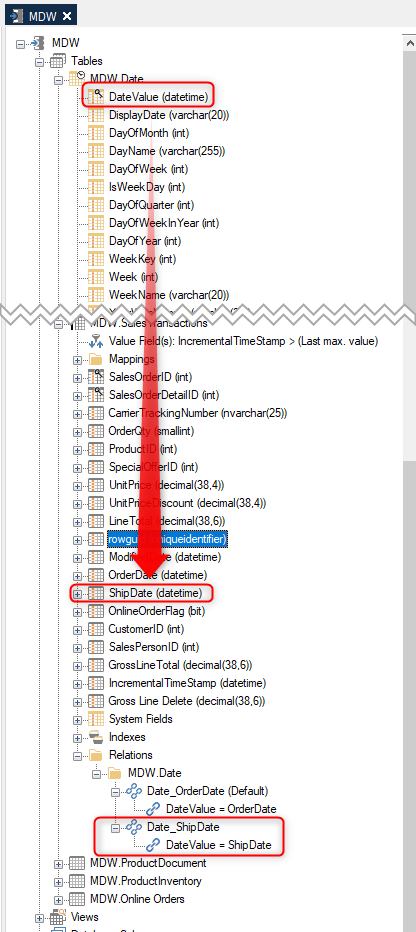
- Create another role-playing relation for additional context: Drag the “DateValue” from the Date table onto the “ShipDate” field in the Fact table.
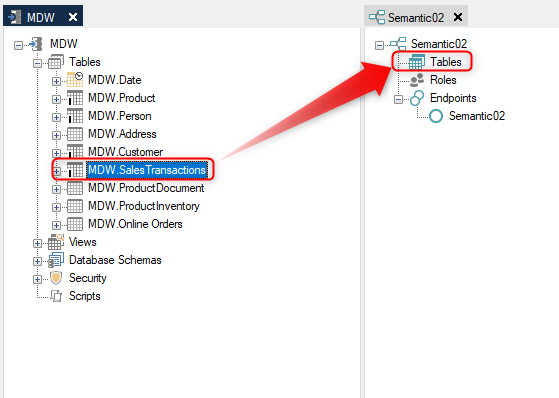
- Drag the Fact table onto the model and select your desired fields. It is not necessary to select the foreign keys (OrderDate and ShipDate fields) because these will be added automatically when needed.
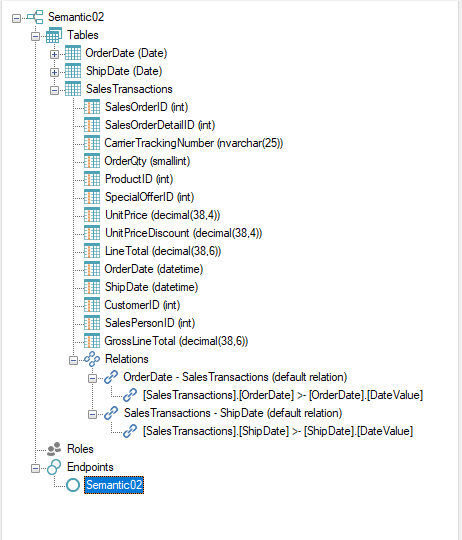
- To create the first role-playing dimension, drag the Date table into the model. Amend the table name to “OrderDate” and select desired fields.
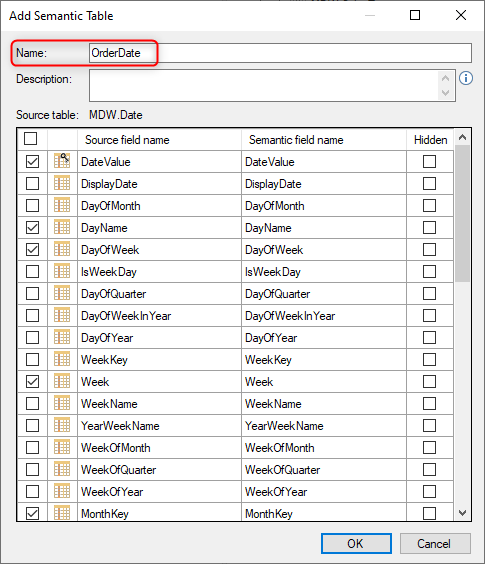
- Select the appropriate relation to define the context for this instance of the role-playing dimension. In this case we will use the OrderDate relationship.
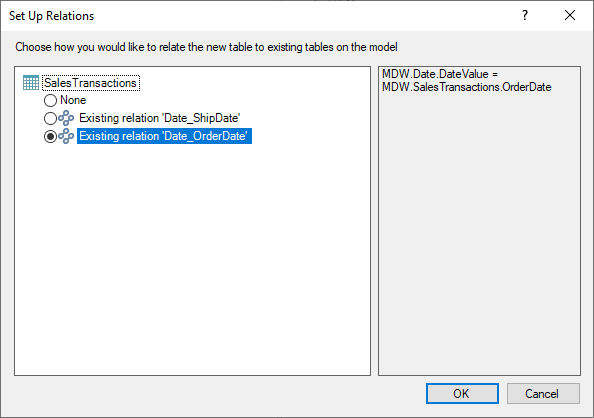
- Now, let’s create another instance of the role-playing dimensions in another context. Drag the Date table into the model again. Amend the table Name to be “ShipDate” and select the fields to be included.
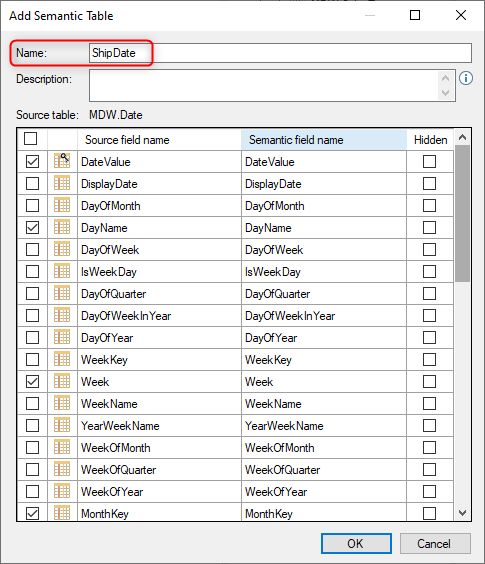
- This time, select the ShipDate relation to define a new context for this instance of the role-playing dimension.
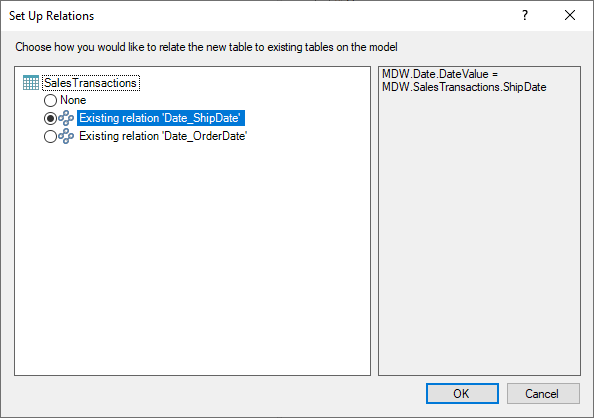
- The model will now appear to have three tables that are actually based on just two Prepare instance tables.
Video Tutorial
This is covered in further detail starting around the 10:30 minute mark in the following TimeXtender Tuesdays video:


