Custom Hash Fields
In scenarios with multiple fields making up the primary key, hashing the values of those fields into a single field can improve lookup performance. In TimeXtender Data Integration, such a field is called a custom hash field, and this field can also be used to easily investigate whether changes have been made to a record or not.
Adding a custom hash field
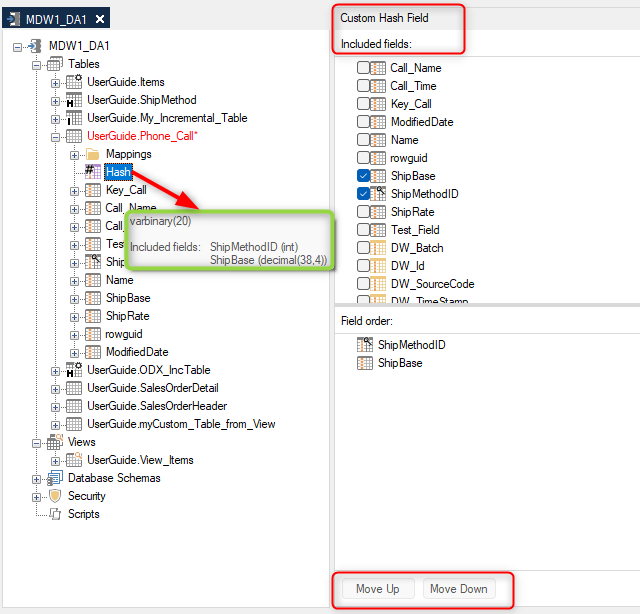
- Right-click on a table and select "Add Custom Hash Field". A custom hash field will be added to the table and selected, and the "Custom Hash Key" pane will appear on the right-hand side of the window.

- In the Custom Hash Key pane, select the fields to include in the custom hash field.
- (Optional) Use the "Field Order" option to reorder the fields using drag-and-drop or ALT + Up/Down. To ensure an accurate comparison of two custom hash fields, verify that the field sequence is the same for both hash fields. Otherwise, the hash value may differ even if the individual field values that make up the hash fields are the same.
Changing the Hashing Algorithm for a Field
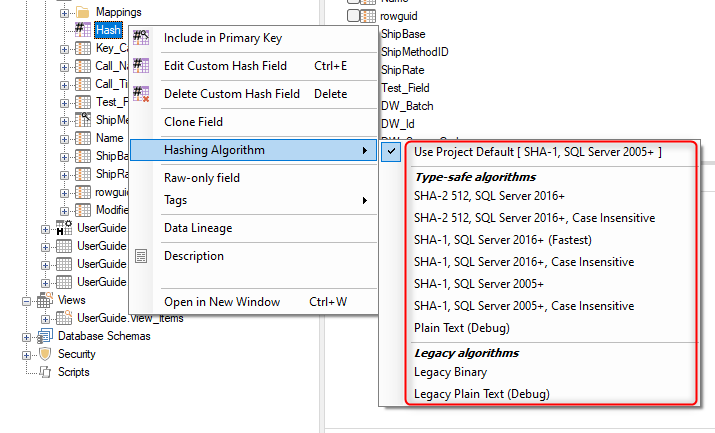
For compatibility reasons, we offer a number of different algorithms for hashing fields. These hashing algorithms are available on all hashed fields in your instance.
In addition to custom hash fields, the following hash fields are also available:
- Junk dimension key
- Surrogate hash key, type I hash key and type II hash key (used for history)
Note: There is usually no reason to change the hashing algorithm for an individual field. The default setting ensures that all hash fields use the same algorithm which in turn makes it possible to compare the values of the individual fields. The most common exceptions are debugging purposes and "upgrading" the hashing algorithm of a field that was created in an earlier version.
To change the hashing algorithm of a hash field
- Right click the field, click Hashing algorithm and click the hashing algorithm you want to use.


