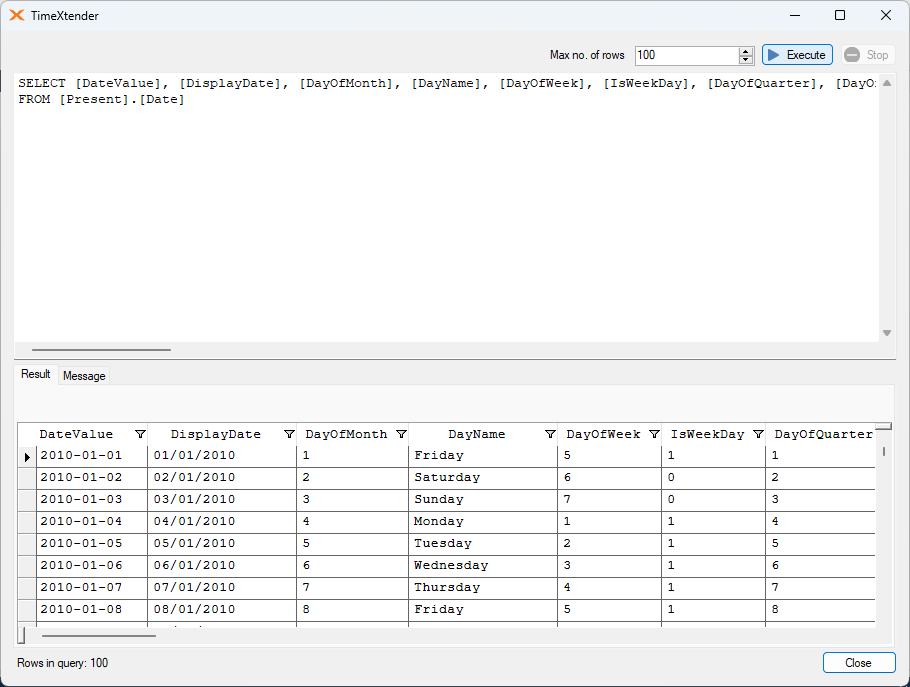
To analyze data over time, it's common to include a date dimension in your data model. By adding a date table to your data area, you can provide the Deliver instance with a time dimension that can be used in calculations. Date tables are typically added to Deliver instances because they simplify the calculation needed to compare different dates related to each other. In addition to using various components of the date value as time dimensions (Day, Week, Month, Quarter, Year), date tables also contain indexes that help determine the relation of any date value to the current date.

Adding a date table

To add a date table, follow the steps below.

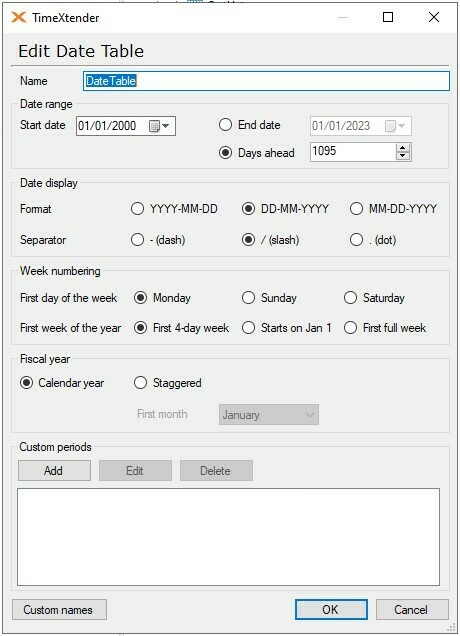
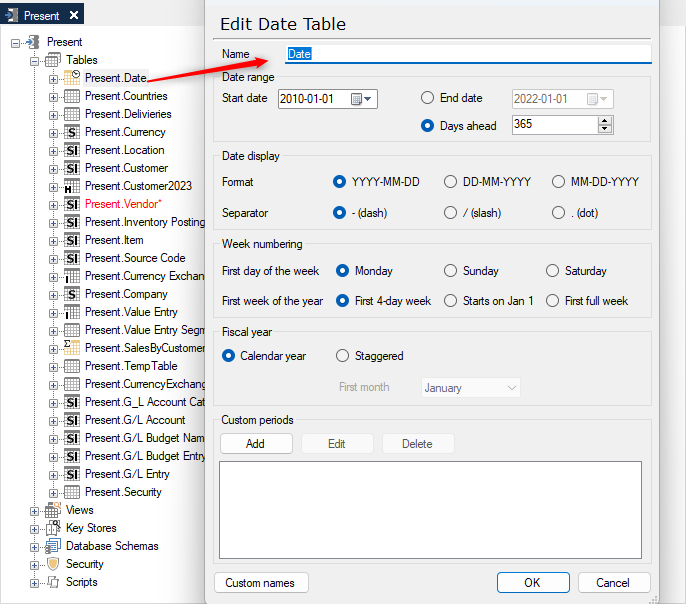
  1. On a Data Area, right click Tables and click Add Date Table to open the Add Date Table window.
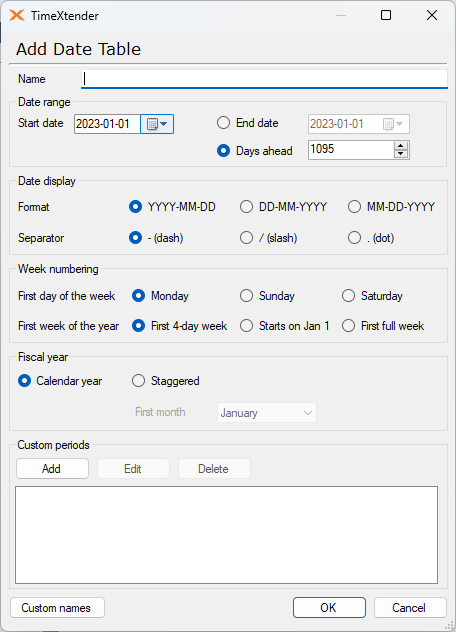
     

  2. In the Name box, type a name for the table.
  3. Select a Date range by entering a Start date and an End date. Regarding the end date, there are two ways that it can be entered. Either a normal date value can be set, or the Days Ahead option can be used to specify a number that indicates the number days to be added to the current date in order to calculate the end date.  The Days ahead feature provides a way for a table to extend itself and effectively have no end, as new rows may get added to the table each time it is executed.
  4. Under Date display, select the date Format to be used from the following patterns:
    • YYYY-MM-DD
    • DD-MM-YYYY
    • MM-DD-YYYY
  5. Select which Separator to used with the above date format from one of the following:
    • - (dash)
    • / (slash)
    • . (dot)
  6. Under Week numbering, click the First day of the week from the following two choices:
    • Sunday
    • Monday
  7. Select the how to define the First week of the year from one of the following options:
    • First 4-day week (following the ISO 8601 standard, common in Europe)
    • Starts on Jan 1 (common in North American)
    • First full week
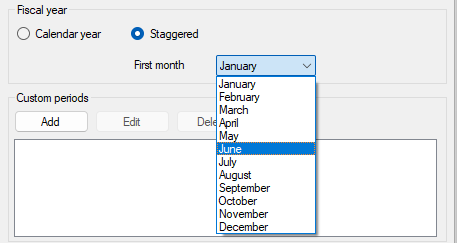
  8. Under Fiscal year, click Staggered to use a staggered fiscal year and click the first month of the staggered fiscal year in the First month list.
  9. (Optional) Click Add under Custom periods to add a custom time period to the date table. In the Add Custom Period window that opens up, first enter a Name for the custom period itself, and then specify the Name, Start date and End date of one or more time periods that will comprise this custom period. In addition to entering time periods manually, they can also be imported and exported using the Import and Export buttons. Once all the time periods have been entered, click OK to save the new custom period.
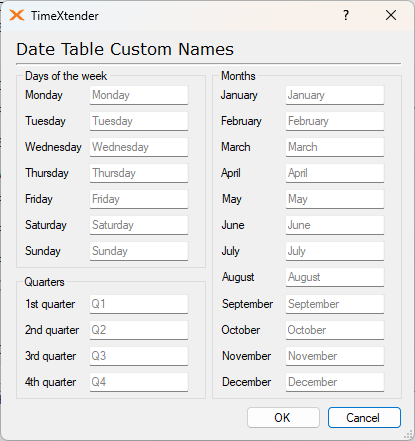
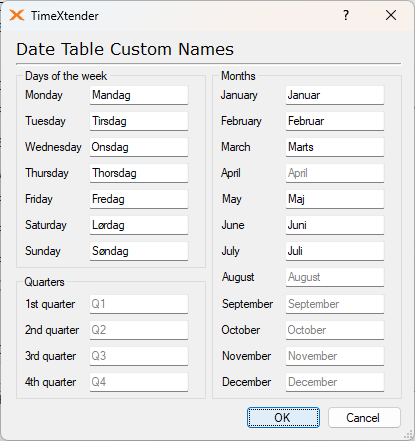
  10. (Optional) Click Custom names to change the names used for days, quarters and months. In the Date Table Custom Names window that opens up, enter the custom names to be used for specific time periods as needed. The default names are derived from the regional settings of that system. Click OK to save the custom names once complete.
  11. Click OK to add the date table.


Add a Date Hierarchy

After your date table is deployed, you can complete the following to create a data hierarchy.

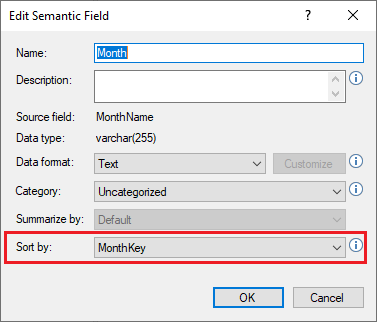
  1. Edit the MonthName field and set the “Sort by” setting to use the MonthKey, which is the integer number of the month.
  1. Right-click the data table and select “Add Hierarchy” from the context menu.
  2. In the Add Hierarchy window, select your date fields from largest to smallest.
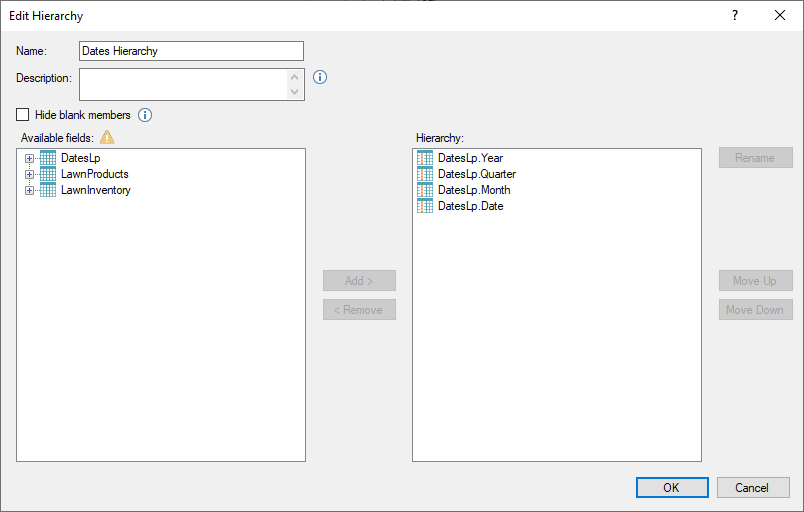
  1. Once your date fields are added, click OK to save the new hierarchy.

Set up a Fiscal year

  1. Create or edit a Date Table
  2. Change the setting to Staggered
  3. Choose a month to be the first month.

After setting this change, the table will now have the following fields set.

Updating a Date Table

Custom time periods can be added to account for special periods of time such as holidays or yearly sales campaigns. These custom periods can be comprised of one or more individual time periods and provide a quick and convenient way to account for these special periods of time.

Set up custom periods
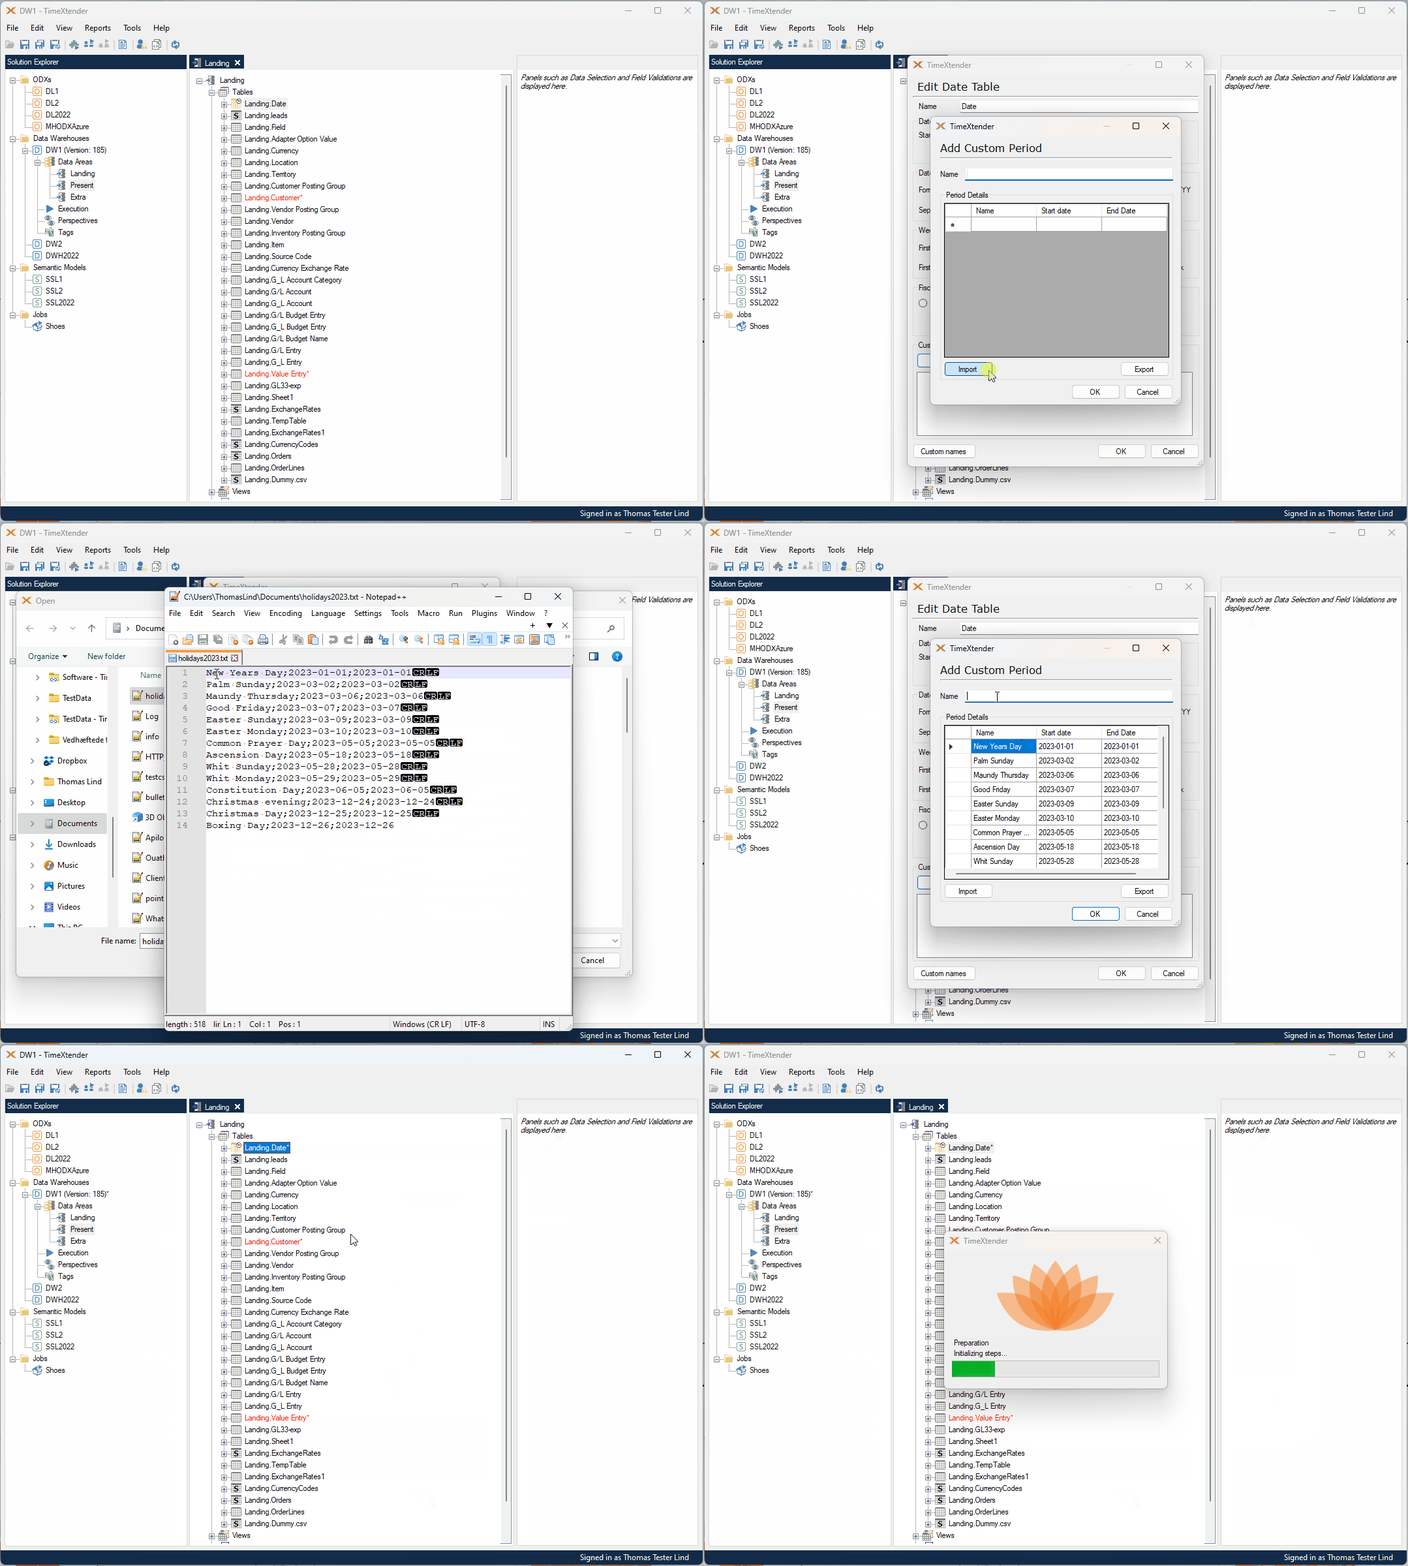
The following example shows creating an import file for the 2023 holidays using the required time period format of name;startdate;enddate.

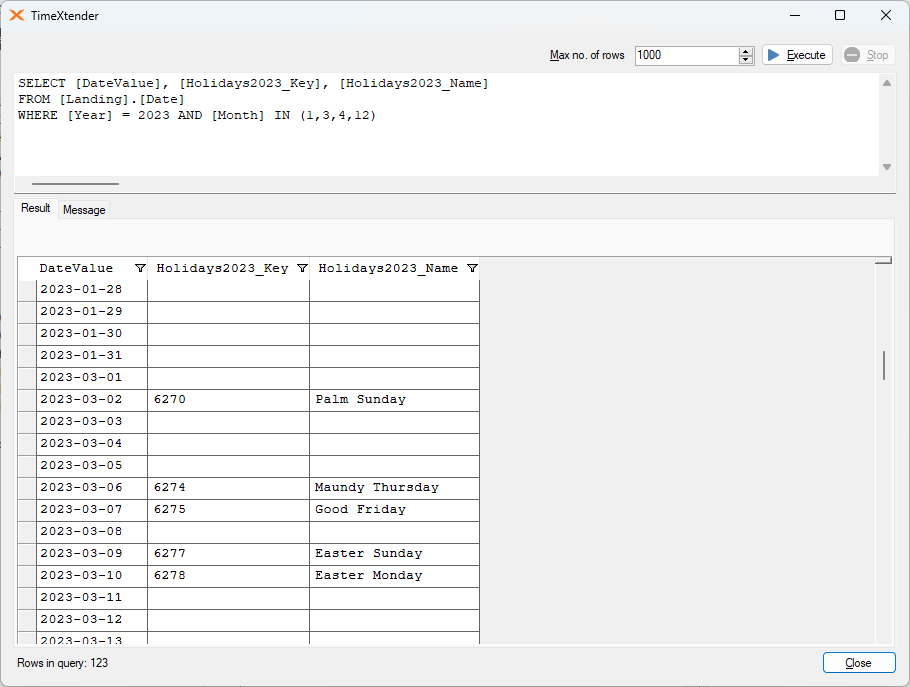
After the file is imported, the necessary fields will be created and appear as follows.
Set up custom names

  1. Create or edit a Date table
  2. Click on Custom names to open the Date Table Custom Names window, which by default appears as follows:
     

  3. Change the default names to a custom name to be used instead as is appropriate.
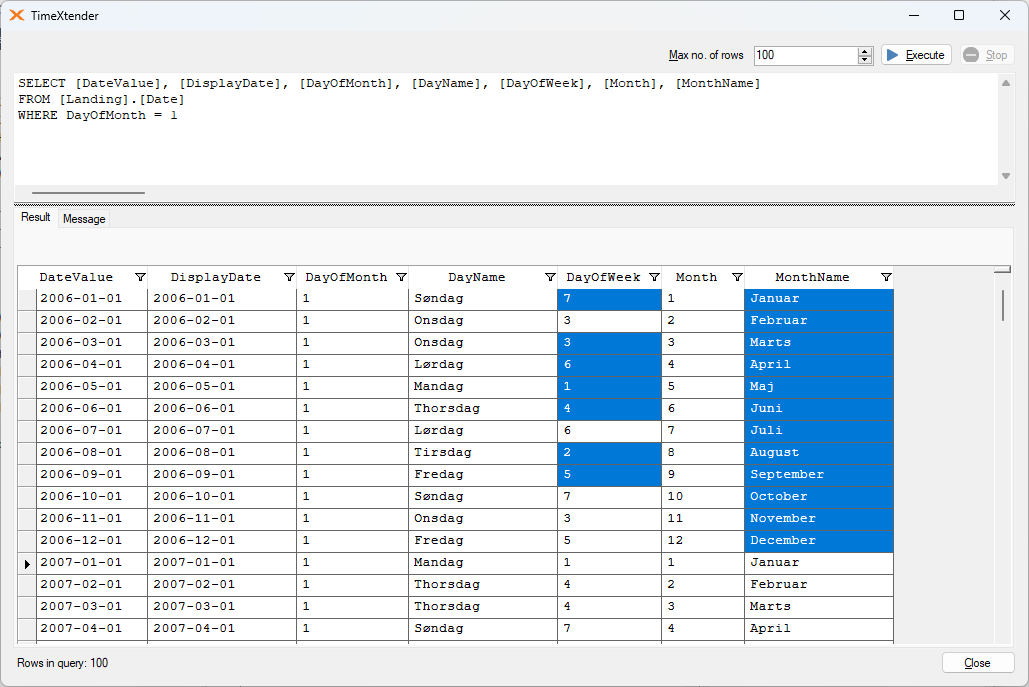
  4. Once the table has been deployed and executed, the output of the date values may appear as follows:


Hi @Thomas Lind

I am not sure if this is the correct place to drop a question but it is related to the toppic..


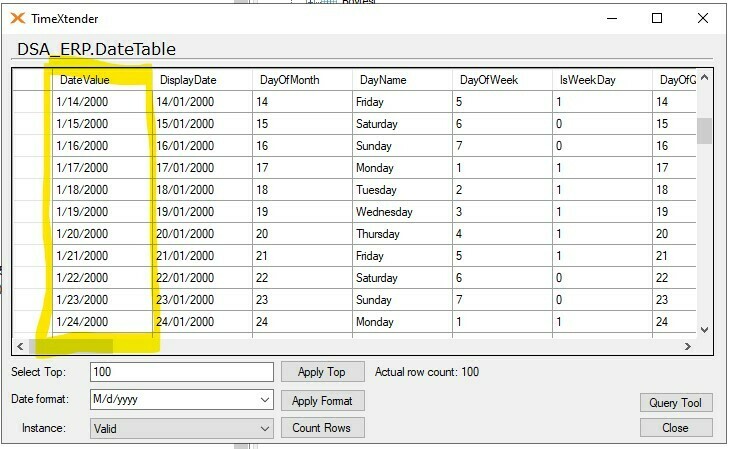
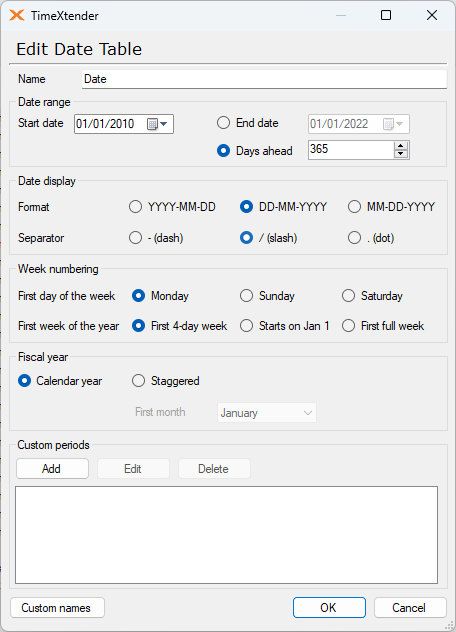
I set the date display to 'DD-MM-YYY’ in the 'Edit Date Table’ settings. After deploying and executing the DateValue is presented as 'MM-DD-YYY’. 


What could be wrong?


DateValue not in the for 'DD-MM-YYYY’


Hi @boyclaesen 

It is due to the Date format you have chosen.

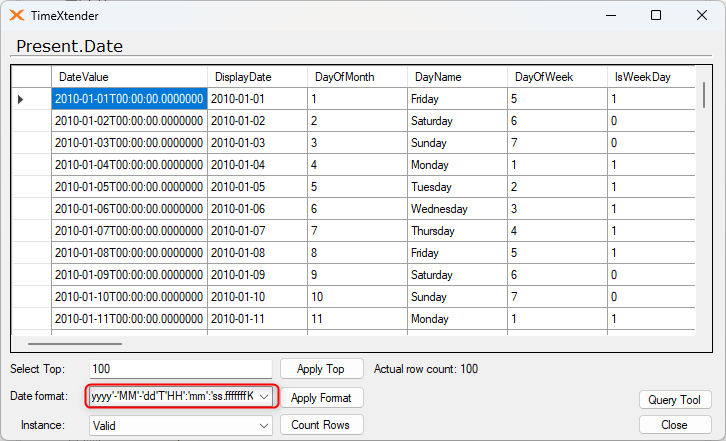
So here is my setup. First the Date table.
 

If I preview it it looks like this.

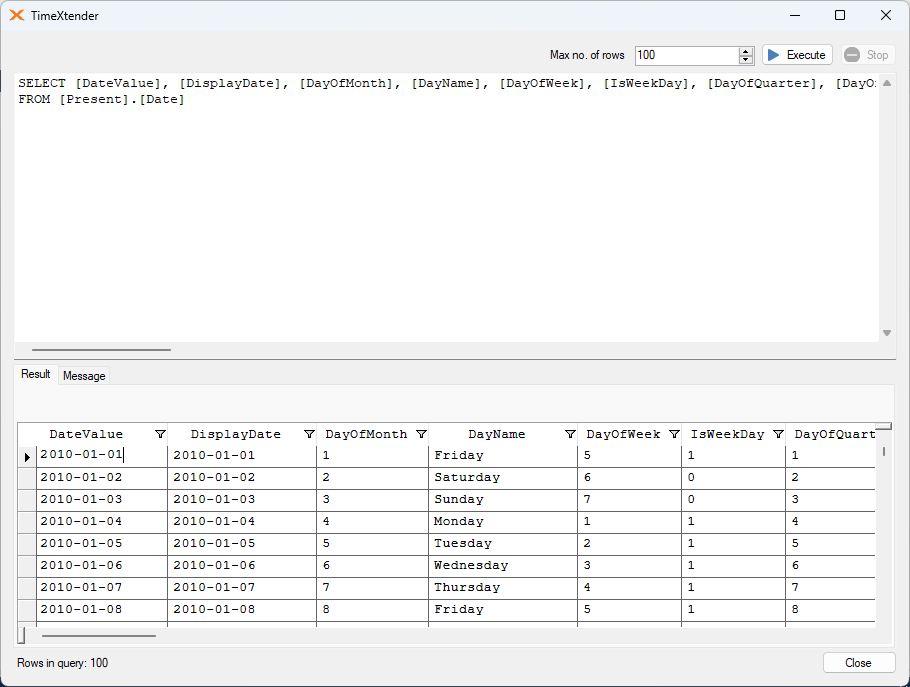
Notice the Date format and compare it to the DisplayDate.

If I click on Query Tool it again looks different.

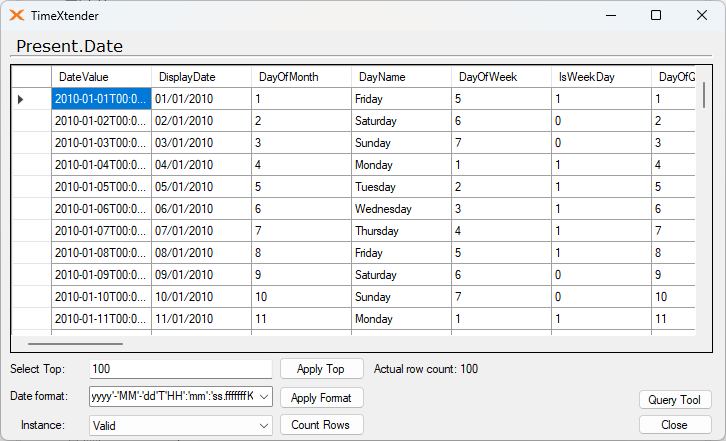
If I were to change it to look like yours with slash instead of - and dd-mm-yyyy format it will look like this.

The preview

and in the query tool.


I hope this explains it.

I myself prefer a date format that includes the hour:minute:second part as well as the date as I often work with almost equal date values.


Hi @Thomas Lind & @boyclaesen,

as far as I know the Date display formatting options directly affect the filling of any varchar type fields in the Date table. With the top line of options only deciding the ordering of day/month/year and the bottom row determining the separator (even if the top row shows - ).

The display of datetime and date are decided by the formatting you choose in the preview dialog.

Other SQL Server tools like Management Studio may differ as this can depend on collation and regional settings.


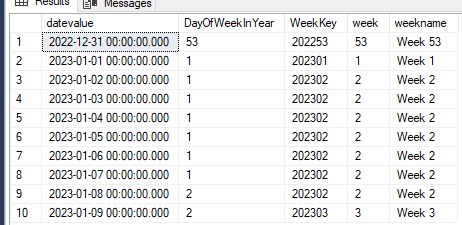
I have a question about my date table. First day of the week is set to “Monday” and First week of the year is set to “Starts on Jan 1”.

But week 1 only has one day (Jan 1), and it's already week 2 on Jan 2:


Is that the expected behavior? I'm guessing my settings for First day of the week and First week of the year are incompatible (US versus European)?


Hi @RLB ,

the first of January was a Sunday, so that would make week two start on the Monday. TX's date table gives you full control over those settings, if your SQL settings deviate that would make function calls used elsewhere mismatch I expect. Here in NW Europe we usually use ISO 8601 (which is TX's default setup I think) numbering.


True. But I think with these settings, week 1 should start in December because each week should have 7 days 🙂 Week 1 shouldn't start on Jan 1, but it's the week containing Jan 1 (which is how Excel calculates week 1: https://support.microsoft.com/en-us/office/weeknum-function-e5c43a03-b4ab-426c-b411-b18c13c75340)

But you're right, my SQL settings deviate from the date table settings which causes issues.


Hi @RLB ,


tl;dr: a weeknumber may not always represent 7 days, weeknumber 1 is not in the previous year (almost 100%), weeknumbers are like all things dates: overly complicated.

I would never base my view of calendar logic on what Excel does as it is usually tied to legacy things. As an example Excel's 1900 date system (not to be confused with the 1904 date system) does this: "For compatibility with Lotus 1-2-3, the 1900 Date System incorrectly accepts the date February 29, 1900, however, 1900 was not a leap year. This also has the side effect that for the period Jan 01 1900 to Feb 28 1900, the WEEKDAY function reports incorrect values.”

Week 1 cannot start in December as that would be crossing a year boundary. In SQL Server weeknumber is defined by the setting of DATEFIRST: https://learn.microsoft.com/en-us/sql/t-sql/statements/set-datefirst-transact-sql?view=sql-server-ver16 . Note the little caveat at the end that states: "Specifying SET DATEFIRST has no effect on DATEDIFF. DATEDIFF always uses Sunday as the first day of the week to ensure the function is deterministic.” so be careful of DATEDIFF in weeks.

If you have a default setting for your TX calendar it should hopefully match the results from ISOWEEKNUM() in Excel (see: https://support.microsoft.com/en-au/office/isoweeknum-function-1c2d0afe-d25b-4ab1-8894-8d0520e90e0e).

In general the concept of a week is that it always has 7 days, but weeknumbers do not have to follow that logic. If you want each weeknumber to contain 7 days, you should use ISO 8601 weeknumbering: https://en.wikipedia.org/wiki/ISO_8601#Week_dates . In other parts of the world than North-West Europe there are different loose definitions if people care about week numbers at all. In the US I think the week starts on Sundays and week 1 starts on 01/01, resulting in broken weeks (not 7 days) for week 1 and 53 generally. See: https://devblogs.microsoft.com/oldnewthing/20160311-00/?p=93144

As an additional little twist, .NET isn't exactly nice with this either: https://learn.microsoft.com/en-us/archive/blogs/shawnste/iso-8601-week-of-year-format-in-microsoft-net . 


Reply