

Once you have selected and moved tables from a Ingest Instance (or an alternate Data Area) into a new Data Area, there are many more actions that you can perform, such as lookups and transformations, and these actions may require the creation of relationships between the various tables.
How to relate tables
Start by identifying a field that exists in both tables that can be used to create the relationship, i.e. an ID field that has unique values in at least one of the two tables. To create the relationship, drag the ID field from one table onto the corresponding field in the other table, i.e., dragging the ID field from the “One” table to the corresponding field in the “Many” table.
The two fields above need to be of the same data type for this to be possible For example, a varchar field cannot be used with an nvarchar field to create a relationship. However, an nvarchar(20) field can be used with an nvarchar(50) field to create the relationship. When dragging the field from one table to another, a “+” icon will appear next to the mouse pointer when hovering over a field that is compatible based on matching data types.
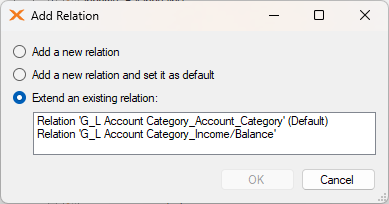
It is possible to create more than one relationship between two tables. If two tables are already related, then a message will appear asking if a new relationship should be added or whether the existing relationship should be extended.
In this instance, there are three options to choose from, but it is generally recommended to use the default selection of “Extend an existing relation.” The following is an explanation of these three options.
- Add a new relation: This will add a new relation between the two tables and not add this new relation to an existing one.
- Add a new relation and set it as default: This is the same as above, but this will also set the new relation as the default relationship.
- Extend an existing relation: As shown in the GIF above, the “Add Relation” dialog box will suggest a default relation, but since more than one relation exists between the two tables, users can choose which relation is to be used by default.
The relation can be amended after it is created.
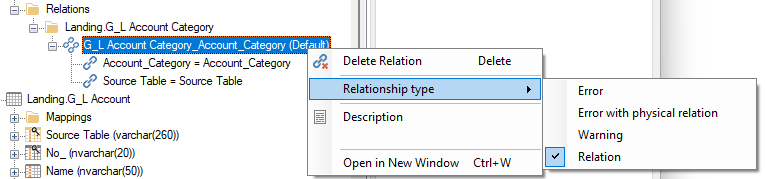
The following are the relationship options.
- Error: This means that if a related row does not exist in the table, it will be moved to the error table and data may be missing from the valid table instance.
- Error with physical relation: The relation is stored in the database for other database tools to see. The behavior is otherwise the same as the Error setting. Note that the table needs to have a primary key and a unique index set. If index automation on the table has been disabled, then table indexes will need to be created manually.
- Warning: The invalid record is copied to the warnings table and the valid table will still include this data. No data will be missing as a result of the warning, however, the instances that violate the rule may need to be further handled in some other way.
- Relation: Any violations of the check is ignored.
The default relation setting can be configured in the Edit Instance menu.
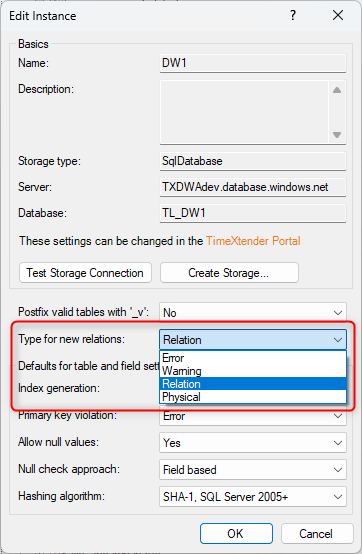
“Relation” is the default setting since the other options may result in data being filtered out and not available.
Benefits of relating tables
The primary purpose of relating tables is to assist in the creation of data area lookups as well as the creation of relationships in the Deliver instance.
Supernatural keys can also be used when creating table relationships since they may expedite the process, streamlining the steps needed to populate the foreign keys in the fact table.
Lookups
Lookups are created as follows:
-
- Right-click on a table and select the “Add Conditional Lookup field” option from the context menu. Enter a name for the field, select the source field, and then manually create the join needed to create the relationship.
- Click and drag a field from the source table and drop it on the corresponding field in the destination table. Afterwards, manually create the required join to complete the relationship.
Once your table relationships are in place, creating a new lookup is as simple as dragging a field from one table to the other.
Using the default relation instead of joins will allow relationships to be dynamically updated if changes are made to the relations between the two tables, which can expedite the creation of multiple lookup fields.
Conversely, you have the option to not use the default relationship, which allows you to copy over relationships that were previously created as well as adding completely new relationships.
Deliver Instances
Existing table relationships in your data areas can be helpful when building your Deliver instance, as these relationships will automatically be detected along with a prompt asking whether this relationship should be brought over along with the table.
Existing table relationships are also beneficial in the Deliver instance when relating a dimension table to a fact table, as the relationships aid in the setup of the correct many-to-one or one-to-many directional rule, as in the following example.
- A dimension table and a fact table are already related to each other in a data area as follows.

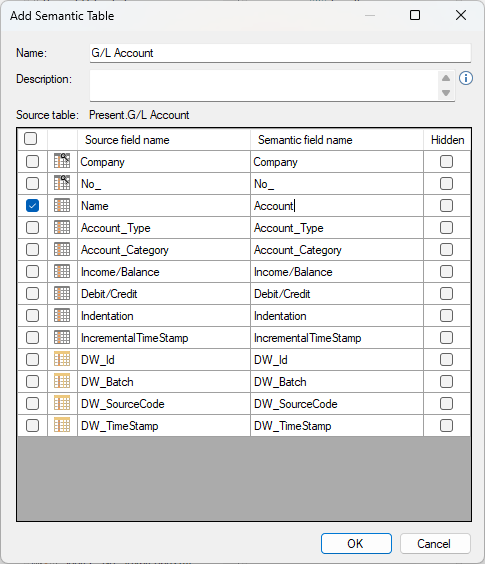
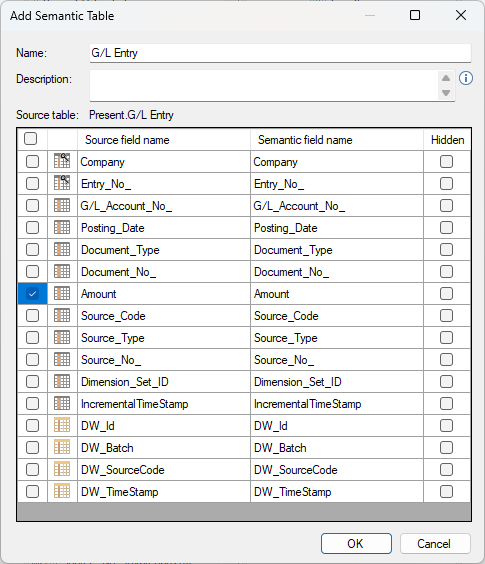
- When the dimension table is added to the Deliver Instance, only the fields needed will be selected.
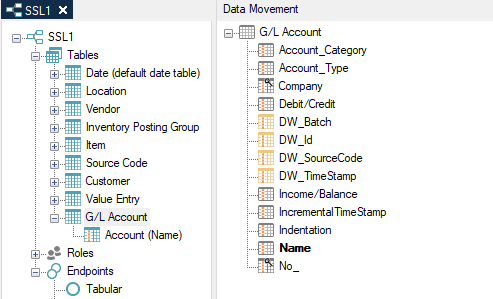
- The new table in the Deliver Instance will now appear as follows.
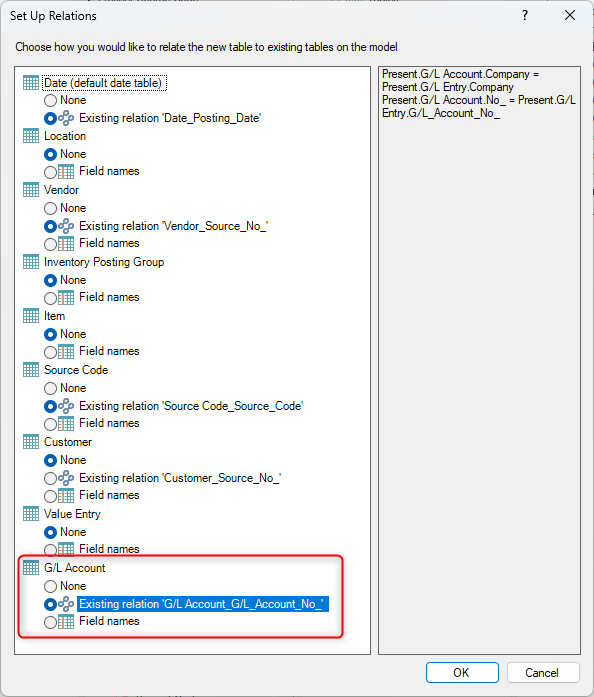
- The next step is to add the fact table.
- After adding the fact table to the Deliver instance, the “Set Up Relations” dialog box may appear with options on how to set up the relations, based on the relationships previously set in the source data area.
- After the tables are added to the Deliver instance, they will appear as below, with the relationship fields automatically added as hidden.
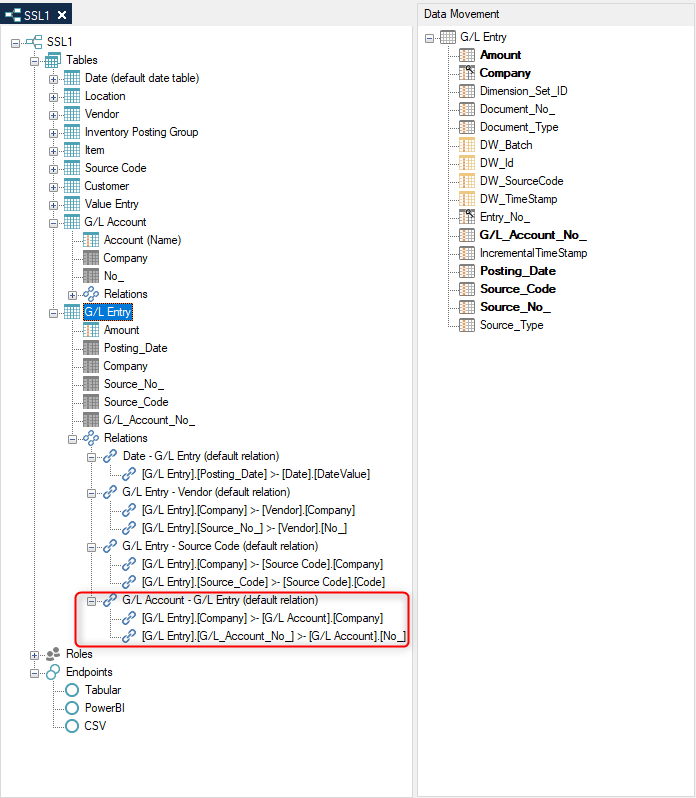
- These table relationships will be based on the “many-to-one” directional rule.
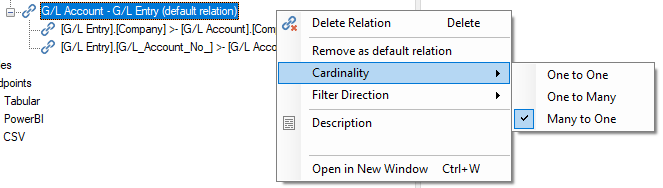
- The cardinality will be set to the destination or fact table.
Thus, the existing table relationships in the data areas helps facilitate the creation of these relationships in the Deliver instance.
