When working with cubes in TimeXtender, restricting access for certain users is a common security implementation. For example, salespersons might only need to see their own data and not the data of their colleagues. This guide explains how to setup security on cubes in TimeXtender Classic
Contents
Adding roles
Important: Security will not apply to any user that has Administrator rights on the OLAP server. These admin users will have full access to the data, even if you add them to security configuration. For TimeXtender Classic users, they must have admin rights to the OLAP Server in order to be able deploy and execute the cubes.
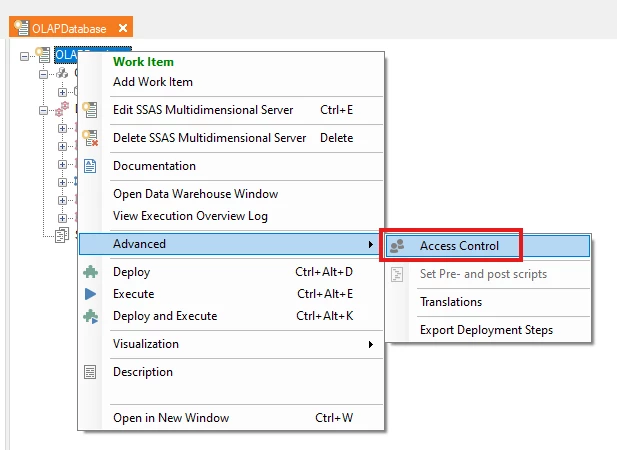
Before security can be configured, the cube must first be deployed and executed. Afterwards, begin by right-clicking on the OLAP Server and go to Advanced → Access Control.
In the dialogue that opens, rights can be setup for every object and value in the cubes.
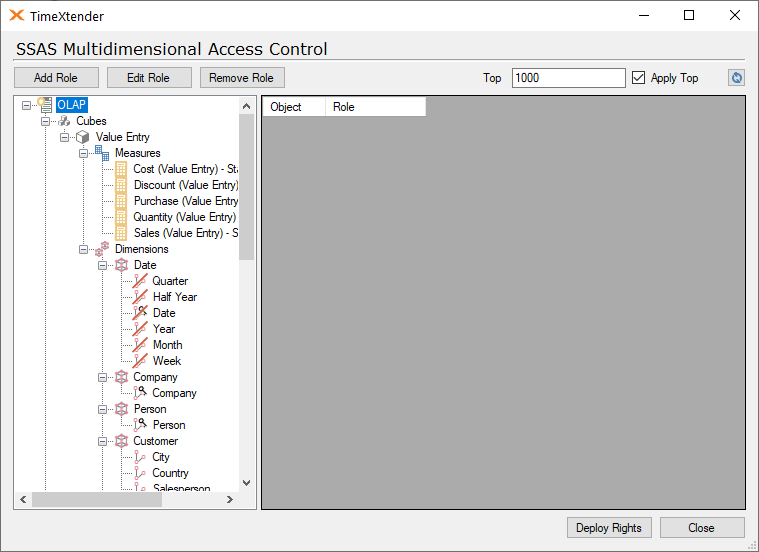
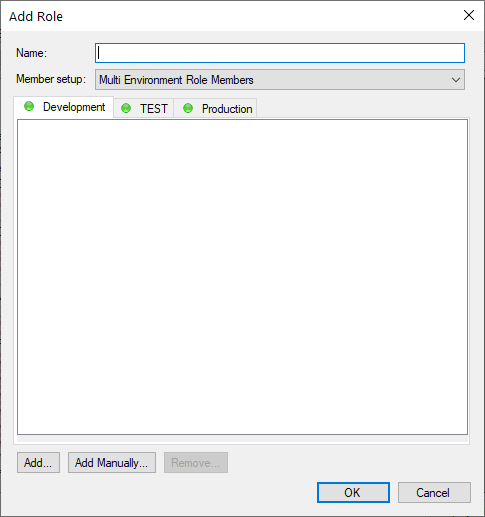
The first step in setting up security is to create a role. Click the Add Role button at the top of dialog window. In the Add Role dialog window, enter a name for the securty role.
There are two ways to add users and groups to a role.
- Using the Windows Select Users or Goups dialog.
- Enter users manually.
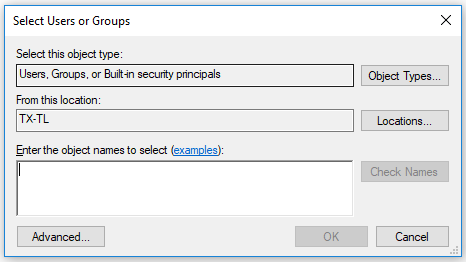
In the Add Role dialog, click the Add button at the bottom to open the Windows Select Users or Groups dialog.
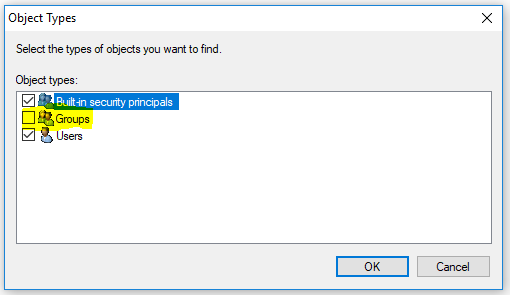
If you also want to choose a group, but you might need to turn it on first.
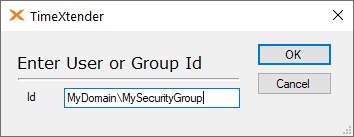
In order to add users or groups manually, In the Add Role dialog click the Add Manually button.
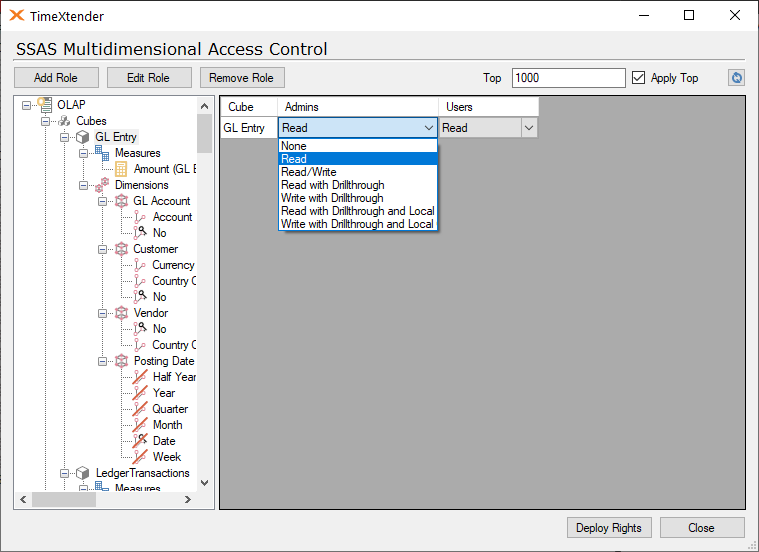
After a role is added, all of the role members will have read access to the entire cube. However, this setting can be changed for any single object in the tree according to the following access options and as shown below.
| None | No rights on the cube |
| Read | Read rights on the cube, the cube can be browsed |
| Read/Write | Read rights, and the users can perform writeback to the cube |
| Read with drillthrough | Read access, and on standard measures, the user can drillthrough and see the data warehouse records that the value consists of. |
| Write with drillthrough | Same as above with writeback support. |
| Read with drillthrough and Local Cube | Additionally gives the ability to save a local copy of the cube. |
| Write with drillthrough and Local Cube | Same as above with writeback |
The access to measures and dimensions are handled in a similar way. Additionally, it is possible to set up rights for any dimension member. For example, certain roles can be granted access to specific companies, and rights can be configured so that role members only see specific performance values, and so on.
Dimension Security
There are two ways of setting up user permissions on dimension members in TimeXtender.
- Global Dimensions
- Cube Dimensions
If the permissions are global, meaning they should apply to multiple cubes where the dimension is used, then setup the permission on the dimension itself and on the cube set the permission level to Inherited, which is the default setting.
If the permissions are specific for a single cube, then define the permissions on the dimension node inside the Cube and set the Cube permission level to NoInheritance.
Lastly there also is a Combined choice. This means that the settings are the same, except where there are differences.
In other words, the way of handling permissions allows you to set up a default behaviour for the dimension that will be inherited on all cubes. You can then override the default setting by setting the permission level to NoInheritance or Combined and setup local permission for the cube/dimension combination.
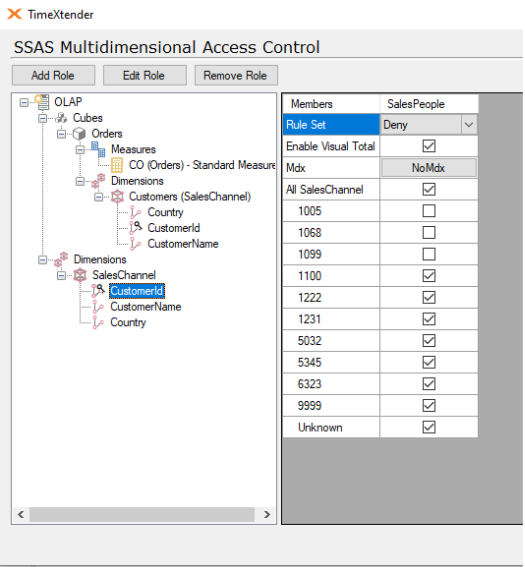
This example will restrict members of the role to see data from just one company on all cubes where the “Company” dimension is used:
First, setup security on the global dimension:
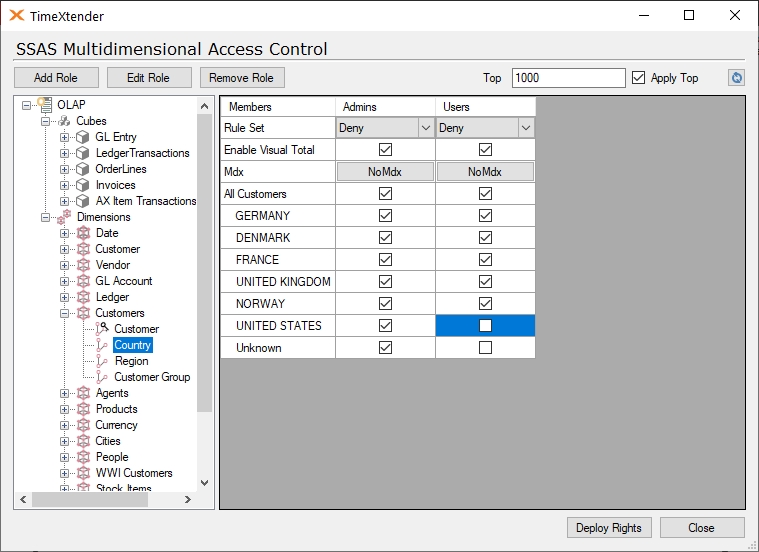
The All member (All Company) should always be Checked or the permission setup will not have any effect!
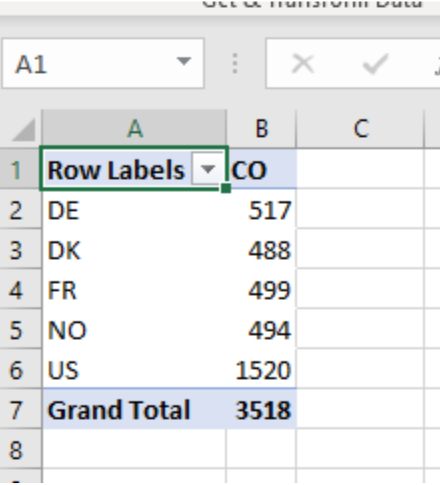
If Enable Visual Total is not checked, then the total will be the grand total for the all companies, if set to Yes, the total will be calculated only on the companies where the role has read access.
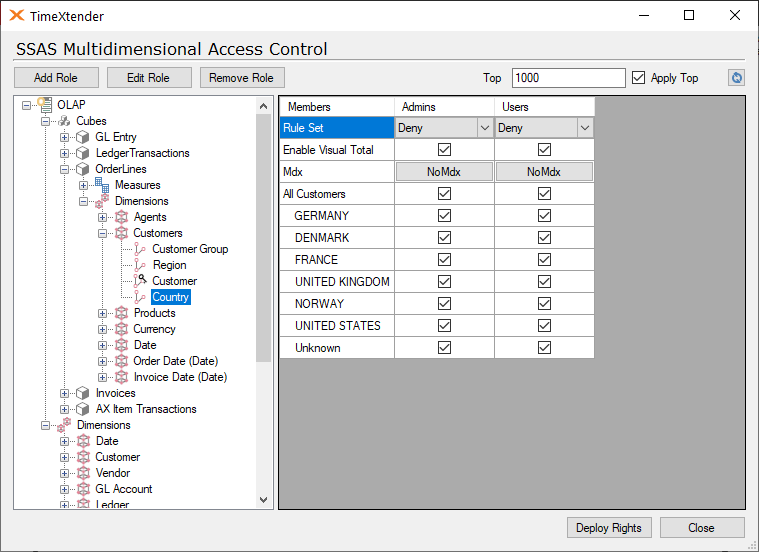
If the local cube dimension is set to NoInheritance then it will not inherit the settings on the global dimension:

In the example above, the Customer Cube Dimension has the Users role is set to Inherited and the Admin role is set to NoInheritance. This means that the User role will inherit its rights from the global dimension and the rights configured on the cube dimension will be ignored. However, the Admin role will use the rights configured on the Cube dimension and therefore have different rights than the global dimension.
To deploy the rights to the OLAP Server click the Deploy Rights button. After this, the rights will be deployed whenever the OLAP Server is deployed.
If no error occurs, the following message will appear:
Multiple Environments
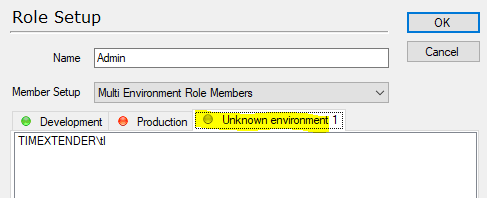
When using the Multiple Environment Deployment feature of TX, the security setup can be differentiated per environment. When TX detects that it is running in a multiple environment setup, if offers the option to setup users/groups for roles differentiated Multiple Environment Role Members or not Local Role Members.
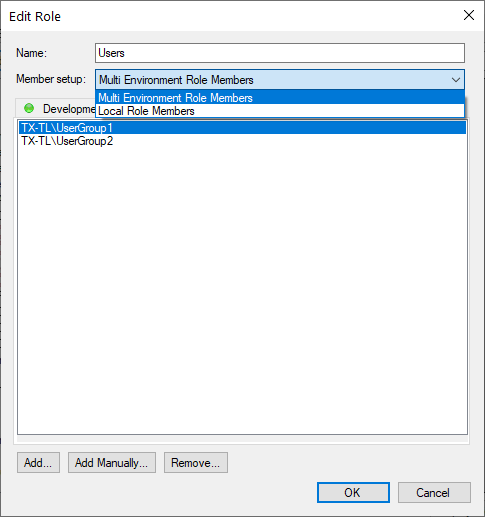
If Multiple Environment Role Members are selected, then you can select users and groups per environment.
The green dot indicates whether the environment can be contacted or not.
If an environment is deleted, then it will appear as “Unknown Environment”.
If the environment in known by TX but can not be contacted, then it will appear with a Red dot. Users and groups can be added and removed even though the environment cannot be contacted:
Using background processing
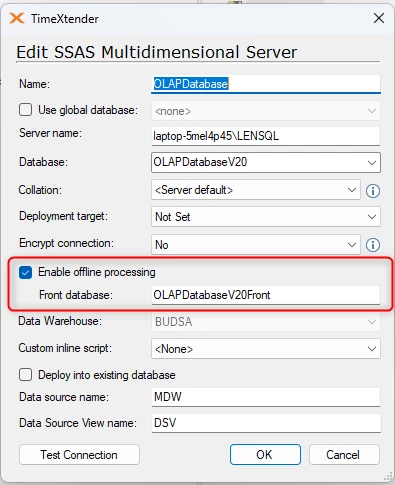
Enable offline processing can be configured by right-clicking on the OLAP Server and selecting “Edit SSAS Multidimensional Server” and checking the box for this and entering a name for the front database.
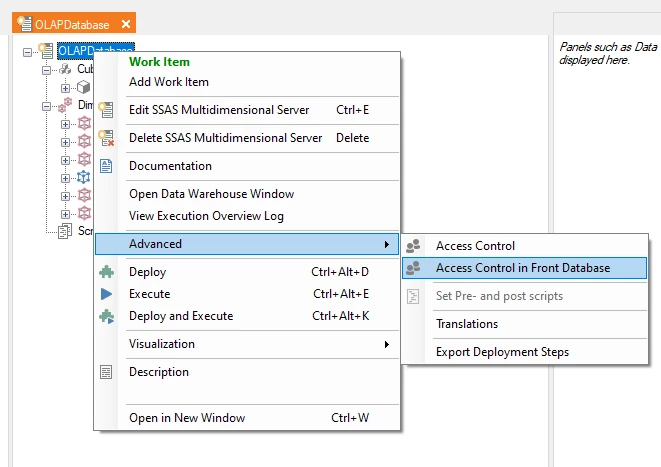
The setup of security now has two options when you right-click the OLAP Server and go to the Advanced menu.
- Access Control
- Access Control in Front Database
When adding the changes you should always deploy them to the Front Database.
After that, to make sure they become the general security settings, deploying the cubes will make sure it is not removed, on the next execution of the cubes.
Common Issue
DimensionPermission The dimension was not found when the string was parsed
This is something that can happen with Excel, but does not happen in PowerBI.
If you set up rights on the Dimension level like so.
Set the cube dimension to Inherited from the dimension (Default setting) and giving it a different name than in the Dimension.

Then you deploy the role and may experience the following error in excel when you attempt to preview the dimension.
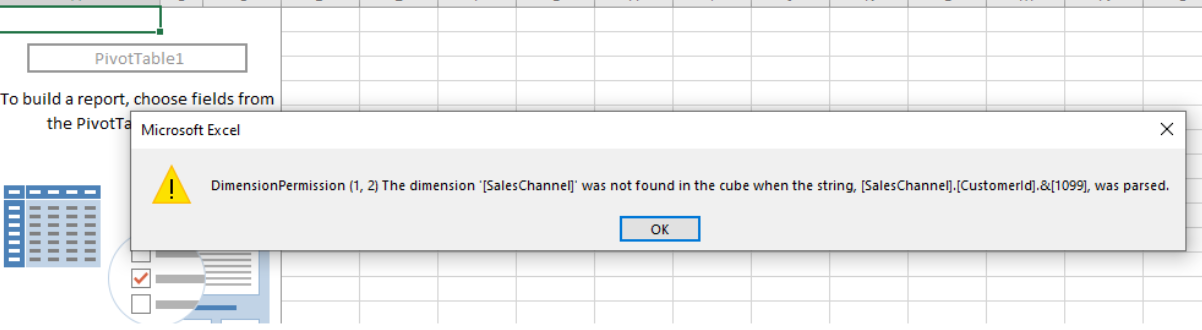
This is because you cannot use Inherit on role playing dimensions (Cube Dimensions which have different names than its source dimension).
The solution is the following.
Solution
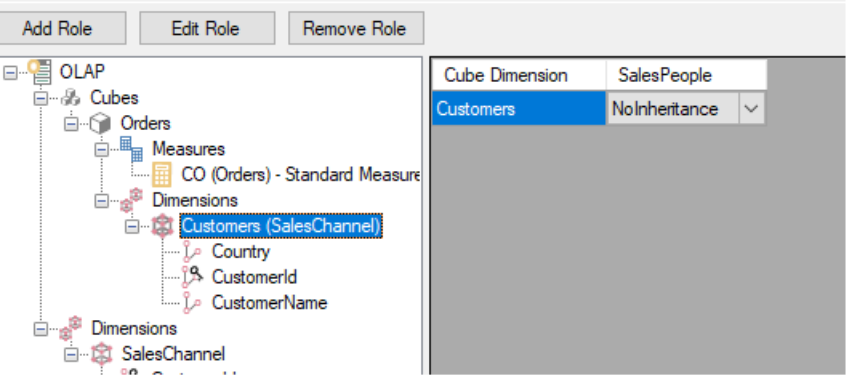
Change the cube dimension to NoInheritance.
Set the Cube Dimension to have the rights.
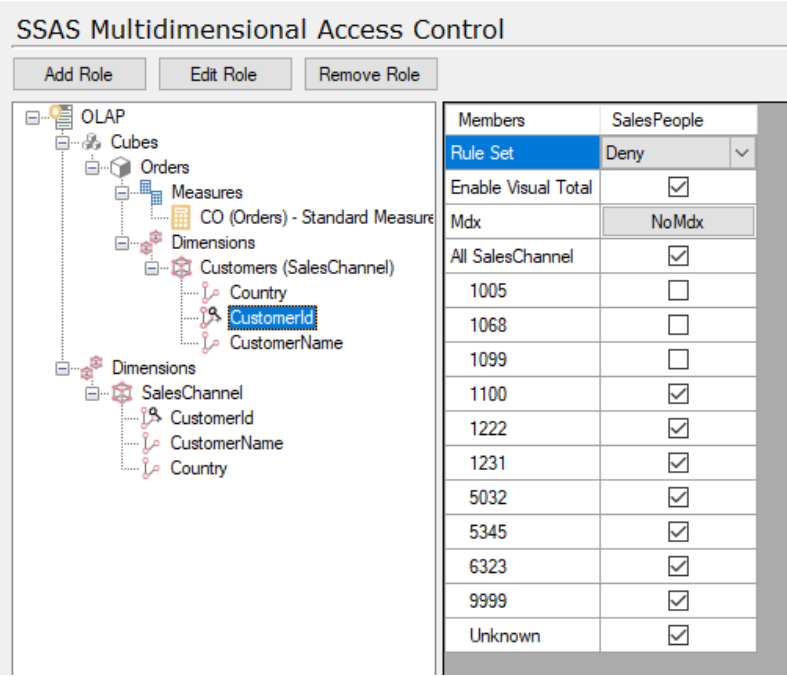
Now if you deploy the role and preview it in Excel it looks like so.