Deliver instance tables represent the culmination of all the extraction, transformation, and loading that happens prior to the tables being added to the Deliver instance. There are various types of fields that can be added to a table in a Deliver instance. Custom fields provide a means to present content that is not normally available for a field from a Prepare instance.
Adding a Custom Field
Use the following steps to add a custom field to a table.
- Right-click a table and click Add Custom Field to open the following window.
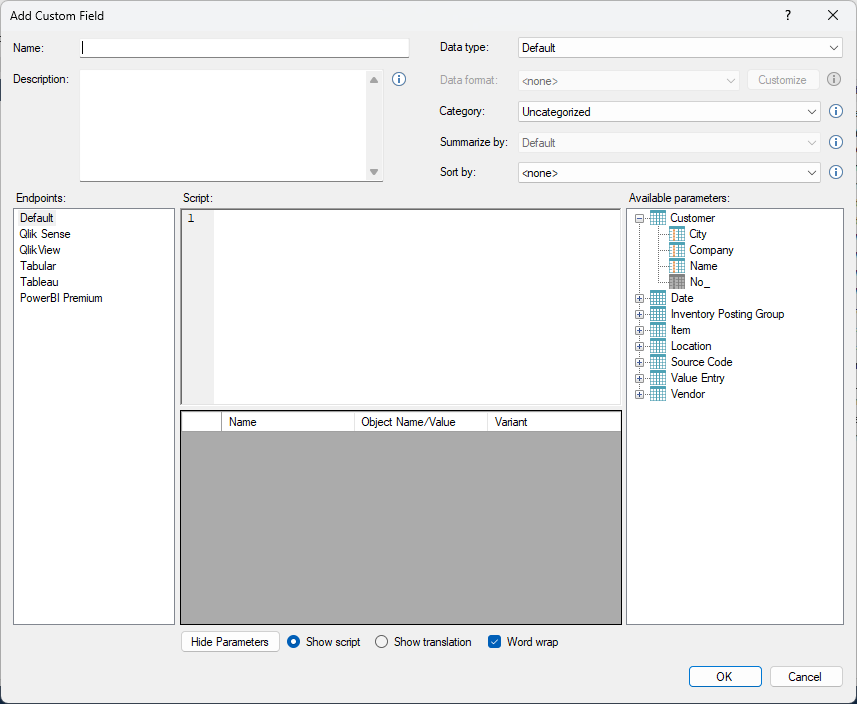
- In the Name box, enter a name for the field.
- In the Description box, enter a description for the custom field, which may be available in front-end tools.
Note: This setting applies to SSAS Tabular and PowerBI Premium endpoints only.
- In the Data type list, click on the data type to be used for the custom field.
Note: This setting applies to SSAS Tabular and PowerBI Premium endpoints only.
- In the Data format list, click on the data format to be used for the custom field. For some data types, only one data format is available and cannot be changed. Click Customize to customize the data format, e.g. number of decimal places for decimal numbers.
Note: This setting applies to SSAS Tabular and PowerBI Premium endpoints only.
- In the Category list, click on the category to be used for the custom field.
Note: This setting applies to SSAS Tabular and PowerBI Premium endpoints only.
- In the Summarize by list, click on the type of aggregation to be used with the custom field and in front-end applications, e.g. Power BI.
Note: This setting applies to SSAS Tabular and PowerBI Premium endpoints only.
- In the Sort by list, click on the field that contains the values to be used to sort the custom field.
Note: This setting applies to SSAS Tabular and PowerBI Premium endpoints only.
- In the Script box, enter the script that generates the value for the custom field. Since script syntax is not the same for different endpoint types, it is possible to add separate scripts for each type of endpoint. Click on an endpoint type in the Endpoints list to switch between the different endpoint types. Any endpoint type that does not have a specific script will use the Default script. Drag fields from the Available parameters list to the Script pane to use them as parameters in the script. Click Show translation to show the script TimeXtender will deploy to the endpoint.
How to set up a custom field
The following custom field example merges two fields into one field in the Customer table.
Qlik Sense endpoint set up of the custom field.
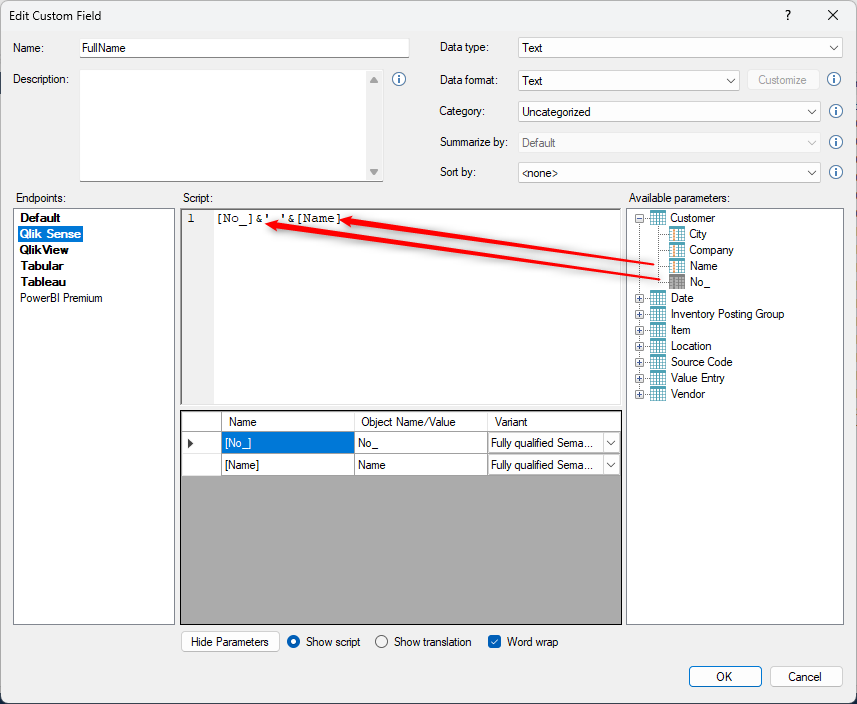
- The Data type is set to Text
- The Data format is set to Text
- The Category is set to “Uncategorized” as there is no category is suitable for this custom field.
- The Summarize by option is not available for Qlik and Tableau.
- The Sort by option is not available for Qlik and Tableau.
- The two fields have been dragged into the Script pane from the Available parameters area
- The ampersand “&” character is used to separate each field as is recommended with Qlik endpoints.
The Tabular Endpoint version of the script to merge the two fields:
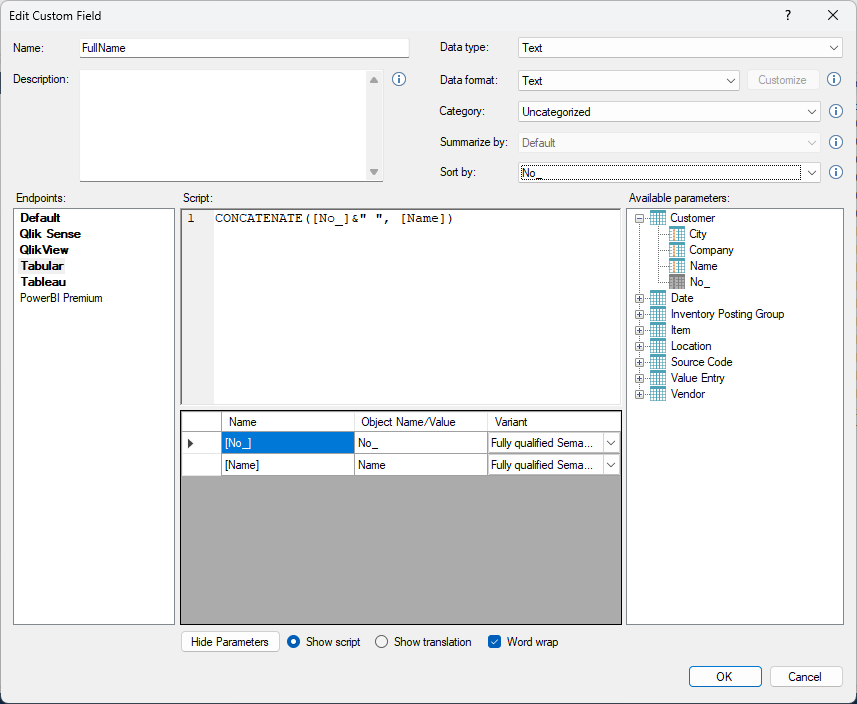
- Since Tabular endpoints support sorting, the “No_” field as been configured for the Sort by option.
- The script added uses the CONCATENATE function to merge two fields.
The Tableau endpoint version of the script to merge two fields.
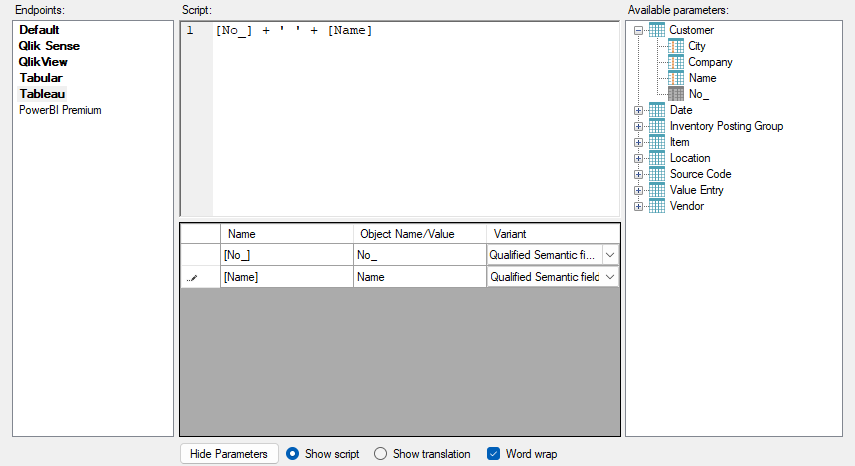
The Tableau endpoint uses plus signs “+” instead of ampersands “&” as compared with other endpoints above.
The Default endpoint appears as follows:
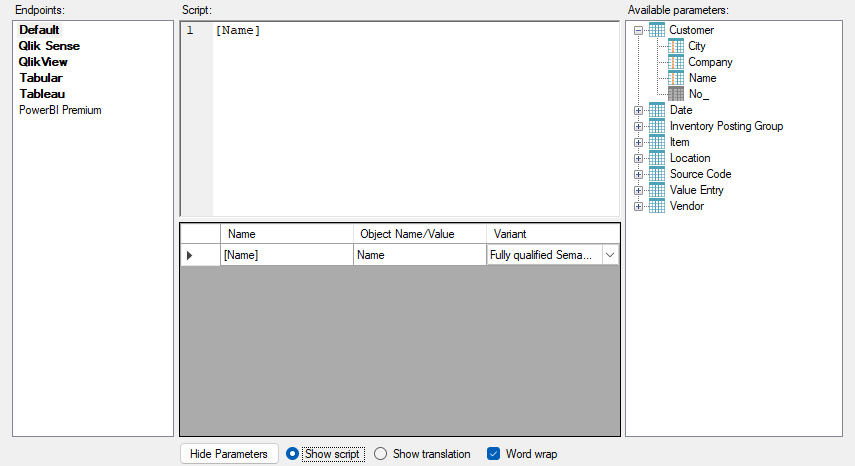
Only the name field is added above to ensure a setting will be applied.


