The TimeXtender Portal is the online administrative website where the following data estate items can be created and managed:
- Users
- Instances (Ingest, Prepare, & Deliver)
- Data Sources
- Credits & Billing
- Security & Permissions
This article describes the process of creating Users and their associated User-Level Permissions.
Each company in the Portal includes at least one user. The first user added to a company will be the contact person for the company and also have administrative rights for the company in the Portal.
User-level Permissions and the Contact Person
In the Portal, a user can be assigned user-level permissions that grant the user access to restricted features and functions. The permissions available may depend on the permissions that are assigned at the company level.
The important user-level permissions are as follows:

- Company admin: Users with this permission have full access to their company account in the Portal, and the visual queue of a crown icon is displayed next to their name in the user list. Company Admins can edit the company info, add/edit/delete users, and assign user-level permissions. The one restriction placed on Company admins is that they cannot remove the company admin permission from themselves, which is not allowed to help ensure that all companies have at least one admin.
- Customer manager: This permission is only available for partners. A customer manager acts as an administrator for all of the partner’s customer companies. While Customer managers can administer their customer companies, then cannot make any changes to their own partner company account.
- Data estate admin: This permissions allows users to manage the instances and data sources that comprise their data estate. Data estate admins can also grant users access to their data estate instances, which is configured in the Portal on the details page for each specific instance. Once granted access, users will be able to open and use the instances in the TimeXtender Data Integration program.
In addition to these roles, each organization has a contact person. The contact person role does not come with any extra privileges. It is just a way of showing your partner who to contact at the company for TimeXtender related matters.
Use the following steps to amend the contact person
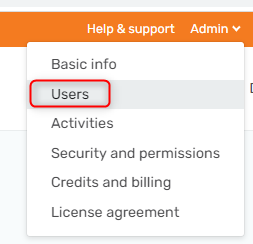
- In the Portal, click on the Admin menu and select Users.

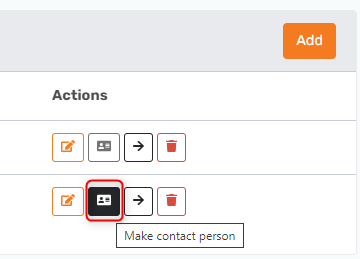
- Locate the appropriate user In the User list, and then click on the Make Contact Person button in Actions column.

Adding a New User
Use the following steps to add a new user to a company or a customer.
- Go to the Users list and click the Add button. Depending on whether the new user is for a company or a customer, use the following steps as appropriate.
- To add a user to your own company: Sign in to the Portal as a user with the 'company admin' permission. Then go to Admin > Users and click the Add button.
- To add a user to a customer: Sign in to the Portal as user that with 'customer manager' permission. Then go to My Customers > Customers and locate the Customer. Click on the Company name to open the customer details page. In the Users list, click the Add button.

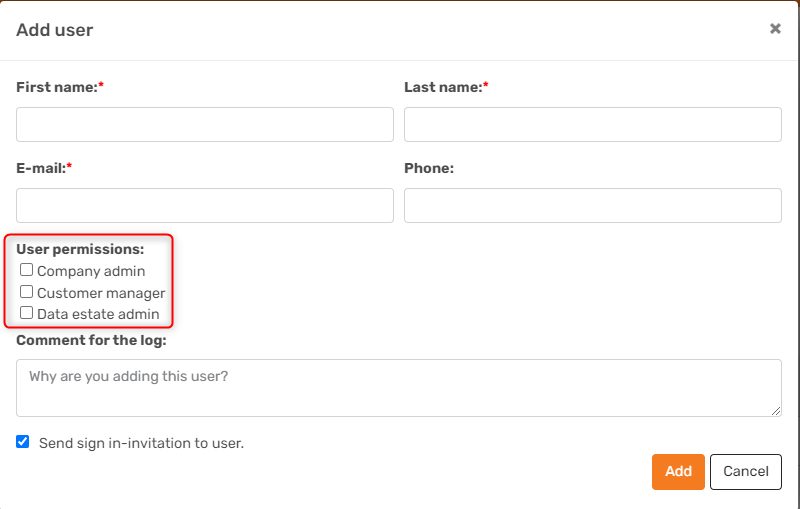
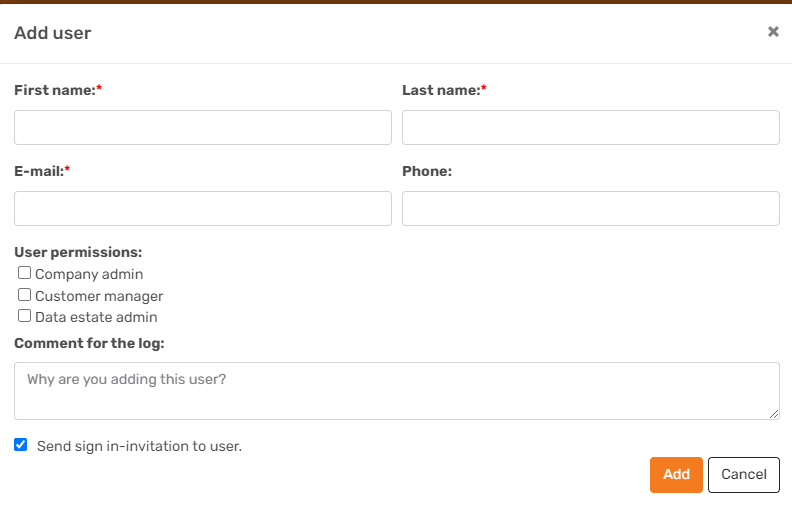
- In the Add user dialog, enter the new user's First name, Last name, Email, and Phone (optional).
- Under User permissions, select the appropriate user-level permission.
- (Optional) Uncheck the Send sign in-invitation to user box to create a user that will not be able to sign in to the Portal.
- Click Add.
Unless otherwise configured, the system will send a Portal Sign-In Invitation email to the new user when the new user is created, along with a link to set up their password. See Signing In for the First Time to learn more about the first sign-in experience.
Portal Sign-In Invitations can always be sent later, should that be needed for any reason, i.e. users that were not initially sent an invitation email.
Use the following steps to send the sign-in invitation email to a user in your company.
- Sign in to the Portal as a user with the 'company admin' permission.
- Go to Admin > Users.
- In the User list, click on the user's name.
- Click Send Invitation on the user details page.
Use the following steps to send the sign-in invitation email to a customer user.
- Sign in to the Portal as a user with the 'customer manager' permission
- Go to My Customers > Customers, find the customer, and click on the company name to go to the customer details page for the customer.
- In the Users list, click on the user's name.
- Click Send Invitation on the user details page.
Resetting a User's Password
If a user did not receive the invitation email or has forgotten their password, company admins can trigger a password reset from within the Portal. The user can also use the "Forgot your password?" link on the sign-in page to reset their password.
Use the following steps to reset the password for a user at your company.
- Sign in to the Portal as a user with the 'company admin' permission.
- Go to Admin > Users.
- In the User list, click on the user's name.
- Click Reset Password on the user details page.


