Database roles are part of TimeXtender Data Integrations (TDI) security functionality and are a prerequisite used to configure object level and row level permissions for specific data area objects including views, schemas, tables, and individual table columns. Database roles can also be used to set row level permissions for data area objects.
Database Roles Setup
The Security folder in the data area tree displays all of the current security setups. Right-click on the Security folder to see the options needed to configure a new security setup.
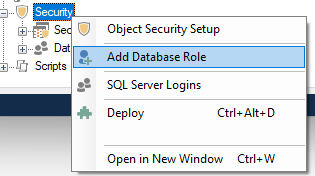
Configuring data area security encompasses the following two steps.
- Create a database role based on an SQL Server login.
- Use the database role to set up either object level or row level security.
This article explains the first step of creating a database role in detail. The subsequent step of creating either object level or row level security is explained in the following two related articles:
- Data Area Security - Object Level Security article.
- Data Area Security - Row Level Security article.
Database roles are based on SQL Server Logins, which can be queried separately or as part of the Database Role setup. This article first explains how to query SQL logins to double-check if a suitable login is already available and how to create a new SQL Login, if needed.
However, if a suitable SQL Login is already available, then this first step may not be needed, since SQL Logins can also be queried as part of the second step of adding the database role.
Step 1: Add or edit SQL Server Logins
The first step in setting up object level security is to identify an SQL Server login that can be used for a database role. SQL Server logins can be viewed within TDI and new logins can be created provided the account used for the data area SQL storage has sufficient permissions.
The SQL Server Logins menu connects to the Microsoft SQL server that is configured for the data area storage and pulls in all of the logins that are set up there. If there are no existing logins that are suitable to use for the database role, a new login can be added either in TDI or on the SQL Server itself.
Use the following steps to add or edit an SQL Server Login:
- Under the data area, right-click the Security and select SQL Server Logins to open the Logins window.
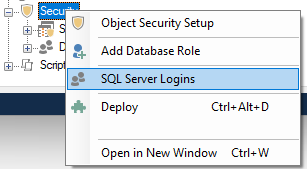
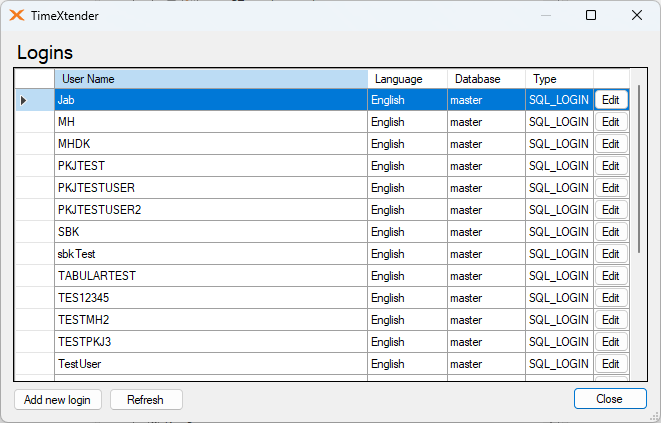
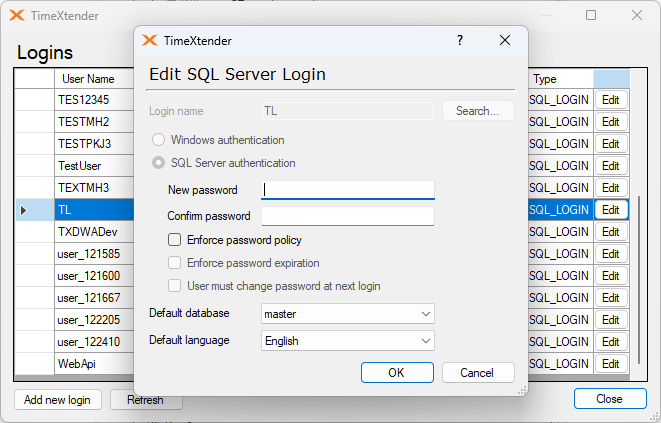
- All existing SQL Server logins are listed out. If an SQL Login already exists that is suitable for use in the database role, then skip to the Adding a Database Role section. Otherwise, click the Add new login button to create a new SQL Server Login.
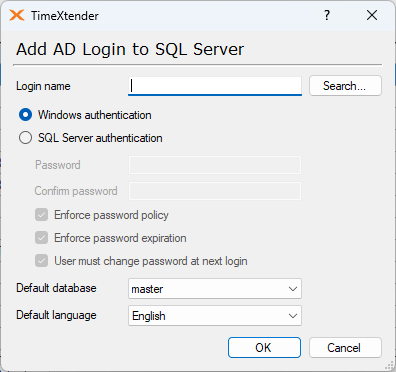
- In the Add AD Login to SQL Server window, begin start by entering a suitable name in the Login name box. New logins can be added for either Windows or SQL Server authentication as follows:
- To add an Azure AD login, it is possible to add an email account. Click on Search and locate the user to add them in.
- To add an SQL Server authentication login, select that option and enter a username and password in the fields provided.
- Click OK to save the new login.
- Click the Refresh button to reload the list, if needed to see the new login.
- If necessary, click the Edit button next to an existing user to edit as needed.
Step 2: Adding a Database Role
The second step is to create a database role based on a SQL Server login, which can later be used to implement object level or row level security.
Use the following steps to add a database role:
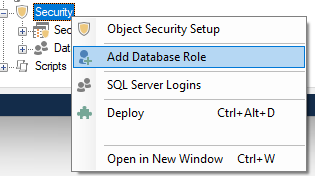
- In the data area tree, right-click the Security folder and select Add Database Role.
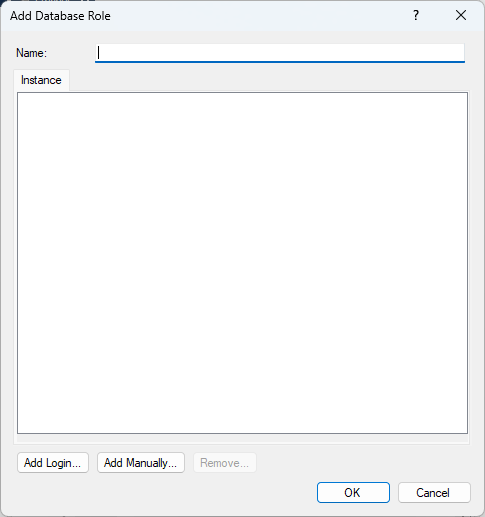
- In the Name box, enter a name for the database role.
- Click the Add login button to add logins that exist on the SQL Server configured for the data area storage.
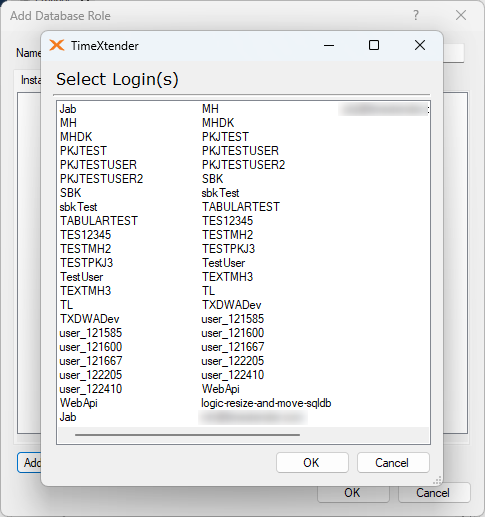
- Select the logins to be added from the list in the Select Login(s) window.
- Click OK.
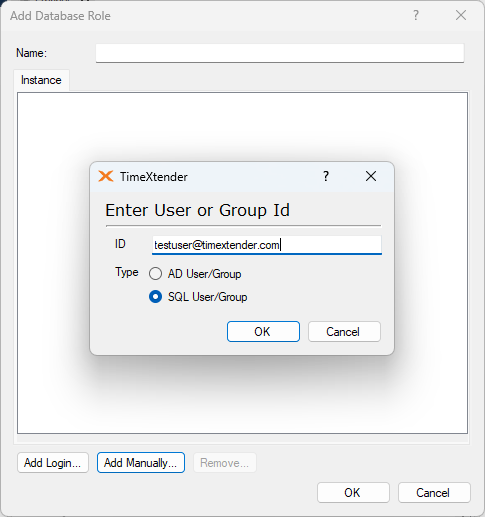
- (Optional) If a suitable SQL Server login is not yet available, click Add manually to add Active Directory or SQL Server users or groups that are not already present on the SQL Server. This might be users on the production server. Complete the following in the Enter User or Group ID window
- In the ID box, enter the ID for the user or group to be added.
- For the Type, select either AD user/group or SQL user/group, depending on the type of ID selected above.
- Click OK to add the user.
- Click OK to close the window and add the database role.
Note: Roles are limited to the data area that they were created in was created on, which means that a role created in one data area will not apply to a different data area within the same Prepare Instance.
Drop Roles Configuration
On each deployment, our program drops the existing roles on the database before recreating them again later. By default, it will only drop the database roles related to the data area that is being deployed. However, it can also be configured to drop other database roles via a setting on the data area. To access this setting, right-click on a data area and select Edit Data Area.
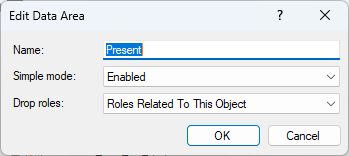
In the Drop Roles setting menu, select from one of the three following options:

- Roles Related to this Object to drop roles related to a specific object used by TDI
- Roles Created by Application to drop all roles created by TDI
- All Roles On Database to drop all roles, which would include roles not created by TDI
After the prerequisite database role has been added to the data area, it is now possible to implement object level or row level security. Click on either of the following links for the articles that explain this second step in setting up data area security.


