


TimeXtender Version 20.10 allows for the configuration of an Ingest Instance as well as the legacy Business Units functionality for data sources. Subsequent versions of TimeXtender have deprecated Business Units in favor of the more robust TimeXtender Ingest Service (TIS).
TimeXtender is currently developing a migration tool to assist users in migrating their Business Units into Ingest Instance data sources and prepare instance data areas. Until the migration tool is available, however, there may be instances where users may want to perform a manual migration of business units over to an ingest instance. This article clarifies the steps needed to accomplish this migration.
High level steps:
- Configure Ingest Instance storage
- Create data sources in the Ingest Instance
- Create and schedule Sync and Transfer tasks
- Move any transformations in the BU into a Prepare Instance DSA.
- Compare the data in the BU and the Ingest Instance
- Remap data objects from the Ingest Instance to the Prepare Instance (e.g. DSA)
- Remove BU mappings in the Prepare Instance (e.g. DSA)
Tips to simplify the manual migration process:
Depending on the type of business unit data source, you may be able to copy the connection string and then import that connection string into the ingest instance data source, which can be particularly helpful with CData data sources as shown in the following example.
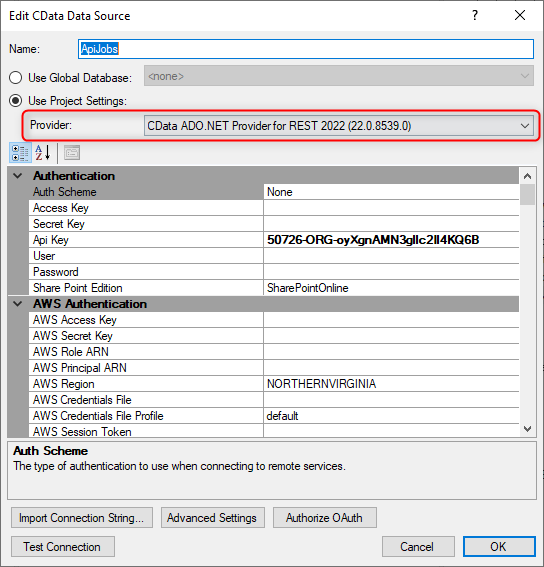
- Right-click on the business unit data source and “Edit CData Data Source” and note the CData provider that is selected. Click Cancel to close the dialog.
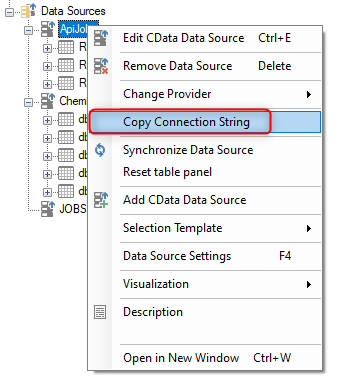
- Right-click on the business unit data source and select “Copy Connection String.”
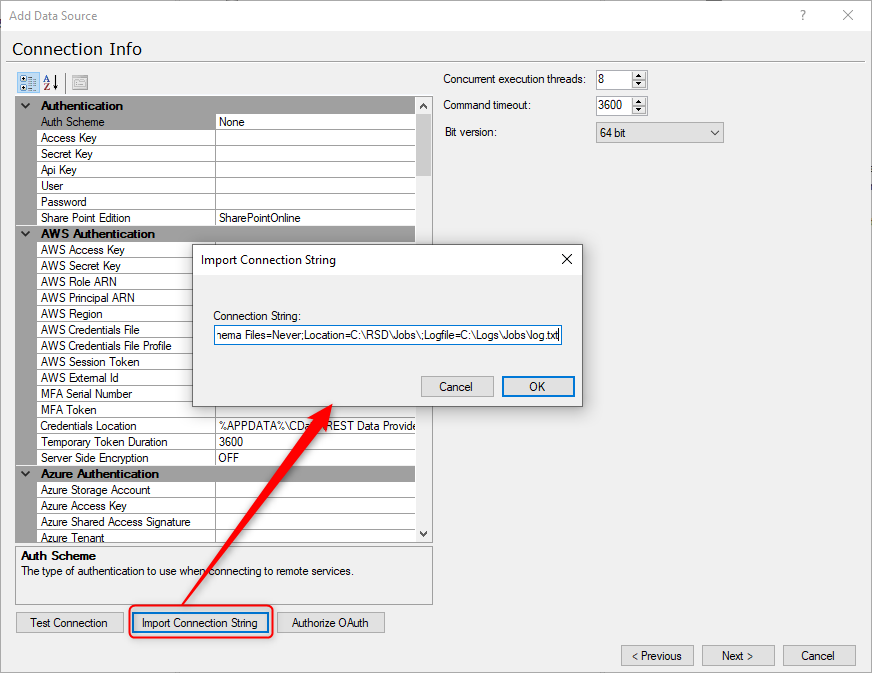
- Under the Ingest Instance, right-click on Data sources and select “Add Data Source”. Select the appropriate CData provider. On the Add Data Source screen, click the “Import Connection String” button and paste in the business unit connection string. Click OK to close.
- Click Next and complete the Synchronization and Transfer tasks for the ingest instance data source.
Once you have setup the data sources, and executed the Ingest Instance transfer tasks, compare the data in the Ingest Instance storage and BU databases to see if the data is the same.
One crucial difference between Business Units and Ingest Instances is that some transformations that exist in a BU cannot be done in an Ingest Instance. Conditional lookup fields are one example of this, so these transformations need to be moved to the Prepare Instance DSA. If there are a lot of transformations that need to be moved to the Prepare Instance DSA, then the following two options may be helpful:
- Create a new intermediary Prepare Instance DSA (a staging area before your current DSA), this will allow you to add the transformations and reconcile data with the BU, with less impact to ongoing development work.
- Move the transformations from the BUs to the current Prepare Instance DSA, consider any impact on ongoing development work.
When remapping the data sources, endeavor to ensure that the Ingest Instance field names match the field names that are in the Prepare Instance, and consider using Query Tables to rename the fields as needed.
With the Query Tables feature, you can enter a SQL query that the Ingest Instance will turn into a table that works the same as any other table in the Ingest Instance. Click on the following link to open the KB Article that has a detailed explanation on how to add a Query Table to an TIS data source Manage Query Tables.
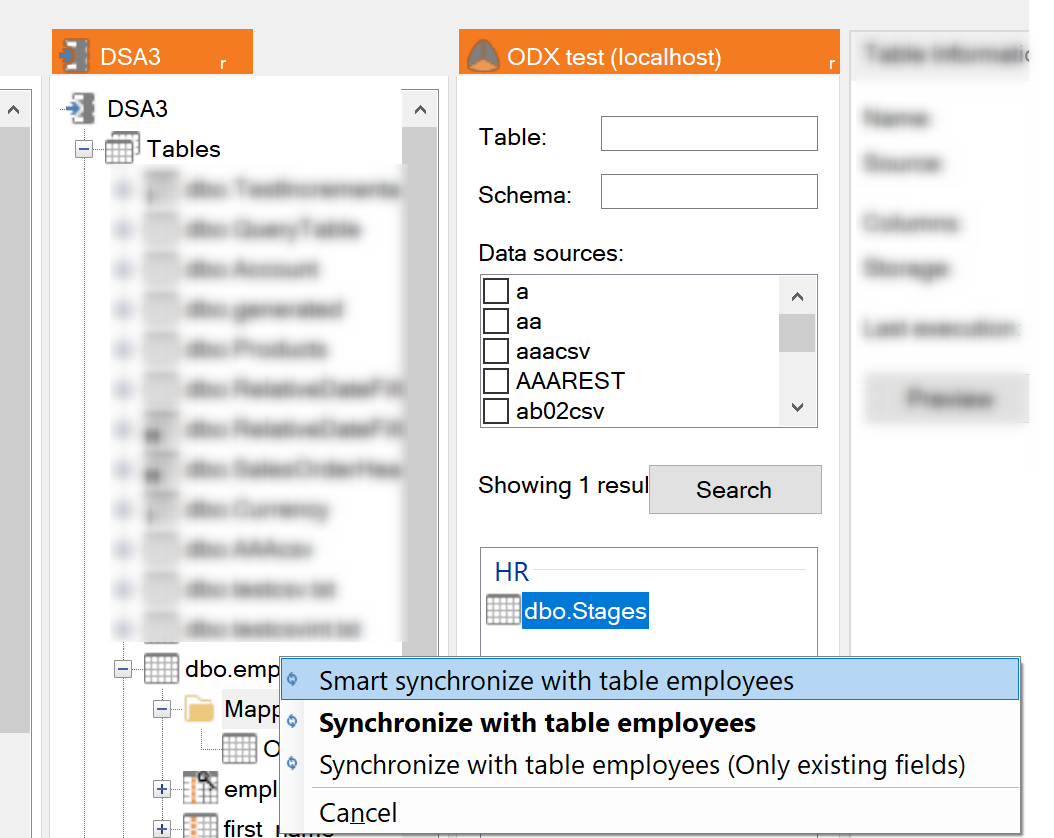
When working with a Query Table, the “Smart Synchronize” feature can also be used to streamline the remapping process. Right-click on the table in the Ingest Instance table selector and drag it to the table in the Prepare Instance DSA and select “Smart Synchronize with table <tablename>”.
Click on the following link to open the KB Article that has detailed information on copying a table from one prepare instance to another. Smart Synchronize with table <tablename>.


