
The Reverse Data Area feature can be used to assist in the recreation of data warehouses in TimeXtender Data Integration (TDI), where the source data warehouse was originally created outside of TDI. The Reverse Data Area feature reads the objects in the source database and then allows for the deployment of these objects inside of a data area. This feature may simplify the setup work that needed recreate the data warehouse in the data area, as objects do not need to be recreated one-by-one. By using the Reverse Data Area feature, Tables, Views, Constraints, Stored Procedures and User Defined Functions can all be recreated within a data area as part of a single deployment.
The Reverse Data Area feature entails the following four steps, which are described in more detail below:
- Create a new Prepare instance in the TimeXtender Portal
- Open the Prepare instance in TDI. Create a data area in the Prepare instance. Right-click on the data area and select, Reverse Data Area to import the source data warehouse objects
- In the TimeXtender Portal, edit the Prepare instance storage so that it no longer points to the original source data warehouse database, but instead points to a new database that will be used to store the new TDI objects
- Deploy the data area
Warning: It is very important to perform Step 3 above to ensure that the objects in the original source database do not get overwritten. Before deploying the new objects in Step 4, ensure that the Prepare instance is pointing to the new destination database server.
Reverse Data Area
- In the TimeXtender Portal, create or edit a Prepare instance so that it points to the preexisting database with the objects that are to be recreated in the new data area
- In TimeXtender Data Integration, open or add a data area
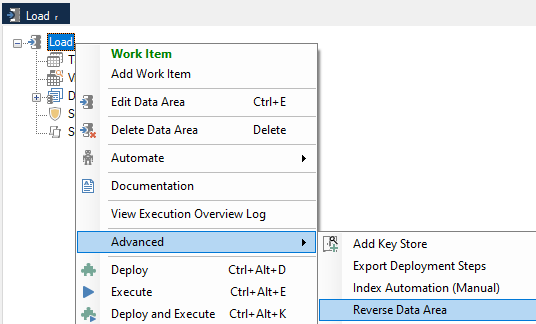
- Right-click on the Data Area, select Advanced, then select Reverse Data Area.
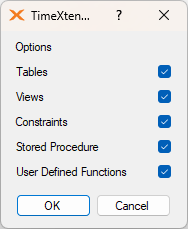
- Select the object types to be brought into the data area and click OK
-
The objects will be generated within the Data Area and marked as red as they have not yet been deployed
-
Go to the TimeXtender Portal, and edit the Prepare instance so that it points to the destination server and database where the objects are to be deployed
Warning: if the database is not updated in the portal for the Prepare instance the objects in the source database may be overwritten
-
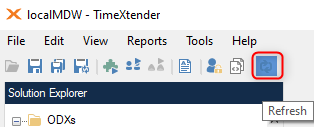
Refresh TimeXtender Data Integration, by clicking on the Refresh button
-
Right-click on the data area and select Deploy to deploy the generated objects
