This guide will walk you through the initial steps of scheduling and monitoring end-to-end processing for your Ingest, Prepare and Deliver instances, as well as how to manage your processes.
Connecting TimeXtender to TimeXtender Orchestration
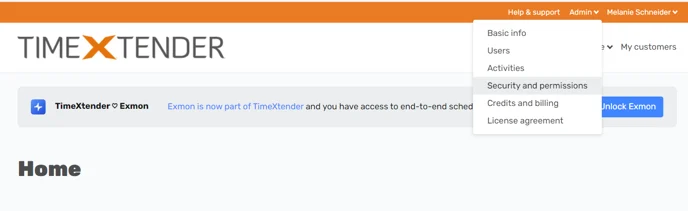
Log in to your TimeXtender Webportal and navigate to Security and Permissions in the admin sector.
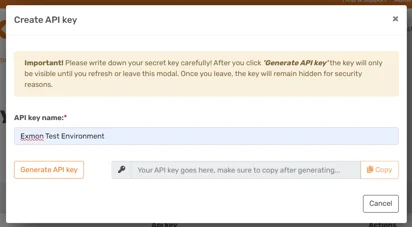
Generate an API Key by selecting a unique name and clicking on Generate API Key.
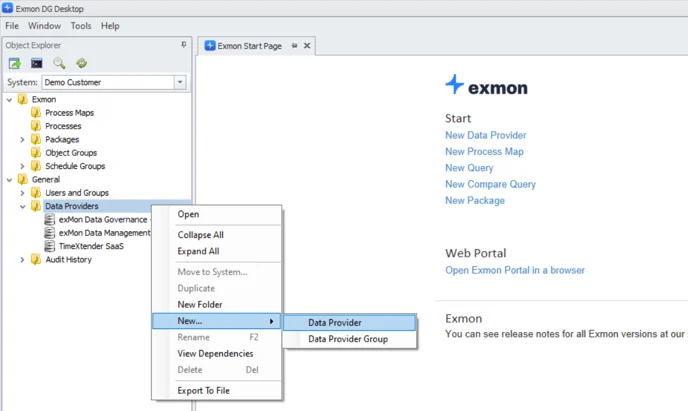
Open TimeXtender Orchestration and add a new Data Provider in the general sector.
Choose Demo Customer as your system and TimeXtender Data Integration as the Datasource Type.
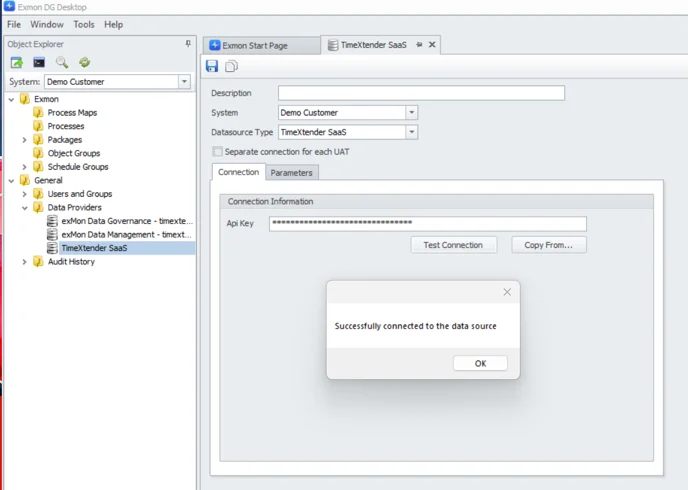
Paste the API key generated in Step 2 and test the connection.
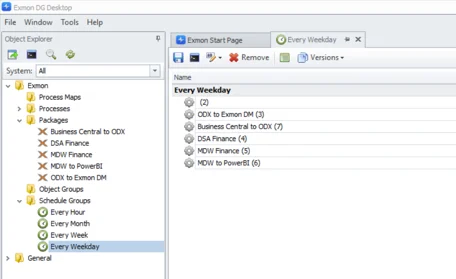
Adding and Scheduling TimeXtender Packages
Add your TimeXtender execution packages in TimeXtender Orchestration by right-clicking Packages and selecting New and then TimeXtender Ingest or TimeXtender Prepare or TimeXtender Deliver. Choose a title for the first package you want to synchronize.
Select the Data Provider you created before and choose the task or execution package you would like to add to TimeXtender Orchestration. Save it. Repeat this process for all the tasks or execution packages you wish to orchestrate, one by one. They will all appear in the folder labeled Packages
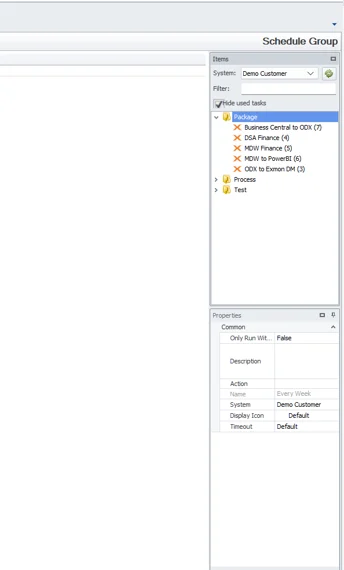
In the Schedule Groups folder, you can find predefined schedules. Choose a default one or create your own schedule. Once chosen or created, a panel will open up on the right-hand side where you can drag and drop your TimeXtender task and packages.
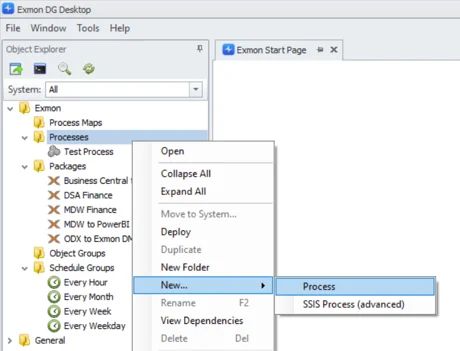
Creating a Process
Go to the Processes folder and create a New Process.
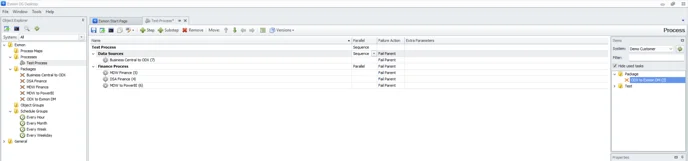
Drag and drop your TimeXtender tasks and execution packages from the right-hand panel to orchestrate your process. Choose whether the process should fail the parent and define the sequence and actions on failure.
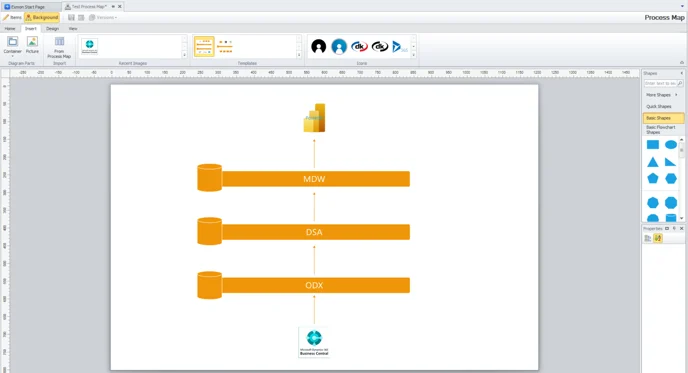
Creating a Process Map
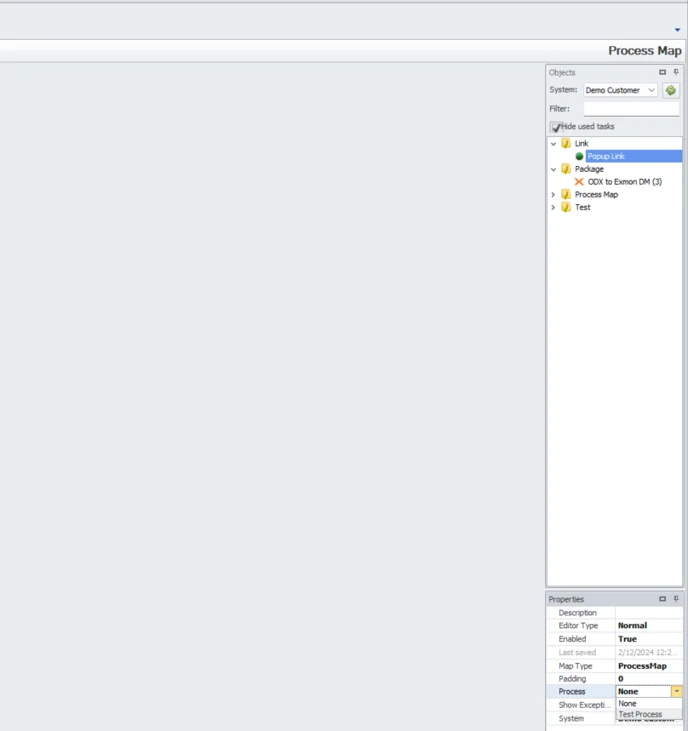
Navigate to the Process Maps folder and create a new Process Map
Click on Background
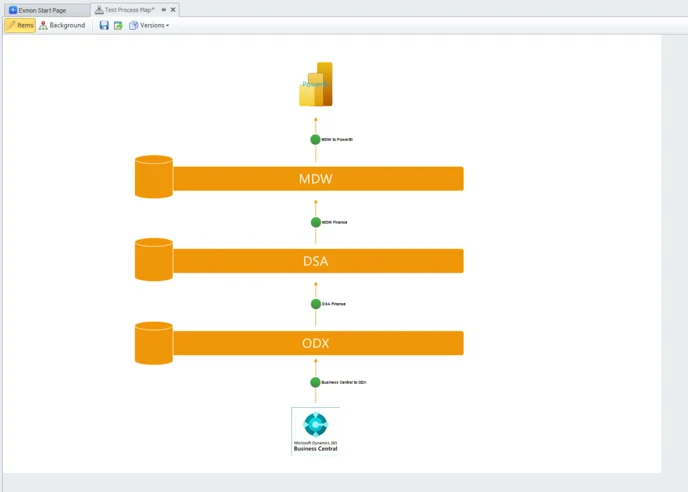
Create your Process Map either by using one of the templates (Insert and double click on Templates) or by creating your visual. Utilize the shapes provided on the right-hand panel or incorporate your own images.
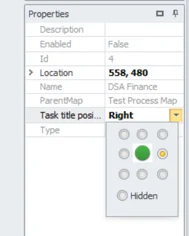
To add your TimeXtender tasks or execution packages to the map, click on Items and drag and drop them from the right-hand panel to the desired location. It is recommended to activate the title next to the process. Alternatively, you have the option to synchronize your recently created process, thereby obtaining all processes in bulk. To proceed, simply click on the link provided in the right-hand panel and select the appropriate process map below.
Once you are satisfied with the process map, save and deploy it.


 and drag and drop them from the right-hand panel to the desired location. It is recommended to activate the title next to the process.