How to create an Environment Specific Project Variable in TimeXtender Classic
TimeXtender Classic supports multiple environments, aligning with CI/CD and Agile development practices. Environment-specific project variables enable developers to apply business logic selectively across different environments.
System Project Variables Overview
System Project Variables allow the use of system names as variables to be used within:
- SQL code
- Execution Packages
- Project Perspectives
Available system project variables include:
- Machine Name
- Environment Name
- User Name
- User Domain Name
Prerequisites
Before creating environment-specific project variables, ensure you have at least one environment configured in TimeXtender Classic. To learn more about environments and get help in setting them up, please see Configure Multiple Environments or contact your TimeXtender Partner or Solution Specialist.
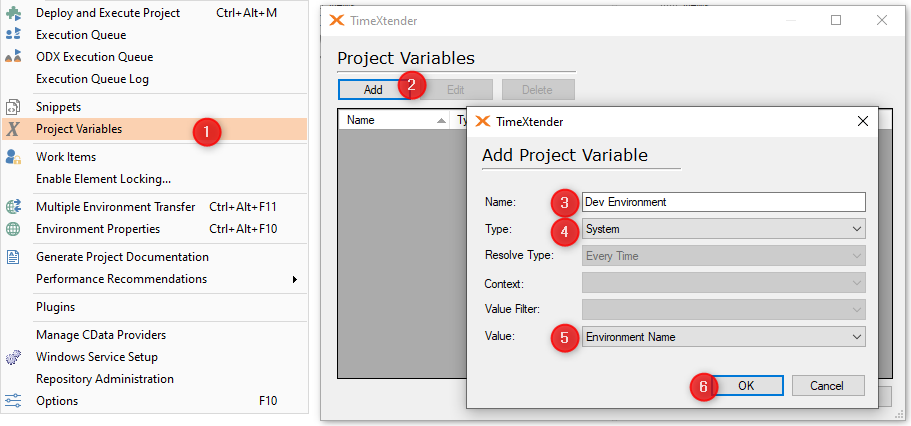
How to create an Environment Specific project variable
- In TimeXtender, select Project Variables under the Tools menu in the toolbar.
- Select Add to create the new project variable.
- Provide a Name for your new project variable.
- Select System in the Type drop-down.
- Select Environment Name in the Value drop-down menu.
- Click OK.
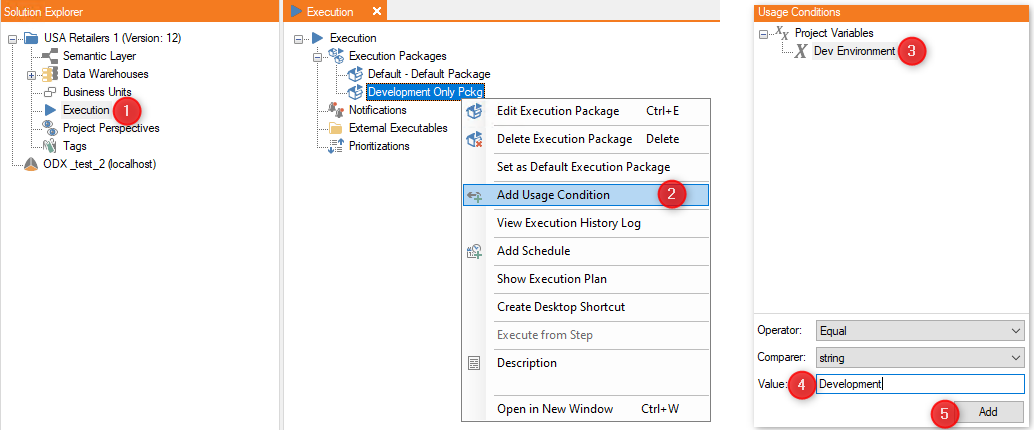
How use an Environment Specific project variable with an Execution Package
- To begin, open the Execution object in the Solution Explorer by double clicking on it.
- Right-click the execution package that will use the project variable and select Add Usage Condition. The right side of your screen will show Project Variables, including the one you've just created.
- Select your Environment Specific project variable from the list.
- The defaults for Operator and Comparer that perform an equals comparison can be used in this scenario. Complete the usage condition by entering the exact name of the Environment in the Value field.
- Click Add.