
Data Level Security
Secured views can be used to implement data level security in a Data Warehouse, filtering the data that each user has access to based on their logon. If your data warehouse has a fact table with different data dimensions, then you can create a secuarble column in one of your dimension tables, and that securable column can be used to create a secured view of your fact table. Depending on how the securable column is configured, each user may only see that data that is relevant to them.
For example, you may have a fact table with entries from different regions. The secured view would filter the fact table so that each user only sees the entries that correspond to their particular region.
The following implementation steps are involved in setting up a secured view and restricting access to the original fact table.
- Creating SQL Logons.
- Creating Database Roles and adding SQL Logons as members.
- Defining a Securable Column on a Dimension Table that will be used to filter the fact table.
- Creating two schemas to be used to implement object security.
- Using the schemas to limit access to valid tables.
This article focuses primarily on Data Level Security. Click on How to Implement Object Level Security in TimeXtender Classic Data Warehouse for a detailed explanation on how to implement object level security.
The steps above are described in more detail using the example of a fact table that is filtered into East and West regions based on user logon.
Create Logins for Security
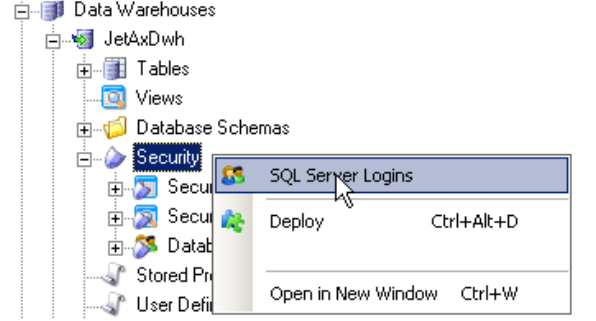
- If needed, you can create SQL Server Logins that will be used to identify users for the security implementation. To create a new SQL Server Login, right-click on the Security folder underneath the data warehouse and select SQL Server Login.
Adding a Database Role
Object level security is based on SQL Server database roles. A user has access to an object if he is a member of a database role that has access to that object. To add a database role, follow the steps below.
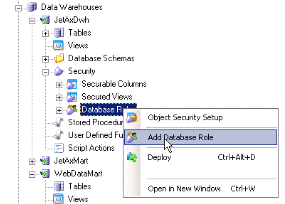
- Under Security, right click Database Roles and click Add Database Role. The Database Role Setup window opens.
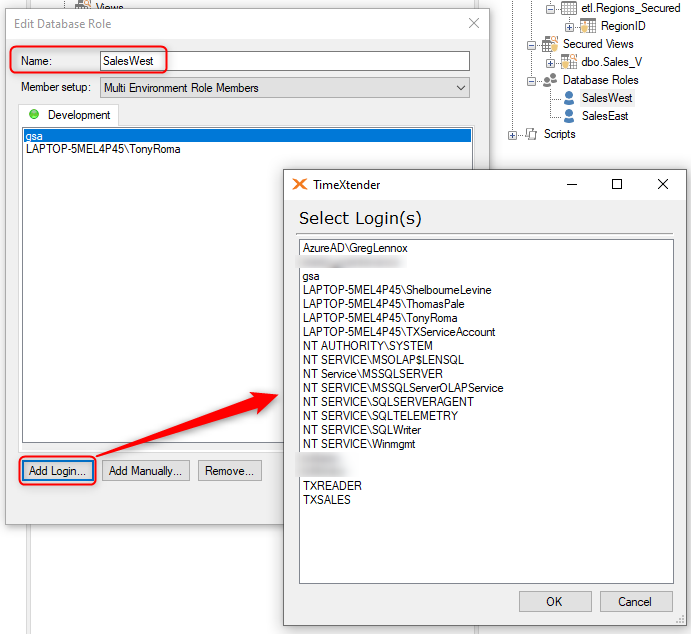
- In Name, type a name for the role.
- If you are using the Multiple Environments feature: In the Member setup list, click Environment Specific Role Members if you want to have a different setup for different environments. The different environments will then each have a tab in the list below.
- Next, you should add users to the role. Click Add login to role to add Active Directory or SQL Server logins that are known to the SQL Server that the data warehouse resides on. The Select Login(s) window opens. Select the logins you want to add in the list and click OK to add the user(s).
- Click Add manually to add Active Directory or SQL Server users or groups that the SQL Server does not know, e.g. users on a production server. The Enter User or Group ID window opens. In ID, type the user or group id. Under Type, click AD user/group or SQL user/group depending on the type of ID you entered. Click OK to add the user.
- Click OK to close the window and add the database role, which is listed under Database Roles.
Note: Roles are limited to the data warehouse or business unit it was created on, i.e. you cannot use a role created on one data warehouse on another data warehouse or business unit.
If you need to add a new login on the SQL Server, you can right click Security under a data warehouse or staging database and click SQL Server Logins. Here, you can add logins if you have the necessary permissions on the SQL Server. However, for safety reasons, you cannot delete users here.
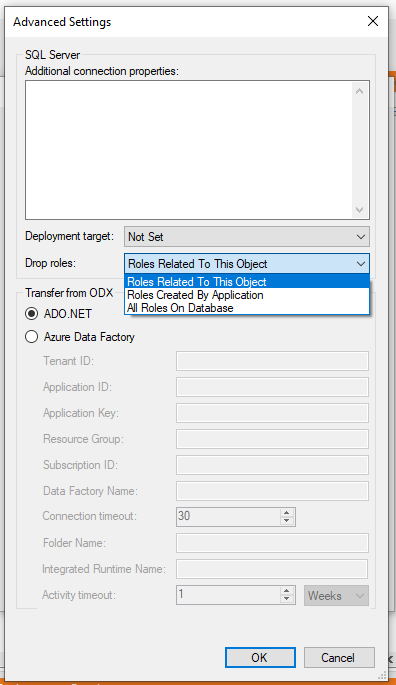
On each deployment, TimeXtender drops existing roles on the database before recreating them. By default, TimeXtender only drops database roles related to the data warehouse or staging database being deployed. However, you can also set TimeXtender to drop more database roles with a setting on the data warehouse or staging database. To access the setting, right click the data warehouse or staging database, click Edit Data Warehouse or Edit Staging Database as applicable and click Advanced… In the Drop Role Option list, click Roles Created by Application to drop all roles created by TimeXtender or All Roles on Database to drop all roles altogether.
- Add a Database role:
- New Window Database role setup Click on Add login to role and select login and click ‘OK’.
- If you have multiple Environments, then the above will need to be repeated in the other environments as appropriate, i.e. Test, Prod.
Add additional Database Roles:
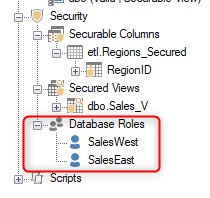
Right-click Database Roles and Select Database Roles. Follow the above steps to create additional roles as appropriate. In our example, we are creating two roles, “SalesWest” and “SalesEast”, each with their own set of SQL Server logins as shown below:
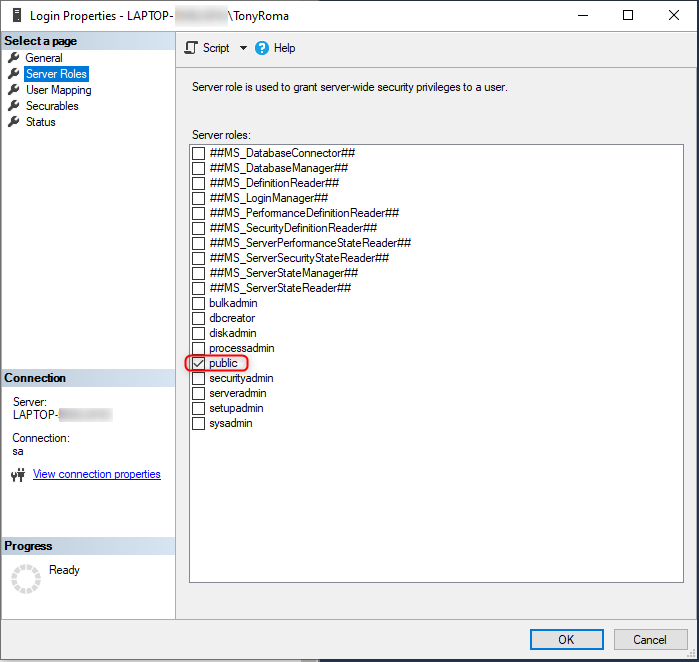
Note: The users and Logins associated with User Defined Database Roles must not have any server roles assigned. The default role should always be ‘public’.
For the DBAs and BIDevelopers to access all the secured views and tables, their User Login and Groups should be added under the ‘db_owner’ database role in SQL Server Management Studio.
In the SQL Server Management Studio, select and expand Security under the database where secured views are being configured. Right click the BIDevelopers Group and select Properties. In this example, the BIDevelopers group consists of DBA Admins and Key Developers
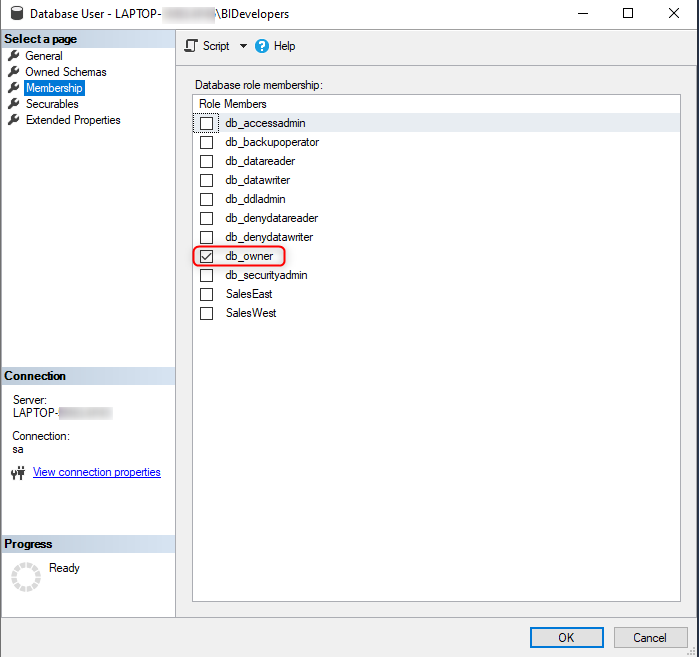
Select ‘db_owner’ under Membership and click OK.
Defining Securable Column on the Dimension Table:
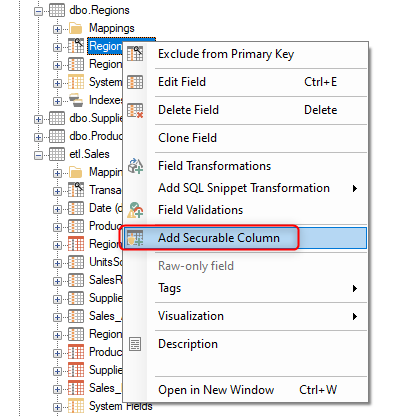
In my data warehouse, the dimension table I want to use to filter my data is the dbo.Regions table.
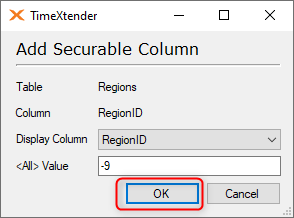
- Right-click on the primary key field in this table (RegionID) and select Add Securable Column.
- Click on Add Securable Column and then click OK after confirming the Dimension table and its primary key are selected for the Table and Column.
- The Add Securable Column Setup screen will then open automatically, where you can add as many setups as is needed to complete the secuable column. Do the following to add a setup:
- Check a box or boxes under Column Values.
- Check a box under the Security IDs that will correspond to the column values. If the Security ID needed, is not present, use the Add button beneath to add it on.
- Click the “Add->” button in the middle of the dialog to add the Security Configuration to the box on the right..
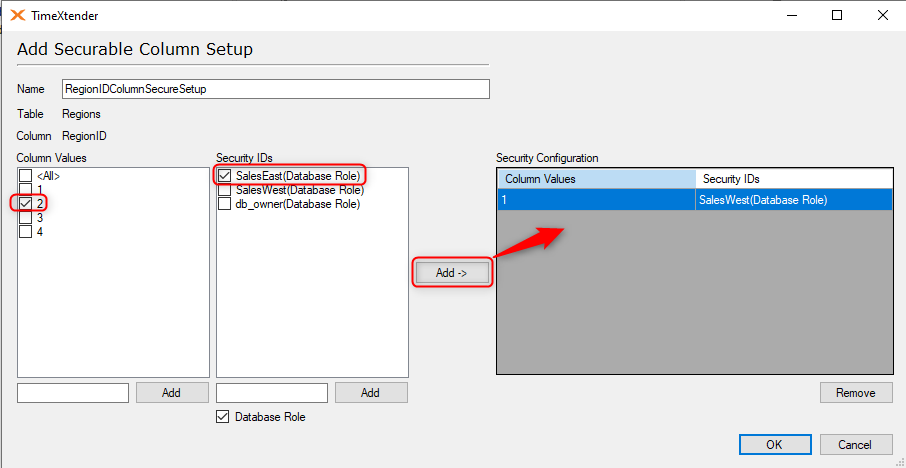
The Column values are the primary keys in your dimension table. In this example, the key value of “1” corresponds to “West” and “2” corresponds to East. The Security IDs correspond to the Database Roles on the SQL Server. In this example, the “SalesWest” roles has already been setup as equal to the Secure Column value of 1. To setup the SalesEast database role, check the box for the number “2” in the Column Values, then check the “SalesEast” database role under Security IDs and click the “Add” button.
- After setting up all the database roles that will be used to filter the fact table, add the db_owner to the list of Security IDs by unchecking the “Database Role” box and typing in “db_owner” and clicking the Add button.
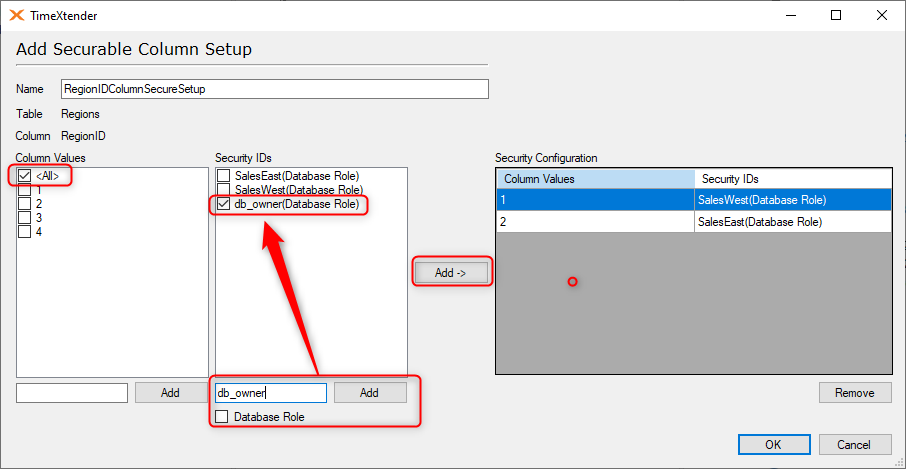
In the Column Values, check the <All> box and then check the db_owner Database Role and click the Add button to add this to the Security Configuration. You can also do the same for BIDevelopers Active Directory Group to ensure that developers have access to the unfiltered fact table.
- The complete security setup appears as follows:
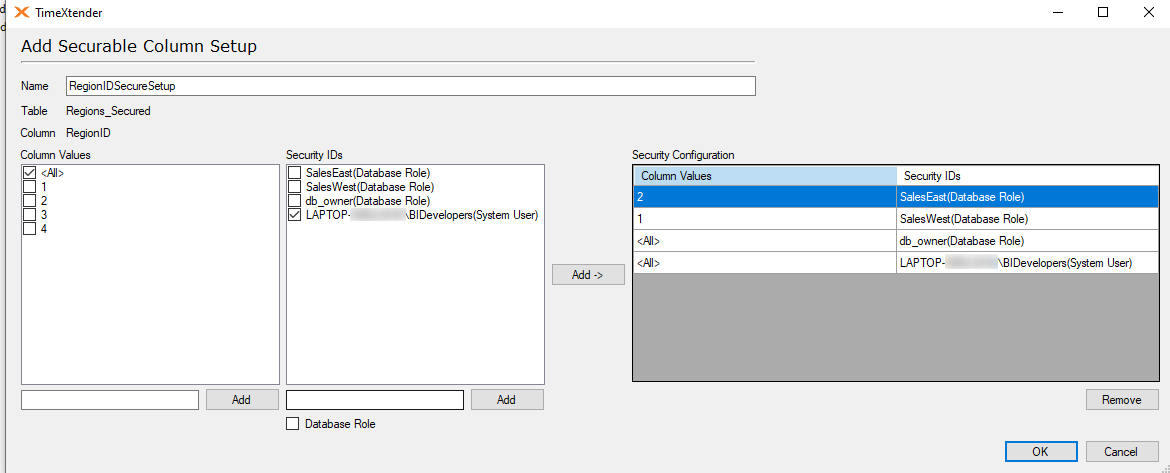
The above will filter the secured view so that West Sales people only see sales in the West Region and East Sales people will only see sales in the East Region, but developers will see all of the sales. Notice that the BIDevelopers group is added as a System User, so Security IDs are not limited to database roles as created in TimeXtender, they can be SQL Server Logins that are created or maintained in the SQL Server Management Studio.
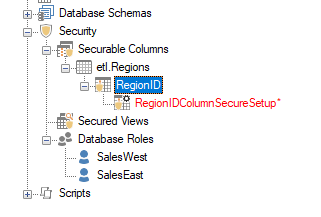
- Click Ok the Securable Column Setup will be waiting for deployment in the Security → Securable Columns section..
Map the Securable Column created on the dimension table onto the fact table to create the secured view.
The newly created securable column must be mapped to the other tables that contain the dimension tables primary key as a foreigin key in order to create the secured view that will filter the fact table according to the column and Security ID configurations. The following are the steps to map the securable column.
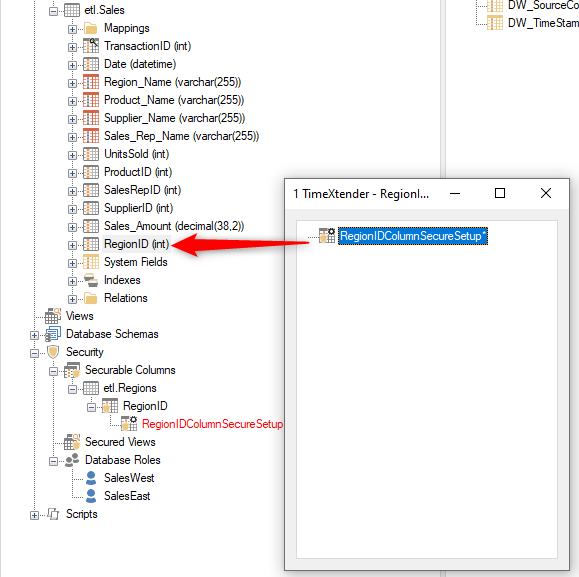
- Open the Securable Column Setup in a New Window.

- Select column RegionID under Sales fact table, which is the relevant foreign key in the fact table. Drag the RegionIDColumnSecureSetup onto the RegionID field.
The dbo.Sales_SV view is created under Secured Views.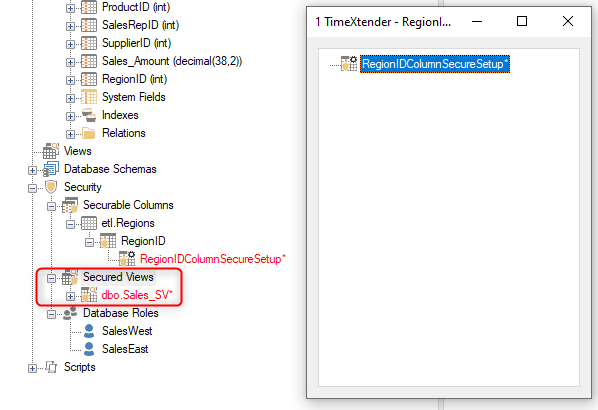
- Follow similar steps to map RegionIDColumnSecureSetup to the RegionID for other tables that may have a foriegn key for this dimension.
Defining Database Schema to secure Tables
To secure the tables from providing access to users, we need to establish and configure two types of schemas. The role based tables and corresponding views will have the etl schema and the remaining tables and views that are accessible to all users will have default dbo schema.
If schemas ‘dbo’ and ‘etl are already created, Schema behavior needs to be changed.
Below are the steps to create the Database Schemas as needed.
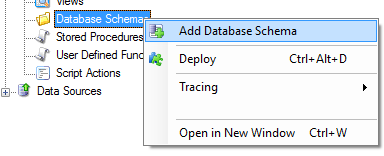
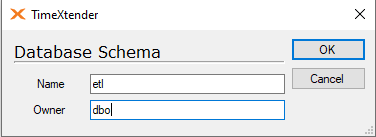
- Right Click the Database Schema and Select Add Database Schema.
- Name the Database Schema as etl and click OK.
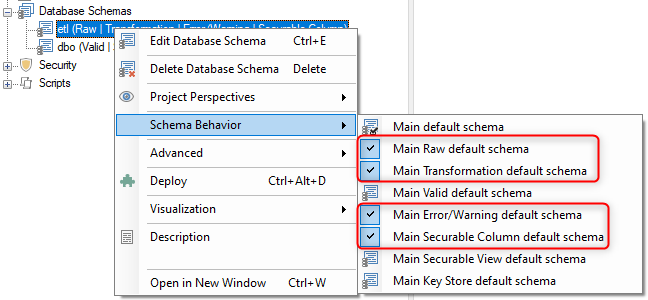
- Set the Schema behavior for the two schemas to limit user access based on their database role. Right-click on the etl schema and select Schema Behavior and then check the following items.
- Main Raw default schema.
- Main Transformation default schema.
- Main Error/Warning default schema.
- Main Securable Column default schema.
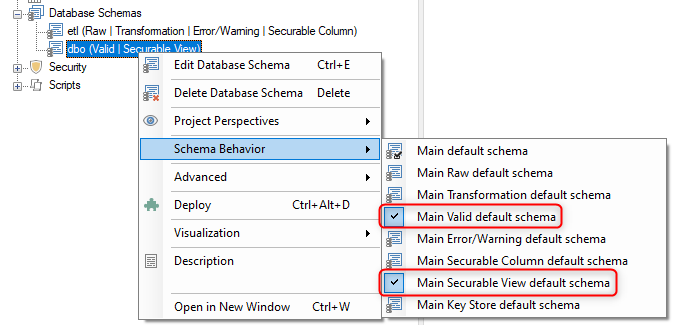
- Right-click on the dbo schema and select the following items.
- Main Valid default schema.
- Main Securable View default schema.
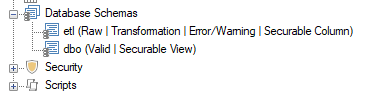
- After completing the above Schema Behavior setup, the etl and dbo schemas should appear similar to the following under Database Schemas.
Setup Object Securty for Schemas based on Database Roles.
Under Security, right-click Database Roles and select Object Security Setup.
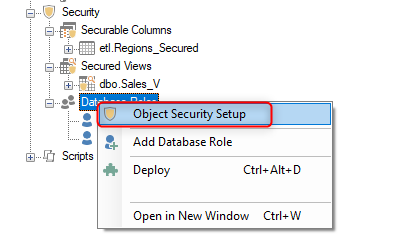
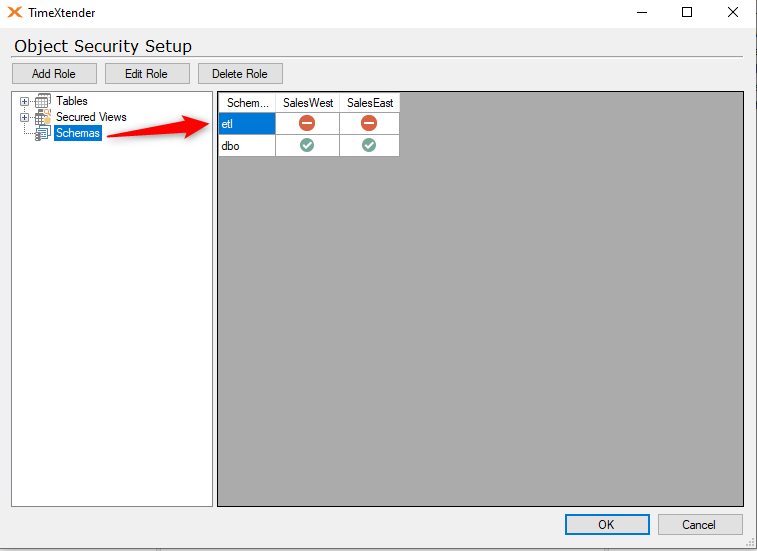
In the Object Security Setup, Click on Schemas to begin the security setup.
- In the etl schema row, click under the database roles until you get a red circle icon to deny access.
- In the dbo schema row, click under the database roles until you get a green circle to grant access.
Applying Schemas to table Fact_SalesOrderTransaction.
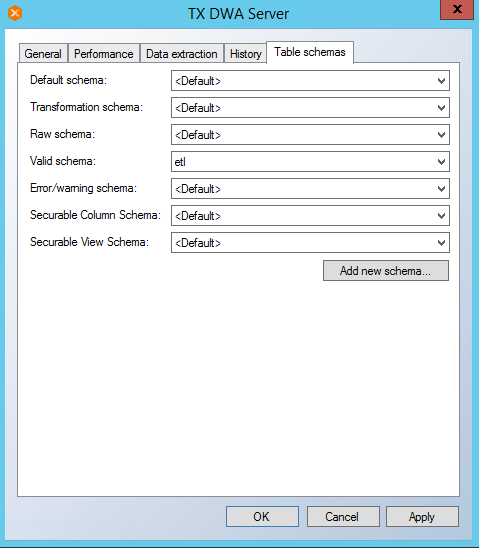
- The schemas defined need to applied to tables that are selected as secured tables to limit access to users. Right click dbo.Sales fact table and select Table Settings.
- In the Table Settings window, Click on Table Schemas tab. Change Valid schema to etl schema so access to the Valid table will be restricted to the database role users based on the Object Security Setup above.
- Rename the Secured View. In the above example, rename the dbo.Sales_SV view to dbo.Sales_V.
- Rename the Dimension Table. In the example above, rename dbo.Regions to dbo.Regions_Secured and the dbo.Sales table to dbo.Sales_Secured.
Key Points to consider before Deployment
- Verify the Pre-Scripts and Post-Scripts related to secured Tables have table name parameterized otherwise execution of the secured tables will fail. If the Pre-Scripts and Post-Scripts do not have parameterized table names, they should be updated before executing the secured tables.
- The external report services such as Microstrategy develops code using table name defined in the SQL Server Management Studio. Hence it is important that the secured views have name matching to table name defined in MMS.
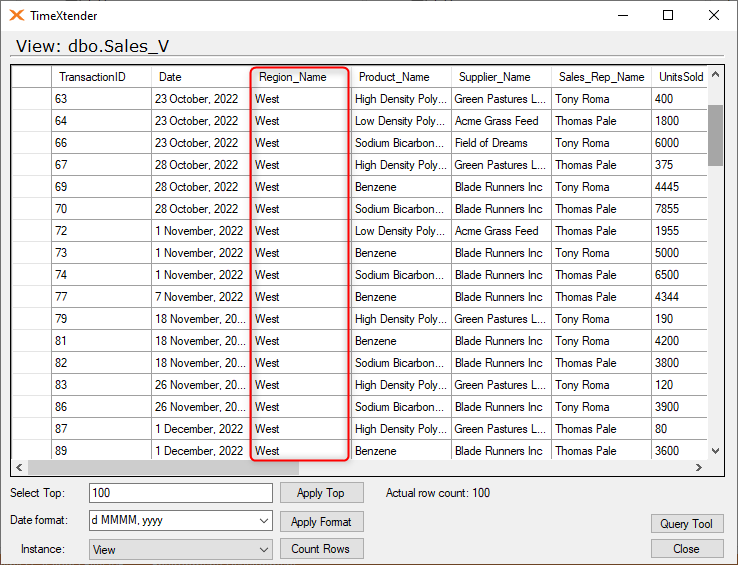
In the example above, if a Developer or db_owner previews the Sales_V secured view, they will see entries from all of the regions.
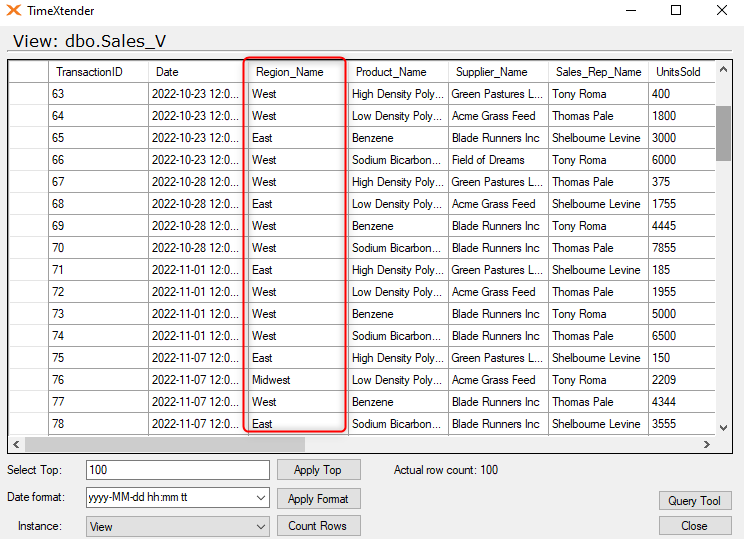
However, if someone from the SalesWest database role tries to preview the Sales_V secure view, they will only see entries that have a Region_Name of West.
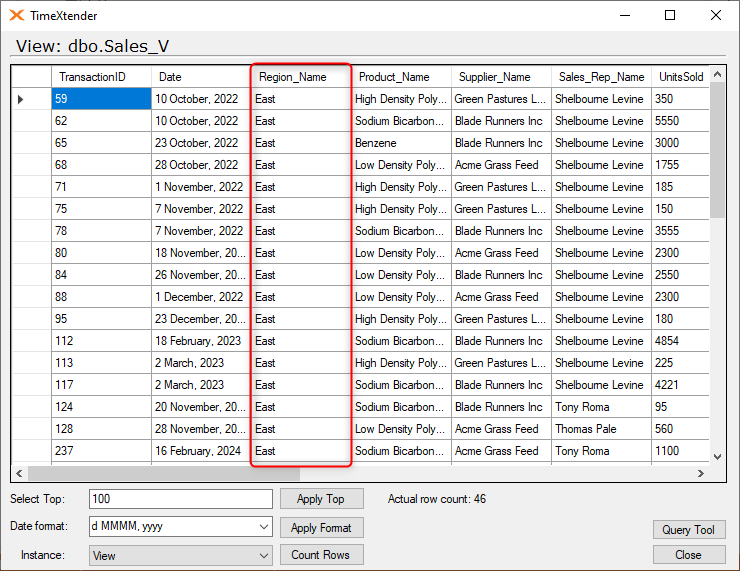
Coversely, if someone from the SalesEast database role previews the same Sales_V secure view, they will only see entries that have a Region_Name of East.
Lastly, if one of the SalesWest or SalesEast database role users tries to preview the dbo.Sales_Secured table, they may see the following error message.
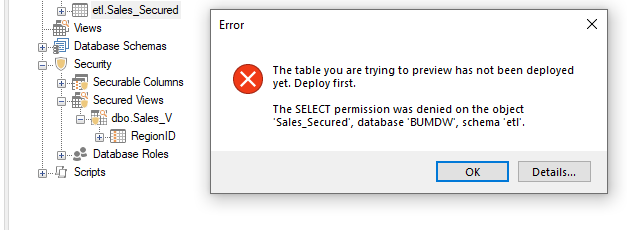
Although the error mentions the table needing to be deployed, these database role members will not be able to deploy the table, as they do not have the Create View permission in the database.
The Sales_View secured view is created in the data warehouse database, and it may be the case that the database role users will connect to that view directly, as opposed to trying to view it in TimeXtender. For example, if I connect to the secure view using PowerBI running as one of the SalesWest database role users, I only see entries with the Region_Name of West.
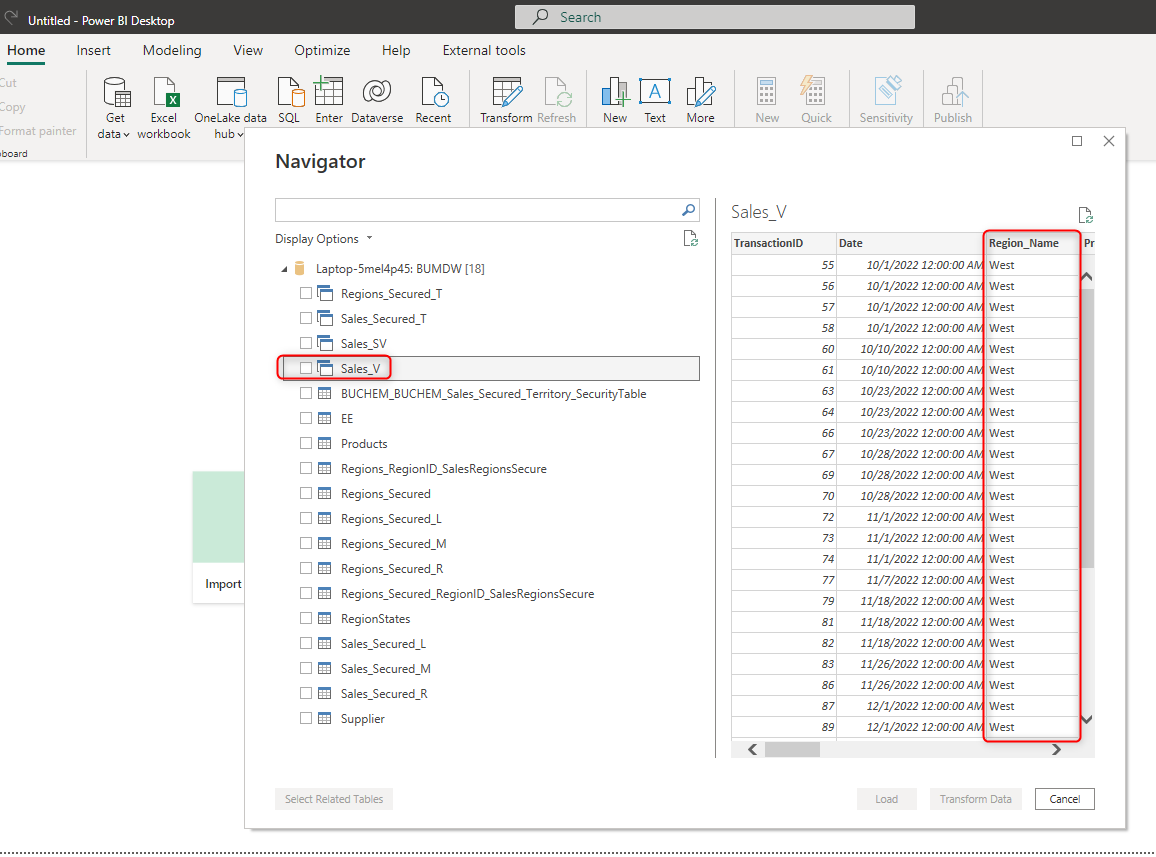
Regarding the tables that are visible in the SQL database, they do not include those that are in the etl schema.
