


Object Level Security
It is possible to implement both object level or data level security on a TimeXtender Classic data warehouse or staging. Object level security refers to restricting what views, schemas, tables, or table columns that a user has access to, while data level permissions refers to creating secured views that filter the data visible to a user based on their logon.
This article focuses primarily on Object Level Security. Click on How to Implement Data Level Security in a TimeXtender Classic Data Warehouse for a detailed explanation on how to implement data level permissions.
The access control features can be found in the Security section at the bottom of any data warehouse or staging database. The general steps to implement Object Level Security are as follows:
- Creating SQL Logons.
- Creating Database Roles and adding SQL Logons as members.
- Defining Object Level Security to either Grant or Deny access to data warehouse objects for database roles.
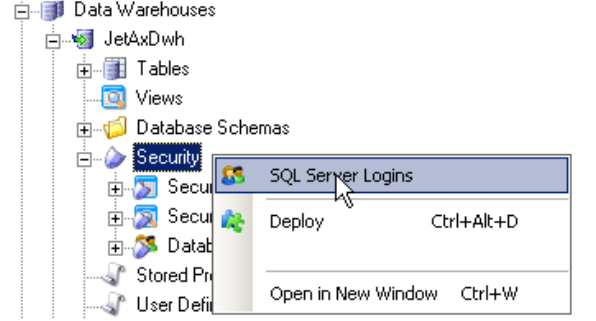
Create Logins for Security
- If needed, you can create SQL Server Logins that will be used to identify users for the security implementation. To create a new SQL Server Login, right-click on the Security folder underneath the data warehouse and select SQL Server Login.
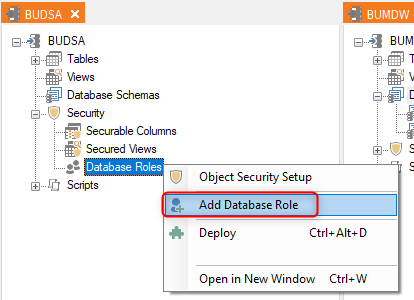
Adding a Database Role
Object level security is based on SQL Server database roles. A user has access to an object if he is a member of a database role that has access to that object. To add a database role, follow the steps below.
- Under Security, right click Database Roles and click Add Database Role. The Database Role Setup window opens.
- In Name, type a name for the role.
- If you are using the Multiple Environments feature: In the Member setup list, click Environment Specific Role Members if you want to have a different setup for different environments. The different environments will then each have a tab in the list below.
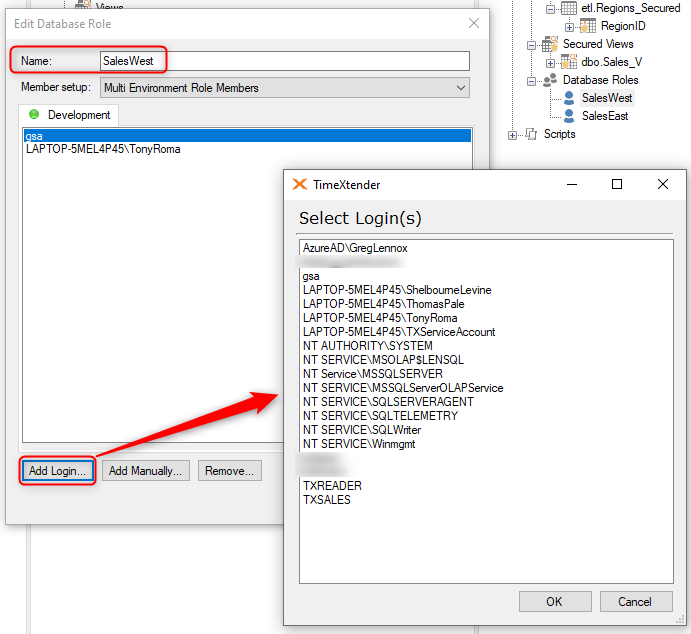
- Next, you should add users to the role. Click Add login to role to add Active Directory or SQL Server logins that are known to the SQL Server that the data warehouse resides on. The Select Login(s) window opens. Select the logins you want to add in the list and click OK to add the user(s).
- Click Add manually to add Active Directory or SQL Server users or groups that the SQL Server does not know, e.g. users on a production server. The Enter User or Group ID window opens. In ID, type the user or group id. Under Type, click AD user/group or SQL user/group depending on the type of ID you entered. Click OK to add the user.
- Click OK to close the window and add the database role, which is listed under Database Roles.
Note: Roles are limited to the data warehouse or business unit it was created on, i.e. you cannot use a role created on one data warehouse on another data warehouse or business unit.
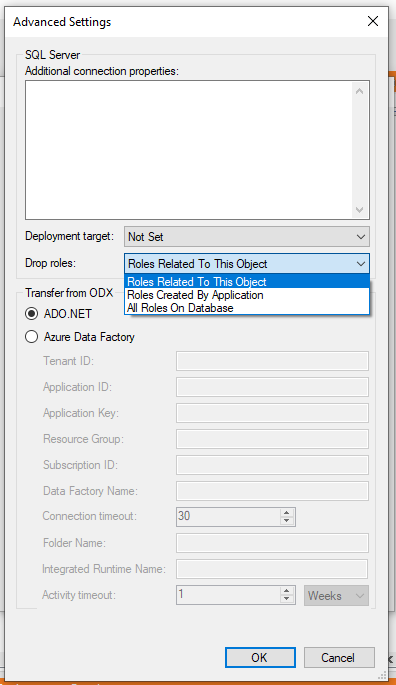
On each deployment, TimeXtender drops existing roles on the database before recreating them. By default, TimeXtender only drops database roles related to the data warehouse or staging database being deployed. However, you can also set TimeXtender to drop more database roles with a setting on the data warehouse or staging database. To access the setting, right click the data warehouse or staging database, click Edit Data Warehouse or Edit Staging Database as applicable and click Advanced… In the Drop Role Option list, click Roles Created by Application to drop all roles created by TimeXtender or All Roles on Database to drop all roles altogether.
Assigning Object Level Permissions to Database Roles
You can assign permissions to database roles on the object level. TimeXtender uses the same allow/deny concept as SQL Server with three possible states:
- Not set (gray dot): The database role is not allowed to access the object, but are not explicitly denied access.
- Grant (green with white checkmark): The database role is granted access to the object. However, if a user is a member of another database role that is denied access, he will not be able to access the object.
- Deny (red with white bar): The database role is denied access to the object. Even if a user is a member of another database role that is allowed access, he will still be denied access.
In addition to the three states described above, a table can have different mixed states depending on the column level permissions set on the table. The mixed states are:
- Partially Granted (green and gray icon). The database role is granted access to some columns on the table. Note that you will also see this icon if the database role is granted access to all columns on a table since this will not automatically set Allow on the table level.
- Partially Denied (red and gray icon): The database role is denied access to some columns on the table. Note that you will also see this icon if the database role is denied access to all columns on a table since this will not automatically set Deny on the table level.
- Mixed Grant/Deny (red and green icon): The database role is granted access to some columns and denied access to other columns on the table.
To assign object level permissions, or column level permissions on tables, to database roles, follow the steps below.
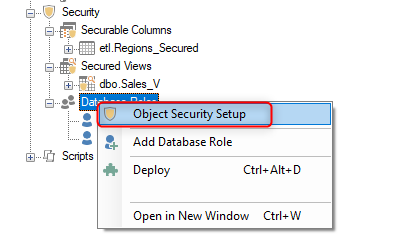
- Under the data warehouse, right click Security and click Object Security Setup.
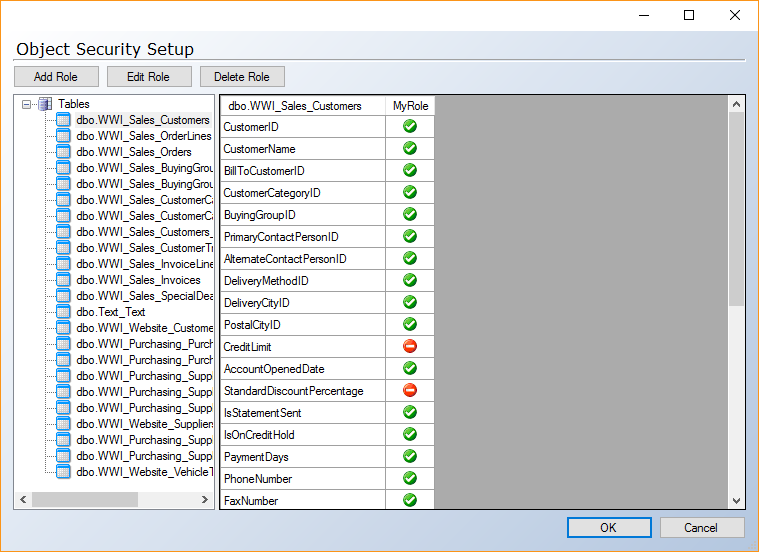
- The Object Security Setup window opens.
-
Click Tables, Views or Schemas in the left-hand column to choose the type of object you want to set up access for. Expand Tables and click an individual table to assign column level permissions for that table.
-
In the right-hand column, the table shows object names in the left-most column and database roles in the following columns. Click icon in the intersection between the object name and the database role to change the permission for the database role on that object. If you set column level permissions on a table, this will overwrite any current object level permissions set and the other way around.
- (Optional) Click Add Role, Edit Role or Delete Role to add, edit or delete database roles as needed.
- Click OK to save changes and close the window.
