Selecting the right data from the source, validating it, and transforming the data as needed are central to the ETL (Extract, Transform, Load) process.
Data Selection Rules can be added to filter the data so that only that data that is needed for analysis will be imported from the data source and present in the data area tables.
Data cleansing can further be performed by applying validation and transformation rules to ensure that only valid data gets loaded into the specific data area.
Data selection, validation, and transformation rules can also be used to confirm the validity of any data that is moved from one data area to another.
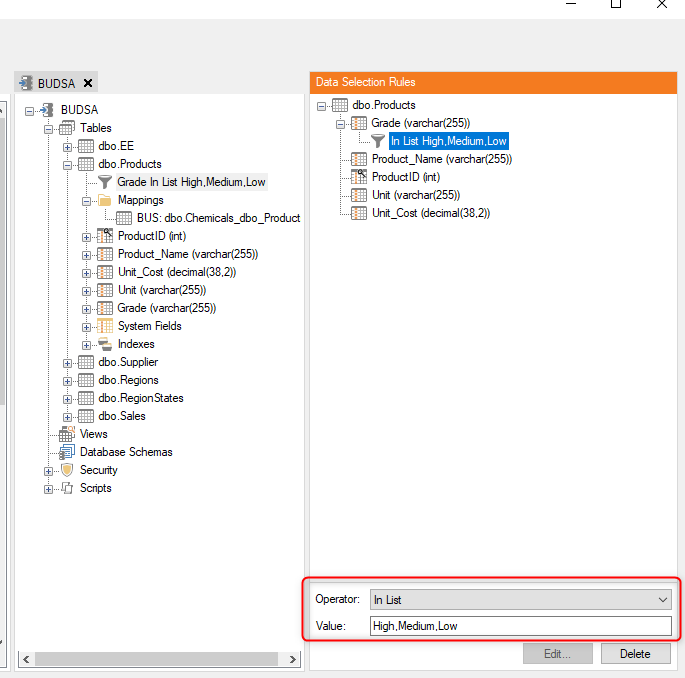
Data Selection Rules can be applied to either Business Unit or Data Warehouse tables, and in those instances where a table has more than one mapping, then separate Data Selection Rules can be created for each mapping.
The following outlines the different types of Data Selection Rules and how to create them.
Operators for Selecting and Validating Data
The following operators are available for use when defining data selection or validation rules. Values must be alphanumeric characters and can also be specified as a comma separated list.
| Operator | Definition |
|---|---|
| Not Empty | Selects records where the value of a field is not empty or NULL |
| Equal | Selects records where the value of a field is equal to the specified value |
| Greater Than | Selects records where the value of a field is greater than the specified value |
| Less Than | Selects records where the value of a field is less than the specified value |
| Not Equal | Selects records where the value of a field is not equal to the specified value |
| Greater or Equal | Selects records where the value of a field is greater than or equal to the specified value |
| Less or Equal | Selects records where the value of a field is less than or equal to the specified value |
| Min. Length | Selects records that contain at least the specified number of characters |
| Max. Length | Selects records that contain no more than the specified number of characters |
| List | Selects records where the value of a field is equal to one of the specified comma-separated values |
| Empty | Selects records where the value of a field is empty or NULL |
| Not in List | Selects records where the value of a field is not equal to one of the specified comma-separated values |
| Like | Selects records where the value of a field is similar to the specified value. A percent sign (%) can be used as a wildcard. For example, "ABC%" will return all records where the value in the specified field starts with "ABC". |
| Not Like | Selects records where the value of a field is not similar to the specified value. A percent sign ( % ) can be used as a wildcard. For example, "ABC%" will return all records where the value in the specified field does not start with "ABC". |
Data Selection Rules
Data selection rules specify a set of conditions that data must satisfy in order for that data to be extracted from a source table. Data selection rules provide a way to filter the data so only that data that is needed will be loaded into the data area.
In data areas, you can add data selection rules on either the source table or any of its destination tables. When a table has more than one source table, then the data selection rules can be setup individually for each source table, providing more granularity with regards to the data that actually gets imported.
On Qlik models, data selection rules are configured on the source table level.
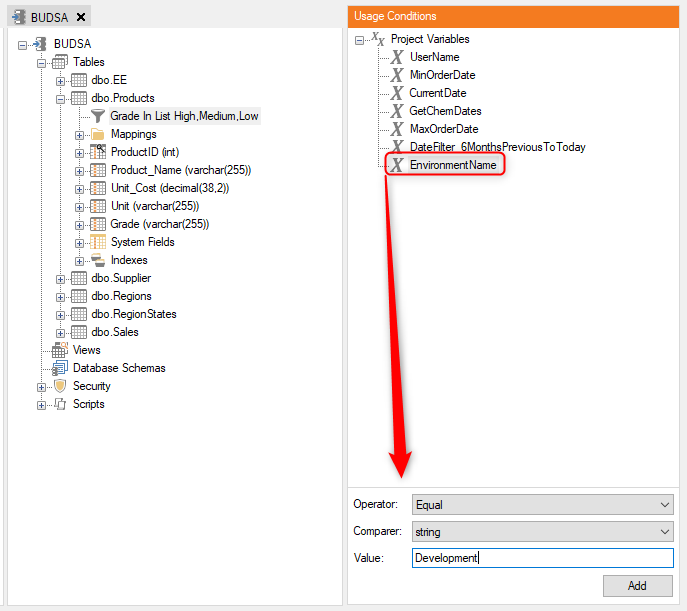
Data selection rules can include usage conditions that are based on instance variables, which allow for the data to be filtered based on the specific environment that the data is being loaded into. For example, a usage condition can be set in the data selection rule so that it will only be applied to the development environment but not the test or production environments.
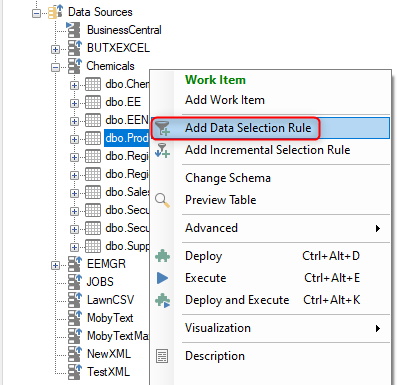
How to Add a Table Based Custom Data Selection Rule.
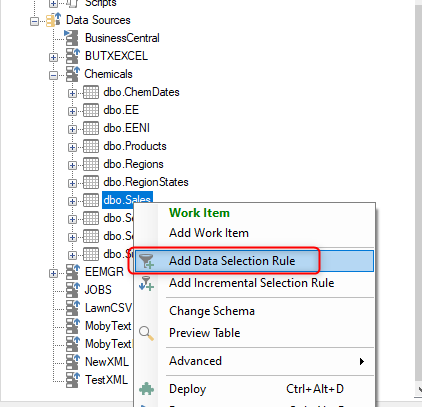
Right-click a table and select “Add Data Selection Rule”
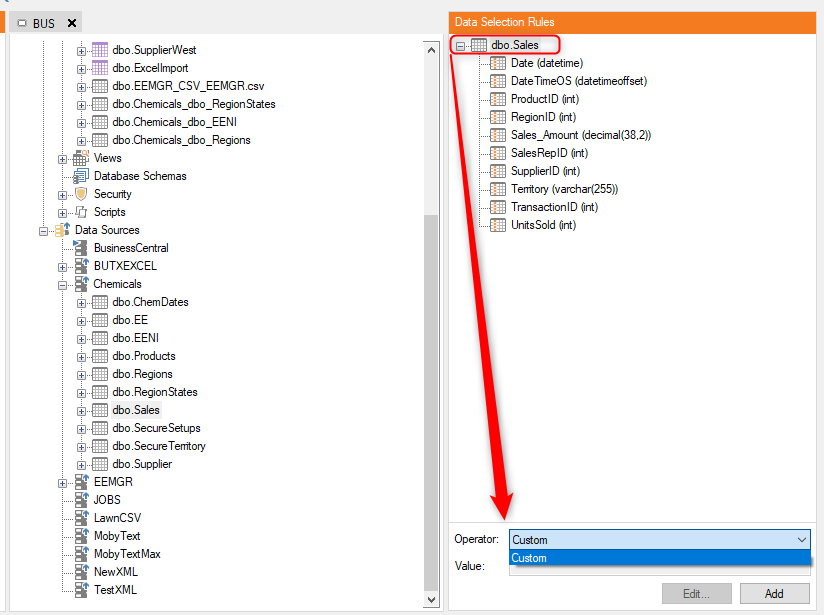
The Data Selection Rule pane will then open on the right-hand side. If you select the table in Data Selection Rule pane, then at the bottom the only operator available will be “Custom”.
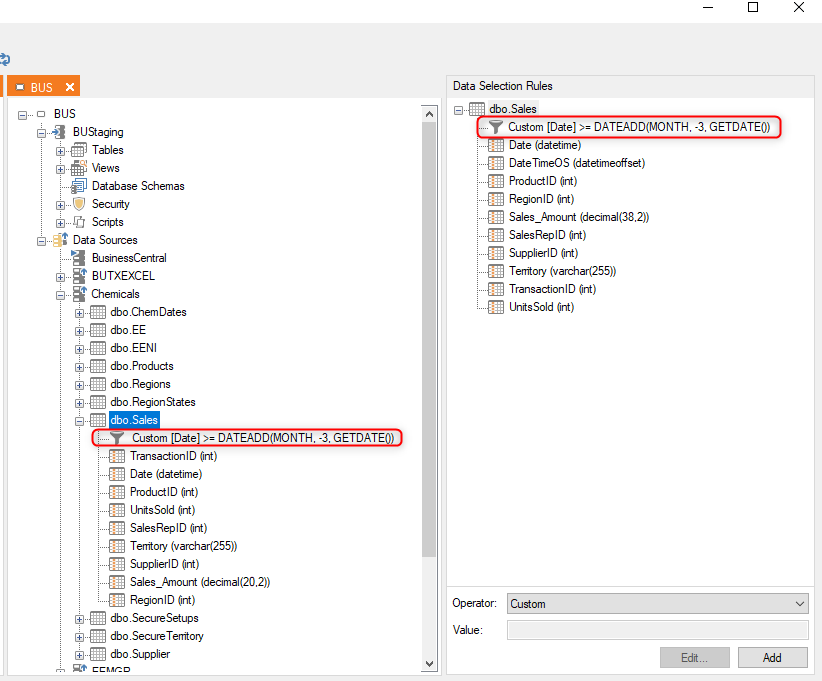
Click the Add button to add a Custom data selection rule.

Drag fields over from the right to have them parameterized in the custom data selection rule. In the example above, the custom rule will filter the Sales table so that it only contains entries from the past three months.
Once the Date Selection Rule has been created, it will be visible beneath the table in the tree.
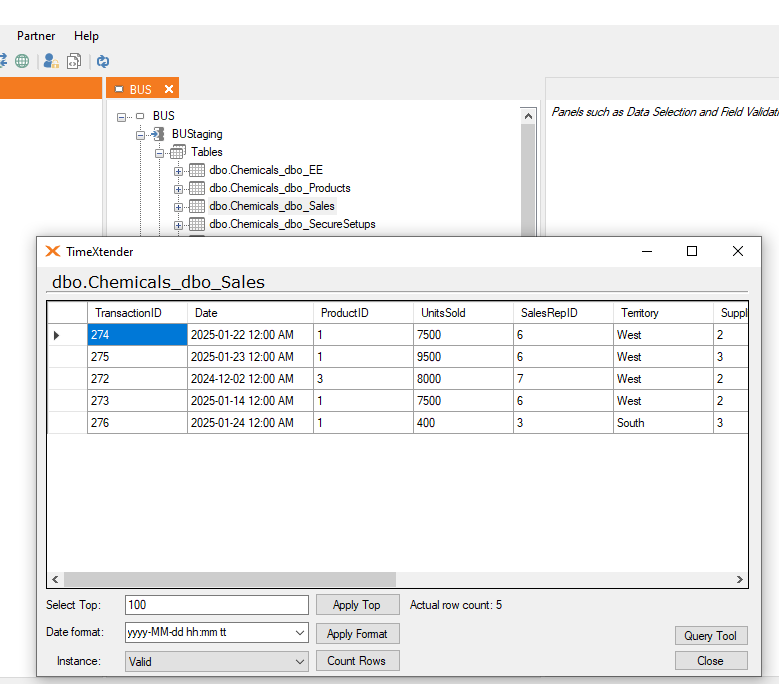
You can preview the table to confirm your data selection rule is working properly. In the example above, a preview of the Sales table will only show 6 entries since these are the only sales in the most recent three months.
How to add a Field Based Data Selection Rule using Operators.
Right-click on a table and select Add Data Selection Rule.
The Data Selection Rule pane will then open on the right-hand side. If you select a field in your table, then at the bottom the Operator drop-down menu will include all of the operators as previously described.
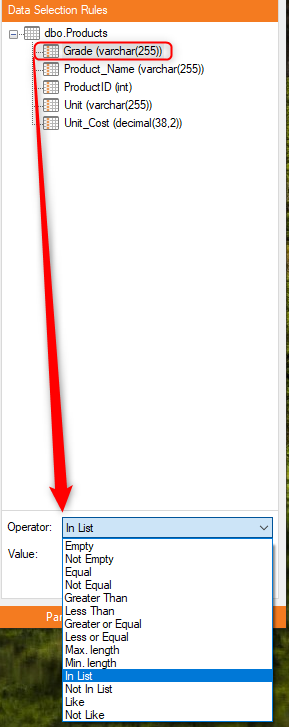
Select the appropriate Operator and then enter the appropriate value(s) in the Value field to complete the filter comparison.
Data Selection Rules based on Table Mappings
If a table includes more than one mapping, then you can right-click on each individual mapping to add the data selection rule specific to that.
Expand the table where the data selection rule should be applied, and then expand the Mappings folder to display the individual mappings.
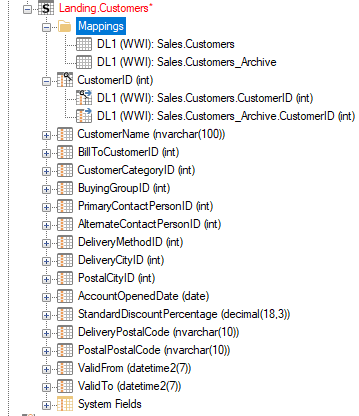
Right-click the relevant mapping and select Add Data Selection Rule from the context menu, which will open The Data Selection pane on the right-hand side of the window.
How to Add a Usage Condition
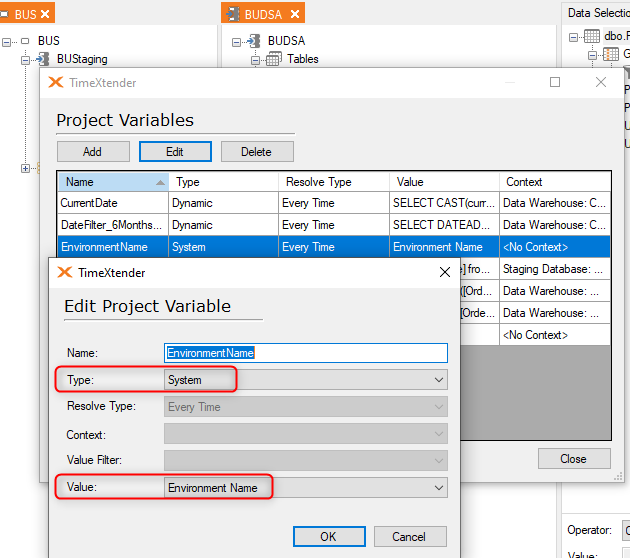
You can add usage conditions to your data selection rules so that they are only applied in certains circumstances. Project Variables are usually used in these Usage Conditions. Click on Project Variables for more information on how to these are created.
As an example, I may have a data selection rule that I only want to be applied in the Development environment. In order to do that, I first create a Project Variable that can be used to specify an environment.
A Project Variable to specify an Environment is created as follows:
- In TimeXtender, select Project Variables under the Tools menu in the toolbar.
- Select Add to create the new project variable.
- Provide a Name for your new project variable.
- Select System in the Type drop-down.
- Select Environment Name in the Value drop-down menu.
- Click OK.
Once my Project Variable is created, I can then right-click on my Data Selection Rule and select “Add Usage Condition”.

Select “EnvironmentName” from the Project Variables and then enter “Development” for the value.