Adding a Custom View to Use an Outer Join Between Tables
It is common to have data warehouse table that needs to be expanded upon include fields from other tables. Normally, this is accomplished by adding a Conditional Lookup Field that uses a join between the two tables, and the Lookup Field value may or may not employ an aggregator such as Top, Sum, Average, Count, Minimum or Maximum.
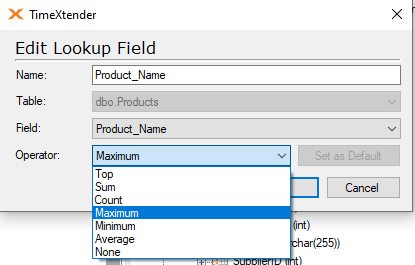
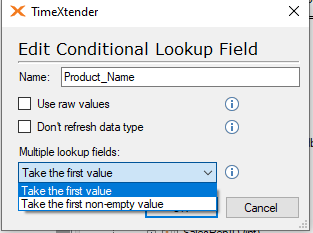
If multiple lookup fields are involved, the Lookup Field can also be configured to take the first value or the first non-empty value.
There may be cases, however, where you do not want to use an INNER JOIN that determines the lookup value, but instead use a LEFT OUTER JOIN in order to add rows as well as fields to the table. In this type of scenario, adding a Custom View can be an easy and flexible way to build out the table as desired.
How to Create a Custom View
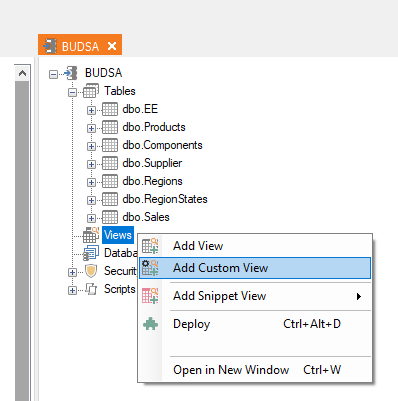
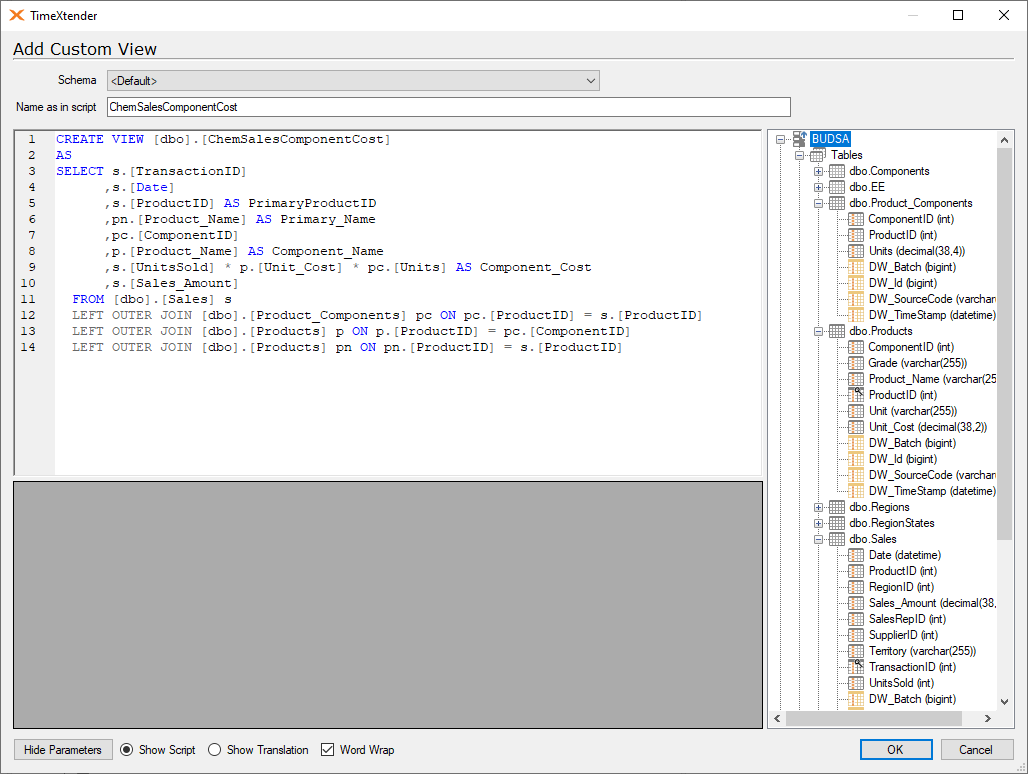
Start by right clicking on the Views icon and selecting Add Custom View.
In the “Name as in script” box, enter a name for the view and begin the script with a CREATE VIEW statement that references the same name.
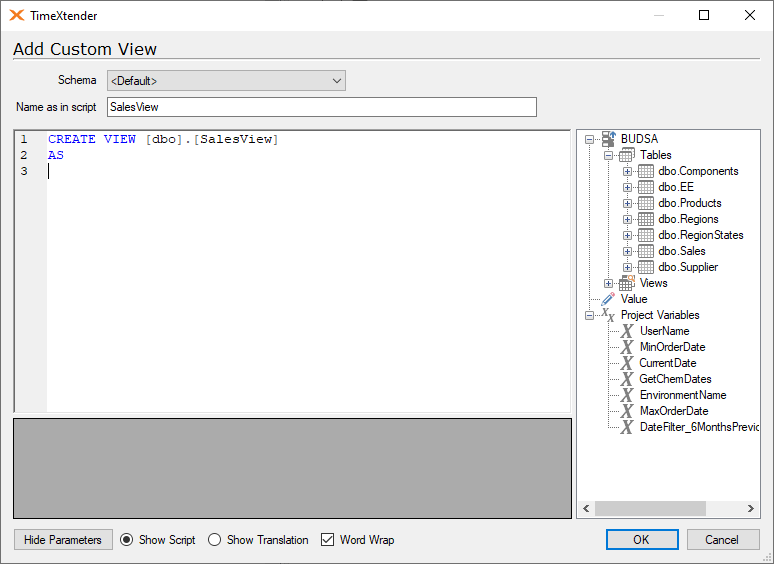
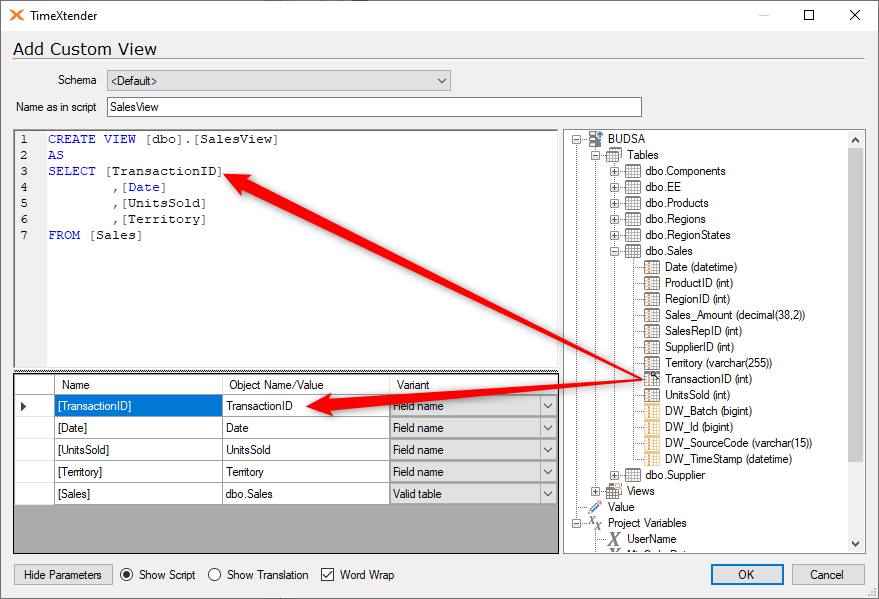
The right-hand pane contains a list of tables, views, and project variables that can be dragged into the script to create parameterized variables. After you drag items into your script, they become parameterized items that are listed out below and can be reused in other parts of the script as needed.
In the parameterized script, it may not be clear what field or table a parameter is referring to. You can click on the “Show Translation” button at the bottom to have the script show the object names of the parameterized items.
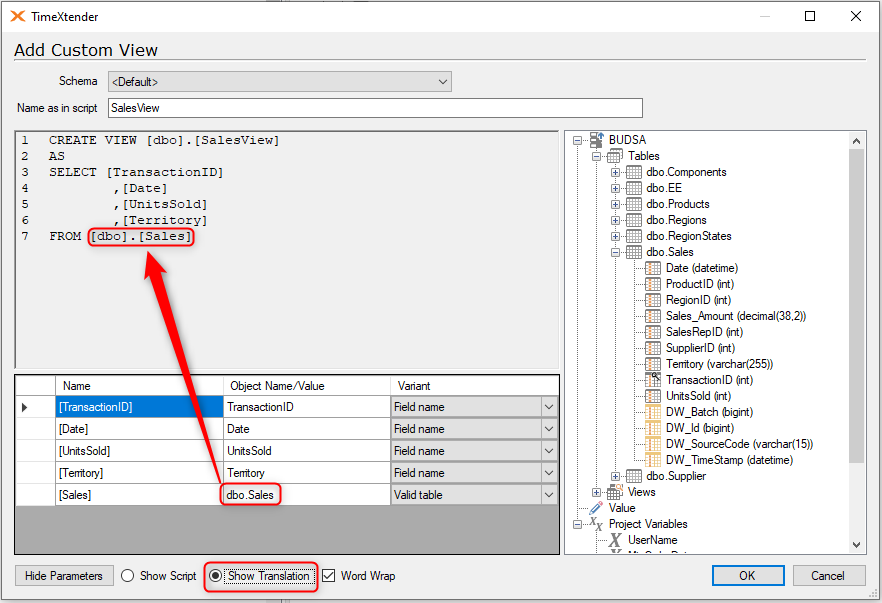
In the example above, the Sales table above is amended to include the dbo schema.
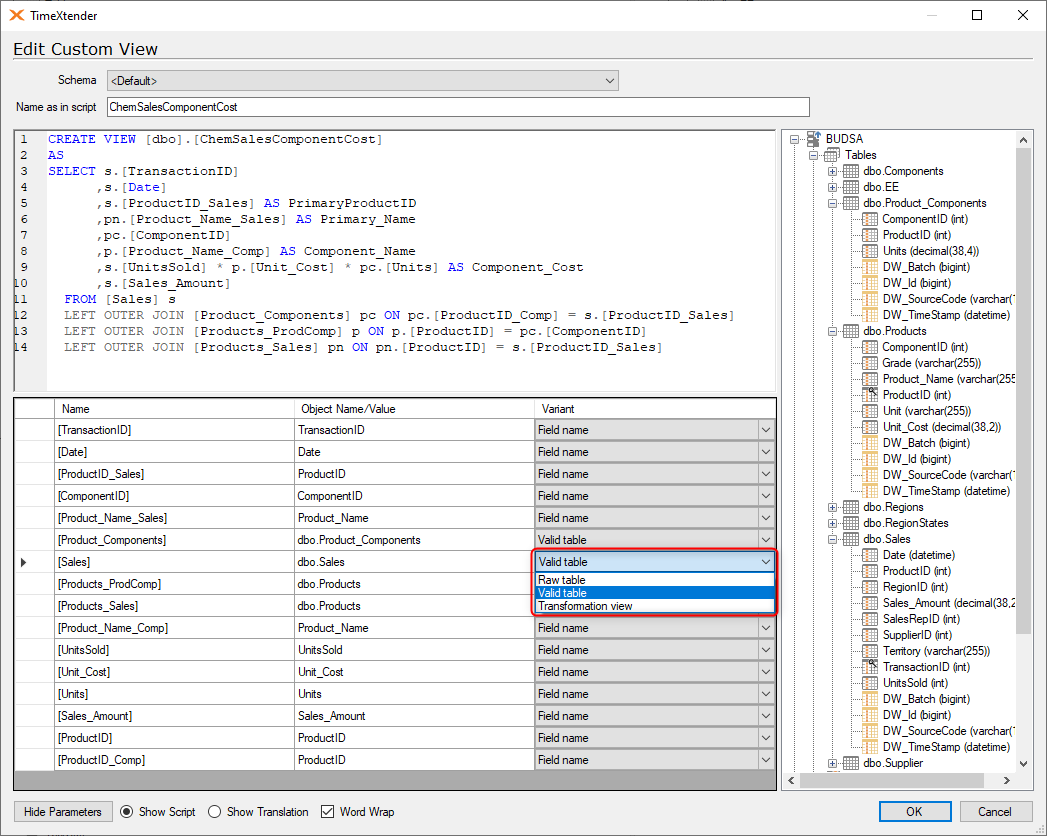
In a TimeXtender data warehouse, there are three different versions of the tables that can be selected from in the Variant column. Click the drop down arrow to choose from the Valid, Transformation, or Raw versions of the table as appropriate for the view you are creating.
The Outer Join Custom View Example
The following example shows a situation where a Custom View that uses LEFT OUTER JOINs is helpful in creating and populating a table the combines fields from there different tables.
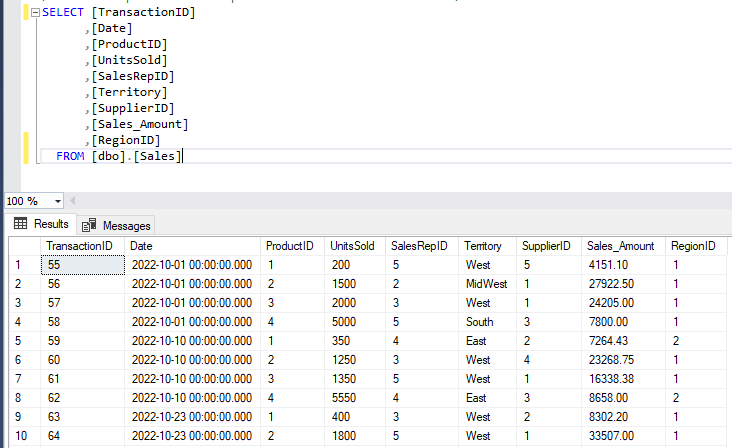
- dbo.Sales - fact table of sales transactions that include the ProductID of the product being sold.
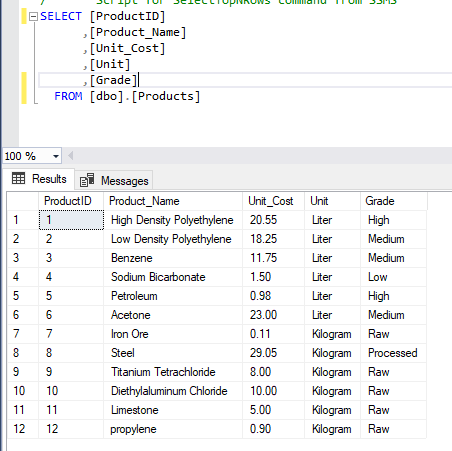
- dbo.Products - dimension table with information on each product, including finished products as well as component products used to create finished products.
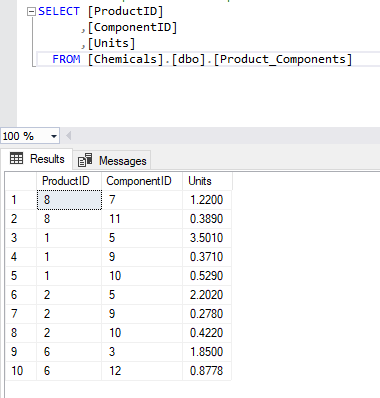
- dbo.Product_Components - lookup table that lists out the component products for each finished product.
Screenshots showing SELECT statements for the data in the three tables are as follows:
dbo.Sales Table:
dbo.Products Table
dbo. Product_Components Table
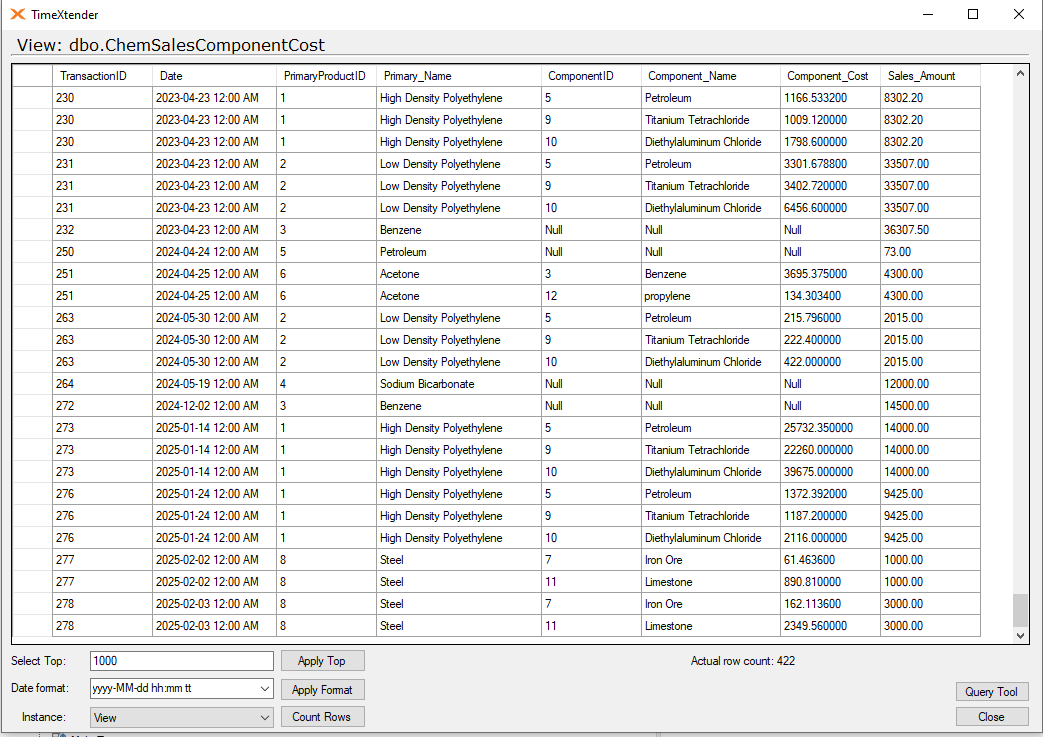
The purpose of the view is to list out the costs of all the component items related to the products that are being sold in the Sales table. In order to do this, we need to use LEFT OUTER JOINs on the tables, as we will be adding rows to the original Sales table that will list out all the component items and their total costs for each finished product in the sale.
Start by creating a SELECT statement in SSMS that accomplishes the above as follows:
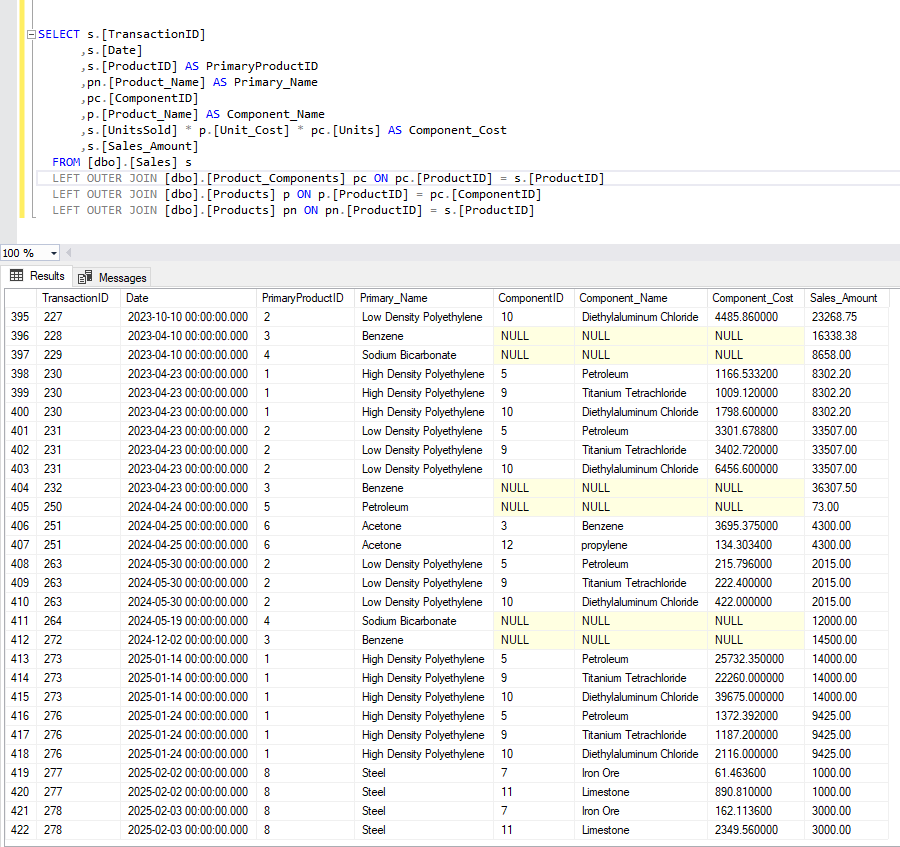
The script would look like this.
SELECT s.[TransactionID] ,s.[Date] ,s.[ProductID] AS PrimaryProductID ,pn.[Product_Name] AS Primary_Name ,pc.[ComponentID] ,p.[Product_Name] AS Component_Name ,s.[UnitsSold] * p.[Unit_Cost] * pc.[Units] AS Component_Cost ,s.[Sales_Amount] FROM [dbo].[Sales] s LEFT OUTER JOIN [dbo].[Product_Components] pc ON pc.[ProductID] = s.[ProductID] LEFT OUTER JOIN [dbo].[Products] p ON p.[ProductID] = pc.[ComponentID] LEFT OUTER JOIN [dbo].[Products] pn ON pn.[ProductID] = s.[ProductID]
Adding it to the custom view
Once you have tested your SELECT statement and confirmed that it returns the expected results, you can start by copying and pasting the SSMS code into the Add Custom View script box.
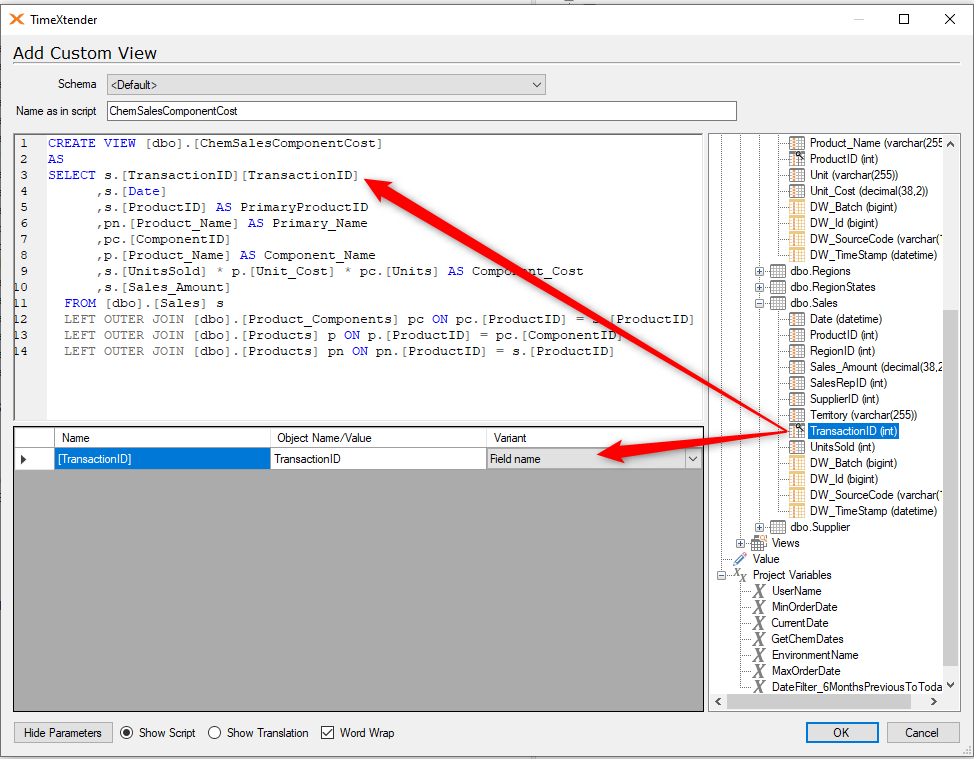
The next step is to parameterize the script by dragging the corresponding fields and tables over from the right-hand pane into the script window.
When a field is dragged into the script window, it will automatically be added to the list of parameters below the script. The next step is to remove the original entry in the select statement, as dragging the field over from the right-hand pane has created a duplicate entry for the same field.
Complete the parameterizing process for all the fields and tables in the SELECT statement.
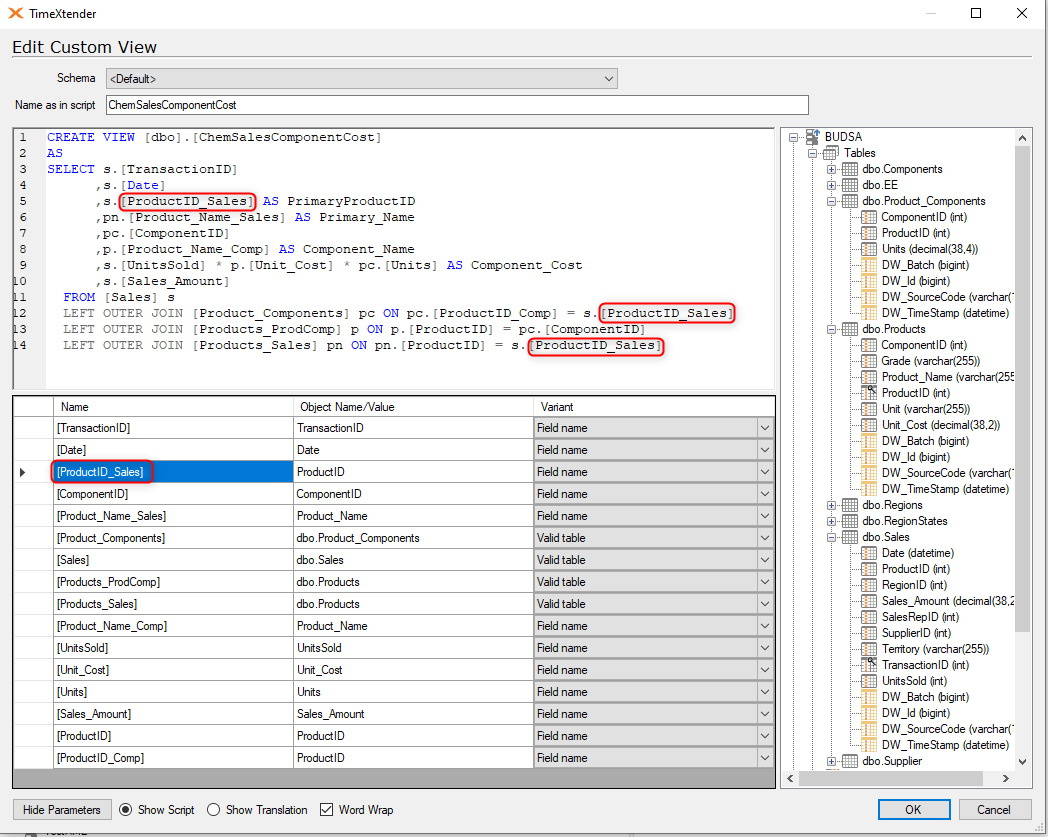
When a field has the same name in more than one table, it is necessary to provide a unique parameter name for that field in order to distinguish which table that parameter is coming from. For example, in the parameterized fields listed above, the “ProductID” field is both a primary key in the Products table and a foreign key in the Sales table. In the list of parameters below, the “ProductID” refers to the ProductID in the Products table and the “ProductID_Sales” refers to the ProductID in the Sales table.
If you click on the “Show Translation” button at the bottom, the parameter names will be replaced by the object names and the CREATE VIEW statement will appear similar to how it would be in SSMS.
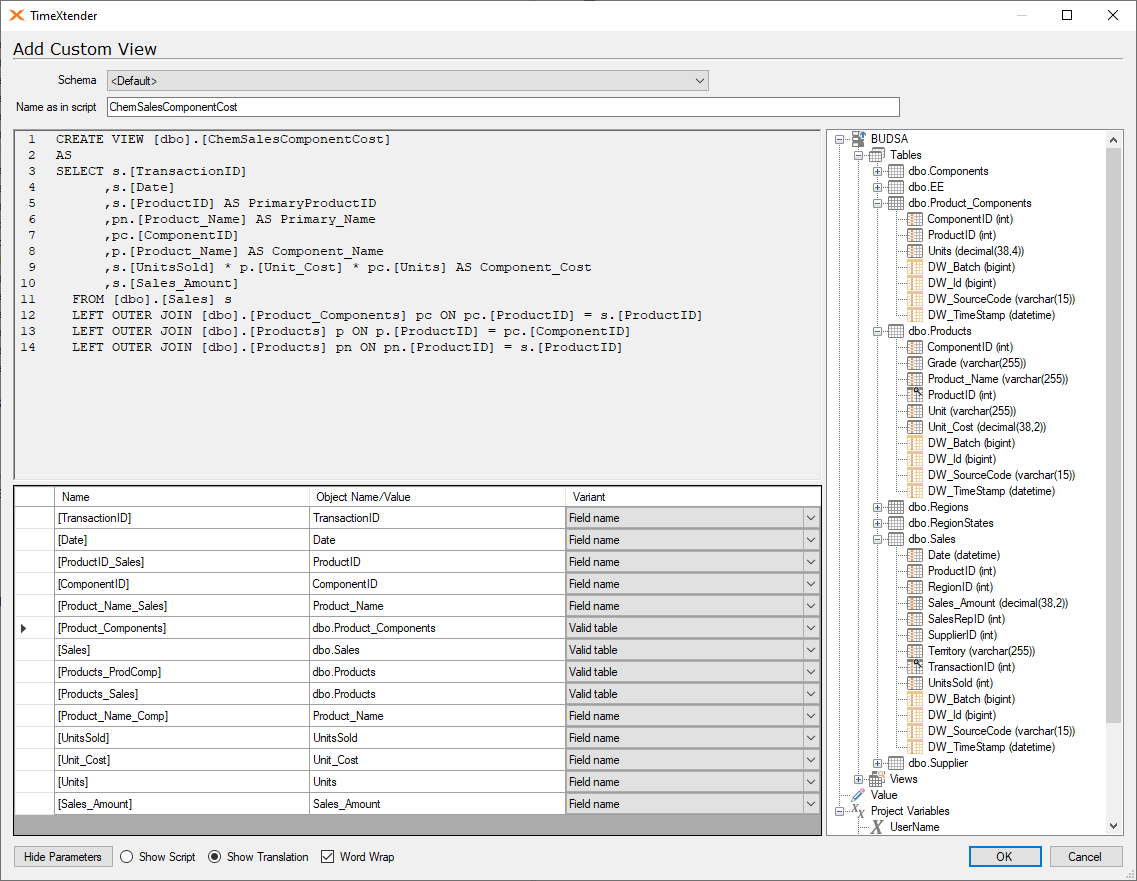
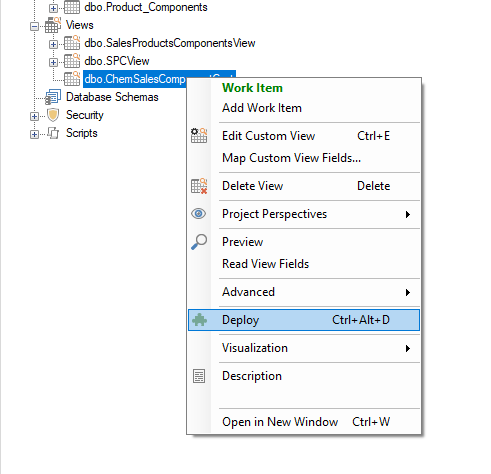
Click OK to save the custom view, then right-click on the view and select “Deploy” to ensure that the view deploys okay and is valid.
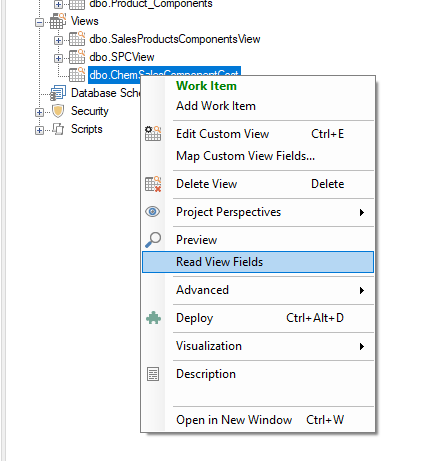
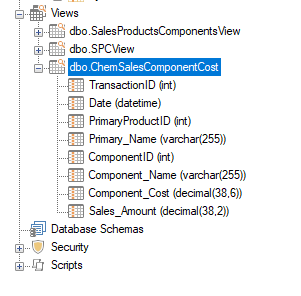
After the view is deployed, right-click on the view and select “Read View Fields” to have the fields populated beneath the view.
Lastly, preview the View and confirm the results are similar to what you saw previously in SSMS when composing the original SELECT statement.