
TimeXtender Classic and TimeXtender Data Integration both support the 'TimeXtender Enhanced' data source providers. Since the TimeXtender-branded providers are our most modern first-party providers, we recommend using them whenever possible.
Compared to the built-in data source providers in TimeXtender Classic, the newer providers can be updated without updating the entire application and receive updates more often.
In TimeXtender Classic, you must install the providers you want to use before adding the data source. The providers can be downloaded and installed from an online repository using the Manage Enhanced Data Source Providers tool. You can also use the tool to update a provider to the newest version or delete it.
If you are running TimeXtender Classic without Internet access, you can also use the tool for offline installation of a provider downloaded on a machine with Internet access.
Managing Data Source Providers
To add a new provider, follow the steps below.
- In the Tools menu, click Manage Enhanced Data Source Providers.
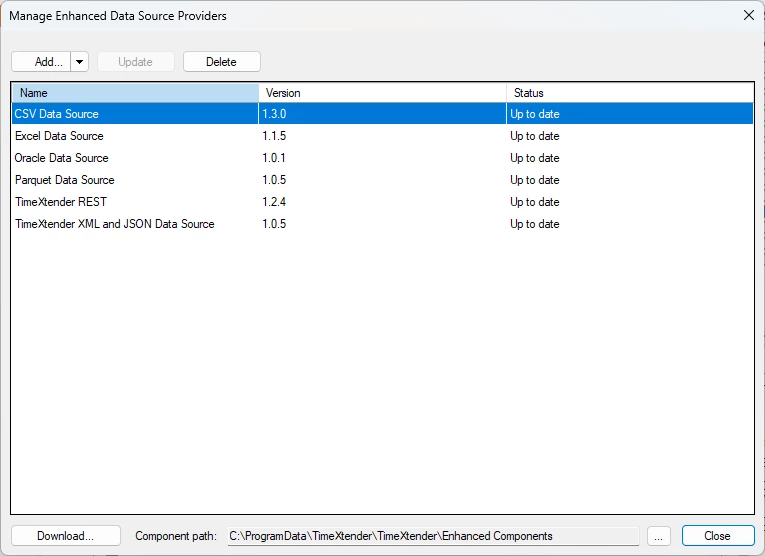
- Click Add... OR click Add Specific Versions... from the Add list if you want to add a version of a provider other than the latest
- Select the providers you want to install and click OK. The required files will be downloaded and installed.
- Click OK to close the tool.
To update a provider
- Open the tool, select a provider with 'Update Available' in the Status column, and click Update.
Note: You can have multiple major versions of the same provider installed, but only one minor version within each major version.
To delete a provider
- Open the tool, select a provider, and click Delete.
Offline installation of providers
Installing a provider on a machine without internet access involves downloading the provider on a machine with access, transferring the file to the offline machine, and using the tool to install it.
To install a provider on an offline machine, follow the steps below.
- Open TimeXtender Classic on a machine with Internet access.
- In the Tools menu, click Manage Enhanced Data Source Providers.
- In the Manage Enhanced Data Source Providers window, click Download.
- In the Download Enhanced Data Source Providers window, select the providers you want to download, click OK, and wait for the download to complete.
- Locate the downloaded ZIP files and copy them to the offline machine.
- Open TimeXtender Classic on the offline machine. In the Tools menu, click Manage Enhanced Data Source Providers. Click Add from ZIP File... from the Add list, select the ZIP file in the Open window, and click OK.
Changing where the providers are stored
Providers are stored in the folder listed in the Component path box in the Manage Enhanced Data Source Providers window.
To change the component path
- Click ... (browse), navigate to the new folder, and click OK.
Warning: If you change the component path while you have providers installed, you must reinstall these providers.
Adding and Synchronizing a Data Source
To add a new data source, follow the steps below.
- Open a business unit, right-click Data Sources, click Data Sources, and then click Add Enhanced Data Source.
- In the Name box, type the name you want to use for the source.
- In the Provider list, click on the provider you want to use.
- In the property grid, enter the information required to connect to the data source.
- Click OK to add the data source.
