

TimeXtender 20.10 will only be supported until February 2027. It will be replaced by TimeXtender Classic (TimeXtender Classic).
TimeXtender Classic does not support ODX. If you are using ODX, it has to be replaced by Business Units (BU).
This guide describes how to do this.
Create the Business Unit and Data Sources
Step 1 – Create the Business Unit
Create the BU
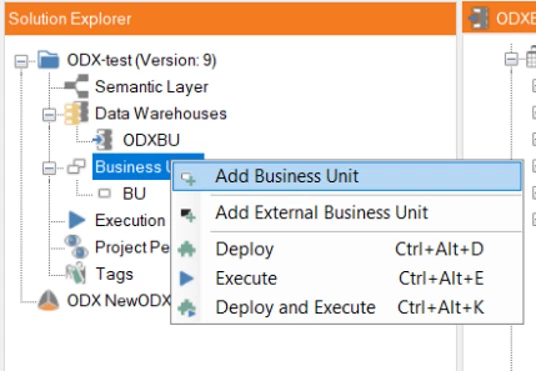
Follow the steps to create the storage for the BU.
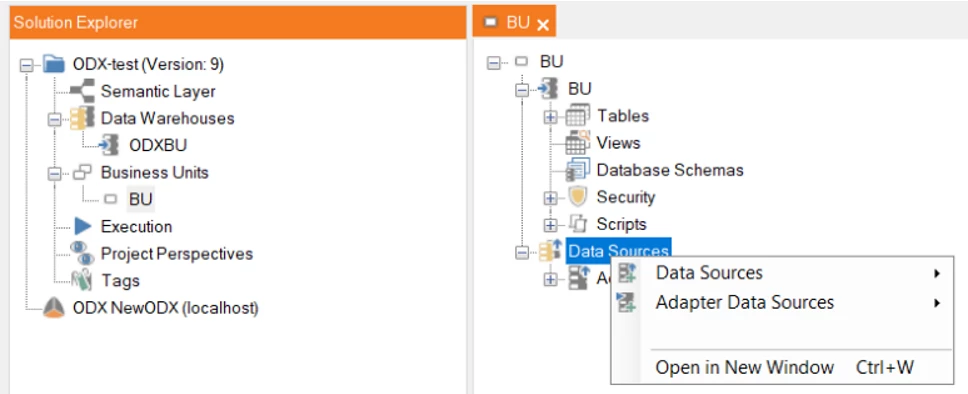
Step 2 – Add Datasources
Recreate all Data Sources existing in the ODX in the BU
To create a Data Source, right-click on the created BU.
Choose the wanted Data Source or Adapter and fill in the necessary information.
Please include:
-
All data sources (in use)
-
All tables and columns (in use) for each Data Source
-
Constraints
-
Incremental Load Settings
Repeat for all your data sources.
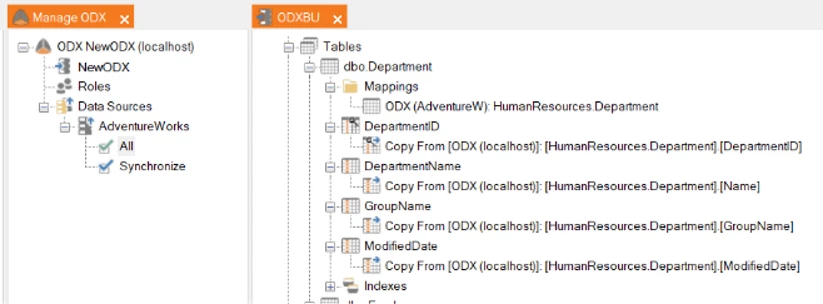
Mapping Tables and Columns
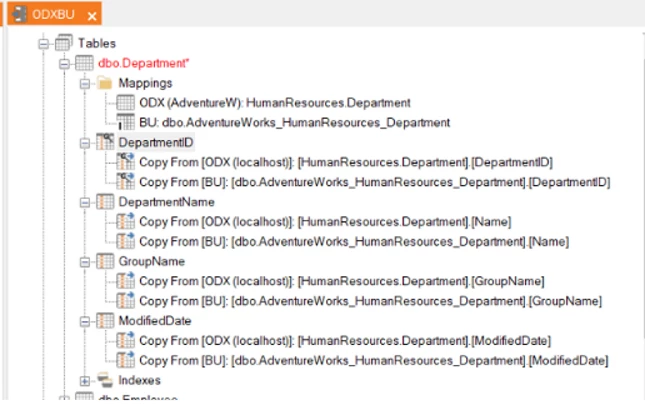
This is the starting point. Tables are mapped to the ODX.
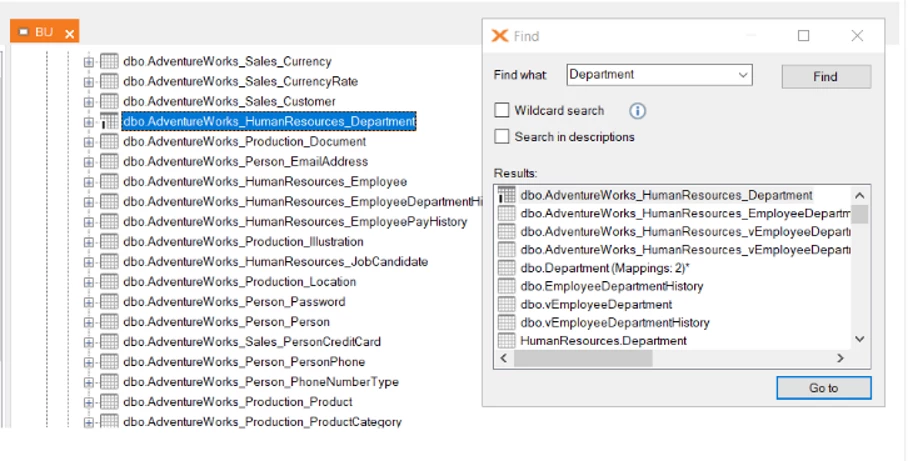
Step 1 – Map the BU table
Locate the equivalent table in the BU.
You can use Ctrl-F to search for a specific table, click the Go to button. This is especially useful if there are many tables or if they are sorted differently.
Note that it is possible to have more than one pop-up search box at the same time.
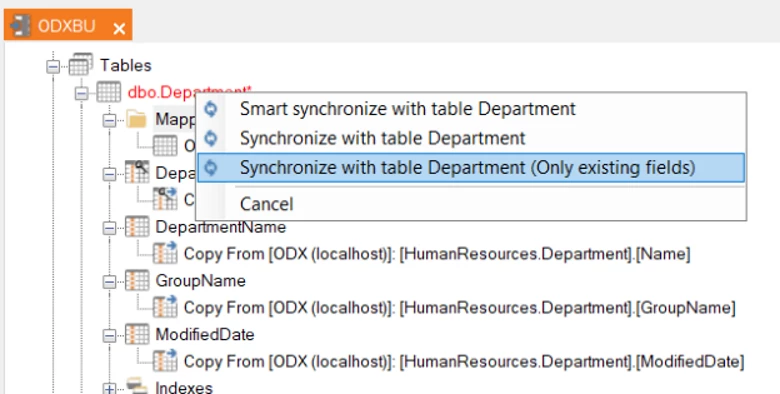
Drag the table from the BU and drop it on the table to be remapped.
Choose this option:
It will now look something like this
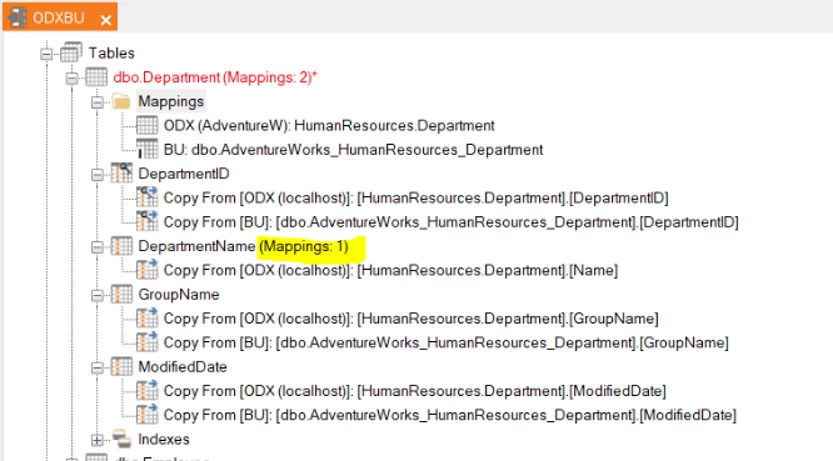
As you can see, all but one column has been automatically remapped.
Step 2 – Renamed Columns (skip if all columns have been remapped)
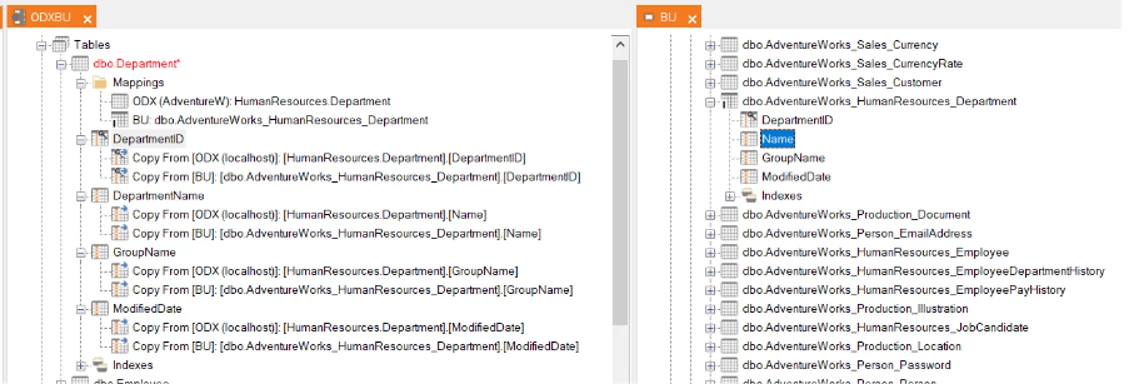
Columns that have been renamed will have to be manually mapped.
This is done by dragging the column from the table in the BU, dropping it on the column to be remapped.
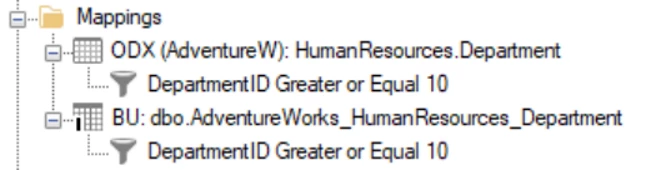
Step 3 – Add Data Selection Rules on the mapping (skip if not in use)
If Data Selection Rules are used on the mapped ODX table, add the same to the BU table.
Step 4 – Remove the ODX mapping table
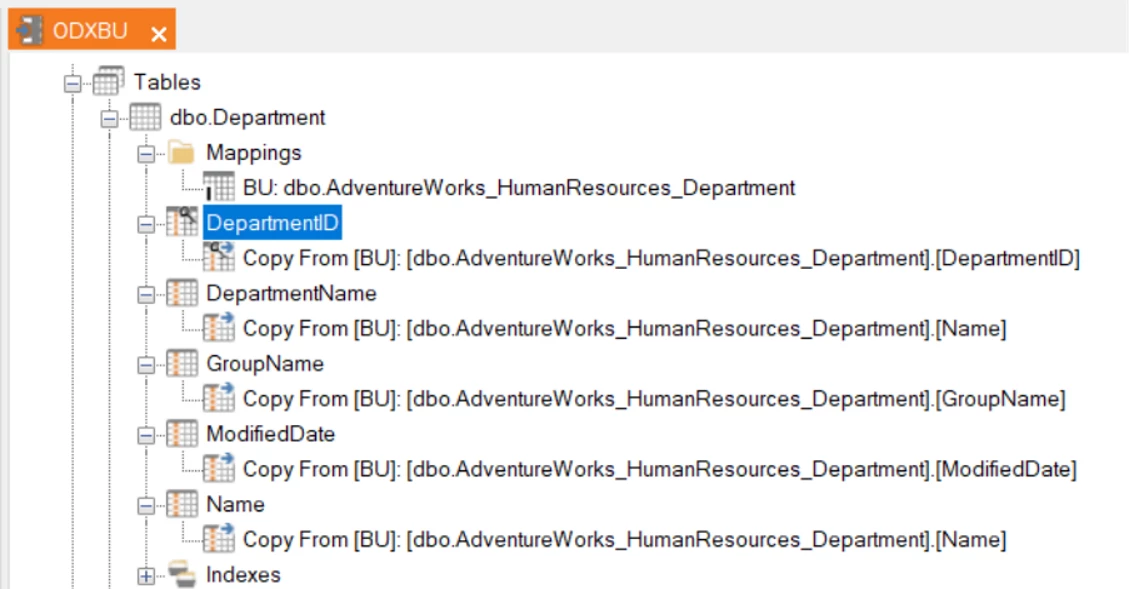
When all columns are mapped, it will look like this.
The remapping is done and the ODX table can be removed from Mappings
This can be done in two ways:
-
Click the mapping and press Delete or
-
Right-click and choose Delete Mapping
Step 5 – Deployment
The last step is to deploy the table.
You can, of course, remap several tables before you deploy.
It is advised to do frequent deployments to avoid having to redo work if anything goes wrong.
Likewise, to reload often if more than one developer is working on the remapping.
