

Ingest instances are added in the TimeXtender Portal just like Prepare and Deliver instances. Unlike Prepare and Deliver instances, there are a few additional steps that need to be taken before an Ingest instance can be opened in TimeXtender Data Integration.
The Ingest service needs to be installed on a machine (the Ingest server) and configured to use the Ingest instance that has been created in the portal. When you create an Ingest instance in the TimeXtender Portal you will be asked to specify the hostname and port. The hostname is the IP or hostname for the VM where the ingest service is running. The port is the port number used by the ingest service, ensure that the specified port is opened on the VM using an inbound port rule to allow for a successful connection.
Add an Ingest Instance
To add an Ingest instance go to the Add Ingest instance page. If you're already signed in, then go to Data Estate > Instances, click Add new instance, and then click Add Ingest instance.
Note: All connection credentials are protected with 256 bit AES encryption
The 'add' form is structured into three sections - we'll take them one by one in the following.
General
The first section is general information that is - mostly - the same for all instance types.
- In the Name box, type the name you want to use for the Ingest instance.
- In the Description box, type a description of the Ingest instance. The description is displayed on the instance details page in TimeXtender Data Integration.
- (Optional) In the Log Retention Days box, adjust the number of days logs should be kept.
- In the Storage type list, select the type of storage you want to use.
- Azure Data Lake Gen2 (default)
- Azure SQL Database, Azure SQL Managed Instance, SQL Database: The different types of SQL storage that can be selected all require the same set of connection information.
Note: SQL Server Authentication is required for Azure SQL Database, Azure SQL Managed Instance or SQL Database
- Snowflake
Storage
Depending on the type of storage you selected, different fields will appear.
Azure Data Lake Gen2 storage:
Snowflake storage:
Click here to learn how to Use Snowflake Ingest Storage
SQL Server storage:
- In the Server name box, enter the name of the server that TimeXtender will use for the creation and storage of the Ingest Instance database. For named SQL instances, enter the server name and instance name separated by a backslash: <ServerName>\<InstanceName>.
- From the Server type list, select the type of SQL server. Note that this setting currently only needs to be changed if you will be using an Azure Dedicated SQL pool, previously known as an Azure SQL Data Warehouse.
- In the Database box, type the name that you want the Ingest Server to use when creating the Ingest Instance database during the initialization phase of your data estate deployment. (The initialization steps are performed in the TimeXtender Data Integration and are described in detail later in this setup guide.)
- In the Username (SQL Server authentication) box, enter the username that TimeXtender will use to connect to the database. Note that TimeXtender does not support Windows Authentication, so SQL authentication is required for connections to the SQL Server database.
- In the Password box, enter the password that is associated with your SQL authentication username.
- (Optional) In the Connection timeout box, enter the number of seconds to wait before terminating the attempt to connect to the server. Set it to 0 to wait indefinitely.
- (Optional) In the Command timeout box, enter the number of seconds to wait before terminating a command. Set it to 0 to wait indefinitely.
- In the Batch size box, enter the number of rows to copy when using ADO.net transfer. '0' equals unlimited.
- (Optional) In the Encrypt connection list, you can enable encryption of the connection, which is recommended when you are not in a private network (e.g. when your server is on Azure). You have the following options:
- No: The communication is not encrypted (default).
- Yes: The communication is encrypted. The server's certificate is verified by a certificate authority.
- Yes, trust server certificate: The communication is encrypted. but the server's certificate is not verified. This setting is not recommended for use on public networks.
- (Optional) If you need a connection string with properties not found in the UI, you can enter it in the Additional connection properties box. It will override the data in the other boxes with connection information.
- Click Save.
Note: TimeXtender Data Integration must be refreshed to retrieve the newly created Ingest Instance.
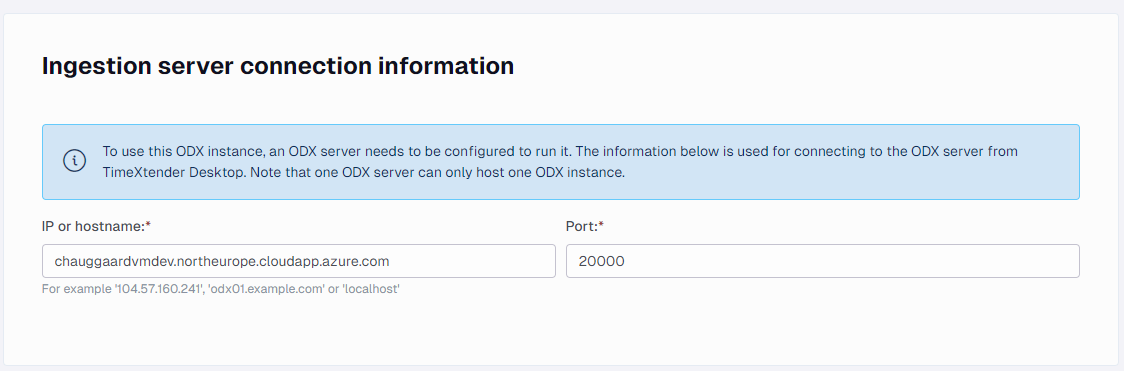
Ingest Server Connection Information
To use the Ingest instance, an Ingest server needs to be configured to run it. The information in this section is used for connecting to the Ingest server from TimeXtender Data Integration.
Note that the Ingest Server does not need to be installed yet to complete this section, and these settings can be updated later, if necessary.
One Ingest server can only host one Ingest instance, so each Ingest instance should have unique settings in this section.
- In the IP or hostname box, enter the name or IP of the machine where the Ingest service is or will be installed. In Azure, this is the Public IP address or DNS name defined for the VM. This will be used by TimeXtender Data Integration to connect to the Ingest, so make sure to use an IP or hostname that is available on your network and can be reached by other machines. If you are installing TimeXtender using the Sandbox reference architecture, where all of the software and services are on the same system, then you may be able to enter "localhost" for the Ingest Server name.
- Enter the port in the Port box. "20000" is the default port used by the Ingest Server. Make sure to allow traffic to the specified port number in the host machine's firewall as well as any network firewalls that may be regulating traffic to the Ingest Server.
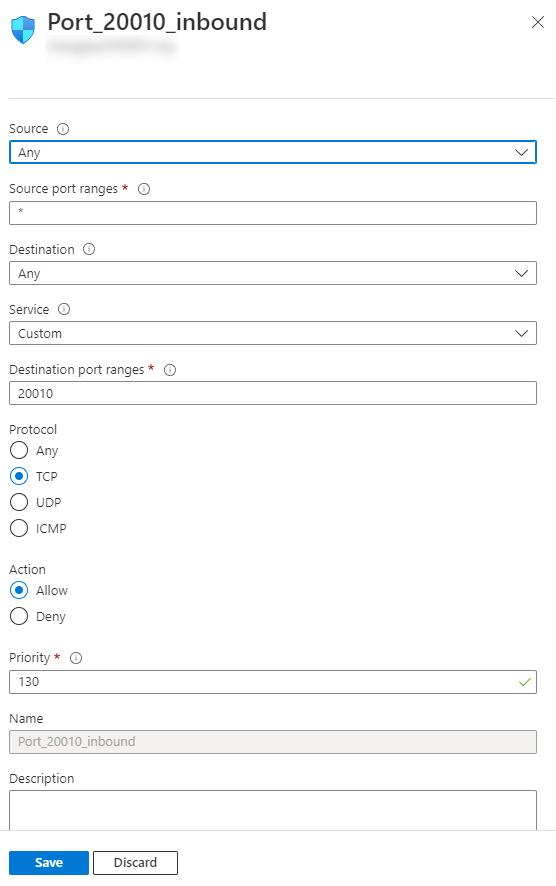
Firewall Rules
If the Ingest Service is installed and running on a VM in Azure, create an inbound security rule in the VM network settings for the port which has been defined for the Ingest instance in the portal. In the example below, we have an Ingest instance with the following Ingest server connection info properties:
An inbound security rule is therefore created under Networking Settings for the VM in the Azure portal.

Edit an Ingest Instance
Go to TimeXtender Portal
Home > Data Estate > Instances
1. Click on your instance, it will open a page with instance details
2. Click on Edit button, edit properties and Save
Note: TimeXtender Data Integration must be refreshed to retrieve the latest changes for the Ingest Instance.

Delete an Ingest Instance
Go to TimeXtender Portal
Home > Data Estate > Instances
1. Click on Delete button next to your instance. The Delete dialog will be shown.
2. Enter the instance name to confirm, add a comment (reason) and click on Delete
Initializing the Ingest Instance in the TimeXtender Data Integration
Create Ingest Storage
Before you can execute transfer tasks in an Ingest instance, you must create the data storage.
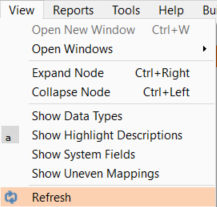
In TimeXtender Data Integration, open the Ingest instance and then right-click on the instance and select Edit Instance.
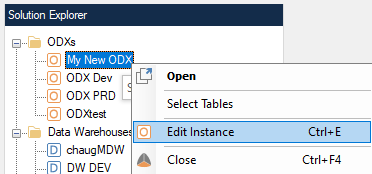
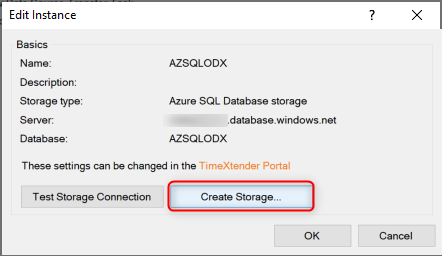
Next, select Create Storage... in order to create the storage for the Ingest instance.
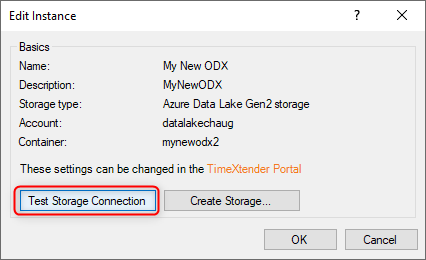
Testing the Storage Connection
After you have created the storage, you can click Test Storage Connection to confirm it is available and ready for use.
Troubleshooting
Create Storage Error
Error: Service request failed: Response status code does not indicate success: 403 (This request is not authorized to perform this operation using this permission)
This error may appear if a storage container has been manually created outside TimeXtender (i.e. within the Azure portal under the storage account resource). This error can be resolved by manually deleting the container within Azure, or by changing the storage container name within the TimeXtender portal. Then try to select Edit Instance and Create Storage...

