

This guide explains how to configure Snowflake as the storage backend for a TimeXtender Data Integration Ingest instance. With native Snowflake ingest storage, you can run a fully Snowflake-based architecture without landing data in Azure Data Lake first.
Note: This feature was introduced in TimeXtender Data Integration 7257.1.
Prerequisites
Before configuring Snowflake ingest storage, ensure you have the following:
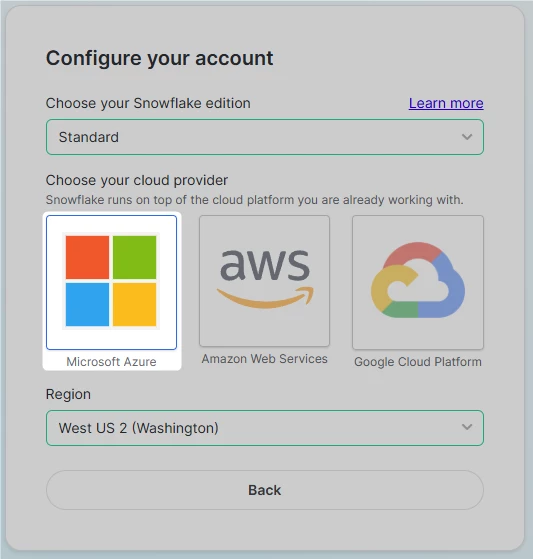
- A Snowflake account hosted on Microsoft Azure. TimeXtender currently only supports Azure-based Snowflake accounts for ingest storage. AWS and GCP-hosted Snowflake accounts are not supported.
- A Snowflake warehouse for running queries and data ingestion
- A Snowflake user account with key-pair authentication configured (recommended) or username/password authentication. See the Use Snowflake for Prepare Instance Storage article for detailed instructions on setting up key-pair authentication
- A TimeXtender Standard, Premium, or Enterprise package
Important: The following features are not supported when using Snowflake ingest storage:
- Transferring data from Ingest to Deliver using Azure Data Factory (ADF)
- ADF data sources
- CData data sources
- TimeXtender OneLake Delta Parquet Data Source
- TimeXtender OneLake Finance & Operations Data Source
- TimeXtender SAP Table data source
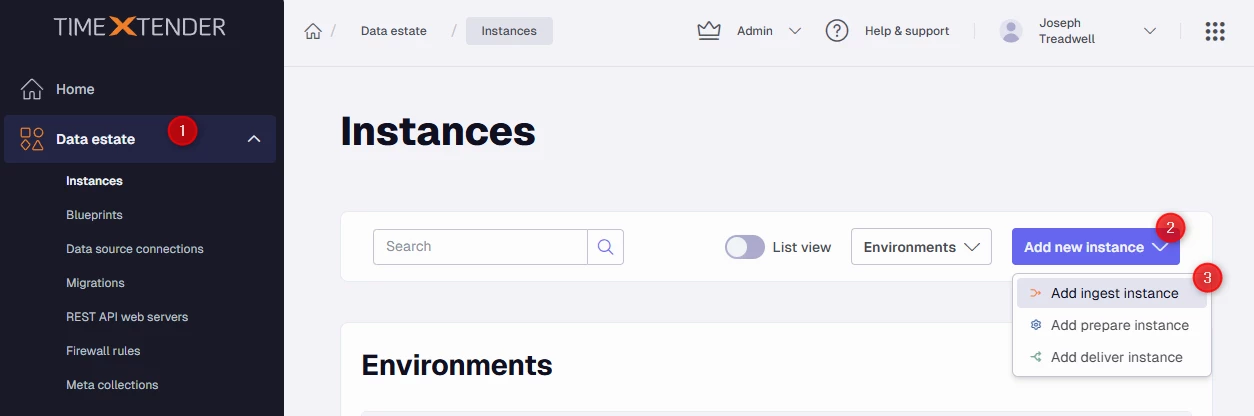
Step 1: Add an Ingest Instance with Snowflake Storage
In the TimeXtender Portal, navigate to Data Estate > Instances, click Add new instance, and then click Add Ingest instance.
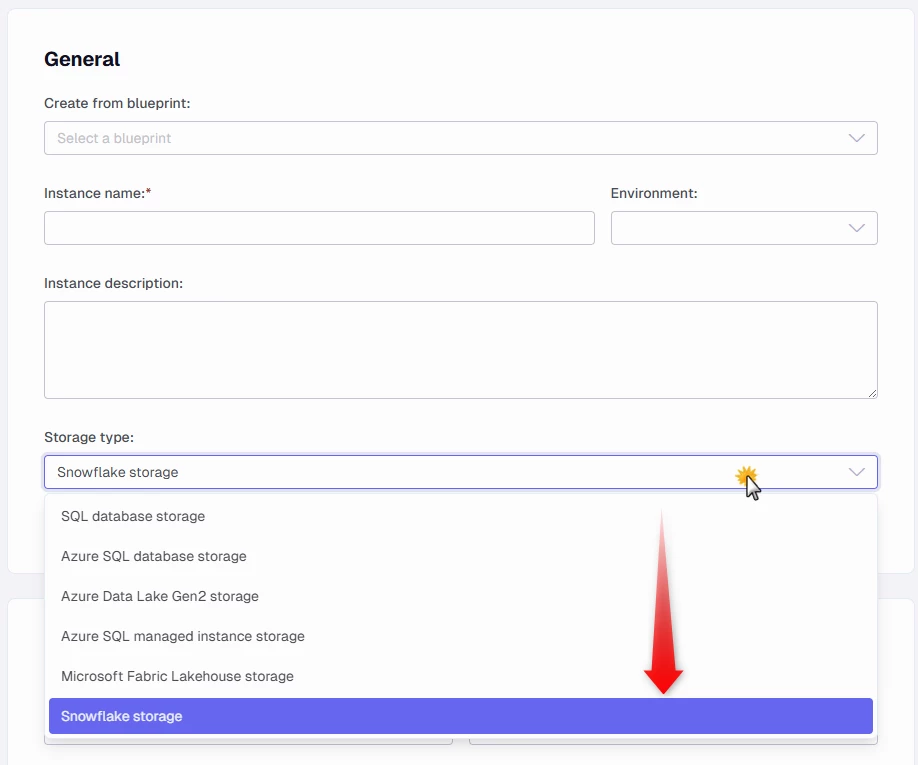
General
- In the Instance name box, enter a name for your Ingest instance.
- (Optional) In the Instance description box, provide a description.
- In the Storage type dropdown, select Snowflake storage.
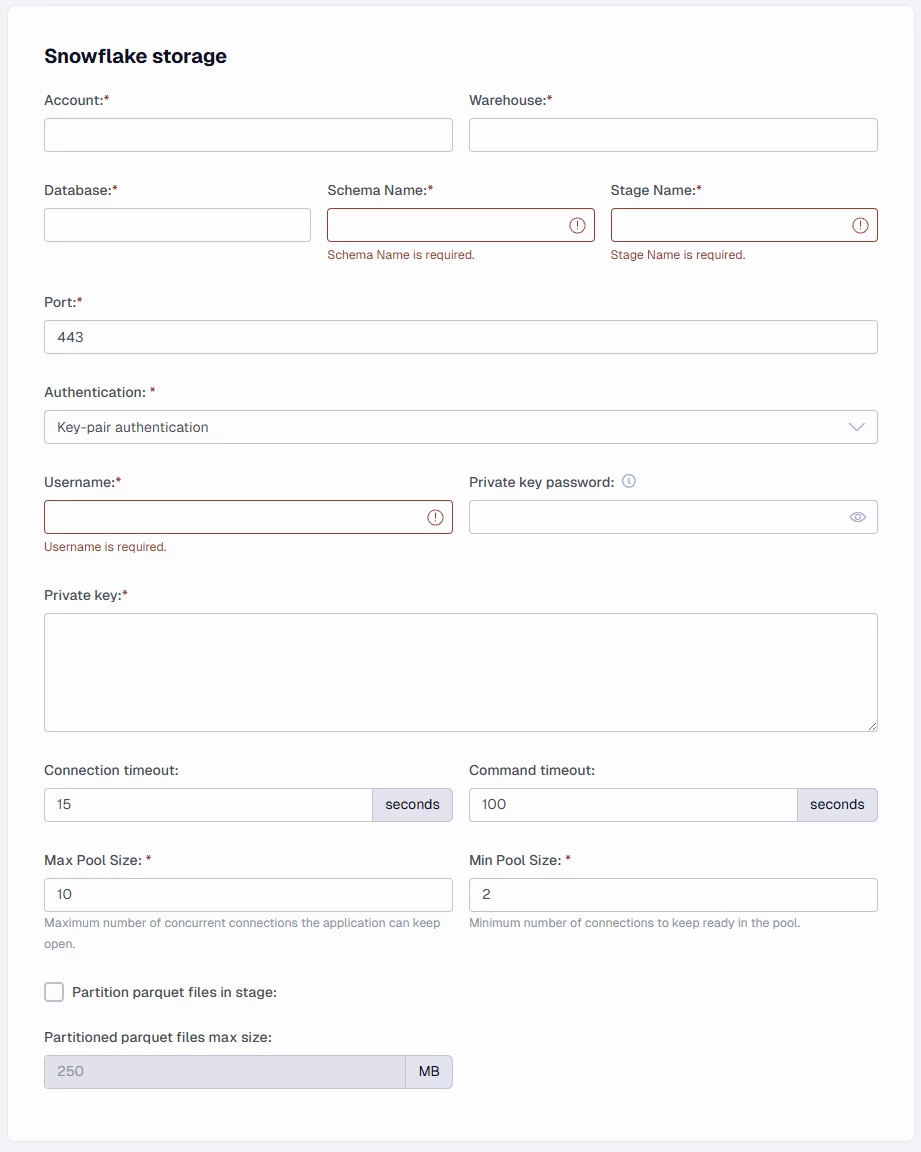
Snowflake Storage Configuration
-
In the Account box, enter your unique Snowflake account identifier (format:
<OrganizationID>-<AccountID>). To find this, go to Admin > Accounts in the Snowflake portal and copy the subdomain from the account URL. -
In the Warehouse box, enter the name of the compute warehouse to use for running queries and data ingestion.
-
In the Database box, enter the target Snowflake database name. The database does not need to exist yet — it can be created by the TimeXtender Ingest Service.
-
In the Schema Name box, enter the schema used for the internal stage and system data. The default value is
_TIMEXTENDER. Use a name longer than 10 characters to avoid conflicts with data source schema names (which are up to 10 characters based on the data source short name). -
In the Stage Name box, enter the Snowflake internal stage name used to land files before ingesting them into database tables. It also stores data source metadata cache files. The default value is
STAGE. -
In the Port box, enter the connection port. The default is 443.
-
In the Authentication dropdown, select your authentication method:
- Key-pair authentication (recommended)
- Username and password
-
In the Username box, enter the Snowflake user account name.
-
In the Private key password box, enter the passphrase protecting the private key file (only required for key-pair authentication with an encrypted key).
-
In the Private key box, enter the full content of the private key in PEM format, including the header and footer lines (e.g.,
-----BEGIN ENCRYPTED PRIVATE KEY-----through-----END ENCRYPTED PRIVATE KEY-----). -
In the Connection timeout box, enter the maximum wait time in seconds before aborting the connection. Default: 15 seconds.
-
In the Command timeout box, enter the maximum time in seconds for an SQL command to complete. Default: 100 seconds.
-
In the Max Pool Size box, enter the maximum number of concurrent connections in the pool. Default: 10.
-
In the Min Pool Size box, enter the minimum number of connections kept ready in the pool. Default: 2.
-
Select the Partition parquet files in stage checkbox to split data into multiple parquet files based on partitioning logic when uploading to the stage.
-
In the Partitioned parquet files max size box, set the maximum size per partitioned parquet file. Default: 250 MB.
Complete the Ingest Server Connection Information and Firewall Rules sections as described in Add Ingest Instances, then click Save.
Note: All connection credentials are protected with 256-bit AES encryption.
Step 2: Create Ingest Storage
Before you can execute transfer tasks, you must create the data storage:
- In TimeXtender Data Integration, open the Ingest instance.
- Right-click the instance and select Edit Instance.
- Click Create Storage... to create the Snowflake database and internal stage.
Step 3: Test the Storage Connection
After creating storage, click Test Storage Connection to verify the connection is available and ready for use.
Troubleshooting
Unable to Connect
Error: Snowflake Internal Error: Unable to connect
Cause: The account identifier is incorrect.
Solution: Edit your Ingest instance in the TimeXtender Portal to review and correct the Account field. Ensure the format is <OrganizationID>-<AccountID>.
Locked User
Error: User temporarily locked
Cause: Five or more failed connection attempts with an incorrect password.
Solution: See Snowflake User and Password Management FAQ.
