This data source can connect to JSON data in files or in an API. It can be used almost interchangeably with the REST provider. So what REST can do, this can as well. The only difference is that this is JSON data exclusively.
In many cases you can use this JSON provider instead of a REST provider, there are a few things you can do with this, that isn't available in REST. JSON can also do pagination, read about it here Pagination. It can also use parameters, to add input from TimeXtender Data Integration into the file, which you can read about here Parameters.
It should be mentioned that this provider can connect to JSONP files as well. Here is a link to the file I use in this example
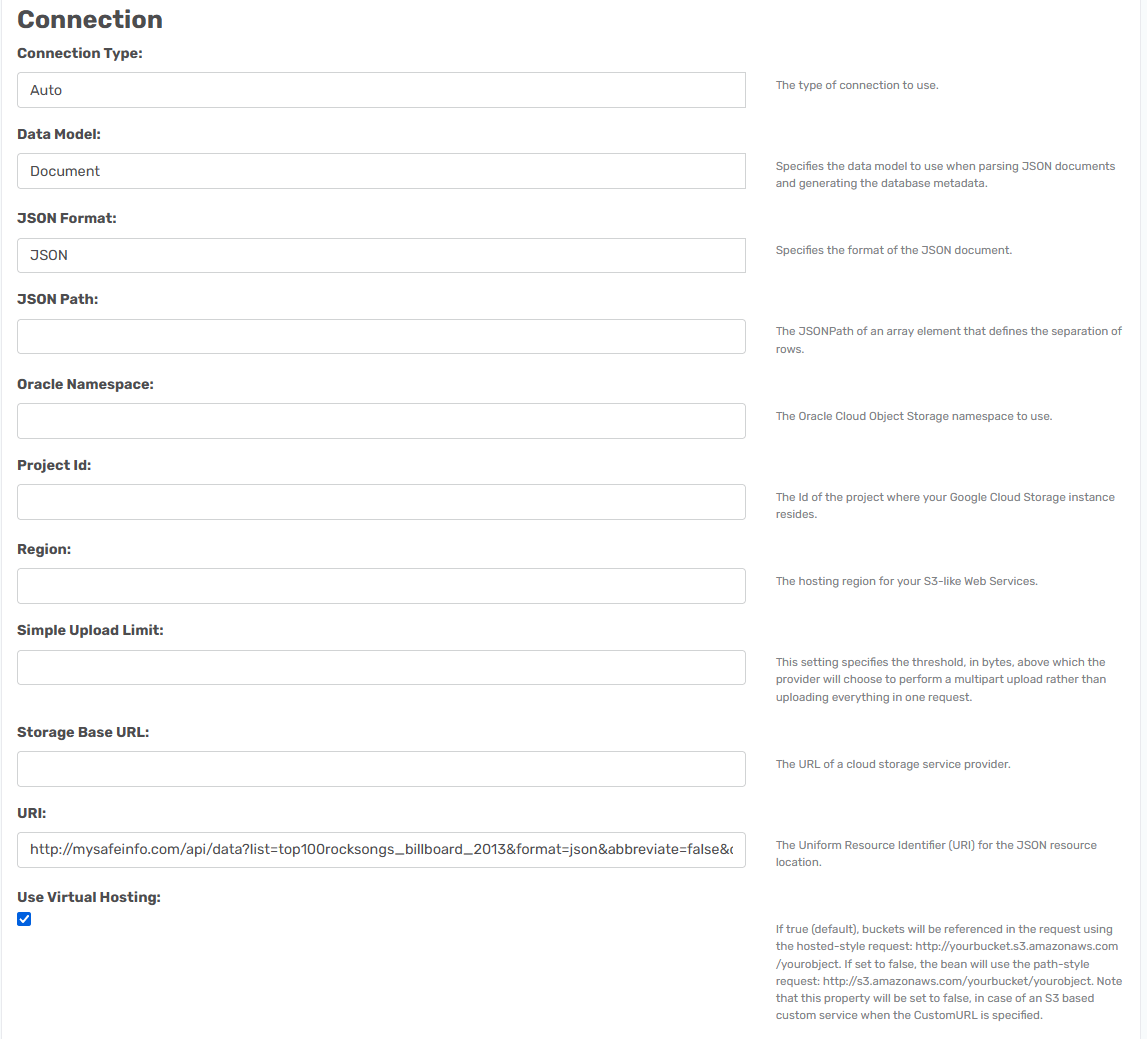
You need to paste in the link to the JSON resource location.
JSON Path: <empty>
This is the the root object/element. If you want to be more specific there is some good examples in this link. JsonPath. Otherwise, just keep it empty, the JSON provider can work out the field automatically.
Here is a setup of this.
Local resource
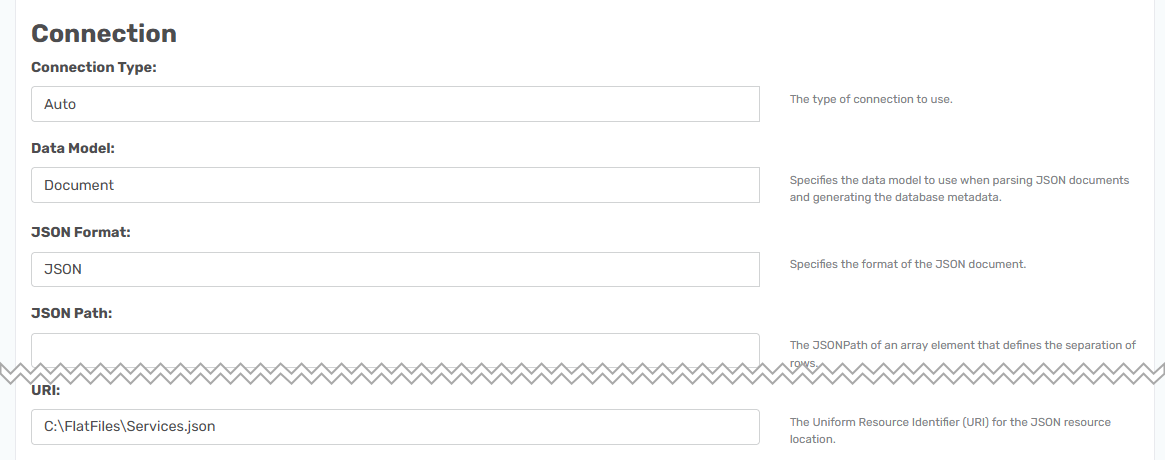
If you have it saved as a .JSON file you need to fill out the following fields. I went to this page RAW data and copied the raw data and saved it in a file called Service.json.
URI: <path to file>
Add the path to the file in the data source field.
JSON Path:<empty>
The same as before.
Getting the data
Once the data source is added, it can be used like all other data sources.You can set up incremental load, make data type overwrites, data selection rules and use the Query Table tool.
Advanced features
Automatically getting the correct data types
As standard CData will scan the first 100 rows and determine what data types these fields are. Sometimes this gives an error because the 101 row contained a longer string than was present in the previous rows. The solution simply is to change the Row Scan Depth field to a higher number. If you set it to 0 it will parse the whole file. Also in regards to JSON/XML files, this field doesn't only solve the issue of data type, but also what tables are available. If the file contains more than 100 rows in total these will not be added. So a good idea is to work out what the maximum amount of rows that are contained in the file and then add that or set it to 0 to be sure.
Parsing Hierarchical Data
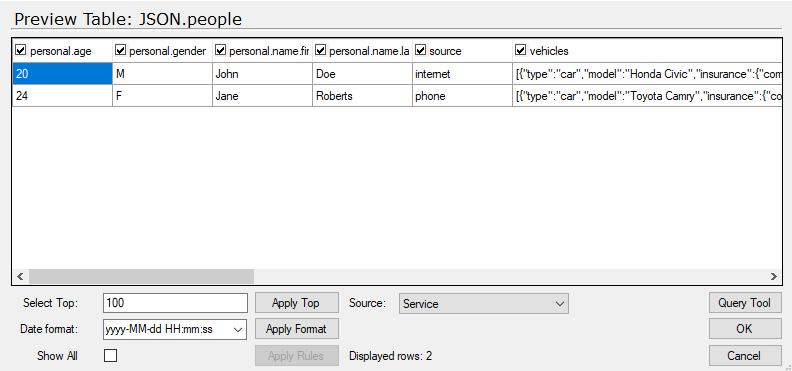
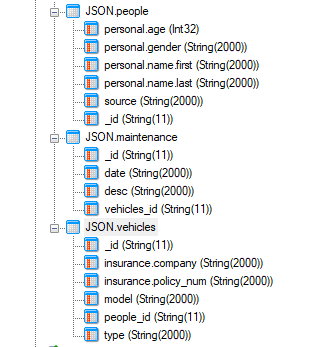
If your file is containing nested objects, you have the opportunity of seeing this. I used the Service.json file I downloaded earlier. It has this structure.
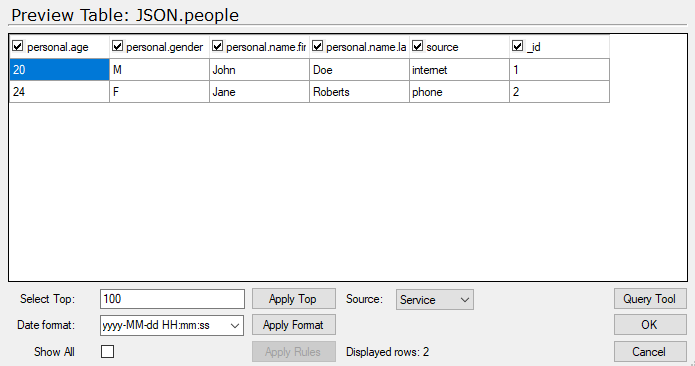
When I pull it in with the default setup, as shown previously. It gives me one table called people. When previewed, each nested part is put into one field.
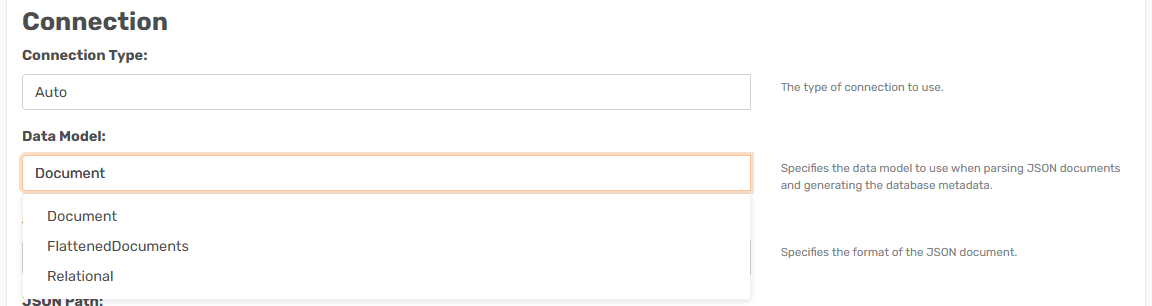
To avoid that use the Data Model feature.
Document: As default it is set to Document which is the top level data. The other two options besides that are Flatten Documents and Relational.
Relational: Creates a table for each nested part and creates ids to relate them to each other. Like this. People now looks like this. The only issue is that it has a limit regarding how deep in the object it can go. If so you will have to use the JSON Path field to start at a lower level, or generate a RSD file where you can manually add the path to the level the data is on.
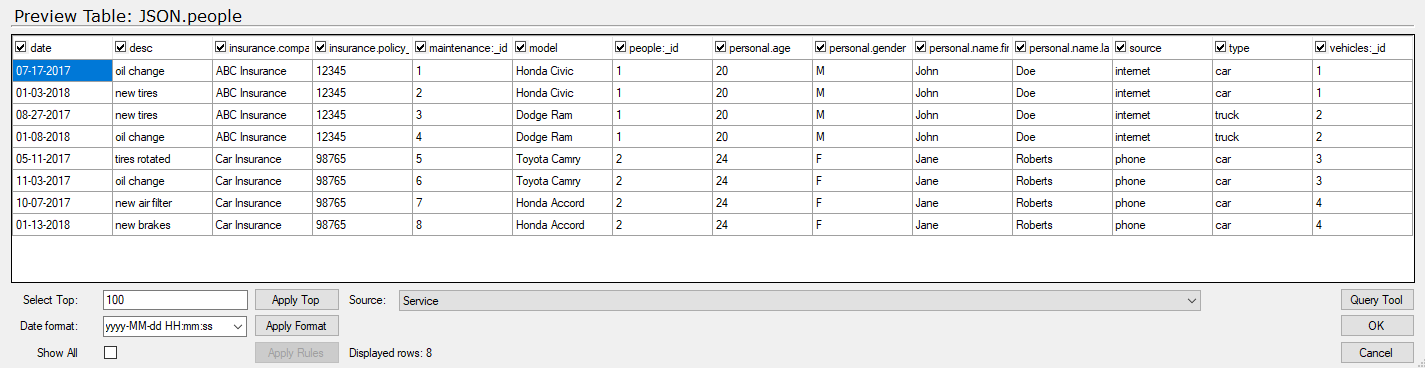
Flatten Documents: makes all these previous tables one large one. Like this.
Using the JSON Format field
This will give you some more configuration options.
JSON
This is the default format and should be used in the majority of cases.
JSONRows
This is a specific format in which data is returned in a relational format consisting of rows of data contained within primitive arrays. Column information is returned as well in a separate array.
Note: Data Model does not apply when using this JSONFormat.
The JSONPath property requires special syntax to identify the column and row paths. The syntax consists of specifying a path for each using a "column:" and "row:" prefix. Using the example above, the JSONPath would be set to: column:$.dataset.column_names;row:$.dataset.data
In the case that columns are returned in an object with additional data, an additional "columnname:" prefix can be specified to identify the path to the value containing the column name.
In the above example, JSONPath would be set to: column:$.columns;columnname:$.columns.name;row:$.rows
LDJSON (Line-Delimited JSON)
This format is used to parse line-delimited JSON files (also known as NDJSON or JSONLines). Line-delimited JSON files contain a separate JSON document on each line.
The JSONPath value is treated the same as when using the regular JSON format. The only difference is that the root path ($.) is always used (therefore treating all the lines of JSON as it is contained within an array).
In the above example, the JSONPath will be "$.", which will return 3 rows containing the columns: Name, Age, and Gender.
In the real world this is necessary to use LDJSON, if you have a file containing more than one table in it. Without this it would only show one of the tables, but with this it will split the file out into two or more tables with the name it has in the file.
RSD files
These can be used for this and will be needed when doing stuff like authentication.
We have a area under data sources with questions about this.