Note: For new setups, we recommend that you use TimeXtender Dynamics 365 Business Central Data Source - Online that includes the functionality of the Option Values data source. Then you won’t have to add the Options Values data source and use the Mapping Set feature to merge tables from different accounts.
This article explains how to setup the TimeXtender Business Central 365 data source, as well as the TimeXtender Business Central 365 Option Values data source. For reference, it will be called just BC to keep it short.
What is the TimeXtender Business Central 365 provider?
It is a provider used to access the businesscentral.dynamics.com web source. It is not usable for a local BC server. In the case of a Local BC server, you would use an SQL provider to gain access.
Prerequisites
Set up the BC data source in the TimeXtender portal
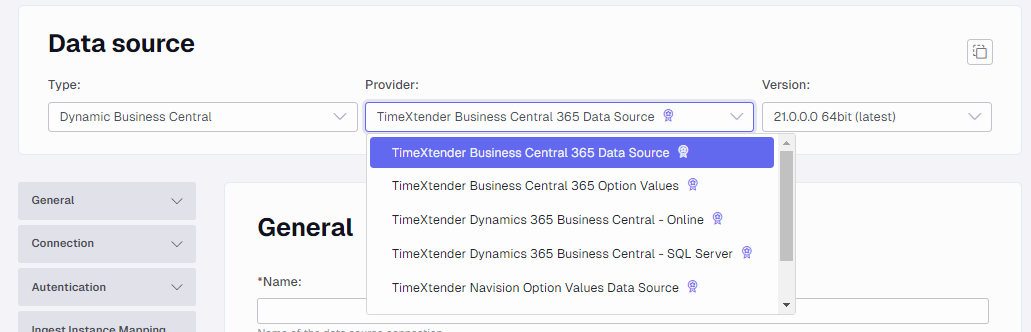
In Data Sources click Add new Data Source.
Search for Business Central and choose the TimeXtender Business Central 365 Data Source option.
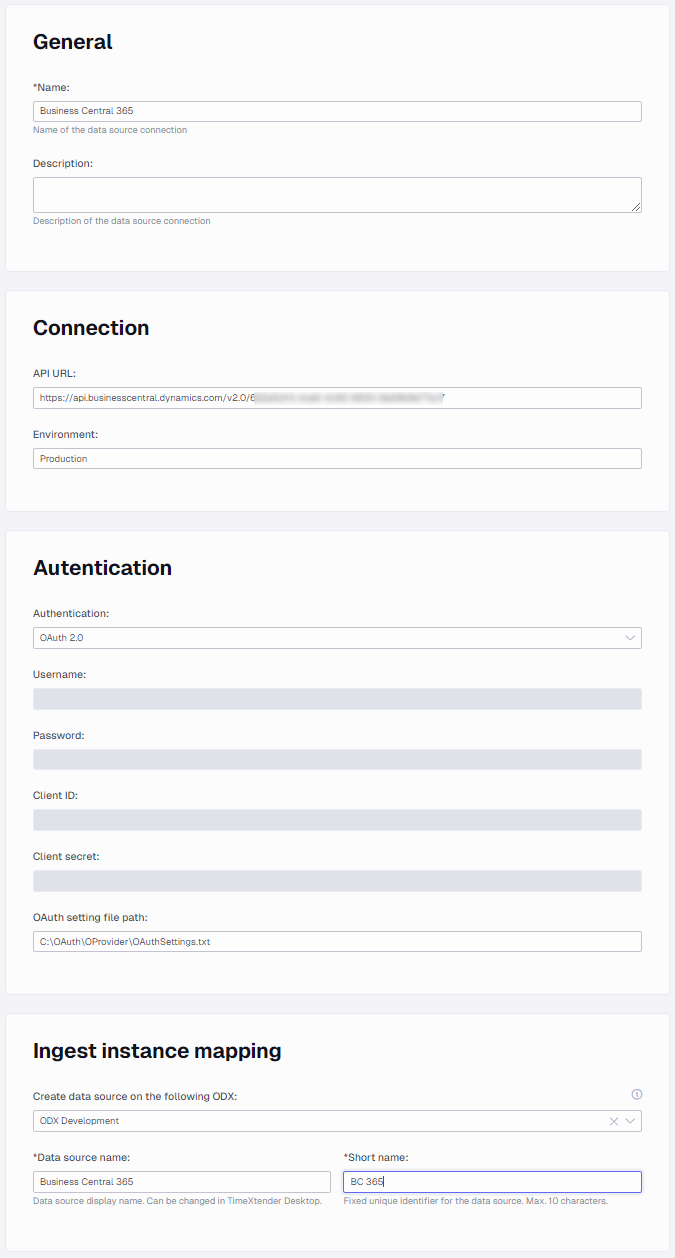
In the Name field, type the name of the data source.
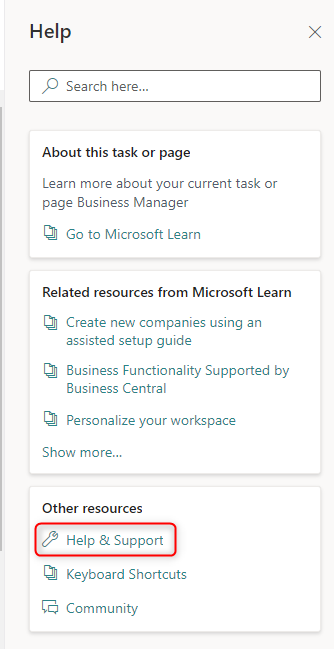
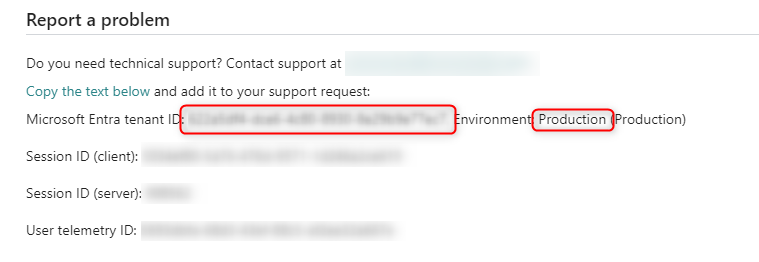
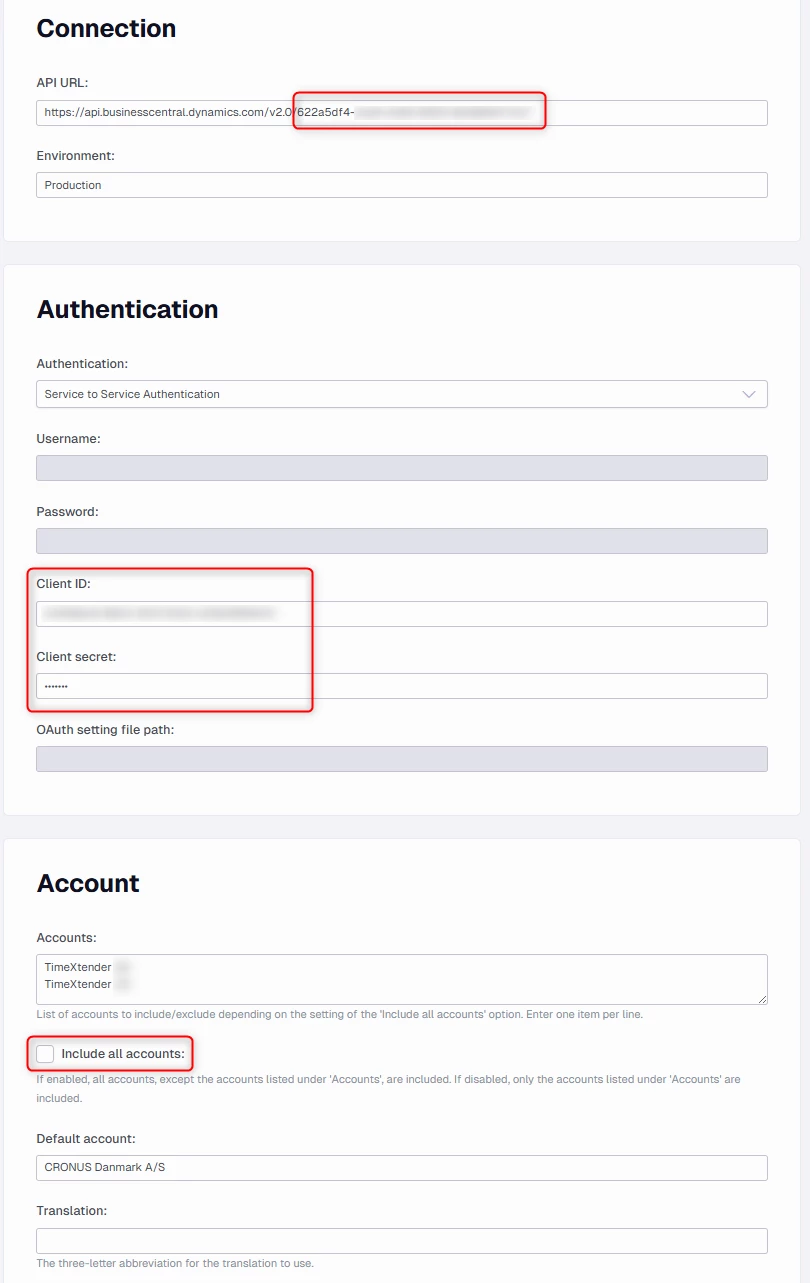
In the API URL field change the https://api.businesscentral.dynamics.com/v2.0/{tenantId} value. Replace {tenantId} with the actual Azure AD Tenant ID which can be found by navigating to the BC environment in https://businesscentral.dynamics.com/, selecting the “?” icon and selecting “Help & Support”. Enter the environment which can also be found in the same location.
You have the following options to authenticate.
If the choice is to use OAuth 2.0 authentication, select this option and enter a legitimate file path (e.g. C:\oauth\oauth.txt) for the locally stored OAuth token to authenticate the connection. The text file does not have to be created beforehand, as TimeXtender will create it once you authorize OAuth.
If the choice is to authenticate using “Service to Service Authentication” then select this option. To use this, apply the Client ID and the Client Secret from an Application as explained above.
The other options are not necessarily possible, specifically, the Username and Password option is expired by BC. It used to work with a Web Service Access Key as the Password.
Once the data source is set up, be sure to map it to the Ingest Instance you want to use it with.
Set up the BC data source in the Ingest Instance
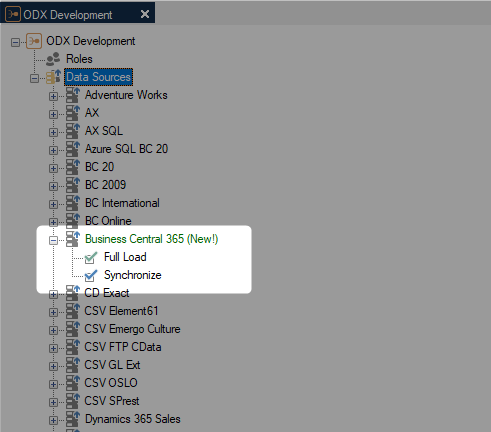
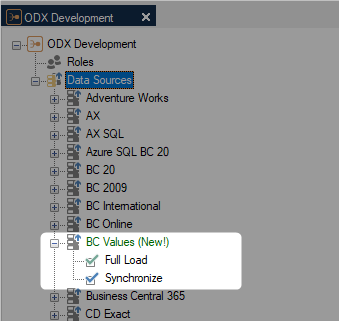
You can now see the new data source in your Ingest Instance
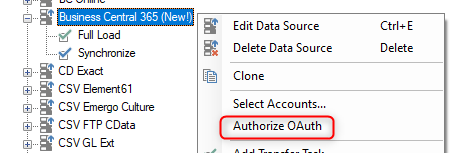
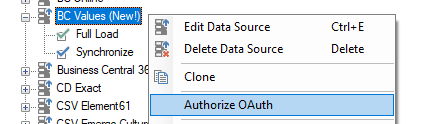
Right-click on the new data source and choose the Authorize OAuth button.
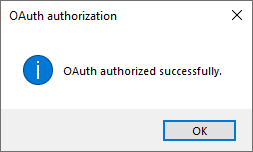
If your logon option is OAuth 2.0 authentication it will then request you to log on. Log on as the Microsoft user account you use to access Business Central. Once done and successful, this message will be shown.
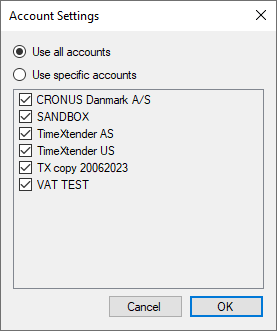
You can choose what accounts you want to look at. If you right-click on the data source and chooses the Select Accounts… option it will look like this.
You can change what accounts to look at by changing the setting so Use specific accounts and then selecting the specific accounts you want to look at.
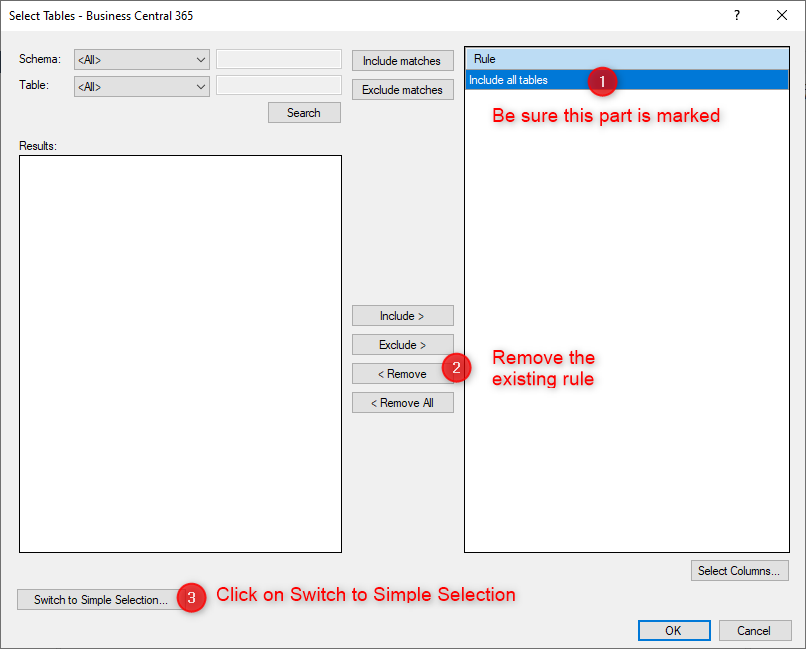
To specify what tables to look for, right-click on the data source and choose the Select Tables option.
Click on the Include all tables Rule and click Remove to remove the existing rule. Finally click on Switch to Simple Selection. This procedure avoids you generating individual rules for all the tables of the source.
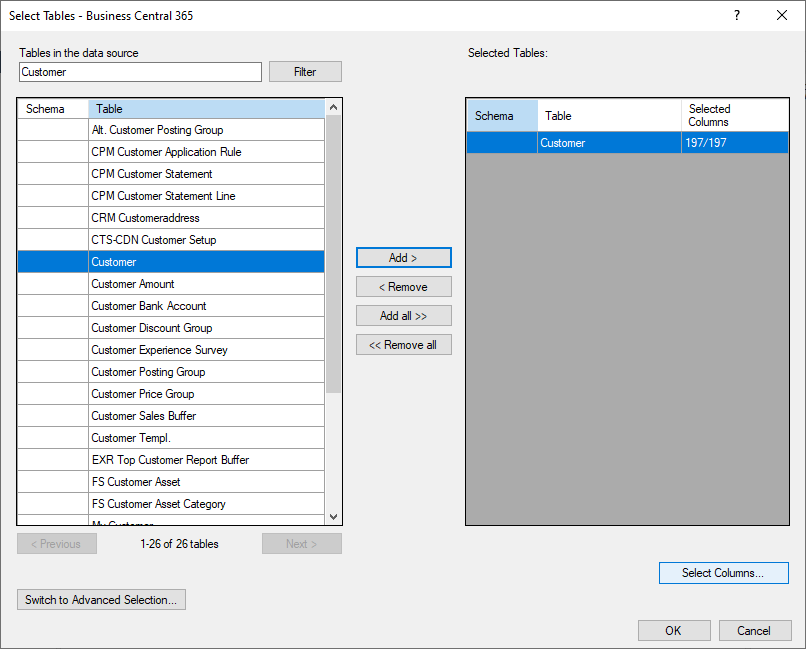
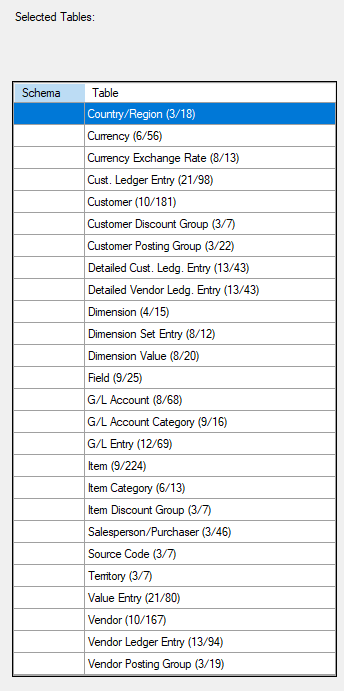
Search for the tables you want to add. Click Add to add one of them or select multiple tables to add more than one to the Selected Tables area. For example, I searched for customer and added the Customer table.
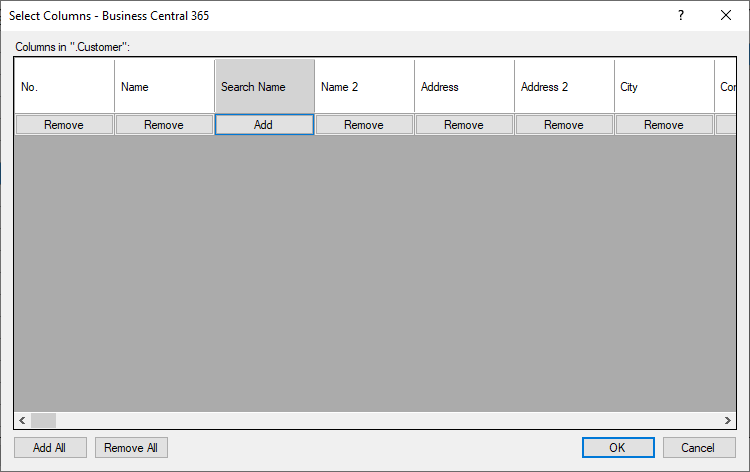
Click on Select Columns to unselect columns that are not needed. Be sure to always keep SystemModifiedAt as it will be optimal to use for Incremental load.
Once you have finalized table selection, you are ready to use the tables in a Data Area.
Execute the Synchronize task for the BC data source.
Right-click on the data source and choose Set up Primary Keys. Locate if any tables has no primary keys and use the override feature to add one. Click OK to acknowledge this.
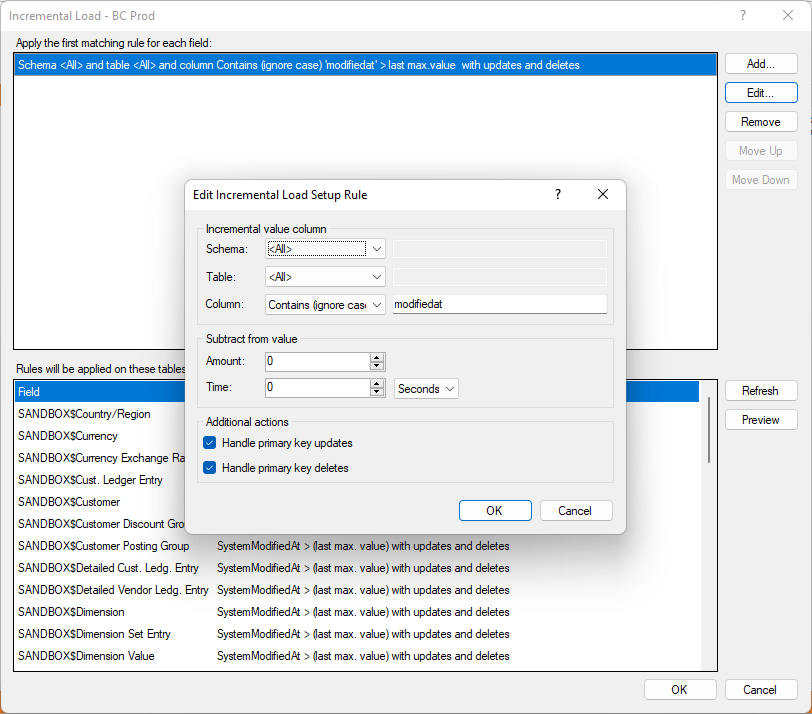
Right-click on the data source and choose Set up Incremental Load. Click Add to add a new rule. Set the Column field to Contains (ignore case), check for Handle primary key updates and Handle primary key deletes. If you have any tables affected by the incremental load rule that have no primary keys, a message about this will be displayed.
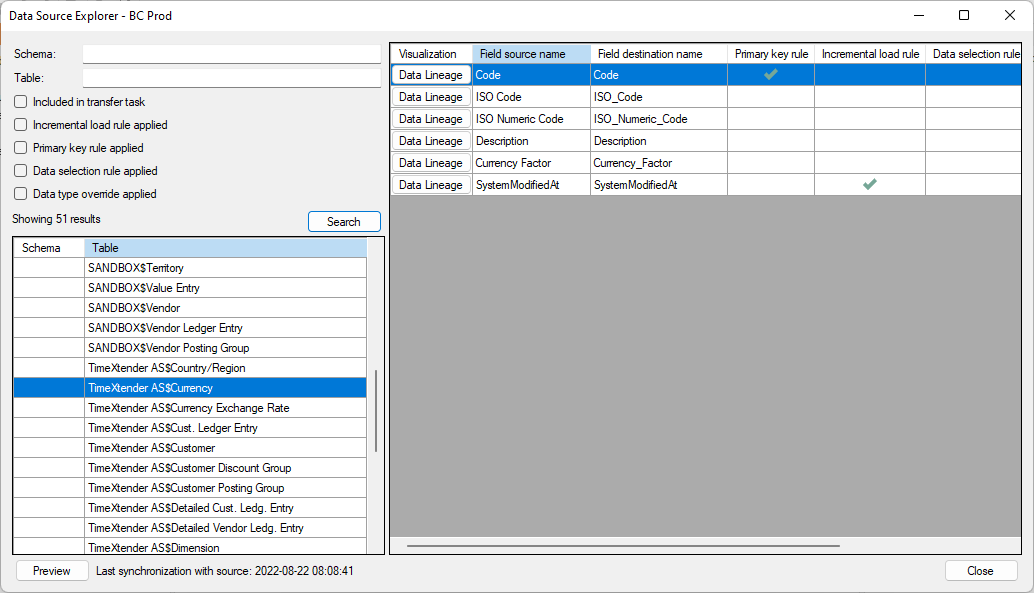
Run the synchronize task again and once it is done open the Data Source Explorer. Here you can see that multiple versions of the tables exist, as a table is replicated for each BC account. If you want to only look at specific ones, you can do this by right-clicking on the data source and choosing Select Accounts.
Run the Synchronize task again, and then run the Transfer task and you are ready to use the BC data source in the Prepare Instances you have.
What is TimeXtender Business Central 365 Option Values data source?
We also have a TimeXtender Business Central 365 Option Values provider. This is used together with the normal BC provider to set up names for Type field values. Many tables have a type field of some sort. For example, the table Value Entry has a field called Document Type. Its content is a int value of 0 - 9 and this contains the description of this value. It will contain all names for these values across tables and fields.
Set up the BC Values data source in the TimeXtender Portal
The setup is the same as for a normal BC.
Create the BC data source in the Ingest Instance
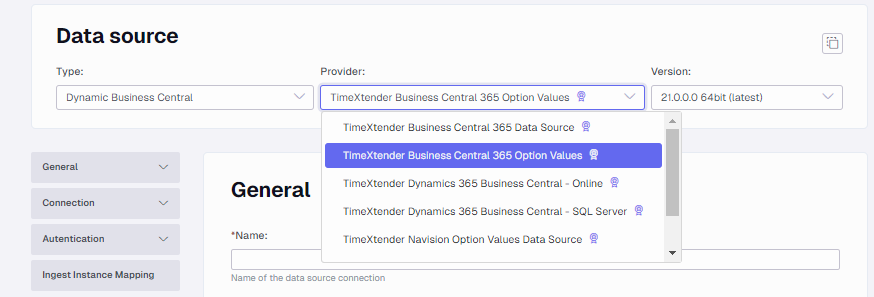
Search for Business Central and choose the TimeXtender Business Central 365 Option Values data source.
Once this data source provider has been chosen the setup is the same as the guide for how to set up a TimeXtender Business Central Data Source.
Once the data source is created it will be visible as a new data source
Right-click on the source just created and choose the Authorize OAuth option.
If your logon option is OAuth 2.0 authentication it will then request you to log on. Log on as the Microsoft user account you use to access Business Central. Once done and successful, this message will be shown.
Run the Synchronize task on the data source again and run the Transfer task.
How to use the BC values data source in a Data Warehouse instance
For more information on how to use the BC Values data source in a Data Warehouse instance, review the Use the Dynamics 365 Business Central Values provider section in the Lookup Transformation Template guide.
Hey, @Thomas Lind thanks for this helpful tutorial! It was really easy to set it up this way.
I do face an issue when running extractions. I get the message that multiple parquet files are received where one file is expected. I’ve looked at the data source settings but I don’t see any settings related to this. Have you seen this before and do you know how to solve it? Error message below.
Executing table $customer: failed with error: System.AggregateException: One or more errors occurred. ---> System.Exception: Received 24 parquet data files, but expected 1 at DataStorageEngine.DataLakeGen2.DataLakeGen2Transfer.<CommitDataAsync>d__39.MoveNext() --- End of inner exception stack trace --- ---> (Inner Exception #0) System.Exception: Received 24 parquet data files, but expected 1 at DataStorageEngine.DataLakeGen2.DataLakeGen2Transfer.<CommitDataAsync>d__39.MoveNext()<---
I’m trying to connect to Business Central Online using the Time Xtender connector. I’m using a service principal and I’ve run through all the steps in the BC/TX tutorial.
I’m getting the following error message when I try to add the data source. Any ideas what’s causing this?
Service request failed: Sequence contains no matching element (System.InvalidOperationException)
Details:
Service request failed: Sequence contains no matching element (System.InvalidOperationException) Module: TimeXtender.ODX.Engine TimeXtender.ODX.Engine.ODXFaultException at TimeXtender.ODX.Engine.ODXEngine.SendServiceRequest[C,T](WcfServerSettings serverSettings, Func`3 func) at TimeXtender.DataManager.AddODXDataSourceWizard_SelectConnectionStep.<>c__DisplayClass11_0.<Validate>b__0() at TimeXtender.DataManager.ConnectingThread.ExecuteConnectingThread(Object dummy)
Service request failed: Sequence contains no matching element (System.InvalidOperationException) Module: timeXtender TXModelInterface.ExceptionWrapperException at TimeXtender.DataManager.ConnectingThread.HandleError() at TimeXtender.DataManager.ConnectingThread.Execute(String title, Int32 progressSteps, List`1 actions) at TimeXtender.DataManager.ConnectingThread.ExecuteFastAction(String title, Action action, IWin32Window parentForm, CancelBehaviors cancelBehavior, ErrorBehaviors errorBehavior, String callerName) at TimeXtender.DataManager.AddODXDataSourceWizard_SelectConnectionStep.Validate() at TimeXtender.DataManager.TXWizardController.DoNext() at TimeXtender.DataManager.TXWizardDialog.ClickNext()
our customer has a custom API URL for BC cloud, this doesn't seem to work with this connector. The errors I get in the portal are non descriptive, how to proceed?
In the Cdata connector we just enter the URL, tenant Id, Client Id and Client Secret and it just works.
One or more errors occurred.

Details:

One or more errors occurred.
Module: Jet.NavMetadataPlugin
System.ApplicationException
   at Jet.NavMetadataPlugin.BCCloudMetadataPlugin.AuthorizeOAuth(TxBCCloudInfo txtBcClondInfo)
   at TimeXtender.DynamicsBC.Ingest.CDS.DBCDataSource.<AuthorizeOAuth>b__24_0()
   at System.Threading.Tasks.Task.Execute()

One or more errors occurred.
Module: mscorlib
System.AggregateException
   at System.Threading.Tasks.Task.ThrowIfExceptional(Boolean includeTaskCanceledExceptions)
   at System.Threading.Tasks.Task.Wait(Int32 millisecondsTimeout, CancellationToken cancellationToken)
   at System.Threading.Tasks.Task.Wait()
   at TimeXtender.DynamicsBC.Ingest.CDS.DBCDataSource.AuthorizeOAuth()
We have this guide. We have two types of BC provider, we suggest you use the one explained in this guide
It merges options and is essentially the same as the one we have for business units in TX classic.
You only need a tenant id, a service account which is client id and client secret.
You can choose the accounts or get all.
I believe this is the connector only works in conjunction with the Jet Analytics Extension.
the important part in my previous post is: ‘Custom API URL’ which doesn’t seem to work in either BC connector. Because it doesn’t include the tenant Id. The Cdata connector for Business Central handles that differently.
You can install the Jet Extension, it is free and only works for TX products. The only other way is to use the ODATA version, but it still requires you to know your tenant id.
You can install the Jet Extension, it is free and only works for TX products. The only other way is to use the ODATA version, but it still requires you to know your tenant id.
Hi Thomas,
I can know that. This specific use case is about a customer with a custom API URL that doesn’t parse the tenant Id via the URL. (I don’t know if Cdata uses the Header or the body). So is this something TimeXtender is going to handle or not?